Cheap Junk 1971 Build

This is the place to discuss, or get help with any of your Type 4 questions.
User avatar
Clatter
Posts: 2034
Joined: Sun Apr 28, 2002 1:01 am

Re: Cheap Junk 1971 Build

Post by Clatter »

Got a few more hours in...

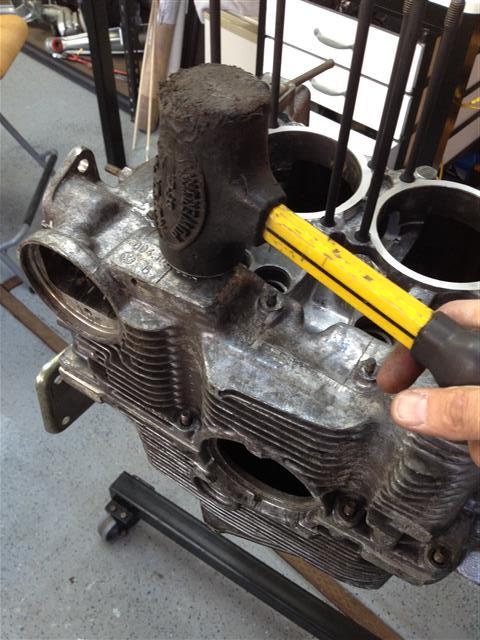
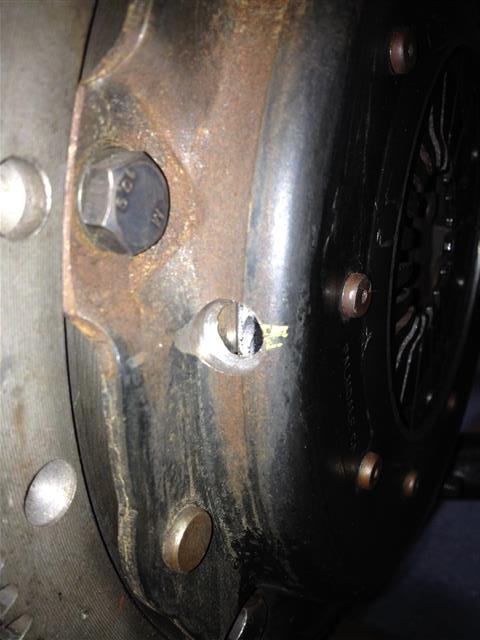
This shows the Vanagon flywheel mount bolts I mentioned earlier.
There is not enough room around the heads of the bolts to use the earlier serrated shoulder bolts.
Image
You can see the paint mark the machinist used for reference during balancing.
There are a few small holes drilled in the side (forgot to take a pic).

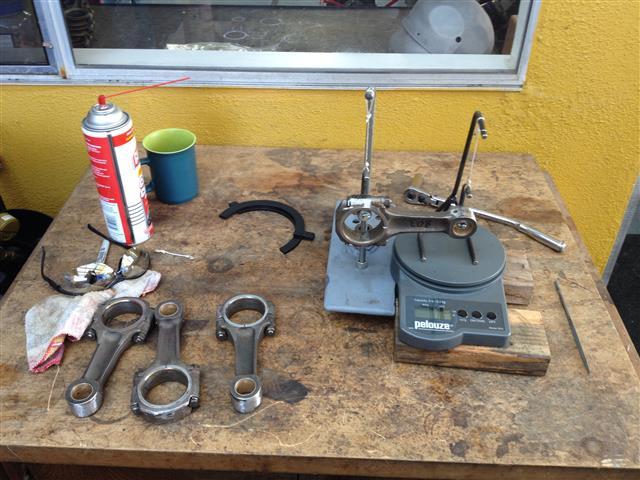
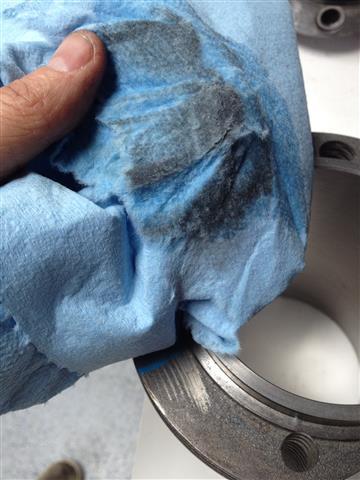
Robert at Schroeder's soda blasted my pressure plate when he did the balance job for me.
Seems a safe enough technique, and he's an automotive machinist by trade, who does this a lot, so I guess i'm stoked.
Pretty, too...
Image

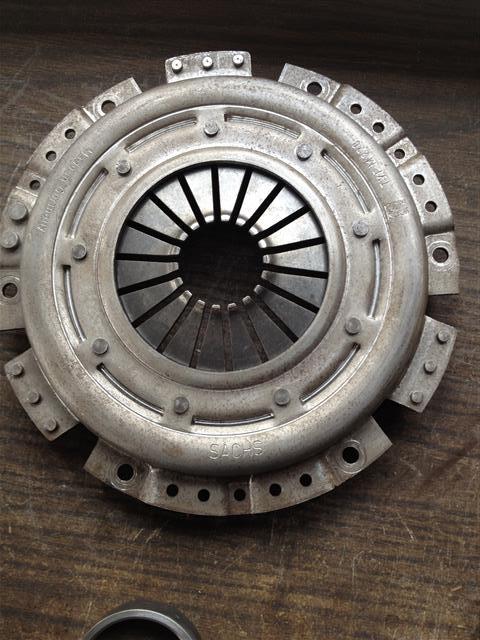
He said the PP didn't require any balance work.
Which is a good reference for the German Sachs PP.
The last Kennedy PP I had done had these large areas of material removed:
Image
Image

The oil pump accidentally went off to glass bead. Woops.
Going to have to clean/shine it up because the aluminum got embedded a bit.
However...
It does show how the scoring was shallow enough that the blasting cleaned it up.
Probletunity!
A cool experiment nonetheless, reinforces my notion of these pumps being re-usable.
Image

If ever you are at a swap meet, or digging thru a box of bearings,
Here is a shot of Type 1 (top) and Type 4 (bottom).
Image
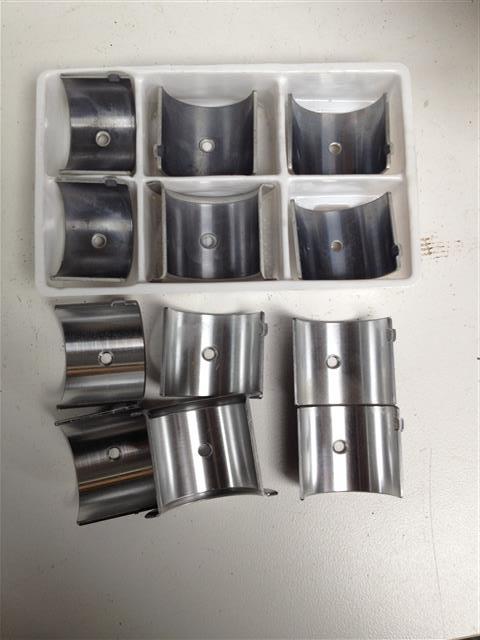
The Type 4 bearings are all very close in size, unlike the Type 1s that have a couple of significantly smaller ones.

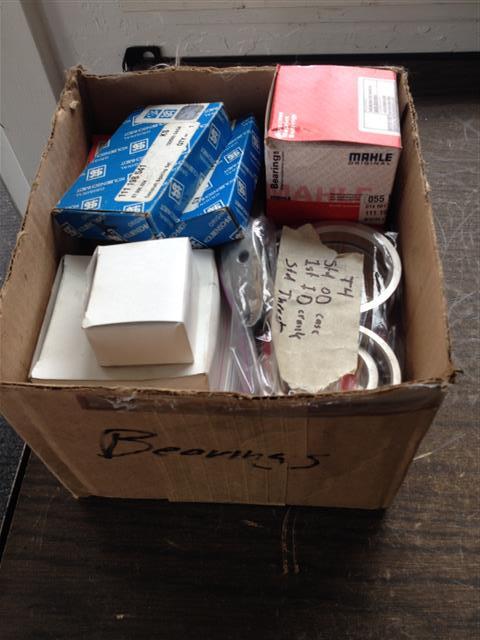
Speaking of a box of bearings...
Like my label?
Image

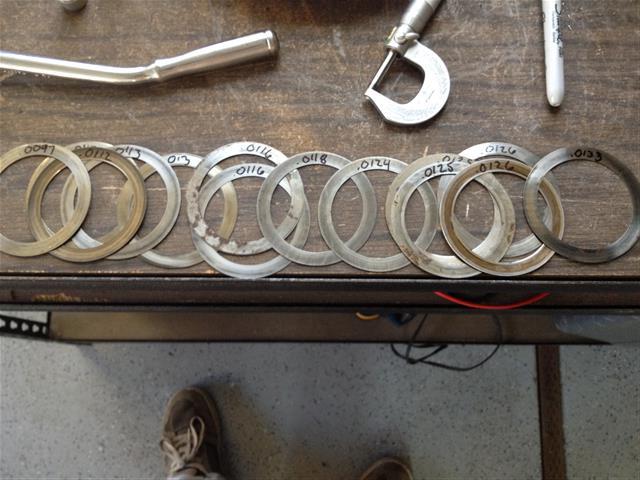
This leads me to this discussion:
Image
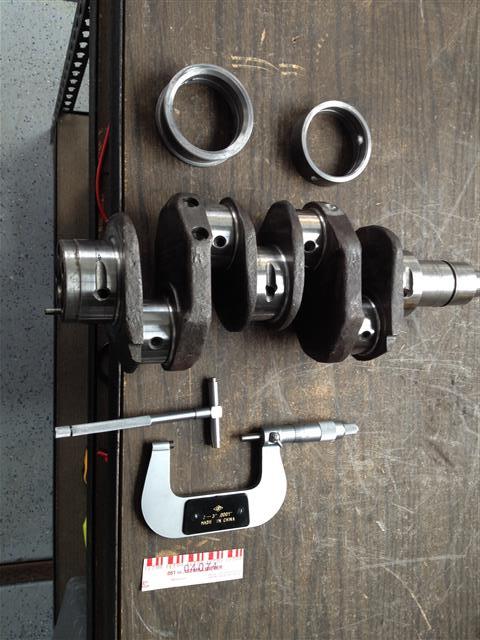
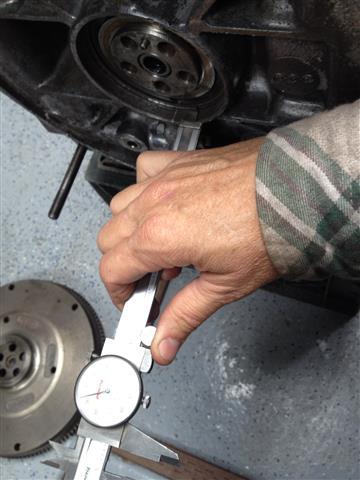
Yes, snap gauges are lame. Hate 'em...
That bore gauge I showed before isn't mine, unfortunately.
Because measurements with snap gauges are a bit of a compromise,
We have not just the "belt and suspenders" approach using two different measurement methods,
Actually the "belt and suspenders and pants that fit in the first place" with three methods.
First off, I have a STD ID set of new bearings in that box that I try on, and carefully feel the fit, comparing it to the feel of the bearings we plan to use.
Like how a good mechanic can do a valve adjustment by feel, having both new and used bearings on a clean dry crank you can feel the measurement.
Then, the snap gauges are used until my mouth gets sore from screwing it up during measuring...
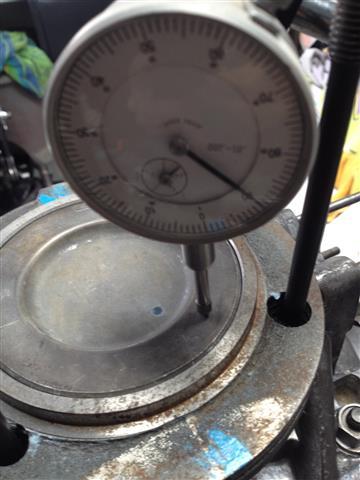
And finally, the Plasti-gauge gets used on the center main.
If all of these measurements yield the same or similar results, then we can assume that our numbers are reasonable within a few tenths.

With the (heavily) polished crank, and used bearings that were scuffed, you can guess that the fit would be loose.
The measurement is getting a couple tenths above .004", which is a bit over the largest spec (.004) for new parts per the Bentley.
However, the wear limit for the mains is .007", so I'm a gunna run 'em...

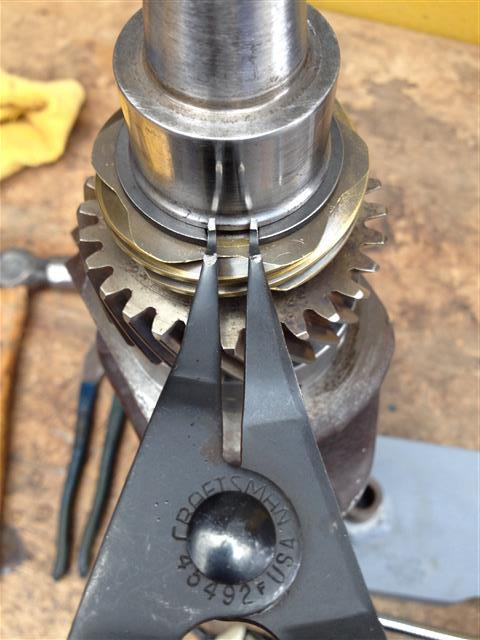
Once the commitment was made, all was cleaned up, and the crank gear installation can commence.
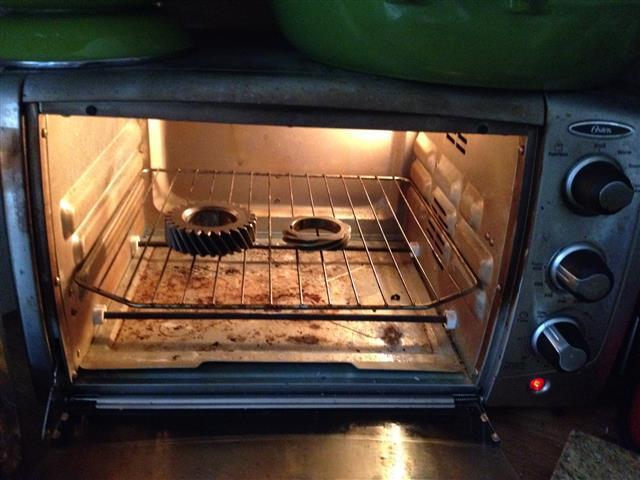
Have to wait until Mom is at work to use the toaster oven...
Image

I like to use the crank holder for install, but a flywheel works just as well.
Image

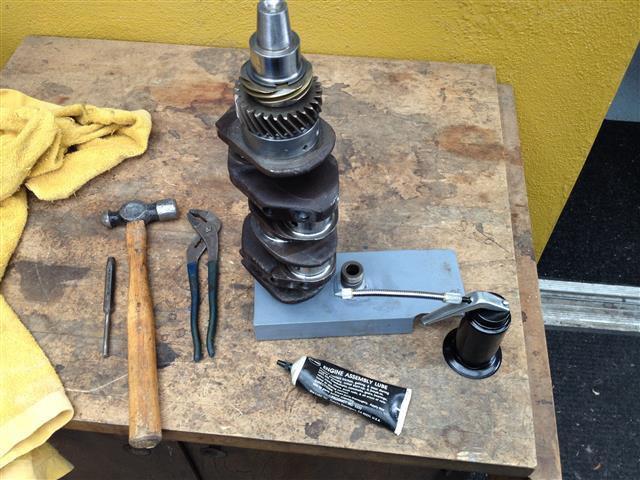
These internal flat-face expanding pliers were cheap at Sears.
Image

To jump around even more - here's a sign of the times...
Image
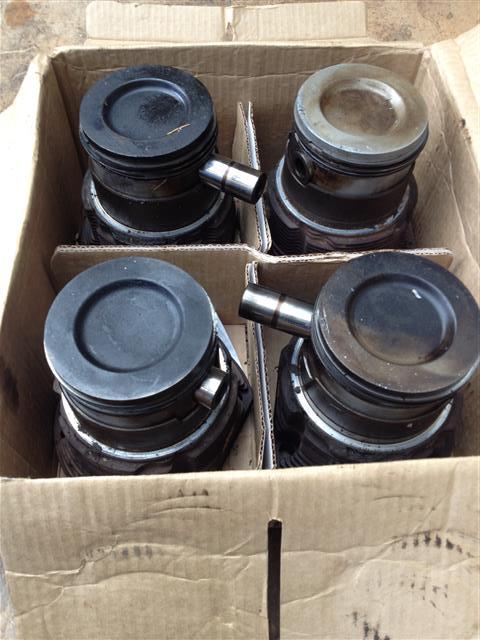
WhooHoo! A big score! some used, worn old bus pistons!
Just the kind of stuff we always just threw away back in the day.
Ironically enough, I traded something for them we always used to throw away; a thermostat!
Thermostats are now getting somewhat rare now for just this reason..
Junk for junk! :lol:

However,
One man's junk is another man's garbage!
Check me out.... Those part numbers make these actually a real score!
OG German OEM cylinders, folks... Go try and find a set of these.
These will get bored to 96 and given a set of Keith Black pistons.
Or maybe some forged J&Es??
Not a broken fin to be found, and a matched set,
Seasoned for decades, and made of the best ductile iron material.
8)

I put one from one set I have, next to another from a different set,
To show slight differences in markings.
All from each set were marked the same as the others in the same set, FWIW.
Image

039 101 301C I'm going to go and get that tattooed on my arm...
Last edited by Clatter on Fri Oct 25, 2019 1:29 pm, edited 1 time in total.
Speedier than a Fasting Bullet!

Beginners' how-to Type 4 build thread ---> http://shoptalkforums.com/viewtopic.php?f=1&t=145853
User avatar
Clatter
Posts: 2034
Joined: Sun Apr 28, 2002 1:01 am

Re: Cheap Junk 1971 Build

Post by Clatter »

Some more random jumping around...

Went back out to that Vanagon at the PNP.
Can't resist the Siren's call...
Wanted to get a rocker shaft or two.
No Dice.
These are worse than the ones i had.
Image
These are available new from the Type 4 Store or EMW, so, unless you are in Survival Mode (like we are here),
There really isn't a good reason to re-use old rocker shafts.

The hydro lifter busses 78-up, and Vanagon used spacers between the rockers.
Again, there are better ones for sale cheap,
But these fit right in a pocket...
Image

Spent about half a day wire-wheeling fasteners.
Wear a dust mask when doing this;
Makes you feel like you are taking sick; sore throat and stopped up nose otherwise.
Some people never learn.
Almost there...
Image

Another thing i always waste time on:
These get wire-wheeled,
Then sanded off a bit with the emery cloth,
Then a wipe-down with some brake cleaner,
Then rattle-can.
Waste of time...
Image

Costs on this build continue to mount.
Spending is getting out of control!
$65!
:shock:
Image
:lol:

A shot of how they balanced the flywheel.
Image

There are a few different sized M10 studs in the box here.
Different transaxles take different lengths.
Image

This measurement, only at the bottom two studs:
Image

Make sure you get the right studs for your application.
You never know what a PO will do by now, after 40-50-odd years, anything is possible.

Until next time...
Last edited by Clatter on Fri Oct 25, 2019 1:32 pm, edited 1 time in total.
Speedier than a Fasting Bullet!

Beginners' how-to Type 4 build thread ---> http://shoptalkforums.com/viewtopic.php?f=1&t=145853
User avatar
Clatter
Posts: 2034
Joined: Sun Apr 28, 2002 1:01 am

Re: Cheap Junk 1971 Build

Post by Clatter »

Well, on it goes...

First off, I found the threads stripped out under where the 'taco plate' goes.
M6 x 1 Heli-coils need a 1/4" drill.
So no need to buy a special drill bit... :wink:
Image

While I was making chips in there,
The oil filler conversion was done; a stud installed, and a hole drilled.
Image

This is a 'Piledriver' trick - Scotch-Brite in a slotted wooden dowel.
Polishing up the seal surface for the pushrod tube o-ring...
Also did the same for the similar area on the heads.
Helps to seal, and keeps O-rings from tearing on installation.
Image
Also ran it into the lifter bores. they had a bit of goopiness left over in there.

This meant that the whole case needed cleaned again.
Blew it out with carb cleaner and 120PSI air until it was 100%.

So, here is another example of a 'silly old man'...
My home-job rod balancing jig.
Image
The one set of bearings is old Weber throttle shaft bearings, and the others came from my local Ace hardware.
I use my crank stand as a base, with some 3/8" rod,
While the little stand for the scale, and the hooks are 1/4"
Image
Yeah, it's kind of hoakey.
It sometimes doesn't repeat.
At least, if you take the very same rod and flip it over,
Like, numbers up, then numbers down, it won't repeat.
So, you have to take an average, or, if you are easily confused like me, you write both numbers down.
I write them right on the rod.
Image
The strings help it repeat better than before - when it was all just rods and rollers.

Here it is un-loaded.
Image

After some back-and forth, and it shows the ends not quite repeating,
You can verify that you nutted it by getting all four overall at exactly the same number.
That one has to repeat.
Image

Because some like to lighten these rods,
First, I take the lightest one and profile it a bit.
Can't help but want to knock the sharp corners off near the parting line, and off of the head of the bolt.
Windage, y'know??
Somehow, I want those sharp edges to not spent their lives wacking against the oil in there...
Dumb, I know...
This shows the (formerly :wink: ) lightest one, on the right, with some minimal clean-up,
And next to it was the (no longer :D ) heaviest one, to the left.
First, the sides get ground away, then, if that's not enough, the cap edges get rounded.
This shows how much was removed to bring this set into balance...
Image
Last edited by Clatter on Fri Oct 25, 2019 1:35 pm, edited 1 time in total.
Speedier than a Fasting Bullet!

Beginners' how-to Type 4 build thread ---> http://shoptalkforums.com/viewtopic.php?f=1&t=145853
User avatar
Piledriver
Moderator
Posts: 22520
Joined: Sat Feb 16, 2002 12:01 am

Re: Cheap Junk 1971 Build

Post by Piledriver »

One of the stands has to be able to roll... no sideloads throwing you off.
Rolling the off scale one is best.
Last edited by Piledriver on Wed Nov 26, 2014 11:32 pm, edited 1 time in total.
Addendum to Newtons first law:
zero vehicles on jackstands, square gets a fresh 090 and 1911, cabby gets a blower.
EZ3.6 Vanagon after that.(mounted, needs everything finished) then Creamsicle.
User avatar
Clatter
Posts: 2034
Joined: Sun Apr 28, 2002 1:01 am

Re: Cheap Junk 1971 Build

Post by Clatter »

After the rods were balanced and cleaned, some "measurements" were made.
Quotation marks included above because of snap-gauge usage.
Plasti-gauges aren't really that effective with rod bearings either; they get squished with installation.
With some 'ciphering, you can convince yourself that the clearance is within spec.
Image
Don't forget to wack the rod with a hammer each side, after torqueing, to seat the bearing.
(Maybe mostly for good luck?)

Then I moved on to the end-play thing...
Having the rods on the crank help keep it from trying to fall off of the bench when the flywheel is mounted.
Image

Having my shim collection labeled helps save time.
Image

Sure enough, even my thickest three won't give me a good number.
Image
Time to go and buy some new ones.
Worn/burned shims give bad readings and wear quickly.
Even a junky build like this needs some better shims...

On to my cam bearing rant....
You always see people sanding down the thrust on a set of expensive double-thrust cam bearings.
Me too.
Until you find out you sanded too much off!
:evil:

Here's how to make sure you are getting a real measurement:
Cam-only mock-up; Fresh bearings, from the box.
Gee, initially it looks like we need to sand the thrust... There's NO end-play!
Image

A little bit of light oil only. No paste or anything.
A couple of main case cross-bolts snugged up good.
Wack that case down a few times to seat it all round!
Image

Take a drift and wack that cam all the way forward.
Do the same on the other side; wack it back...
Image

Twirl it around, back-and forth with a big screwdriver to get it free.
Image
And wack it back and forth with the drift a few more times for good measure!

Viola!
Almost too much. .003+.
Ideally, you would want .0015 or so...
Image
The book lists .005 as max for new bearings, so we are there.

Be advised that we have a single-thrust set here.
Doubles might actually need some sanding. Maybe. Wack 'em first to see.

The cam thrust is purported to be an early(er) wear item on these motors.
With heavy single (type 1) springs and a Web 86, this might be a good place to start thinking about a double-thrust bearing set.
This particular motor isn't taking me to the tip of Argentina, so the singles are staying.
Last edited by Clatter on Fri Oct 25, 2019 1:40 pm, edited 3 times in total.
Speedier than a Fasting Bullet!

Beginners' how-to Type 4 build thread ---> http://shoptalkforums.com/viewtopic.php?f=1&t=145853
User avatar
Clatter
Posts: 2034
Joined: Sun Apr 28, 2002 1:01 am

Re: Cheap Junk 1971 Build

Post by Clatter »

Good point, Pile.

Versions 1.0 through 3.2 did suffer from this condition, and badly.
Moving the stand and scale away from each other doesn't seem to mess with the numbers much, though.
The strings seem to be helping?

Got a pic of a real/pro rod-balancing set-up?
I have only ever seen hoakey ones like mine...
Speedier than a Fasting Bullet!

Beginners' how-to Type 4 build thread ---> http://shoptalkforums.com/viewtopic.php?f=1&t=145853
User avatar
Piledriver
Moderator
Posts: 22520
Joined: Sat Feb 16, 2002 12:01 am

Re: Cheap Junk 1971 Build

Post by Piledriver »

https://www.youtube.com/watch?v=QLpiF0E0EJU

Note the long drop on the big end, and never moving the setup provide consistent results.
Ideally to set the length to match the rods: the rolling end would automagically deal with that.
The long drop deals with it another way, renders the offset into the measurement noise.
Addendum to Newtons first law:
zero vehicles on jackstands, square gets a fresh 090 and 1911, cabby gets a blower.
EZ3.6 Vanagon after that.(mounted, needs everything finished) then Creamsicle.
User avatar
Clatter
Posts: 2034
Joined: Sun Apr 28, 2002 1:01 am

Re: Cheap Junk 1971 Build

Post by Clatter »

Moved on over to the heads again...

The only way to get a meaningful Cylinder Head Temp measurement is at the plug.
The typical VDO under-plug CHT sender sucks to install.
It gets squashed all zig-zag and chafes against the plug and head.
Give it some time, and a couple of in/outs with the plug, and you can start getting leakage.
Or worse, some cross-threading or otherwise buggered threads.
Image

The sender ring has to be bent pretty heavily to fit.
Before and after:
Image

Behold the "German Supply Scott" technique.
(At least that's who I learned it from)
Die-grind some room out for that sucker!
But first, put a thin washer in the plug hole.
If you nick the sealing washer surface, life will be less fun.
Image

Making some room...The sender can essentially lay flat.
Image

Look closely how dangerous this can be to your plug washer (now CHT sender) surface.
Creep up to that washer area, but don't nick it!
Image


Here the springs/retainers/keepers are going in.
These were a set of Scat duals I got years ago.
They were $32 at the time.
Those type 1 guys on TOS are right Type 4s are expensive! :shock:
Because duals are just singles with inners, the inners got set aside for when I turbocharge this thing. :lol:
The keepers got ground (said that already) and the matching retainers got stabbed in, too.
Image

Another wire-wheel session to clean all of the baked-on oil from the rocker spacer stuff..
Image

These are factory hydro-lifter spacers from a Vanagon.
They have a bit more robust-ness (robustidy? :? ) than the earlier solid-lifter parts.
But not much...
Far better would be a set of solid aluminum spacers.
Again, this is a mild build, the Web 86 has pretty gentle ramps, and not a lot of lift.
Plus, the Scat singles are a bit softer than some Bugpack or other singles I have seen.
So, I'm pretty confident we will be OK without the solid spacers...
Stand-rocker-flat washer-wavy washer-spacer-wavy washer-flat washer-rocker-stand...
Image
Last edited by Clatter on Fri Oct 25, 2019 1:42 pm, edited 1 time in total.
Speedier than a Fasting Bullet!

Beginners' how-to Type 4 build thread ---> http://shoptalkforums.com/viewtopic.php?f=1&t=145853
User avatar
Brent69
Posts: 28
Joined: Fri Oct 28, 2011 9:31 pm

Re: Cheap Junk 1971 Build

Post by Brent69 »

Were the adjusters used and ground?

A lot of time and effort going into this thread, more details the better. :lol:
scvw
Posts: 5
Joined: Wed Oct 29, 2014 7:14 pm

Re: Cheap Junk 1971 Build

Post by scvw »

best build up so far ! makes me think about my long overdue motor rebuild I was going to start !
User avatar
Clatter
Posts: 2034
Joined: Sun Apr 28, 2002 1:01 am

Re: Cheap Junk 1971 Build

Post by Clatter »

Thanks for the kudos, guys...

Brent,
The adjusters were an OG set saved long ago because they looked good.
Don't know why...
Never thought I would ever build another T4 without swivel feet, actually.
(Regression..)

Got them all cleaned up, and was in the process of chucking them up into the drill press for some polishing.
(Imitating Pile again)
But,
Looking at them,
There wasn't really any improvement to be made.

They had evidently been adjusted/re-adjusted enough that there were NO flat spots to be found,
On any of them.

Goes to show that the original adjusters can be in good shape, and re-used.

Good question.
With aftermarket adjusters being suspect these days, you have to watch out...
Speedier than a Fasting Bullet!

Beginners' how-to Type 4 build thread ---> http://shoptalkforums.com/viewtopic.php?f=1&t=145853
User avatar
Clatter
Posts: 2034
Joined: Sun Apr 28, 2002 1:01 am

Re: Cheap Junk 1971 Build

Post by Clatter »

Too bad there weren't actually some nice parts, or this thread might be worth something! :lol:
But, it is coming together, so I can soon get on with my life...

So, last time we had the cam-only mock-up and a crank-only mock-up.
All of these were done with the gasket set still sealed up closed.
Because life can come and get in the way of these projects at any time, I don't ever bust open a gasket set until I have the time to do some serious assembly.
The goal is to get a short-block done in one session, so there is a clearly-delineated stopping point.
In the case of "short block" it means rods sticking out of the case, which is otherwise sealed up and ready for the top end.

If we have a lower-end balanced as a unit, a short block includes the pressure plate and flywheel too.
The fan is nearby, and marked for the motor it goes to.
I have a couple of motors taken apart around here, so that represents another risk.

I will tell a story to exemplify why this is important...
Back in college, I got the chance to go back east with a friend for Thanksgiving.
We were staying with a girl who had a party, and during this party the bathroom had a long line of girls cued up.
So I peed outside, in the back corner of the yard.
Behind the shed, found this makeshift building, opened it up and found a Lambretta motor scooter.
Was talking to the girl's dad the next morning, and he told me how he bought it new in '68 for his ex-wife to ride.
She only rode it a few times, and it sat since. That bitch...
Talked him into giving it to me, with the promise that if I sent him a picture of it shiny and clean, he would send me the title.
So, it was partially dis-assembled and loaded onto/into my friend's car for the trip back to Colorado.
I lived in a second story apartment, and loaded it up the stairs for the winter.
During this time I found out that it was a low-mileage (like 60 miles) 1968 TV175, with fresh air intake, front disk brake, fairing, lowers, crash bars, continental kit, etc.
A real gem - all accessorized out!
Pulled it apart and lovingly cleaned it one part at a time.
The cooling shrouds and tin came SO shiny and clean with just liquid rubbing compound.
All of the paint came back 100%. Shiny like brand new. better even with the rub-out.
Chrome was perfect. Not a scratch on the whole thing.
I bought a puller to get the flywheel off, to clean and gap the points.
As I worked on it, the tins got put back on for display, and the picture of it on the porch got sent off to the guy.
He sent the title.
Spring came, and another guy was there giving me mad poop about how it just sat.
Since there were a couple guys there to help me get it down the stairs, I finished up the last stuff in a hurry, and we hauled it down.
It started on the third kick, and had a tight sound that only a brand-new little beauty could have.
I winged the throttle a couple times, and it was pure sweetness.
Winged it a couple more times and all hell broke loose.
It sounded like glass breaking.
Like someone threw a huge plate-glass mirror down the stairs behind us...
The flywheel had been left only finger tight.
In my cleaning of tins and parts, I forgot to tighten it back up.
Destroyed the flywheel, crank, and the right engine case.
Reduced the whole thing to junk, basically...

So... Lesson.

Only do your projects in 'phases' during assembly.
You can clean and mock-up to your heart's content,
but,
When it comes assembly time, make absolutely certain that there is NO way something can be left un-tightened.
Have a clear point where one part of the assembly will have a defined stopping point.
Like with a short-block...
Image
Last edited by Clatter on Fri Oct 25, 2019 1:44 pm, edited 1 time in total.
Speedier than a Fasting Bullet!

Beginners' how-to Type 4 build thread ---> http://shoptalkforums.com/viewtopic.php?f=1&t=145853
User avatar
Clatter
Posts: 2034
Joined: Sun Apr 28, 2002 1:01 am

Re: Cheap Junk 1971 Build

Post by Clatter »

So, with the whole happy story prior,
You can see why I forgot to take many pics during assembly. :oops:

There are a few issues fresh in my mind with some of it, though.

Cam-gear back-lash is a whole subject into itself.
Mine was perfect this time!
I'll skip the whole story about cam-gear back-lash,
Partly because it's been covered elsewhere,
But mostly because there's really nothing to be done about it! :lol:

One other thing I forgot to take a picture of was the oil pick-up tube.
There are two kinds; long and short.
The hydro lifter cases take the short one, and the solid lifter cases take the long.
Make sure you have the right one for your case, folks.
You never know what a PO or old rebuild shop might have done...

There are two different depths of rear main seal.
Image
Image

Measure the seal area on your case to make sure you got the right one.
Image

Don't forget the O-ring at the back of the fan hub.
Looking at it, it really isn't obvious that an O-ring goes there, like a typical slot.
This also shows the thick hub washer, and the specific long serrated bolt.
Image

Digging up a felt ring for my input shaft, I found two thicknesses of them.
Anybody know if there is some formal difference between, or is this just different sources?
Image

On to the top end...

Jim taught me to scrub cylinder bores with carb cleaner and a Scotch-brite pad.
Scrub them out really good, and follow the cross-hatches as best you can.
There can be a lot of honing grit embedded in the walls.
Image

Flush with more carb cleaner and compressed air.

Then, use more carb cleaner and a fresh paper towel.
Look at the color of the grit - obviously honing stone residue!
Image

Then, once you have it clean,
Contaminate it again with a fresh coat of clean oil.
Thin, to basically soak in, but not run down and contaminate the base sealing surface...
Image

I'll skip the whole piston ring compressor/install thing. It's been covered elsewhere plenty of times.

Trying to get the deck height measurement, and mark TDC...
Without installing the fan/shroud, here's the quicky way to find TDC.
Put the indicator on a hole, and zero it on max height.
Image

Then, make a mark at .010' each side.
Image
Image

Measure half way between the marks, and make a line.
Image
Image

I like doing this a couple times, to check and double-check the timing marks.
Especially since this will need to be a 'universal' set-up; able to be installed in 914 and/or Bus.
The timing marks will need to be made in the different places the can be.
Do this for all these. 'cause you never know where it might end up...

Deck ended up around .006"??? WTF?
Was hoping it would just go together...
It's never as easy as that, eh?
Looks like I need to find some shims.
Image


And a parting shot of the bottom of my 'short block'.
For reference.... :wink:
Image
Last edited by Clatter on Fri Oct 25, 2019 1:48 pm, edited 1 time in total.
Speedier than a Fasting Bullet!

Beginners' how-to Type 4 build thread ---> http://shoptalkforums.com/viewtopic.php?f=1&t=145853
User avatar
Piledriver
Moderator
Posts: 22520
Joined: Sat Feb 16, 2002 12:01 am

Re: Cheap Junk 1971 Build

Post by Piledriver »

Going well, total drag about the scooter.
Probably would still worth fixing given what they are worth today.$$$$$

I just use hot soapy water (Dawn dishwashing liquid) and scotchbrite, followed by...
WD-40 soaked Bounty paper towels until they run clean, then oil wipe.
(WD==water displacement)

I usually use the big metal binder clips and clip the scotchbrite on a 3 stone hone and do the final stage of the plateau finish at the same time, with a battery powered drill, right in the sink under hot running water or in a big bowl of soapy water.
(either seems to work)

Buy WD-40 in the pump spray size, goes 10X as far as aerosol, for 1/2 the cost.

It is said that alcohol or brake cleaner dissolves the scotchbrite some and leaves a layer of polymer.
Hot, soapy water works better anyway, MUCH easier on your hands, lungs,the environment, and wallet...
Also, never underestimate the cleaning power of a dishwasher.

Gowesty sells and strongly recommends genuine VW flywheels seals, and I cannot argue with their logic or findings.
http://www.gowesty.com/library_article.php?id=535

Shave the pistons. Needs more compression anyway.
Std base shims are ..010, so you only need to sand off ~.015-.020ish, .035 or even a tad less is fine on a low RPM motor.
(5600 RPM redline stock, maybe wing it to 6200, no point going higher w/that cam/head combo)
Don't worry about carbon buildup, it won't have room to form. :twisted:
Addendum to Newtons first law:
zero vehicles on jackstands, square gets a fresh 090 and 1911, cabby gets a blower.
EZ3.6 Vanagon after that.(mounted, needs everything finished) then Creamsicle.
User avatar
Clatter
Posts: 2034
Joined: Sun Apr 28, 2002 1:01 am

Re: Cheap Junk 1971 Build

Post by Clatter »

Ah, conundrum....

The .006" deck measurement shown in the picture above was the smallest I got.
There was another that seemed to be .013" on the other side, and a couple in-between.
Depending upon how I held my mouth...

There is a lot of 'rock' in the piston, so these measurements are a bit wonky.
There might be a bit of difference in rod lengths, or differences in stroke ground into the crank.
It might end up being a case of switching rods around to different journals to get them more equal.

Also need to measure all cylinders to make sure they are all the same length, and that the deck is flat across tops of the cylinders.


Mostly, I was just getting a ballpark measurement to try and figger the CR.

Like it sits - no base gaskets or head gaskets, and the case decked about .010"...

Deck = .010
Piston dish 15cc + Chamber 54cc = 69cc total chamber volume
Bore = 94mm
Stroke = 71mm

This makes a nice tidy 8:1 CR!
WhoooHoo..., er, wait, we can't have a .010" deck! :oops:

So, spacer city, sweetheart...
Preferably at the base of the cylinder.

I don't want to fly-cut the heads.
Fly-cutting the heads can work to reduce your chamber volume,
but,
The exhaust studs lurk just under the cylinder deck sealing surface.
If you ever saw the cross-section sawed-in-half heads post on this site by the Great Nate Morse, you can see how close they are.
Heads being fly-cut too much is one of the top reasons they go to the grave.

So,
a .020 spacer gets me .030 total deck and 7.6:1 CR.
According to aircooled.net, the Web 86 wants 7.75 - 8.25:1 CR.
So, a bit short...

A .010 spacer gets me 7.8:1, but that's only .020 deck.
This motor is going to be a low-revver, under 5500 or so,
So there's not a lot of chance of the rods stretching or the crank flexing,
but,
it is also a crapper, and likely to be beaten upon in a heavy bus.

.040 deck would be safer than .030, but only 7.5:1.
A lot less than the 7.75 minimum recommended for the cam.

So, gotta ask myself, "Do I feel Lucky??"
Image
Speedier than a Fasting Bullet!

Beginners' how-to Type 4 build thread ---> http://shoptalkforums.com/viewtopic.php?f=1&t=145853
Post Reply