66 Double Cab Restoration
-
heli-easy
- Posts: 87
- Joined: Mon Nov 15, 2010 5:29 pm
Re: 66 Double Cab Restoration
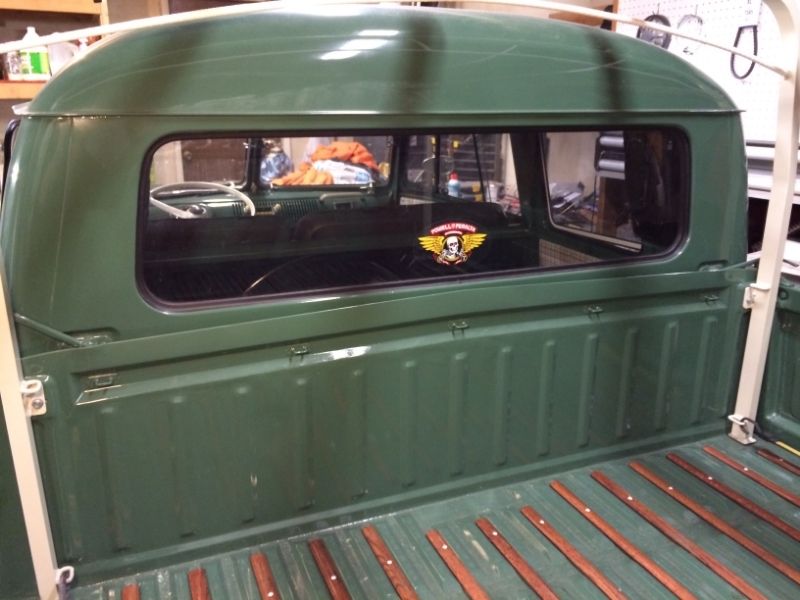
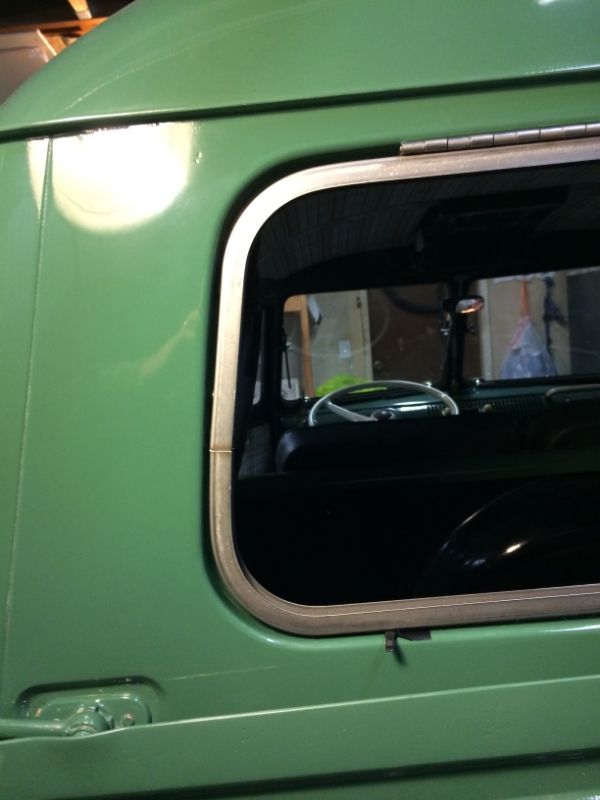
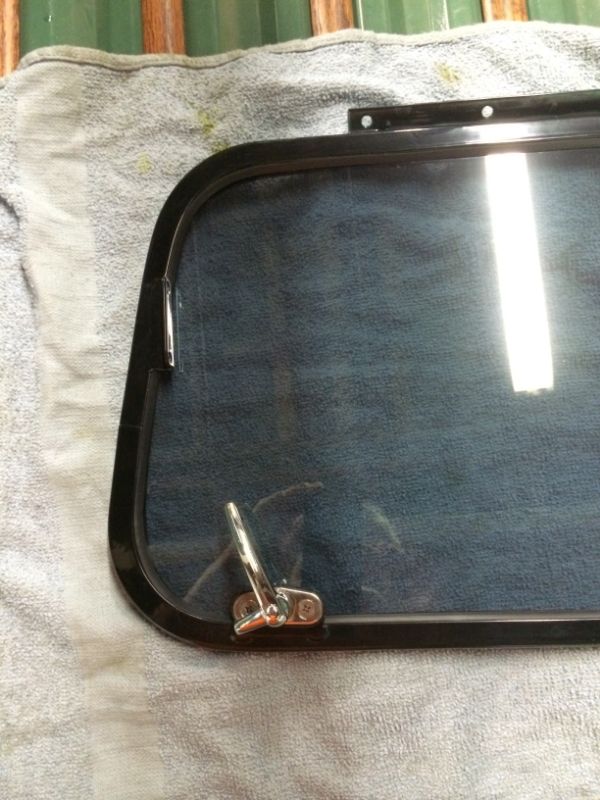
Decided to start work on my rear safari window. Unfortunately my year has an uncommon window size so they don't make one for mine. Wolfgang sent me a kit to make my own. I have to remove the window first.
Fitted the seal

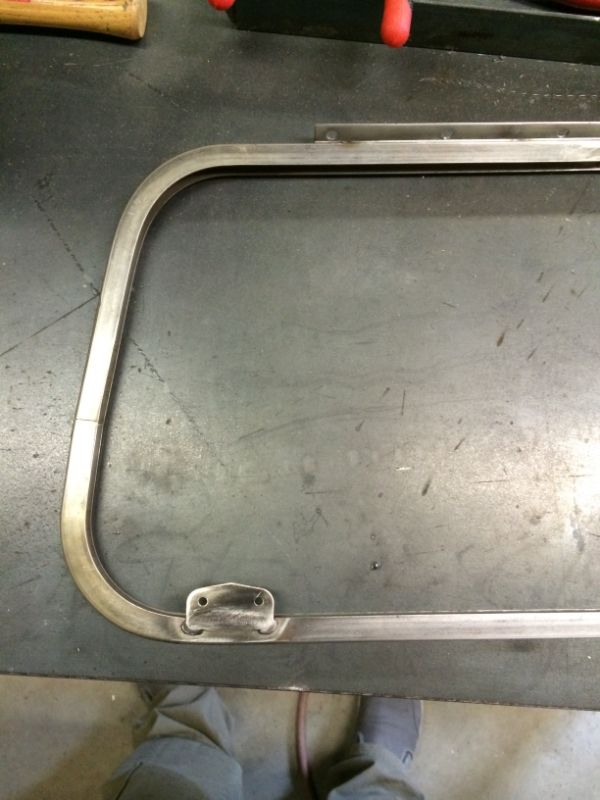
The parts
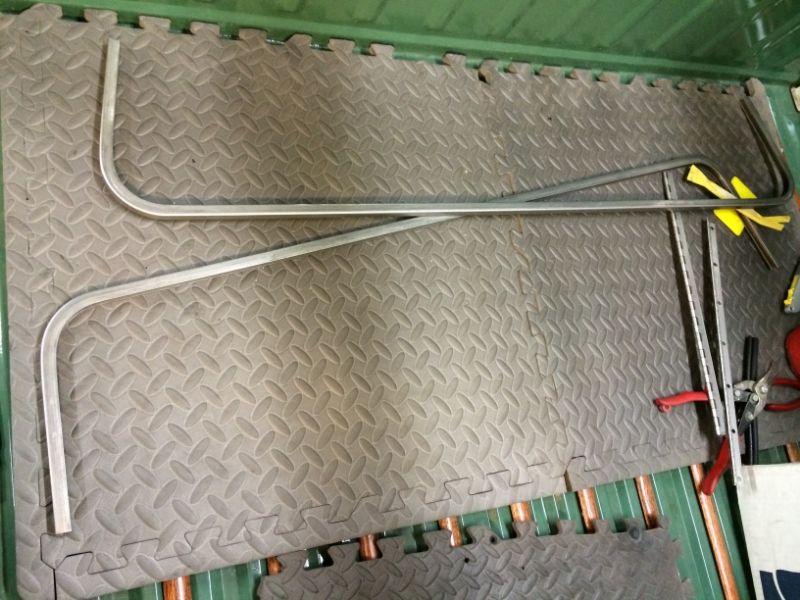
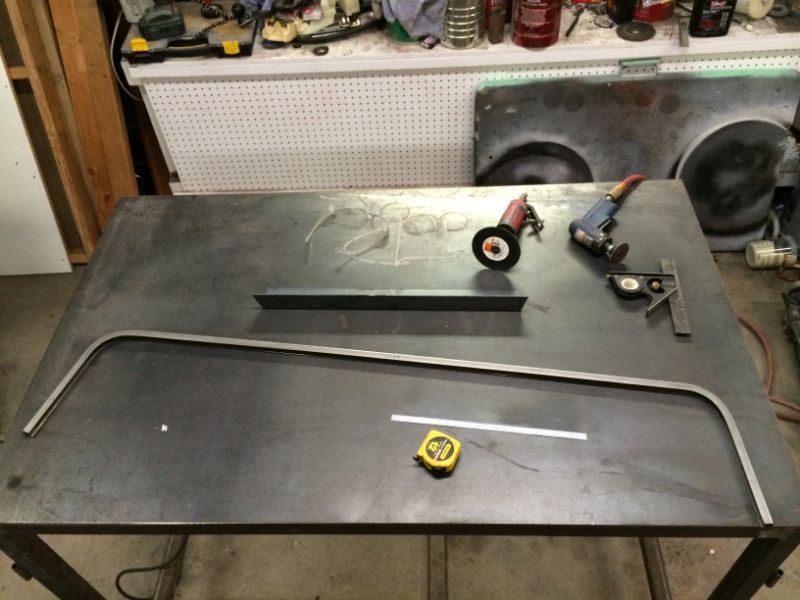
Started with the upper frame. It is .45" too short. So I had to cut it in half and weld a small section in.
Welded the hinge to the upper half

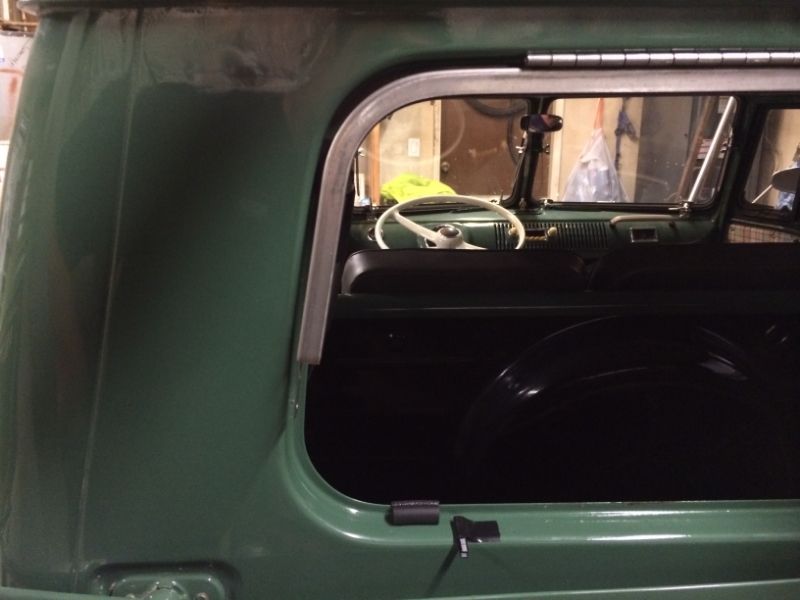
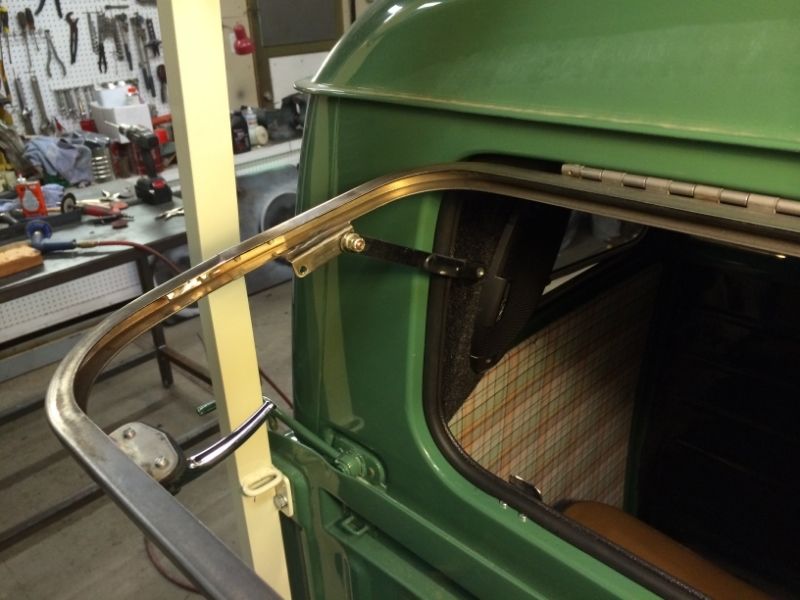
Attached the hinge to the car after getting frame centered in the opening.
The lower section has to be lengthened .1" to make it the right size too.
Fitted the seal
The parts
Started with the upper frame. It is .45" too short. So I had to cut it in half and weld a small section in.
Welded the hinge to the upper half
Attached the hinge to the car after getting frame centered in the opening.
The lower section has to be lengthened .1" to make it the right size too.
Last edited by heli-easy on Tue Jul 29, 2014 5:11 pm, edited 7 times in total.
-
heli-easy
- Posts: 87
- Joined: Mon Nov 15, 2010 5:29 pm
Re: 66 Double Cab Restoration
Fitting the lower half
Latches plates welded on
Prop rod brackets
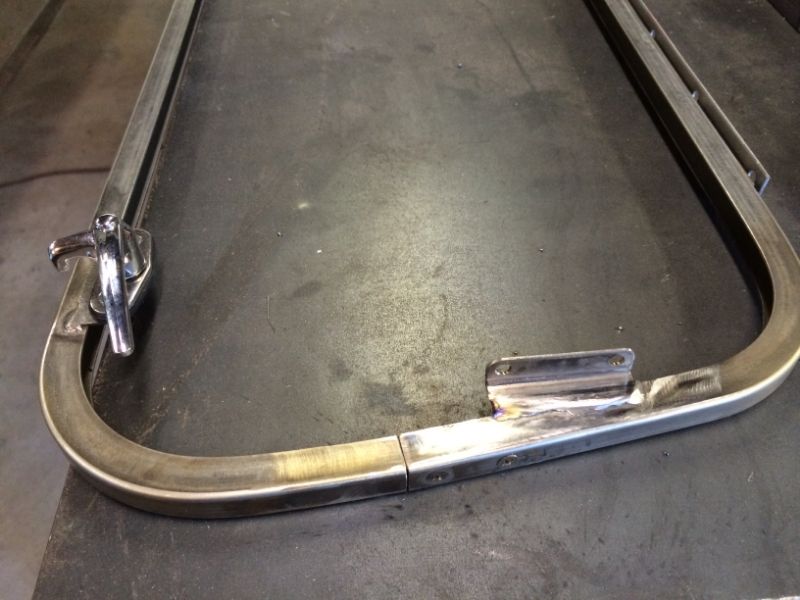
Latch plates installed

Almost done
Prop brackets made
Finished
Frame sent to powder coat, and having a new glass panel made. 7 days till the glass comes in.
Latches plates welded on
Prop rod brackets
Latch plates installed
Almost done
Prop brackets made
Finished
Frame sent to powder coat, and having a new glass panel made. 7 days till the glass comes in.
Last edited by heli-easy on Tue Jul 29, 2014 5:10 pm, edited 8 times in total.
-
heli-easy
- Posts: 87
- Joined: Mon Nov 15, 2010 5:29 pm
66 Double Cab Restoration
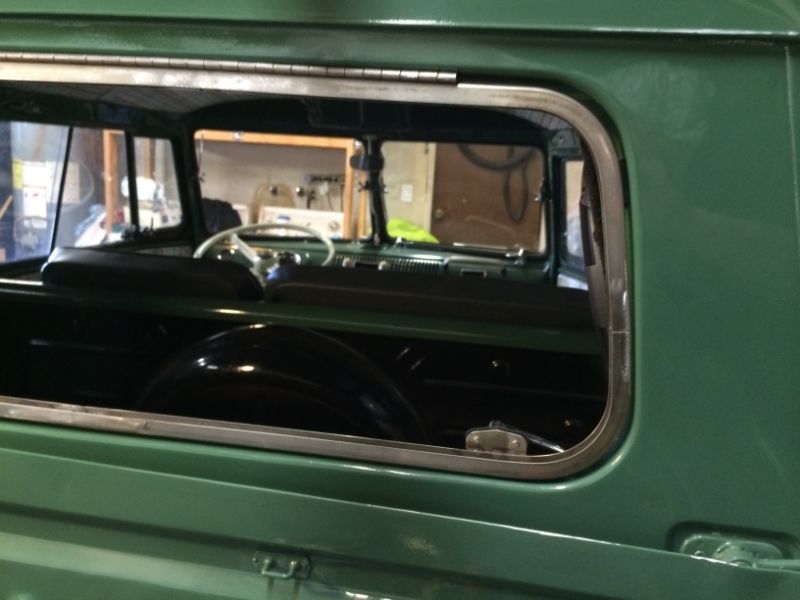
Got my glass so was able to finish this project off.
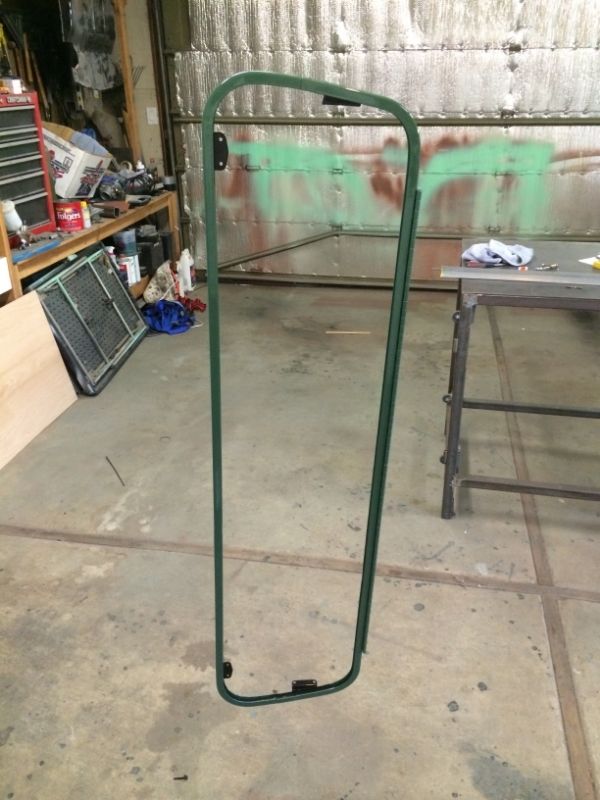
First had to paint the frame
Then had to tint the window, and got it in the frame. With the seals it's a wrestling match.
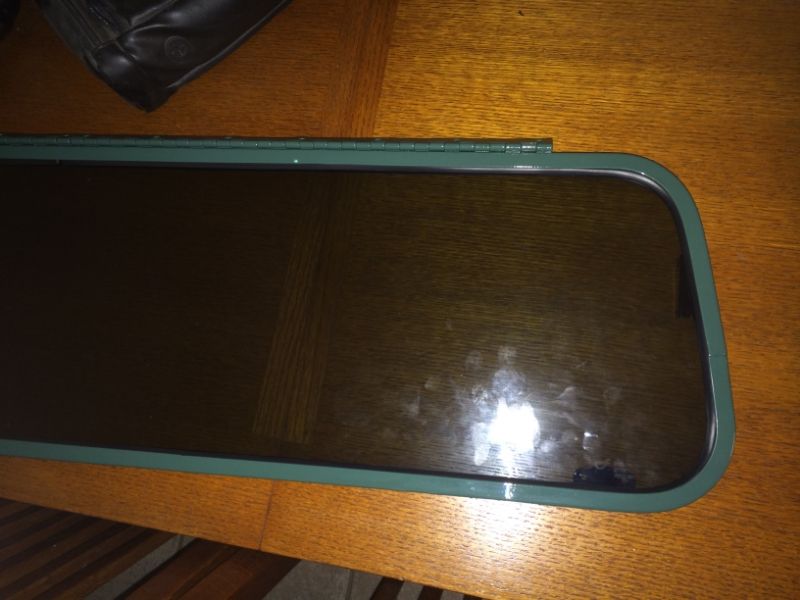
Latches on
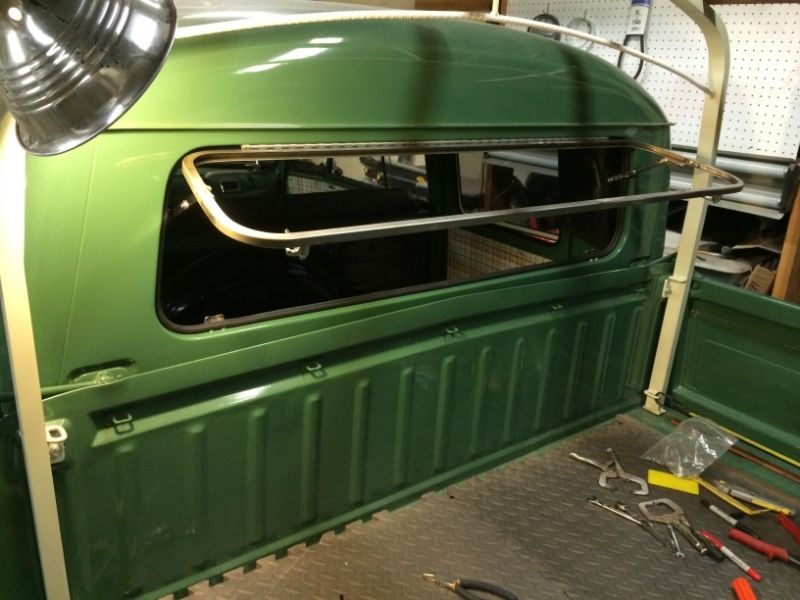
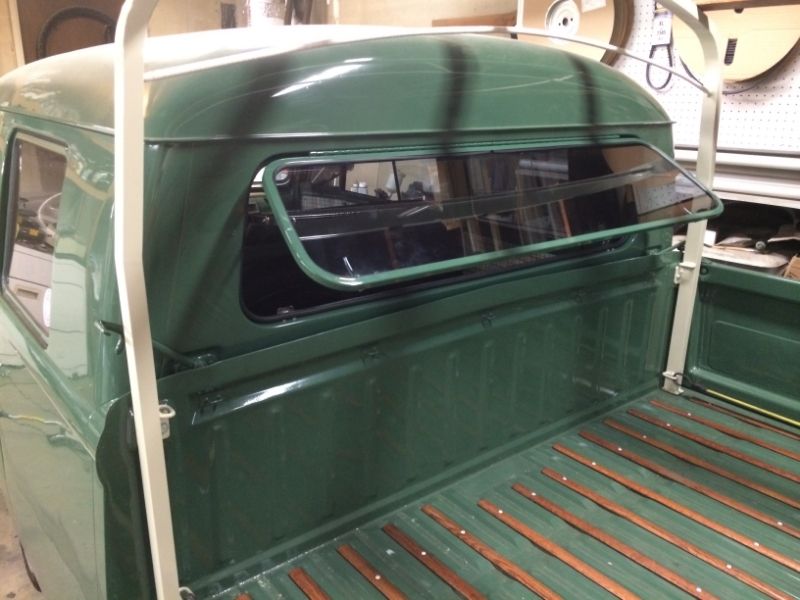
Mounted in the car
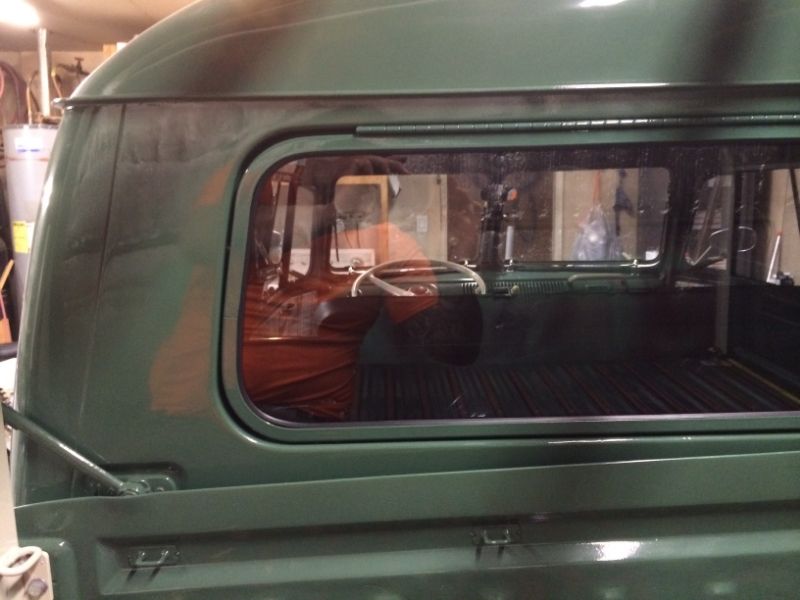
Done
That was a lot of work just to make a window open, not sure I would do it again.
First had to paint the frame
Then had to tint the window, and got it in the frame. With the seals it's a wrestling match.
Latches on
Mounted in the car
Done
That was a lot of work just to make a window open, not sure I would do it again.
Last edited by heli-easy on Tue Jul 29, 2014 8:53 pm, edited 9 times in total.
-
heli-easy
- Posts: 87
- Joined: Mon Nov 15, 2010 5:29 pm
Re: 66 Double Cab Restoration
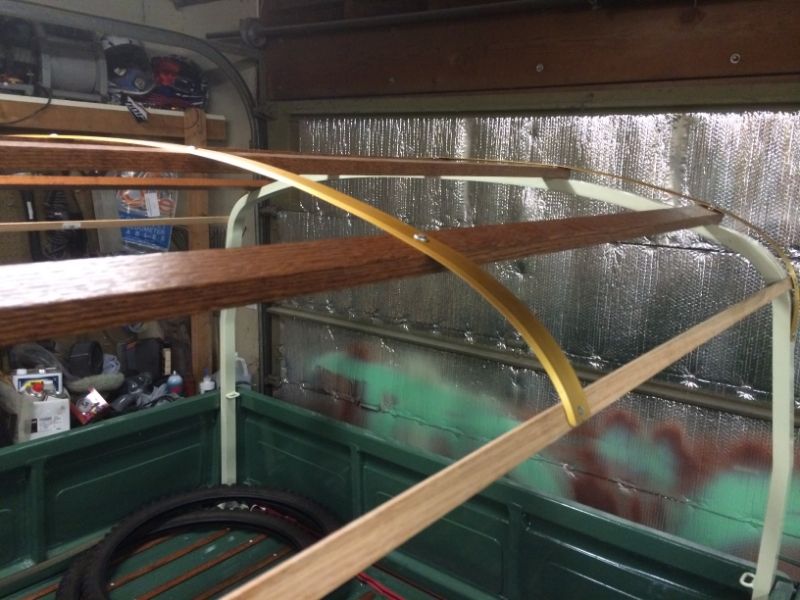
Took my Double Cab in to have the tilt top made. Had to finish off the framing by adding some contour frames.
Should have it back by tomorrow.
Should have it back by tomorrow.
Last edited by heli-easy on Tue Jul 29, 2014 2:45 pm, edited 2 times in total.
-
heli-easy
- Posts: 87
- Joined: Mon Nov 15, 2010 5:29 pm
Re: 66 Double Cab Restoration
Starting to wonder why I come to this site. This forum seem dead.
Last pic. I'm out!
Last pic. I'm out!
Last edited by heli-easy on Tue Jul 29, 2014 2:48 pm, edited 2 times in total.
-
Piledriver

- Moderator
- Posts: 22520
- Joined: Sat Feb 16, 2002 12:01 am
Re: 66 Double Cab Restoration
No!!!
We all look on in awe!
Seriously, My square has one little tiny area of rust due to a stupid PO drilling holes and I'm avoiding fixing it like it has cooties, and I HAVE all the toys to fix it.
Due to rustworm, you essentially hand built your DC (mostly) from scratch.
This is one of those classic "I cannot believe he saved that" threads.
~godlike resto.
It would be easier for folks to look at the pics if you skipped the [img] tags
The site makes then unclickable links... just paste the link, or shrink them to 800x600, those can be uploaded.
Addendum to Newtons first law:
zero vehicles on jackstands, square gets a fresh 090 and 1911, cabby gets a blower.
EZ3.6 Vanagon after that.(mounted, needs everything finished) then Creamsicle.
zero vehicles on jackstands, square gets a fresh 090 and 1911, cabby gets a blower.
EZ3.6 Vanagon after that.(mounted, needs everything finished) then Creamsicle.
-
heli-easy
- Posts: 87
- Joined: Mon Nov 15, 2010 5:29 pm
66 Double Cab Restoration
Hmm. I tried uploading and 15 pics in I got a max upload error.
On my tapatalk app it is all clickable, guess I assumed it looked the same for everyone else.
Thanks for the encouragement. It's been like posting to an empty room. Actually wish I'd posted this to thesamba. Even the scorn for not leaving it unrestored or for all my little mods would at least be entertaining for me.
Fixed the problem with the posts, was a incorroect upload setting in photobucket.
All the full resolution pics are on my photobucket account.
http://s1246.photobucket.com/user/2squa ... %20Project
Last edited by heli-easy on Tue Jul 29, 2014 8:57 pm, edited 1 time in total.
-
Piledriver
- Moderator
- Posts: 22520
- Joined: Sat Feb 16, 2002 12:01 am
Re: 66 Double Cab Restoration
IIRC you can only upload 3 pics per post, links are unlimited, but may not work as you expect if the hosting board doesn't share size info with STF.
Posting this on TOS would surely be entertaining
...although what you ended up fabricating is almost indistinguishable vs a rust-free original with a repaint, unless one has one of each to compare.
Posting this on TOS would surely be entertaining
...although what you ended up fabricating is almost indistinguishable vs a rust-free original with a repaint, unless one has one of each to compare.
Addendum to Newtons first law:
zero vehicles on jackstands, square gets a fresh 090 and 1911, cabby gets a blower.
EZ3.6 Vanagon after that.(mounted, needs everything finished) then Creamsicle.
zero vehicles on jackstands, square gets a fresh 090 and 1911, cabby gets a blower.
EZ3.6 Vanagon after that.(mounted, needs everything finished) then Creamsicle.
-
splitbusvanatic
- Posts: 7
- Joined: Thu Nov 09, 2006 5:28 pm
Re: 66 Double Cab Restoration
I actually forgot about this thread.
Glad I checked in on it again.
It's great work.
I need to get off my ass and restart my own project.
( The tdi so42. )
It's threads like this that keeps the lazy ones like me motivated.
Keep it up.
Glad I checked in on it again.
It's great work.
I need to get off my ass and restart my own project.
( The tdi so42. )
It's threads like this that keeps the lazy ones like me motivated.
Keep it up.
-
Piledriver
- Moderator
- Posts: 22520
- Joined: Sat Feb 16, 2002 12:01 am
Re: 66 Double Cab Restoration
I think looking at your pics has motivated me to roll my own roof rack on my Square.
Studying intently...
Did you make a 3 wheel variable radius bender or you you gently work it over your leg or tree trunk etc?
Studying intently...
Did you make a 3 wheel variable radius bender or you you gently work it over your leg or tree trunk etc?
Addendum to Newtons first law:
zero vehicles on jackstands, square gets a fresh 090 and 1911, cabby gets a blower.
EZ3.6 Vanagon after that.(mounted, needs everything finished) then Creamsicle.
zero vehicles on jackstands, square gets a fresh 090 and 1911, cabby gets a blower.
EZ3.6 Vanagon after that.(mounted, needs everything finished) then Creamsicle.
-
ALYKAT III

- Posts: 312
- Joined: Sat Apr 18, 2009 7:42 am
Re: 66 Double Cab Restoration
This is a dynamite build. I didn't comment because all I could do was watch and shake my head in wonder.
-
heli-easy
- Posts: 87
- Joined: Mon Nov 15, 2010 5:29 pm
Re: 66 Double Cab Restoration
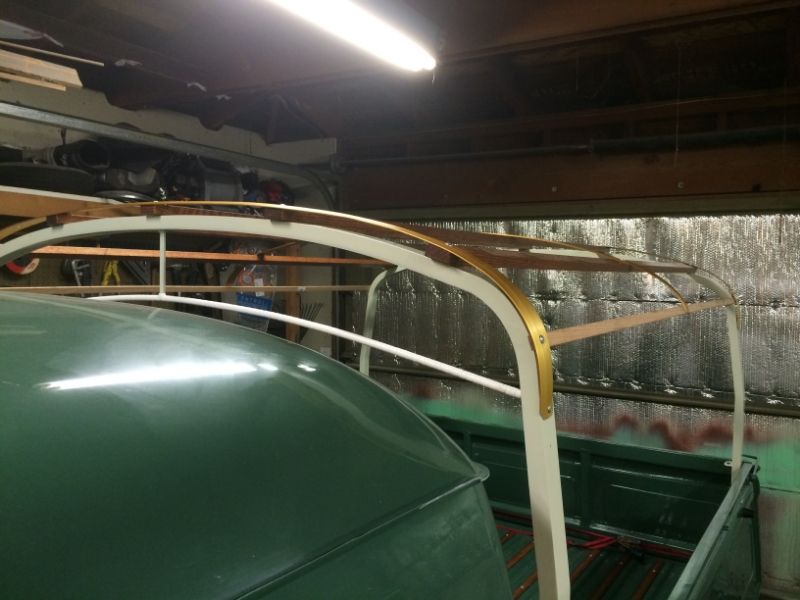
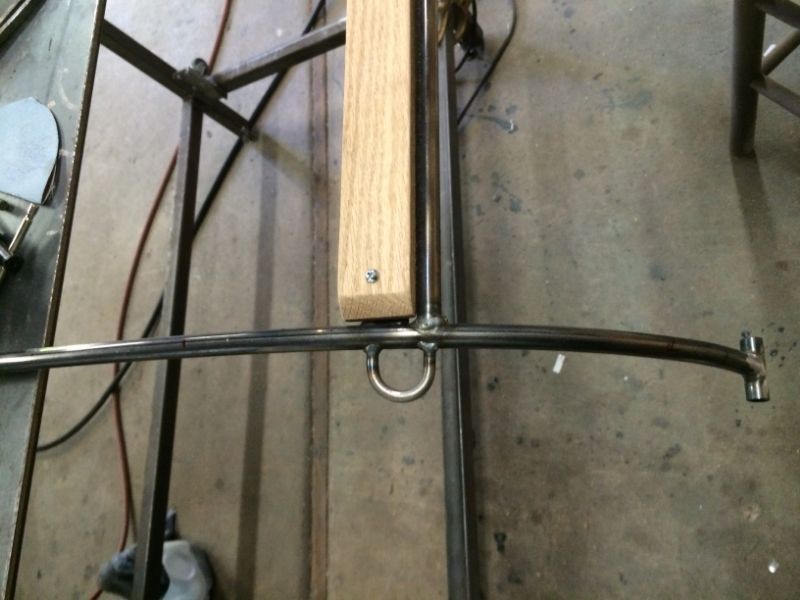
I used a sheetmetal roller. The kind with 3 rollers. Most of them have a ⅜ and ½ radius cut in the rollers at the end. I just used that. I am going to roll an upper bar for a basket. I'll take a few pics then to illustrate the method. Was fairly easy to do.
-
heli-easy
- Posts: 87
- Joined: Mon Nov 15, 2010 5:29 pm
Re: 66 Double Cab Restoration
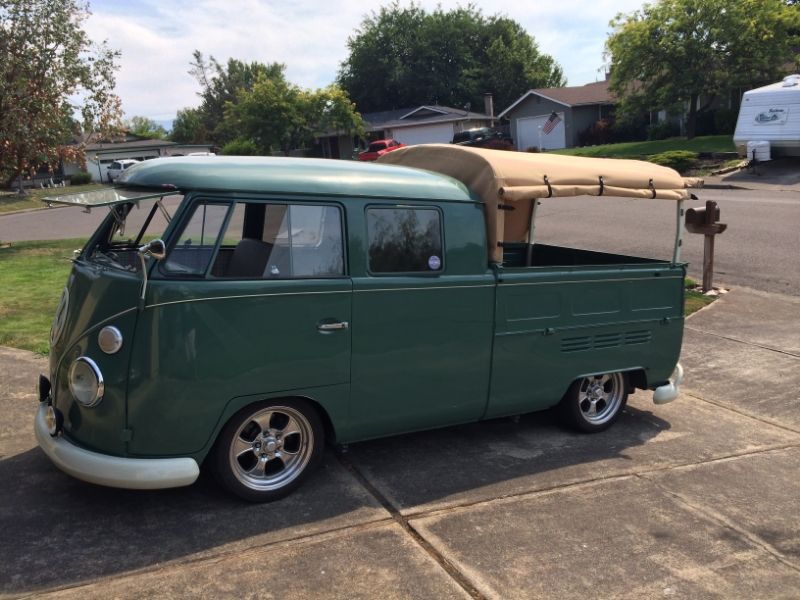
Built a custom roof rack cause my tilt top is not the standard height:
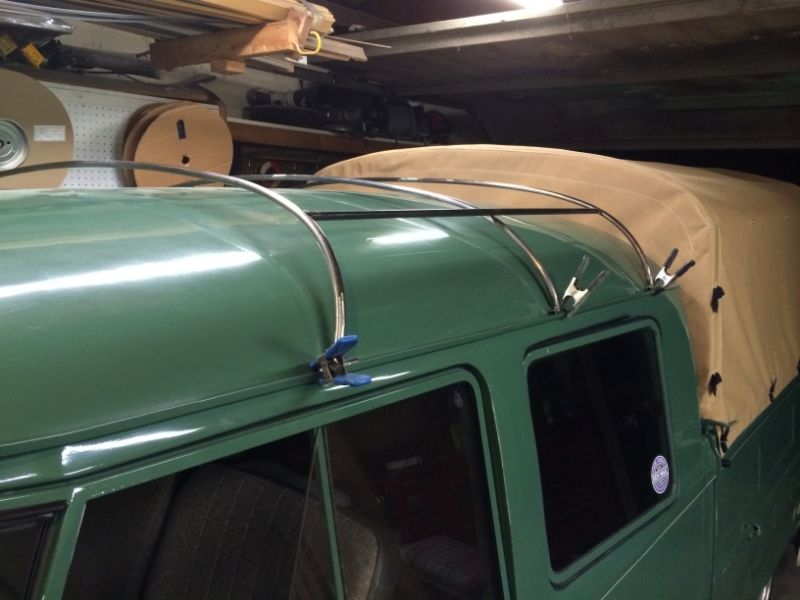
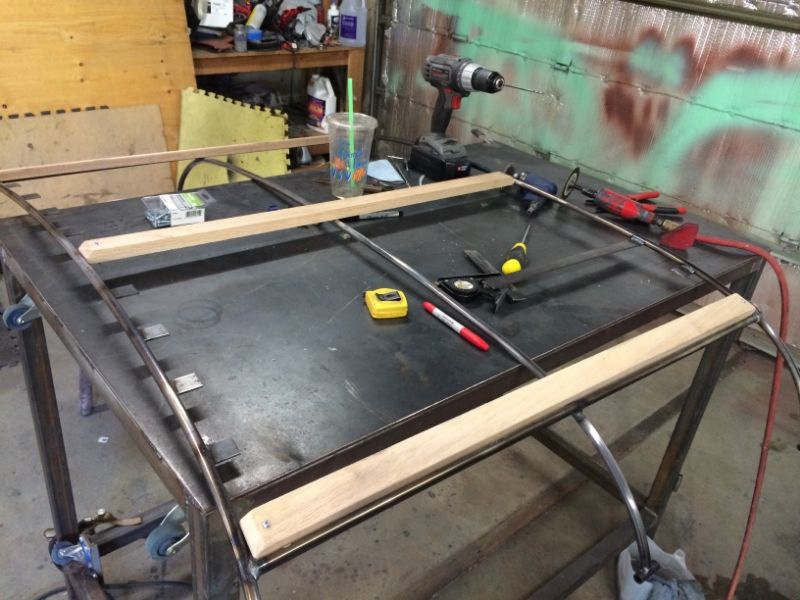
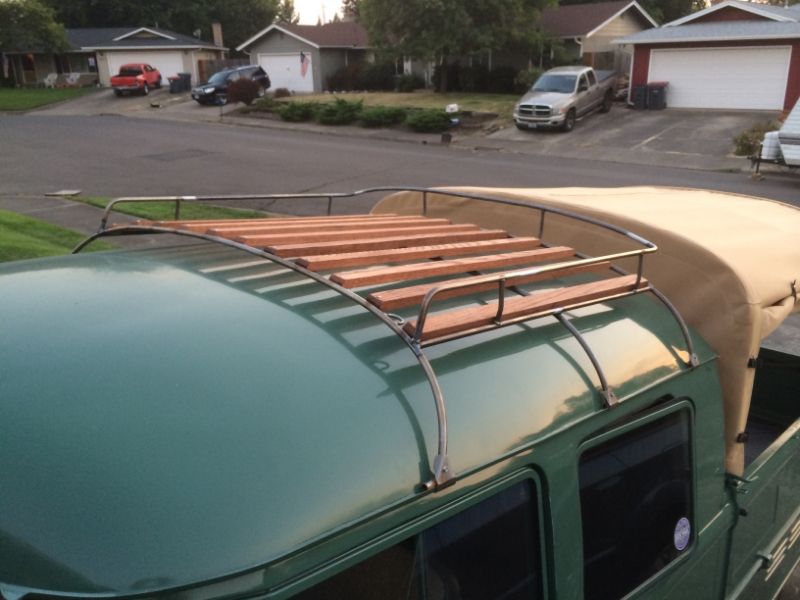
The project done
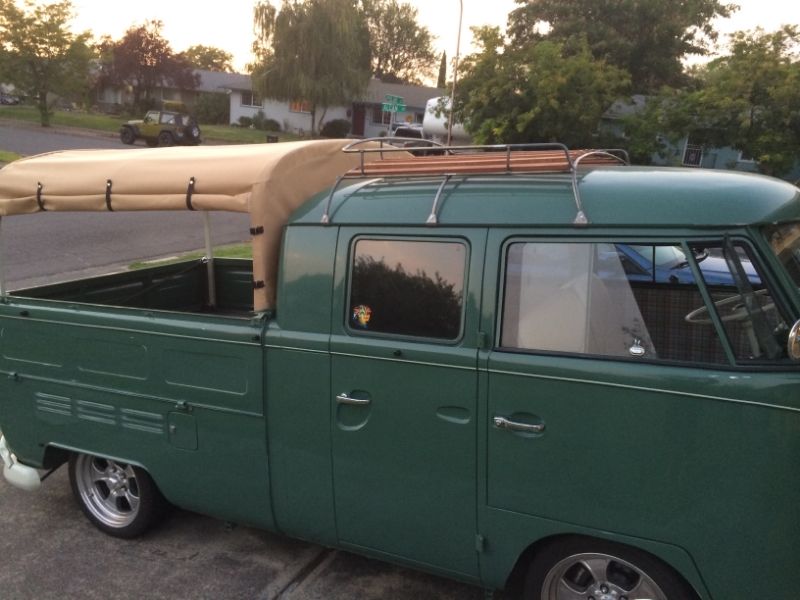
The project done
