'89 Blue Star Vanagon Project
-
turbobaja

- Posts: 2826
- Joined: Fri Sep 14, 2007 4:56 pm
Re: '89 Blue Star Vanagon Project
You're right Steve, that splined joint adjustment is key to a happy shifter. You can adjust it by checking that the shifter tabs are centered in the box while the shifter socket/ball at the trans is in line. Might need a mirror to get a good view up into the back side of the box. Grab the shaft and it should easily swing into 1st/2nd gears without any twisting force on the shaft. Other than checking dash-to-shift handle clearance, you can adjust and check all the shifting functions through all 5/6 gears by grabbing the shaft just behind the shift box "think backwards".
Karl
DON'T QUIT
DON'T QUIT
-
turbobaja
- Posts: 2826
- Joined: Fri Sep 14, 2007 4:56 pm
Re: '89 Blue Star Vanagon Project
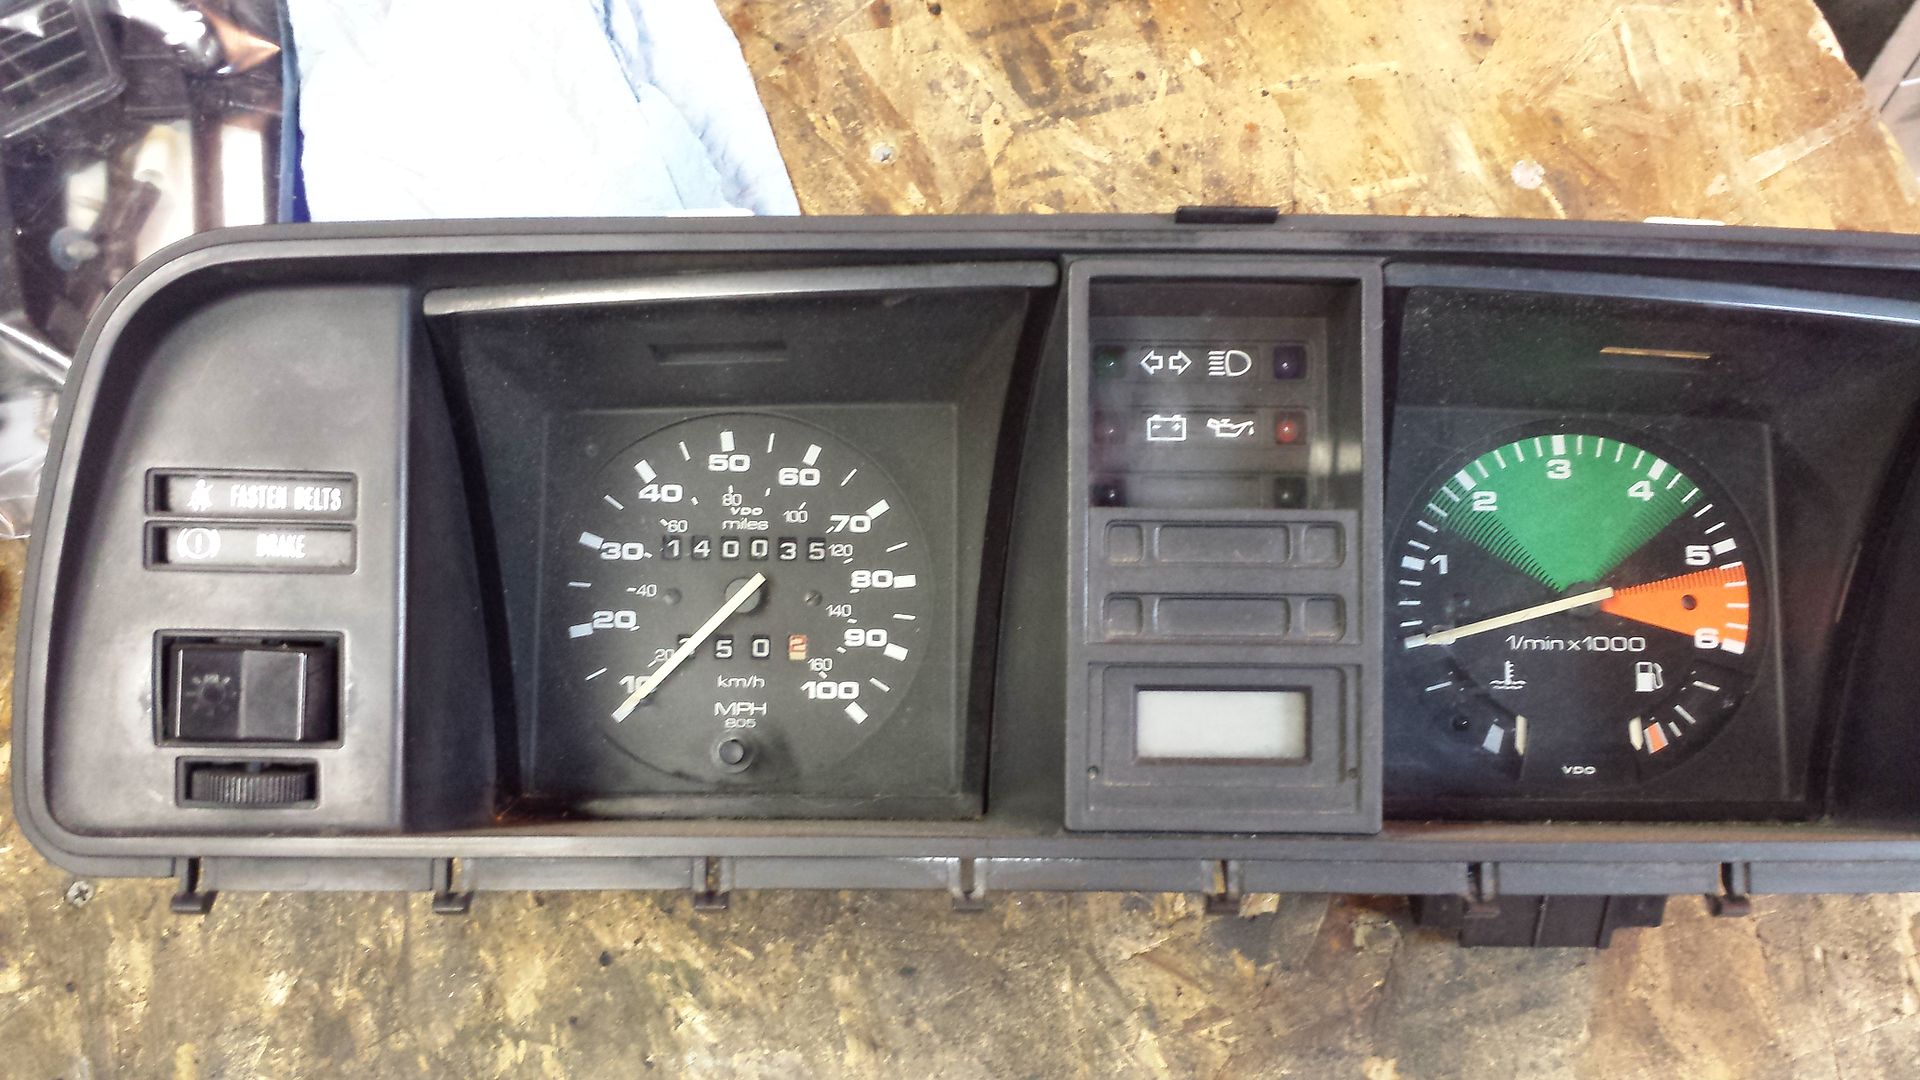
Even though this van is pretty hammered I think the odo might actually be original at 140K miles.
Plenty of little surprises on this rig. Had to bend that tab straight so I could run a sawzall up both sides of the bushing...rusty bolt syndrome on both trailing arms.
Pressed in some new front upper control arm bushings. Pretty tight fit pressing these power flex collars into the control arm bores. Then each got a little weld, cleaned and a squirt of paint so the welds dont rust.

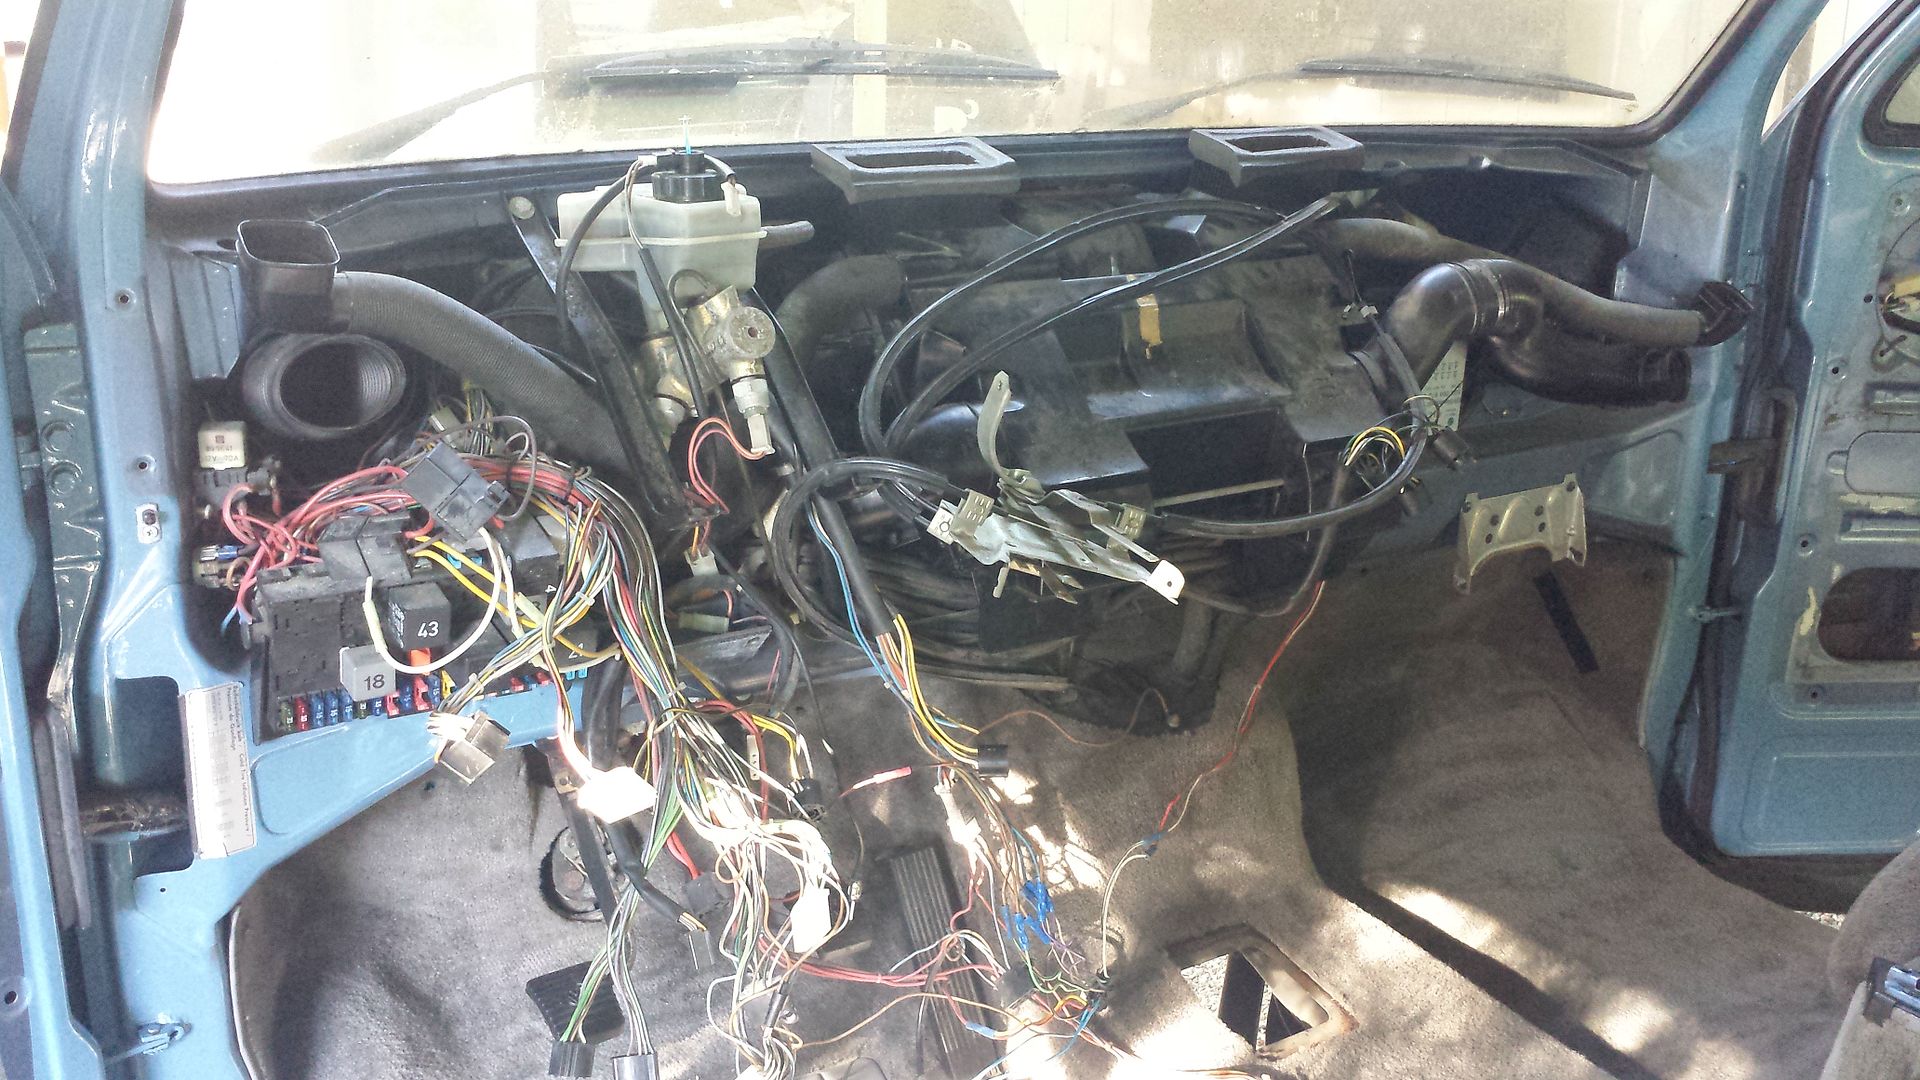
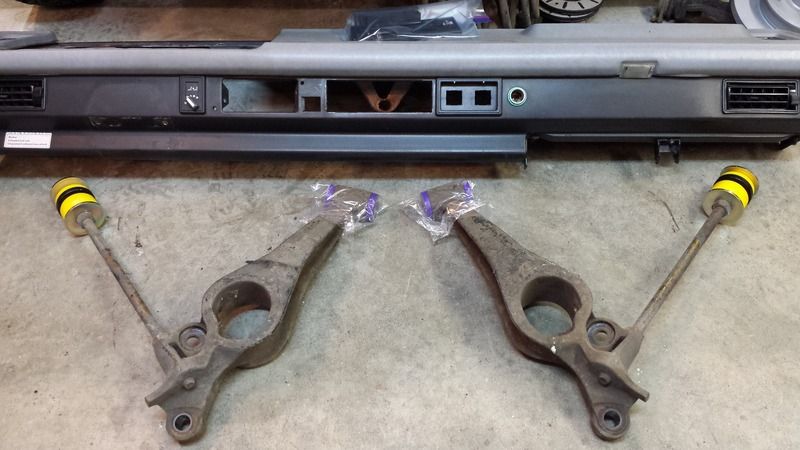
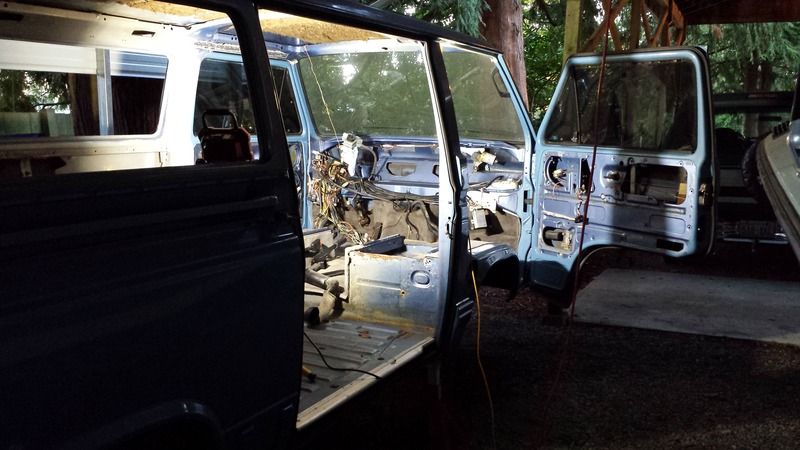
I pulled the dash to sort out a few things. I need to pull the heater housing and get my eyes on the heater core, looks like somebody hacked their way in there once before. I'm deleting the rear heater and AC controls and I want to get both ends of these harnesses buttoned up for potential future modifications. Someone has aleady installed relays for the headlight power supply, so thats a plus. I need to test the brake booster and have a look at the pedal cluster . The steering column got a new ignition switch and lock cylinder that matches all the other locks on the Van. Also the suspension is all pulled for a complete brake and bushing rebuild. Trying to get it on its own tires before we start working too much more on the interior.

Plenty of little surprises on this rig. Had to bend that tab straight so I could run a sawzall up both sides of the bushing...rusty bolt syndrome on both trailing arms.

Pressed in some new front upper control arm bushings. Pretty tight fit pressing these power flex collars into the control arm bores. Then each got a little weld, cleaned and a squirt of paint so the welds dont rust.

I pulled the dash to sort out a few things. I need to pull the heater housing and get my eyes on the heater core, looks like somebody hacked their way in there once before. I'm deleting the rear heater and AC controls and I want to get both ends of these harnesses buttoned up for potential future modifications. Someone has aleady installed relays for the headlight power supply, so thats a plus. I need to test the brake booster and have a look at the pedal cluster . The steering column got a new ignition switch and lock cylinder that matches all the other locks on the Van. Also the suspension is all pulled for a complete brake and bushing rebuild. Trying to get it on its own tires before we start working too much more on the interior.

Karl
DON'T QUIT
DON'T QUIT
-
turbobaja
- Posts: 2826
- Joined: Fri Sep 14, 2007 4:56 pm
Re: '89 Blue Star Vanagon Project
I've got to push a little harder on this project. I'd like to find a way to squeeze it into my small 2 car garage before the weather turns too wet and chilly up here in the PNW. I keep taking it further and further apart, now it's time to get going back together with the suspension so it can move under it's own power again.
The rear trailing arms are ready to go back on, bearings feel good, so I'm gonna run them as is. Replaced the brake drums, shoes, wheel cylinders and park cables. Also popped in some Powerflex bushings and got new hardware to reinstall everything.
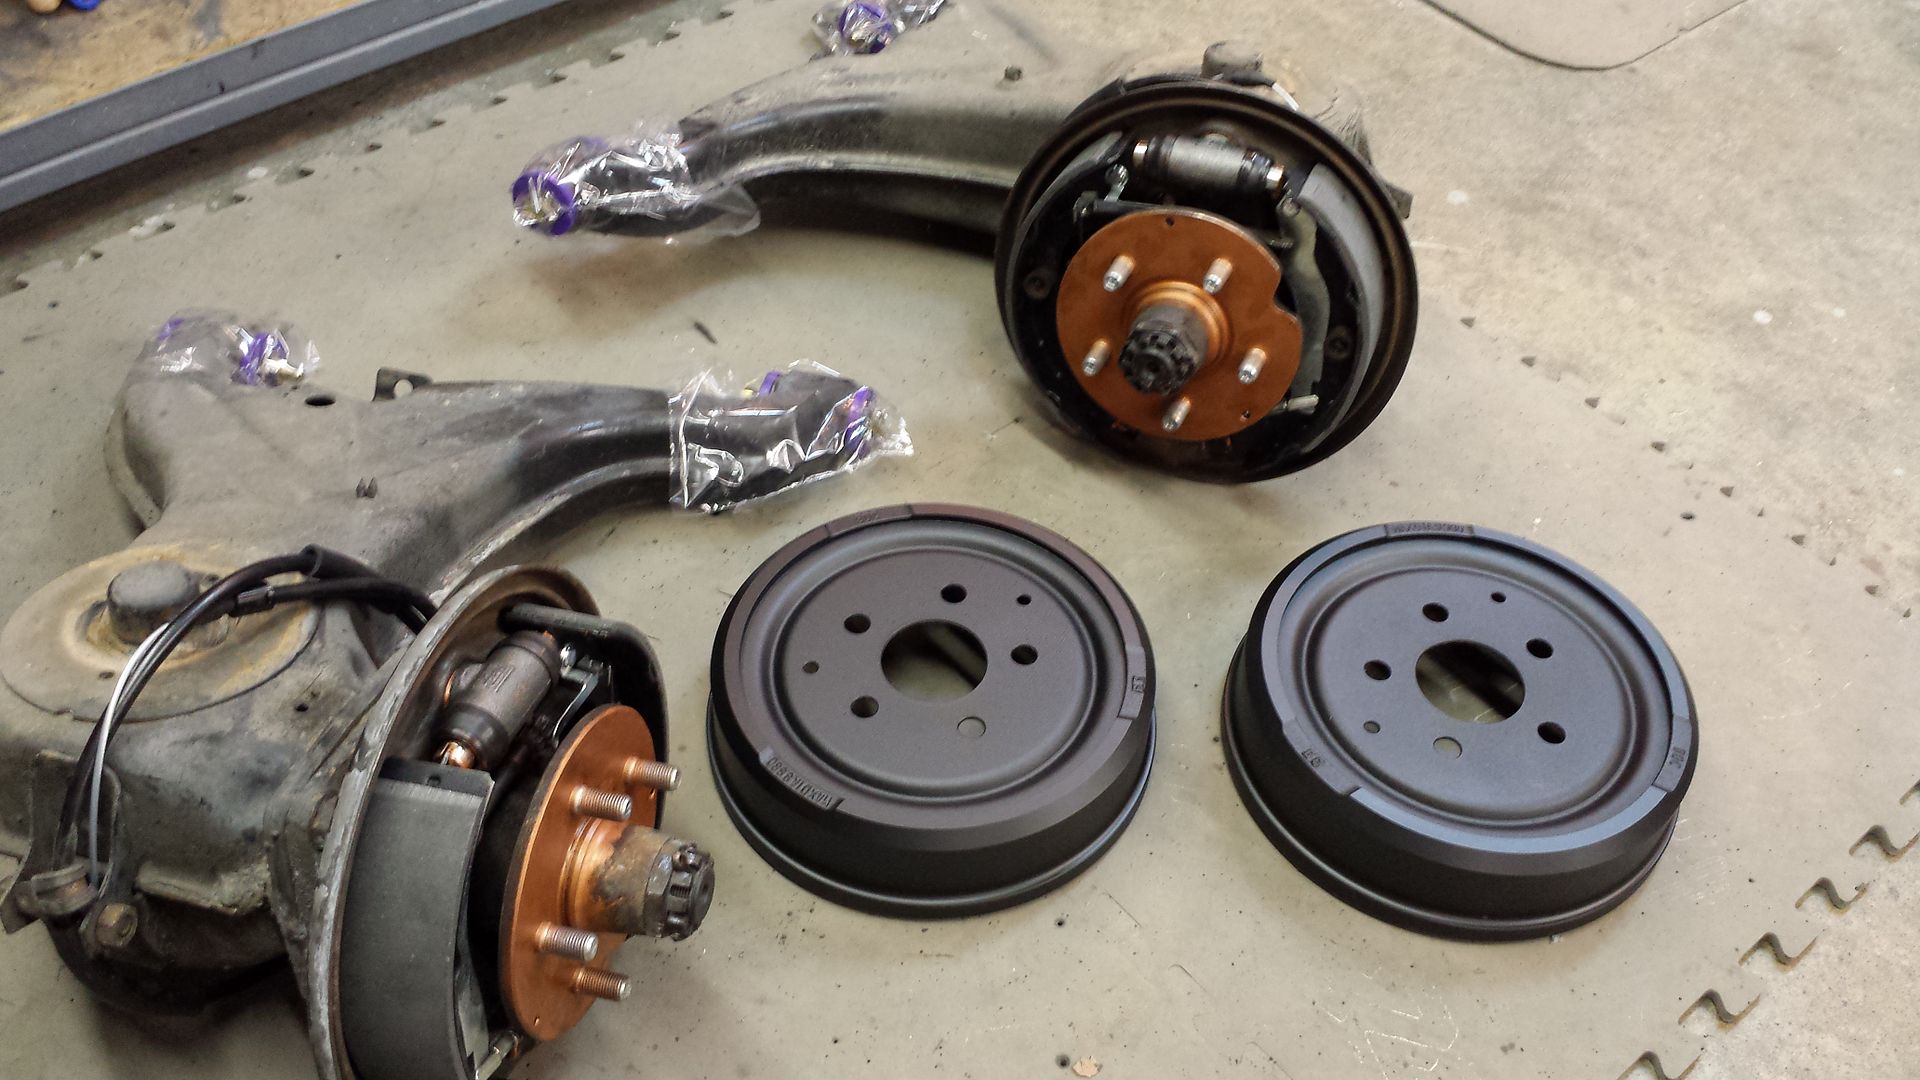
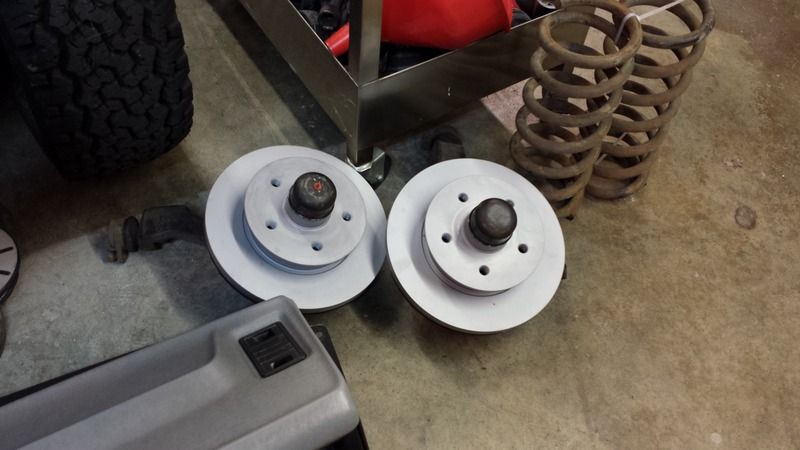
Front lower arms got new bushings too. Upper/lower BJs and inner/outer tie rods are all nice and tight, so will reuse them. New bearings/rotors and brake pads.
The rear trailing arms are ready to go back on, bearings feel good, so I'm gonna run them as is. Replaced the brake drums, shoes, wheel cylinders and park cables. Also popped in some Powerflex bushings and got new hardware to reinstall everything.

Front lower arms got new bushings too. Upper/lower BJs and inner/outer tie rods are all nice and tight, so will reuse them. New bearings/rotors and brake pads.


Karl
DON'T QUIT
DON'T QUIT
-
Steve Arndt
- Posts: 7404
- Joined: Sat Mar 10, 2001 12:01 am
Re: '89 Blue Star Vanagon Project
Aircooled dot net has VW LT bigger rear wheel cylinders and super stopper semi metallic shoes if you feel the need. I'm going to go that route when brake time comes. I'm currently running multi piece rear shoes (broken in half lol)
Steve
My Baja Build
My Baja Build
-
turbobaja
- Posts: 2826
- Joined: Fri Sep 14, 2007 4:56 pm
Re: '89 Blue Star Vanagon Project
Funny, mine came with those multi piece shoes too  . Park cables seized slightly hanging up the shoes I think, one side even had a hole melted through the wheel cylinder dust boot. My tires are only 5% oversized, hopefully stock brakes will do on a simple Van like mine, at least until I get used to driving it some.
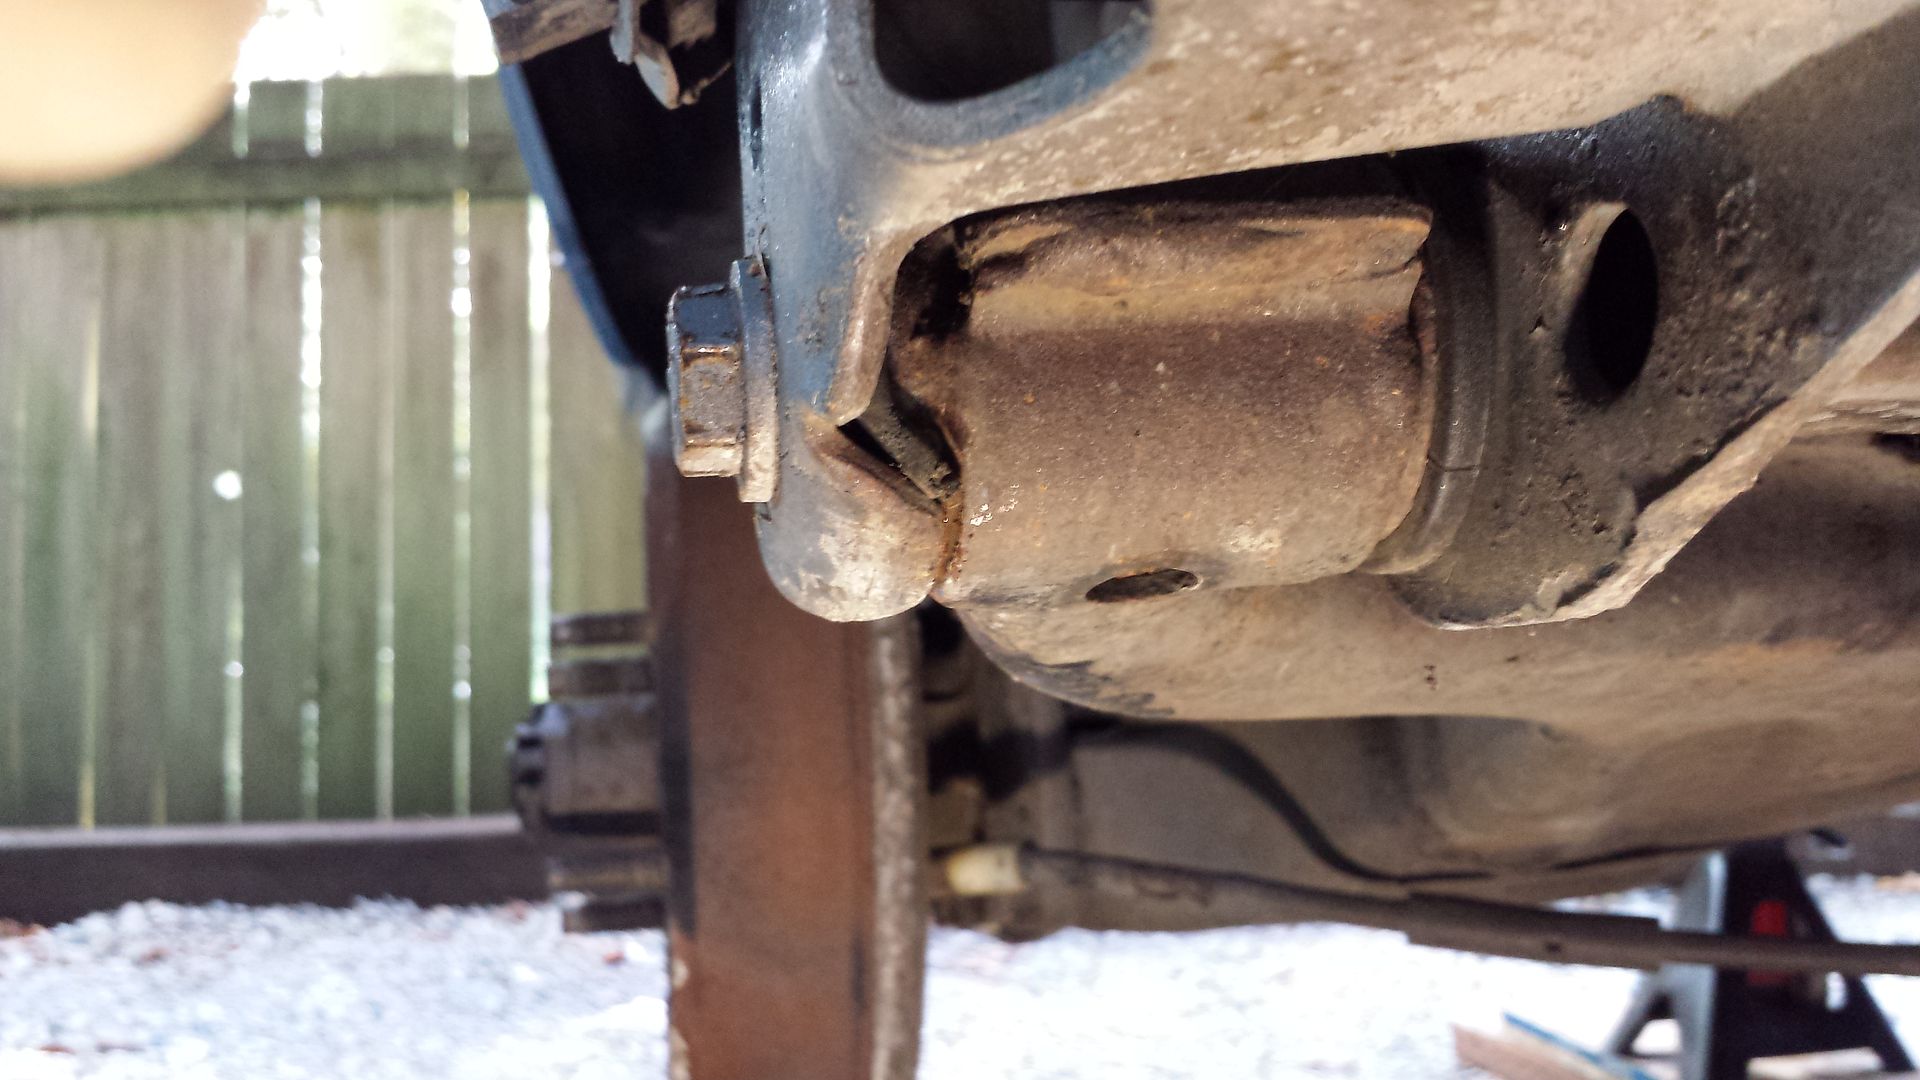
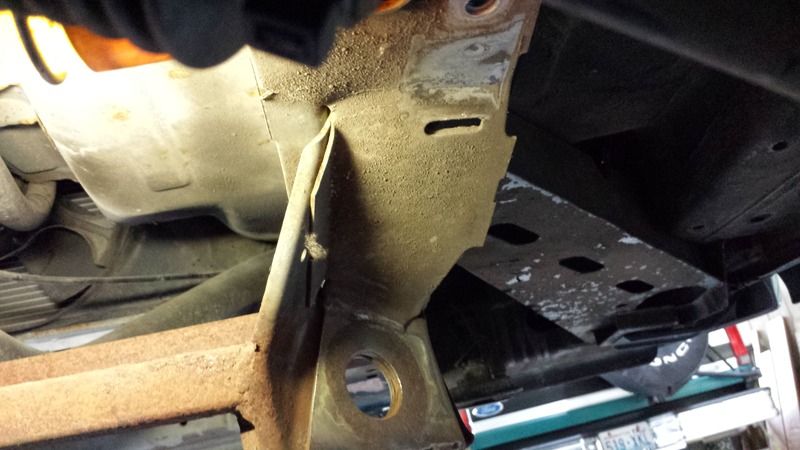
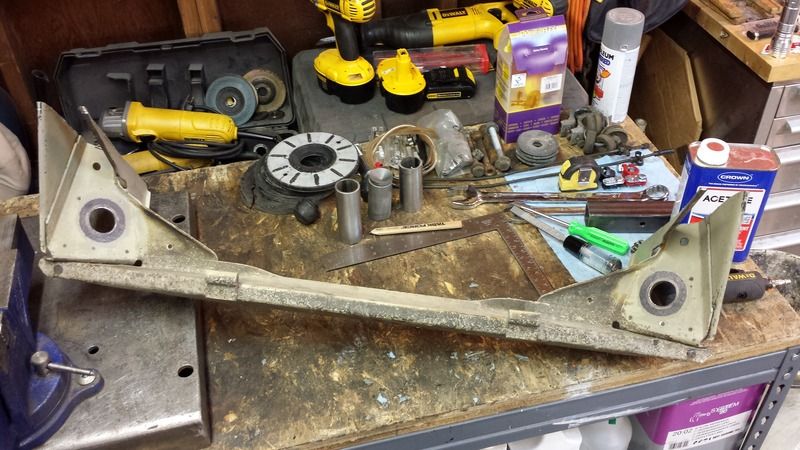
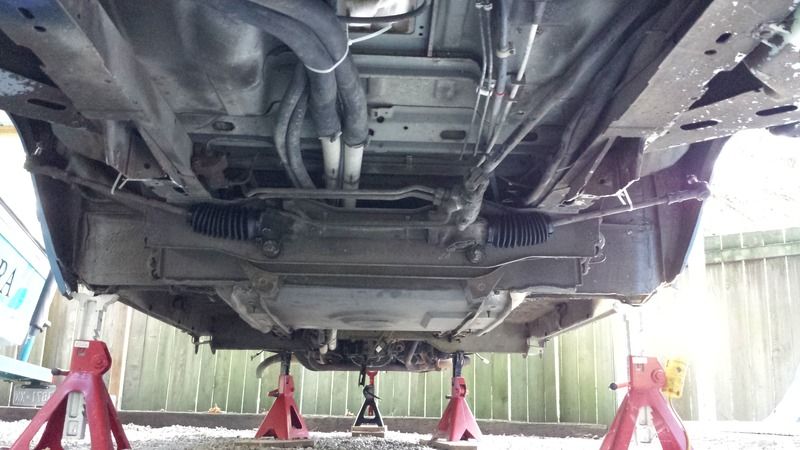
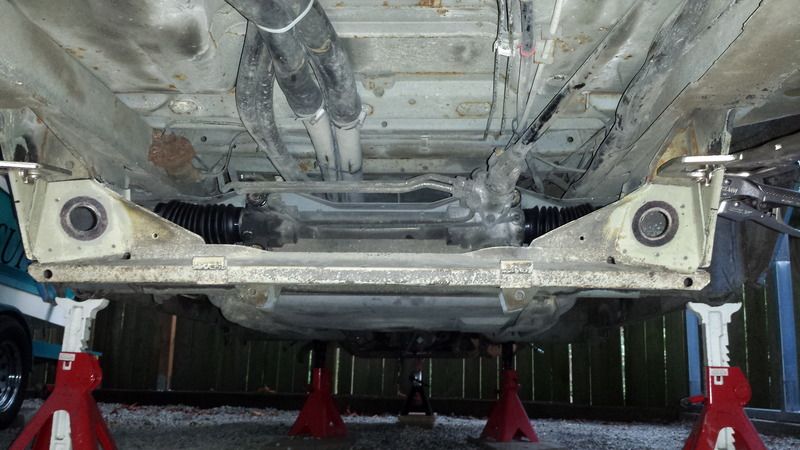
Today I installed a set of Whiteline mounts and a new pair of boots on my steering rack, then I took another hard look at the chop job on my front suspension and realized it's definitely tweaked on the right side radius rod mount. I thought they just cut off the cross member for ground clearance, but it looks like it took a hit on the right side radius rod mount. There's a nice little crease in the sheet metal where it's been pushed up into the "frame" area, and the face of the rod mounting surface is pushed back and up slightly, bowing the inner lip where one of the new "cross members" is welded to it. It's not a huge amount of damage and I'm sure I could align it like it is just fine, however, I've got a cross member I brought home just in case I ended up needing to graft it into my Van. I'm not looking forward to it, but I'm afraid it's got to be done. I've cut off 2wd front suspensions to convert them to Syncros, but never the other way around. The very first Van I converted is where I got my donor front clip, along with the hardware to mount a spare tire under the front again like stock (nothing there on mine when I bought it...)
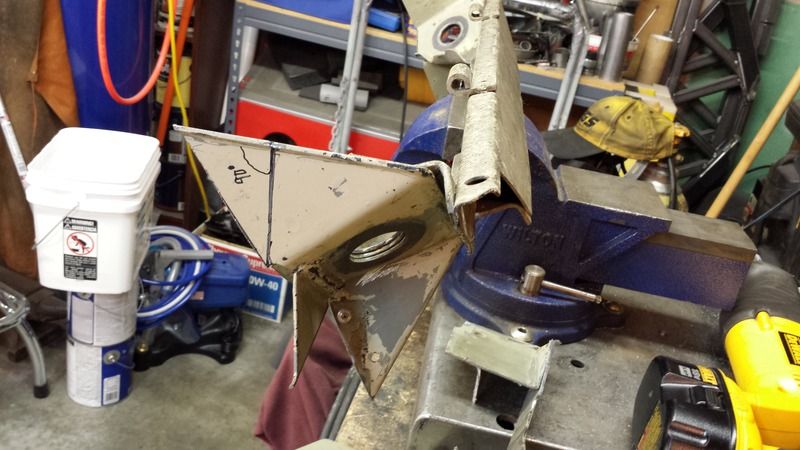
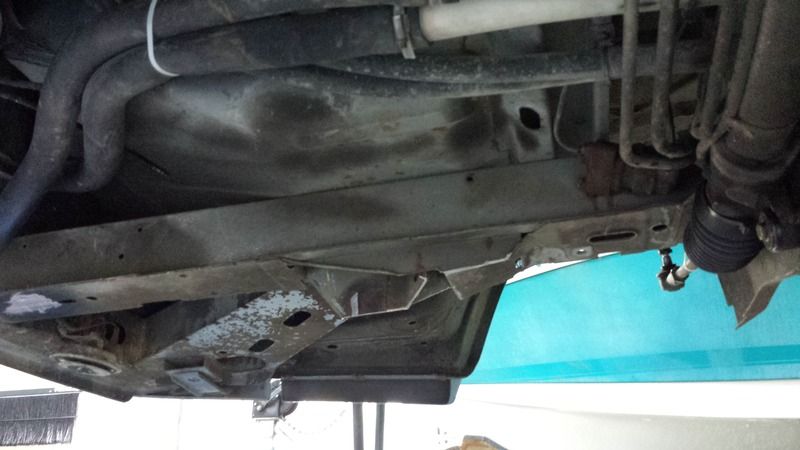
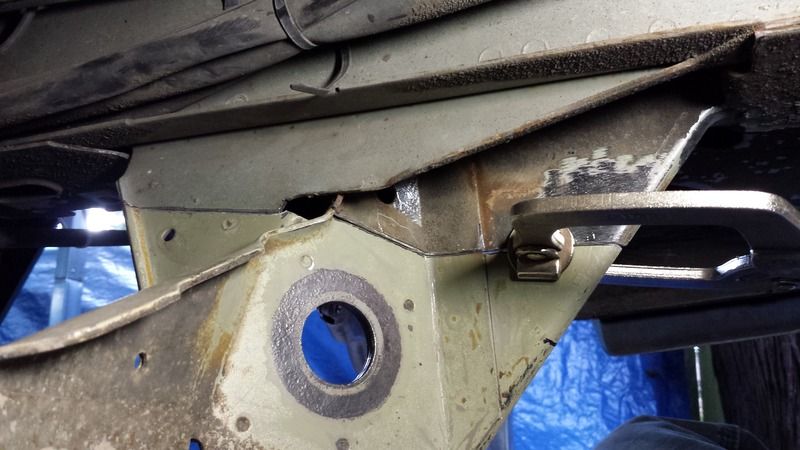
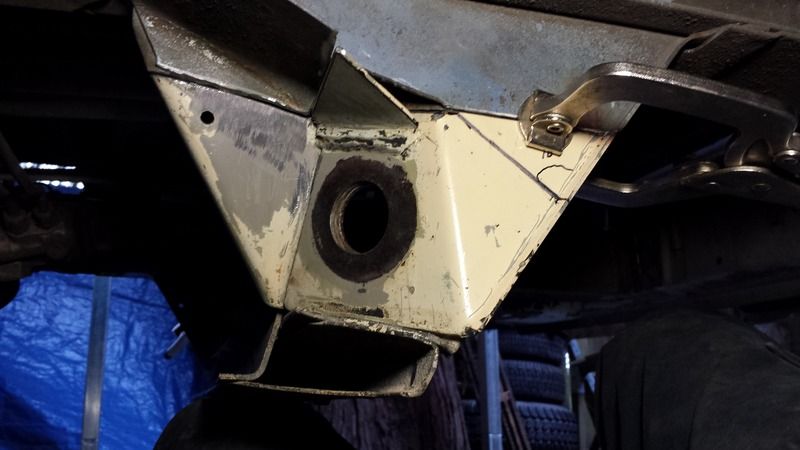
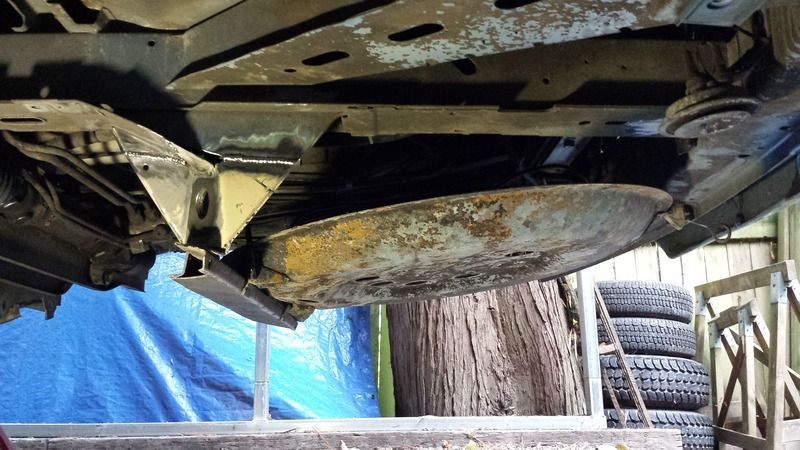
Here's the back side of the right side radius rod mount, notice the small crease with the shadow up above, evidence this thing took a good hit.
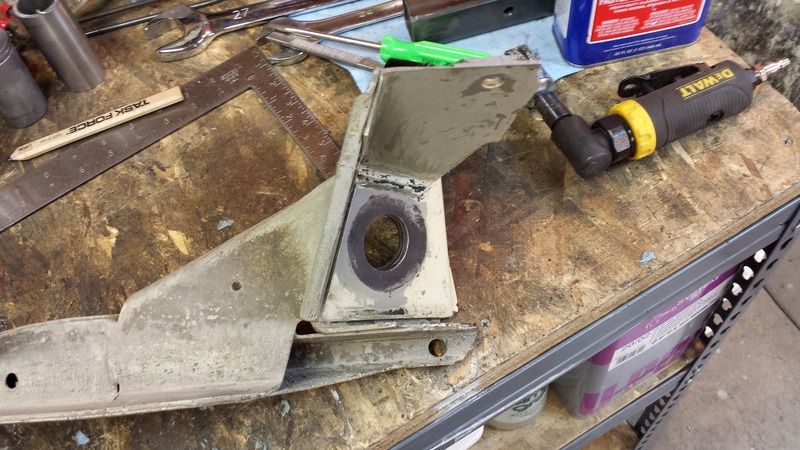
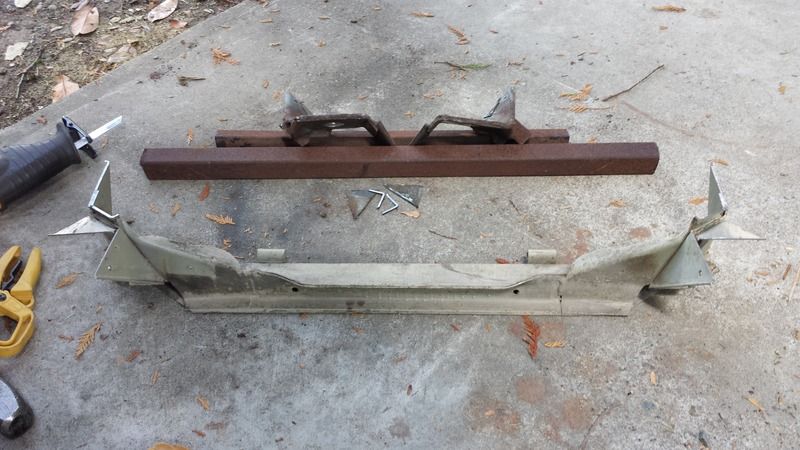
This is that same area on my donor piece, it's off an '85 Westy. Tricky multi-contoured surface to try and cut/fit just right. Plus my replacement section doesn't have that area with the crease. So I will have to reuse some and cut some here and there and bend things just a bit I'm sure, just what I wanted to do...
Today I installed a set of Whiteline mounts and a new pair of boots on my steering rack, then I took another hard look at the chop job on my front suspension and realized it's definitely tweaked on the right side radius rod mount. I thought they just cut off the cross member for ground clearance, but it looks like it took a hit on the right side radius rod mount. There's a nice little crease in the sheet metal where it's been pushed up into the "frame" area, and the face of the rod mounting surface is pushed back and up slightly, bowing the inner lip where one of the new "cross members" is welded to it. It's not a huge amount of damage and I'm sure I could align it like it is just fine, however, I've got a cross member I brought home just in case I ended up needing to graft it into my Van. I'm not looking forward to it, but I'm afraid it's got to be done. I've cut off 2wd front suspensions to convert them to Syncros, but never the other way around. The very first Van I converted is where I got my donor front clip, along with the hardware to mount a spare tire under the front again like stock (nothing there on mine when I bought it...)
Here's the back side of the right side radius rod mount, notice the small crease with the shadow up above, evidence this thing took a good hit.

This is that same area on my donor piece, it's off an '85 Westy. Tricky multi-contoured surface to try and cut/fit just right. Plus my replacement section doesn't have that area with the crease. So I will have to reuse some and cut some here and there and bend things just a bit I'm sure, just what I wanted to do...


Karl
DON'T QUIT
DON'T QUIT
-
turbobaja
- Posts: 2826
- Joined: Fri Sep 14, 2007 4:56 pm
Re: '89 Blue Star Vanagon Project
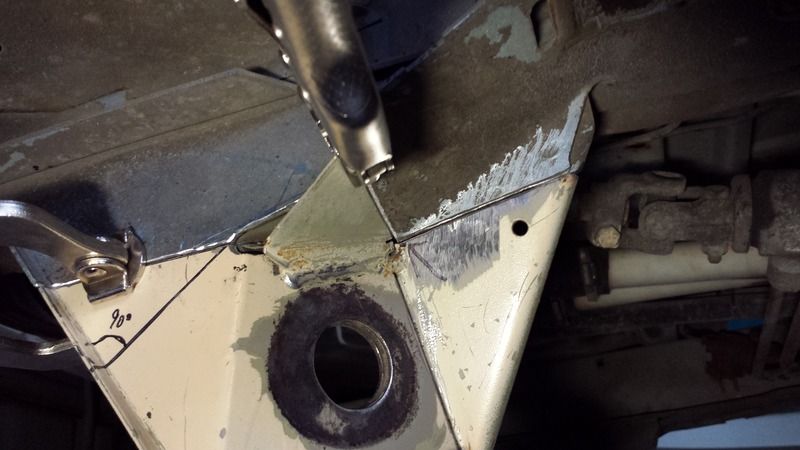
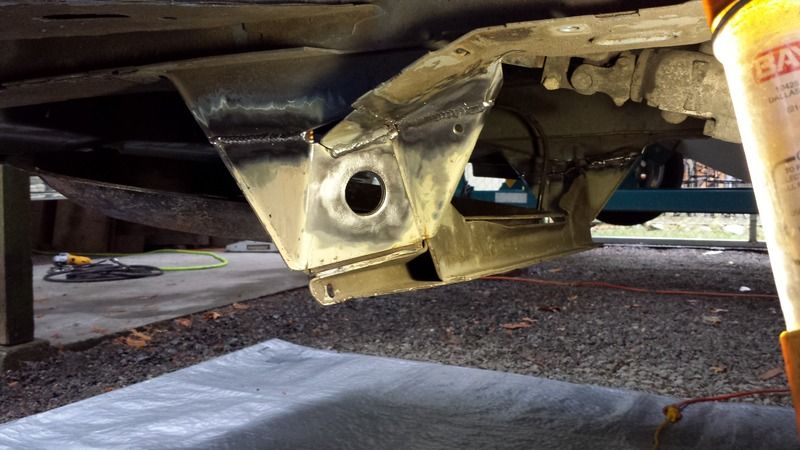
After taking a close look at the situation, I determined 4 cuts to make on each end of the cross member. I got the cut lines drawn on both the Van and the donor piece started by trimming up the new cross member.
Then it was time to cut the old brackets off the Van. Point of no return here. Really glad I went through with this, that right mount was really mangled.
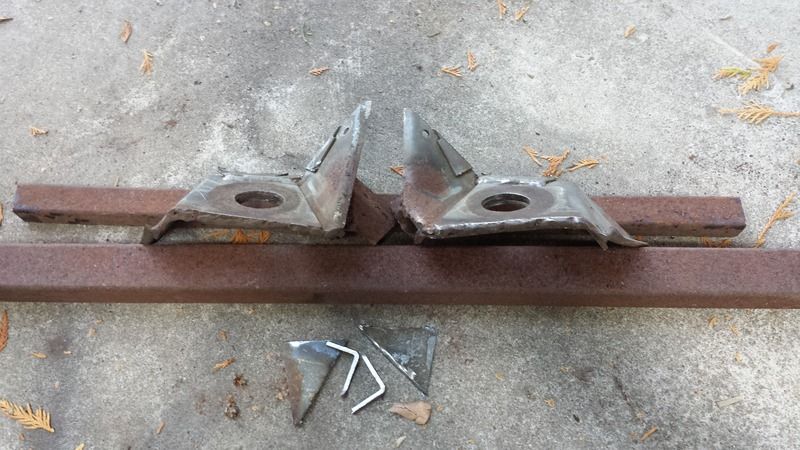
After a few dozen test fittings and grinding sessions, it's almost ready to clean/prep and weld in place.


Then it was time to cut the old brackets off the Van. Point of no return here. Really glad I went through with this, that right mount was really mangled.


After a few dozen test fittings and grinding sessions, it's almost ready to clean/prep and weld in place.


Karl
DON'T QUIT
DON'T QUIT
-
ajdenette

- Posts: 717
- Joined: Wed Jan 20, 2010 1:18 pm
Re: '89 Blue Star Vanagon Project
At least you know it will be structurally sound and correct after cutting out the hacked up parts and replacing it with known good factory sheet metal.
Alex
|_________oo_oo
/ /__/____[_____\
I I======[]IIIIIII[]
()_)-----()_)----)_)
|_________oo_oo
/ /__/____[_____\
I I======[]IIIIIII[]
()_)-----()_)----)_)
-
Steve Arndt
- Posts: 7404
- Joined: Sat Mar 10, 2001 12:01 am
Re: '89 Blue Star Vanagon Project
That is some tricky metal work. Rocking it!
Want to come and fix my corner dent? I have the patch cut out of another van!
Want to come and fix my corner dent? I have the patch cut out of another van!
Steve
My Baja Build
My Baja Build
-
turbobaja
- Posts: 2826
- Joined: Fri Sep 14, 2007 4:56 pm
Re: '89 Blue Star Vanagon Project
Thanks for the support guys. I've been dreading this repair since I first bought the Van, knowing I'd be doing it on my back in the gravel. It's turning out about as good as I could have hoped. Took me a while to figure out how to cut it in and have everything line up. Can't wait to get it welded on and get moving foward with some assembly.
Karl
DON'T QUIT
DON'T QUIT
-
turbobaja
- Posts: 2826
- Joined: Fri Sep 14, 2007 4:56 pm
Re: '89 Blue Star Vanagon Project
Steve have you thought about using panel bond instead of welding the repair panel on? Killer strength and no heat warpage issues.
Karl
DON'T QUIT
DON'T QUIT
-
turbobaja
- Posts: 2826
- Joined: Fri Sep 14, 2007 4:56 pm
Re: '89 Blue Star Vanagon Project
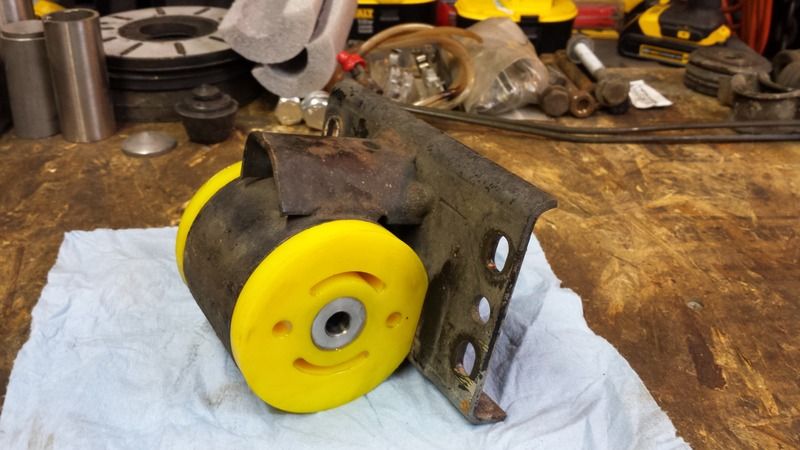
Moving forward, I decided to replace my front trans mount, the original one was pretty soft and this new one should keep my shifter feel a little happier, and maybe help with wheel hop.
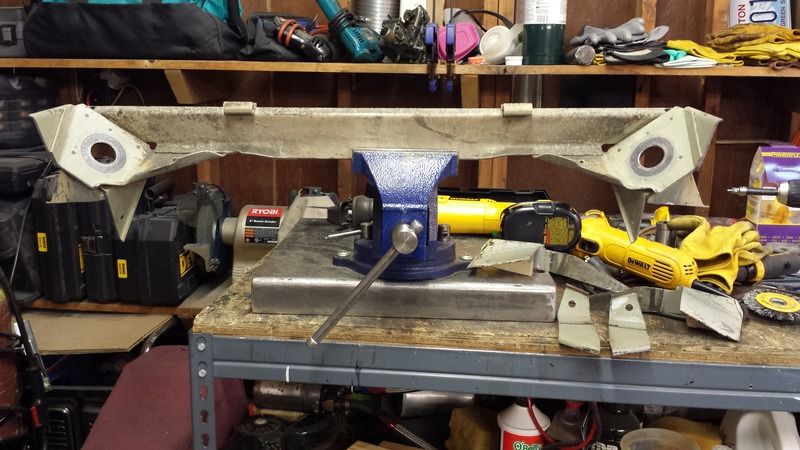
I finished fitting the new front cross member and got it welded in place, good and solid now. Also happy to see the clam shell fit in place for the first time since I've owned this rig. Bit of a milestone in terms of making this Van my own. I can finally get the front suspension reassembled and keep moving with the build.
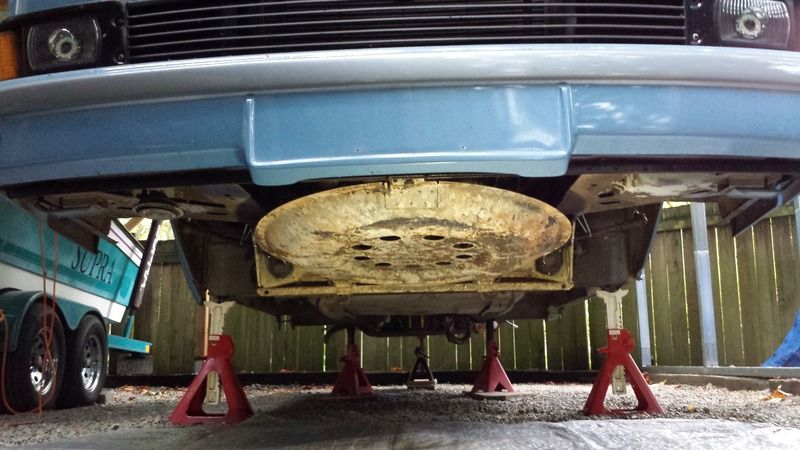

I finished fitting the new front cross member and got it welded in place, good and solid now. Also happy to see the clam shell fit in place for the first time since I've owned this rig. Bit of a milestone in terms of making this Van my own. I can finally get the front suspension reassembled and keep moving with the build.


Karl
DON'T QUIT
DON'T QUIT
-
ajdenette
- Posts: 717
- Joined: Wed Jan 20, 2010 1:18 pm
Re: '89 Blue Star Vanagon Project
I still can't believe some one cut out such a large piece of front suspension.
Alex
|_________oo_oo
/ /__/____[_____\
I I======[]IIIIIII[]
()_)-----()_)----)_)
|_________oo_oo
/ /__/____[_____\
I I======[]IIIIIII[]
()_)-----()_)----)_)
-
turbobaja
- Posts: 2826
- Joined: Fri Sep 14, 2007 4:56 pm
Re: '89 Blue Star Vanagon Project
I have a feeling the original cross member was pretty twisted up from whatever this thing hit. They must have done some work to get it as good as it was and just reinforced it a little with the 1.5" square tube member. I originally thought the "mod" was done to get it lower, but finally realized it had been hit and damaged enough to be worth replacing at this point. It drove nice on the freeway and around town on the 17"s and lowered ride height, for the 2 or 3 short drives I took in it with a growling front wheel bearing and a shifter with a mind of it's own. Pretty simple and forgiving geometry on the front suspension with these Vans, I almost spaced the whole member down an inch or so to work with some upper BJ spacers and keep from working over the radius rod bushings so bad, but I don't think I'm going to lift it more than I need to comfortably drive with the 27's it'll have for now. I've got a T3 front sway bar and would like to see how it handles at a moderate ride height to begin with, so my Wife can get used to driving it a little easier (curbed it hard on her first and only drive in it so far...not a bus driver, yet).ajdenette wrote:I still can't believe some one cut out such a large piece of front suspension.
Karl
DON'T QUIT
DON'T QUIT
-
turbobaja
- Posts: 2826
- Joined: Fri Sep 14, 2007 4:56 pm
Re: '89 Blue Star Vanagon Project
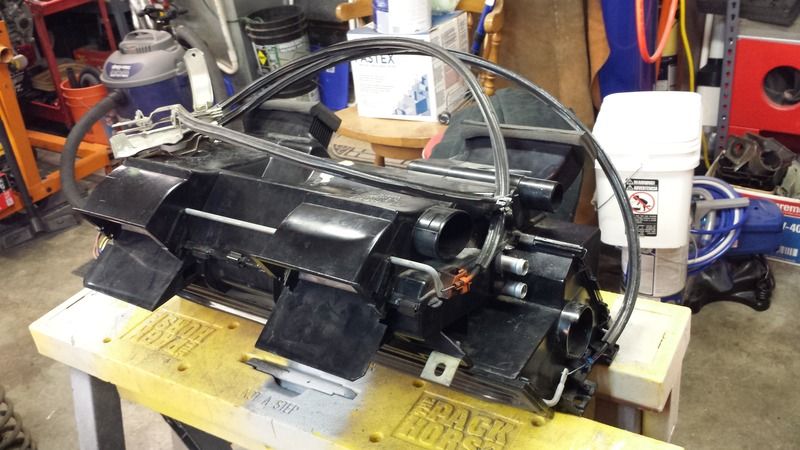
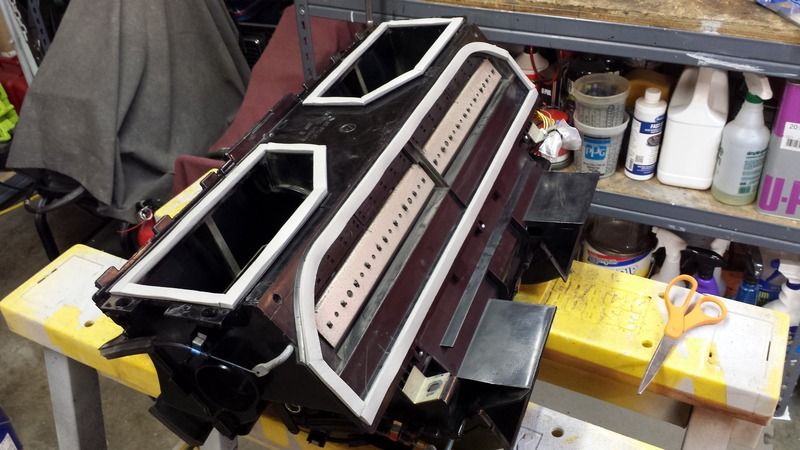
I pulled the heater box out and found the housing had been carved open and poorly glued back shut, almost... Inside was what looked like a new to this Van blower motor and resistor and an original heater core. The plastic housing around the blower resistor was slightly deformed, so I would assume the original blower/resistor were cooked and replaced. There was just a little bit of goo on the bottom fins of the heater core so I pressure tested it and found multiple pinhole leaks, so I replaced the heater core. I removed the factory AC blowers from my Van a while ago and had heard that those blowers could be used in place of the factory dash blower. Turns out, the blower in my heater box was already the same part # as both blowers I pulled out of the rear AC housing. I tested all 3 blowers and all seemed to blow like crazy, so I kept the one that was already in the dash, figure I've got 2 spares now. I found some of the sealing material missing or falling apart on some of the internal flaps, so I replace them. I put a little extra sealing foam around the heater core to ensure a nice tight seal and cleaned off all the previously glued housing tabs so the proper clips could be used to hold the housing shut. It went back together nicely and I decided to replace the foam strips that seal the box to the body as well before reinstalling.
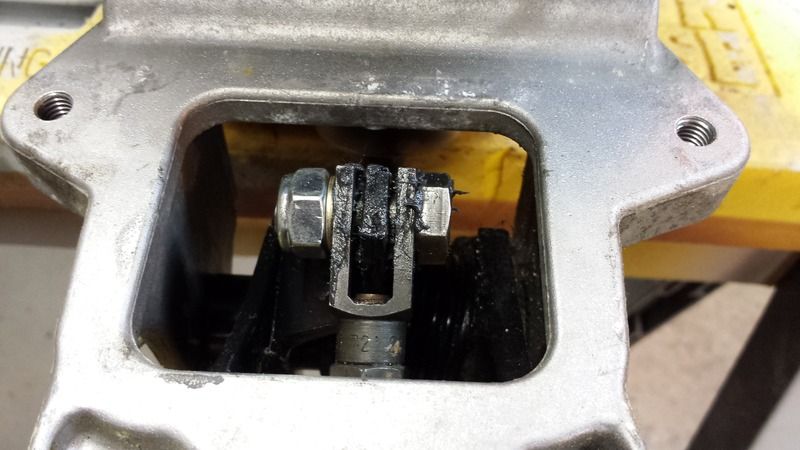
I almost didn't pull the pedal assembly out, but Steve's voice in my head kept telling me to check it out while I'm this far apart, so I did. Sure enough the clutch clevis pin was all warn and the hole in the pedal was warn oblong causing excess pedal freeplay and curtain trouble down the road if not dealt with ASAP. So I opened up the holes to fit a shouldered M10 bolt and lubed everything up good. No signs of leaking from clutch or brake master cylinders and the booster holds vacuum good, so everything is ready to go back together.

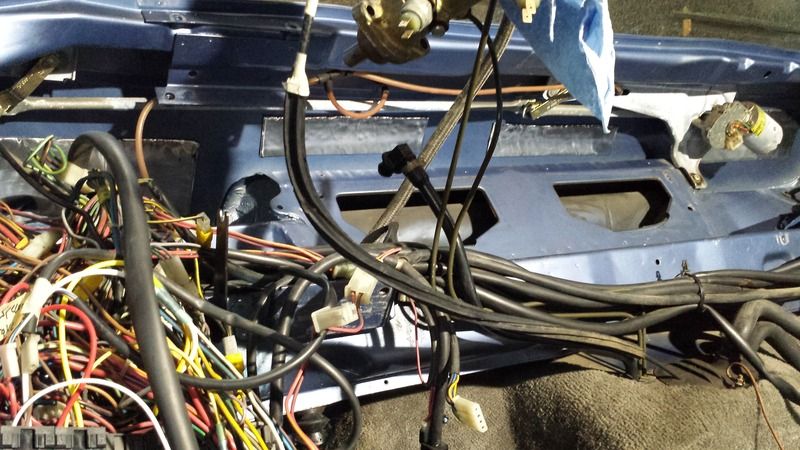
I gave all the wiring a good look over and serviced all 3 ground flowers while I had good access. I put a new antenna in and also replaced the previously installed headlight relays as well as split the left/right headlamp grounds to their own terminals. All the wiper linkage and pivots checked out in great shape so they got a little lube. I cleaned all the dust and grime from behind the dash and added 4 CLD tiles on the inside of the body sheet metal to help quite things down a little. Unfortunately I also found my windshield leaks water due to being partially installed on the top drivers side corner, just another sign of the pathetic hack work previously done on this poor Van, add it to the list of weather stripping I've got to replace... Next I've got to reconnect a battery to this thing and check the power mirror/window/lock functions before the dash goes back on.


Karl
DON'T QUIT
DON'T QUIT
-
Steve Arndt
- Posts: 7404
- Joined: Sat Mar 10, 2001 12:01 am
Re: '89 Blue Star Vanagon Project
Making serious headway man! The T3 front sway bar is on my wish list as well. After putting 1100 miles on my van last week I was wishing for the big sway bar in the rain and 50+ mph winds in Eugene I was driving through. For sure the sway bar will be on before I do the hightop conversion lordy.
Good idea on the shouldered bolt for the clutch pin fix. I will remember that when I get into mine.
Good idea on the shouldered bolt for the clutch pin fix. I will remember that when I get into mine.
Steve
My Baja Build
My Baja Build