Hey guys, I posted this guide once before but only the link. It was less complete then, and still working on it now, but it's mostly there. Sorry no pictures, it's pretty long as it is. Please correct any wrong info, or let me know if I'm missing useful information besides pictures
[email protected]
Parts list and cost - currently editing, all costs are average
Engine, harness and ecu $330-1500+
Adapter plate and flywheel $550
Clutch - stock okay for 2.2/2.5. stage 1 pp $125
Oil and filter $35
*timing belt kit w/water pump and tensioner - good one $200-400 (aisin)
Plug for brake boost line m10x1.0 $5
90 degree ⅝” for heater hose $8
Belt for alternator only $15-$30
*Maf to air filter 3” $10-20
Air filter $40
Fuel pump $70-100
Fuel filter $10
Fuel line high pressure 5/16, or 3/8 with 5/16 adapters ($10) at rail fittings
Larger fitting and return line for fuel tank
Radiator $75-350 (mishimoto for Honda)
Cooling lines $50-200
Drain @@@@ for easily bleeding system $7
O2 sensor nut bung $10
Vacuum caps $8
Egr block off $0-40
Throttle cable connector and bracket $10-$50
Oil fill move/block off $0-15
Vehicle speed sensor $0-150
*oil pan shorten $200-400
*exhaust $20-$400
*metal oil separator $30
*metal thermostat housing $25
*intake manifold flip $40-150
Hose clamps, vacuum line, wire shrouding, electrical tape, random hardware $50-200
*may not be needed
Prices are average. A lot of this can be done much cheaper. I did my first engine for around $1200 total. New parts add up, but it's nice to know your stuff will work. A super clean, well don't job may cost more than this.
Engine selection. 2.0t, 2.2, 2.5 single cam, 2.5 dual cam.
2.2 liter Pre 1995 OBD1 tends to be the more popular swap. The reliability of the 2.2 is slightly better than the 2.5 due to head gasket issues on early models. The OBD 1 wiring system is slightly easier to work with. But the biggest benefit is that it fits well within the engine compartment of the vw bug with little to no cutting. The power is good at roughly 130-140hp, and engines have been known to last well over 300,000 miles.
2.5 EJ25 Different versions of this motor affect reliability and horsepower.
The first variation started in 1996 (OBD2), is rated at 155hp, and is a dual cam design. years 1997 onward were rated with 165hp (DOHC). Depending on the vehicle, the first variation of 2.5 was phased out sometime in 1999. This variation is more prone to internal head gasket leaking issues. The second generation (SOHC 99 onwards) had slightly less issues with the head gasket, but experienced more of an external leaking and was solved by a “coolant conditioner” provided by subaru. This motor is typically easier to find in junk yards with less miles than a 2.2. However, around the year 2000 the dash board in subaru legacy cars became electronic, and the mileage hidden. I have yet to hook up a battery to the system and jump the ignition to see if the odometer will come on.
Both 2.5 engine versions typically last to around 150-200k before needing a head gasket. And will continue to last many miles with little more than basic maintenance.
Turbo motors Ej205/207/255/257/20g/20x etc. these motors are found in the turbo legacy gt, wrx and STI engines and range in horsepower. Fitting one in would require cutting of the firewall because of the turbo and intercooler placement - unless mounted in a custom location. Both the 2.0 and 2.5 are the same outside dimensions as the naturally aspirated DOHC 2.5’s found domestically. They will likely break a stock transaxle. A stock starter might last in one because of the lower compression and displacement if using a 2 liter.
Variations of the engine block to consider if you're looking to add a turbo later: Open deck - lacks support (2 contact points) for the cylinder walls within the case. Semi closed deck (has 4 contact points). Closed deck - fully supported cylinder walls. I believe pretty much all US engines are open deck besides wrx and sti models. 2.0 engines have thicker cylinder walls and don't easily suffer from the cracking and warping issues 2.5’s have. Semi open decks are found on all 2.5 wrx and sti engines (ej255 and 257). The Fully closed deck was found in non US 2.2 turbo engines, possibly some US 2.2 N/A engines, and some but not all ej20g (early wrx and sti). If you don't plan to go turbo, or are only going for low boost, any of the blocks are fine.
JDM engines vary with US wiring compatibility. The early ej20g’s use a 4 plug ECU. The later engines use a 3 plug harness can be used with a US WRX wiring harness. If equipped with active valve control system (AVCS), a wiring solution can be made to adapt the harness to the ECU for about $200.
There are mixed reviews with using a JDM engine, they are quite cheap, but other than compression and mileage, little is known about the condition of the engine. Some are incomplete, intercooler, turbo, ecu, mass airflow sensor, and other various parts may not be included with the engine.
Some turbo legacy’s used a twin turbo design. Replacement parts and exhaust may be hard to impossible to source. Some people swap to a single turbo setup. These suffer from a power drop when switching from the little to the big turbo.
07+ systems with CAN Bus. (Controller Area Network Bus). In this system the computer systems talk to each other. They use a special code and need all the inputs to run properly. Subarugears is one company who has created a device to replica the code for aftermarket programming. Other companies such as rjengineering may be able to swap a harness over if all the components of the harness are intact and readable with the ECU. Newer technologies may have overcome this issue since the creation of this guide.
How to select a used engine.
First, look for signs of a head gasket leak. Head gaskets can leak internally and externally. An internal leak might show coolant in the oil, or a sludgy film in the overflow bottle. An external leak will show wetness around the base of the cylinder head as it meets the block.
Check the mileage. Subaru engines last a long time, there is even a half a million mile club for them. In the search for my first engine, I encountered a few engines over 300,000 miles in the wrecking yard. I settled for one with 219k, but would have preferred something with a little less.
Look for missing parts or cut wires. Often time a wrecking yard will have multiples of the same cars, but make sure you're not missing anything critical.
Spin the engine over using a wrench and socket, see if compression is good. Also feel for valves hitting the head or a broken rod.
Pull the cam belt covers off and look at the condition if the belts, and if the timing belt has jumped teeth - SOHC notches on crank and cam pulleys all face straight up, DOHC has marks on the belt that line up with cam and crank pulley notches.
Engine considerations.
The dual cam 2.5 is wide and requires major cutting of the engine compartment to fit when using a kennedy adapter plate. Rj engineering solution’s bell housing kit eliminates the gap created by an adapter plate. While using a kennedy adapter plate I was able to squeeze a 2.5 dual cam into a bug, but used fiberglass fenders that bolted straight to a fiberglass apron under the decklid. Cutting was required to the cam gear plastic shielding was needed, as well as body cutting. Note that a stock bug, and 002 bus transmission and shorter by ½” than an 091 bus transmission, and fitting one may cause issues.
A solution to the wide motor is to swap the heads to a SOHC 2.2 (see more power), which provides slightly less flow, but increases the power by roughly 15hp due to a higher compression (your stock starter will not last long with a frankenmotor like this).
The single cam 2.5 will fit the bug much better, but getting one from a junk yard brings the aforementioned mileage checking problem.
OBD 1 vs OBD 2. The only real issue with using an OBD 2 is the Vehicle Speed Sensor (VSS). The sensor allows the ECU to make adjustments to running conditions, and acknowledges that the car is moving. Normally the VSS hooks up to a sensor in the transmission. Issues with not having one range from: rev limiter set at 4400 rpm (have not had that problem), decelerating causes engine to think normal load is decreased and dies when clutch is put in, and engine codes hat throw it into one of its various safe modes. See vehicle speed sensor for solutions.
MAF vs MAP. Some subaru cars come with a mass airflow sensor, and some with a manifold pressure sensor. The issue with the airflow sensor is that is must be run between the filter and throttle body. There is enough room to run it in the engine compartment, but the external mount for the filter housing is square, leaving you to modify the stock airbox (can be done), or making a mount to run a cone filter. The manifold pressure sensor allows you to run your cone filter anywhere and how you want, if you can find a motor with it.
Mass airflow sensor was used to 99
Manifold pressure sensor was used from 99 on in non turbo cars
99 was a transition year, and may have either.
Turbo motors (from what I have seen) have a mass airflow sensor.
TGV system Consist of runners with butterfly valves that sit between the intake manifold and block to reduce cold air emissions. Some find hp gains from deleting this system if the ecu doesn't throw a code. Most say to take out the butterfly valves but leave the system plugged in. I'd do more research before swapping an engine with a TGV system.
Interference vs non interference Beginning in 1997, all US market subaru engines had interference between the valves and piston. If the timing belt were to break or skip, the valves would impact the piston, and cause damage to the valves and possibly the piston.
Idle air control valve (IAC) is a valve that helps regulate engine rpm, especially when the engine is cold. It draws in air and bypasses the throttle body via a solenoid. Inconsistent idle speeds (constantly rising and falling) are often attributed to a dirty IAC valve. There are a couple types and can affect the swap depending on the intake setup.
One type draws in air from the intake box that lies between the MAS and the throttle body. This would have to be plumbed in regardless of setup.
Another type draws in air from the throttle body, and no modification is necessary..
A third set up affects the base that the throttle body sits on. Instead of it being a round hole with a square mounting face, there is an extra passageway on top of the base to allow air into the manifold. Flipping a throttle body by means of a plate would mean the IAC port will be blocked off, so grinding out a hole between the passage and the air flowing through the throttle body would be needed.
Automatic vs manual donor car
Timing belt guide The timing belt guide only came on cars equipped with manual transmissions. Automatics do not see the rapid change in engine speed that manuals do. Not having one may cause the belt to jump teeth on one or more pulleys, but few people have an issue with this. The timing belt guide rides over the crank pulley and is bolted to the oil pump housing. Not an issue unless hard shifts in racing will occur, even then it may not be an issue.
Engine weight The exact numbers are murky, but subaru engines have been claimed to weigh somewhere around 275-300lbs without the radiator or coolant. A VW 1600 is claimed to weight 265lbs.
Secondary air pump valve is only found on later model cars (~06+). It sits near where the egr would be on earlier cars. Deleting it is not an issue unless the atmospheric pressure sensor is built inside the pump. Do some research on whether this is the case, and where the atmospheric pressure sensor lies.
Engine vs harness compatability. Some engines from certain years are comparable. For example, the 96-99 DOHC 2.5 are all compatible with each other. What makes other years incompatible is the Mass airflow sensor vs manifold pressure sensor. AVCS is another consideration, but kits are out there to adapt the harness. Some engines used two temperature sensors on the coolant crossover pipe, however all information I have seen points to one being a gauge sensor, and the other an ECU sensor. Also, some engines had different placed pickups for the left cam timing sensor.
Swapping the crank sensor and possibly the cross over pipe from the harness car should solve compatibility issues.
WRX/STI/JDM (non impreza) wiring harnesses differ at the ecu hook up. They use 5 small plugs instead of one large one found in many of the OBD 2 systems. The harnesses are compatible with each other.
Engine and wiring anatomy. (need pics) What you need, and what you can leave
TCV valve tube (some hook up to intake)
Throttle body
Breather
O2 sensor front (3 wire/4 wire)
Mass airflow sensor
Fuel pressure regulator
Exhaust
1 Abs sensor (to use as a speed sensor pickup)
Main relay
Fuel pump relay
OBD port
ECU
Test plugs
Engine plugs
Atmospheric pressure sensor
Intake piping (optional)
Air filter (optional)
Ac and power steering - keep AC if you want it, otherwise discard both
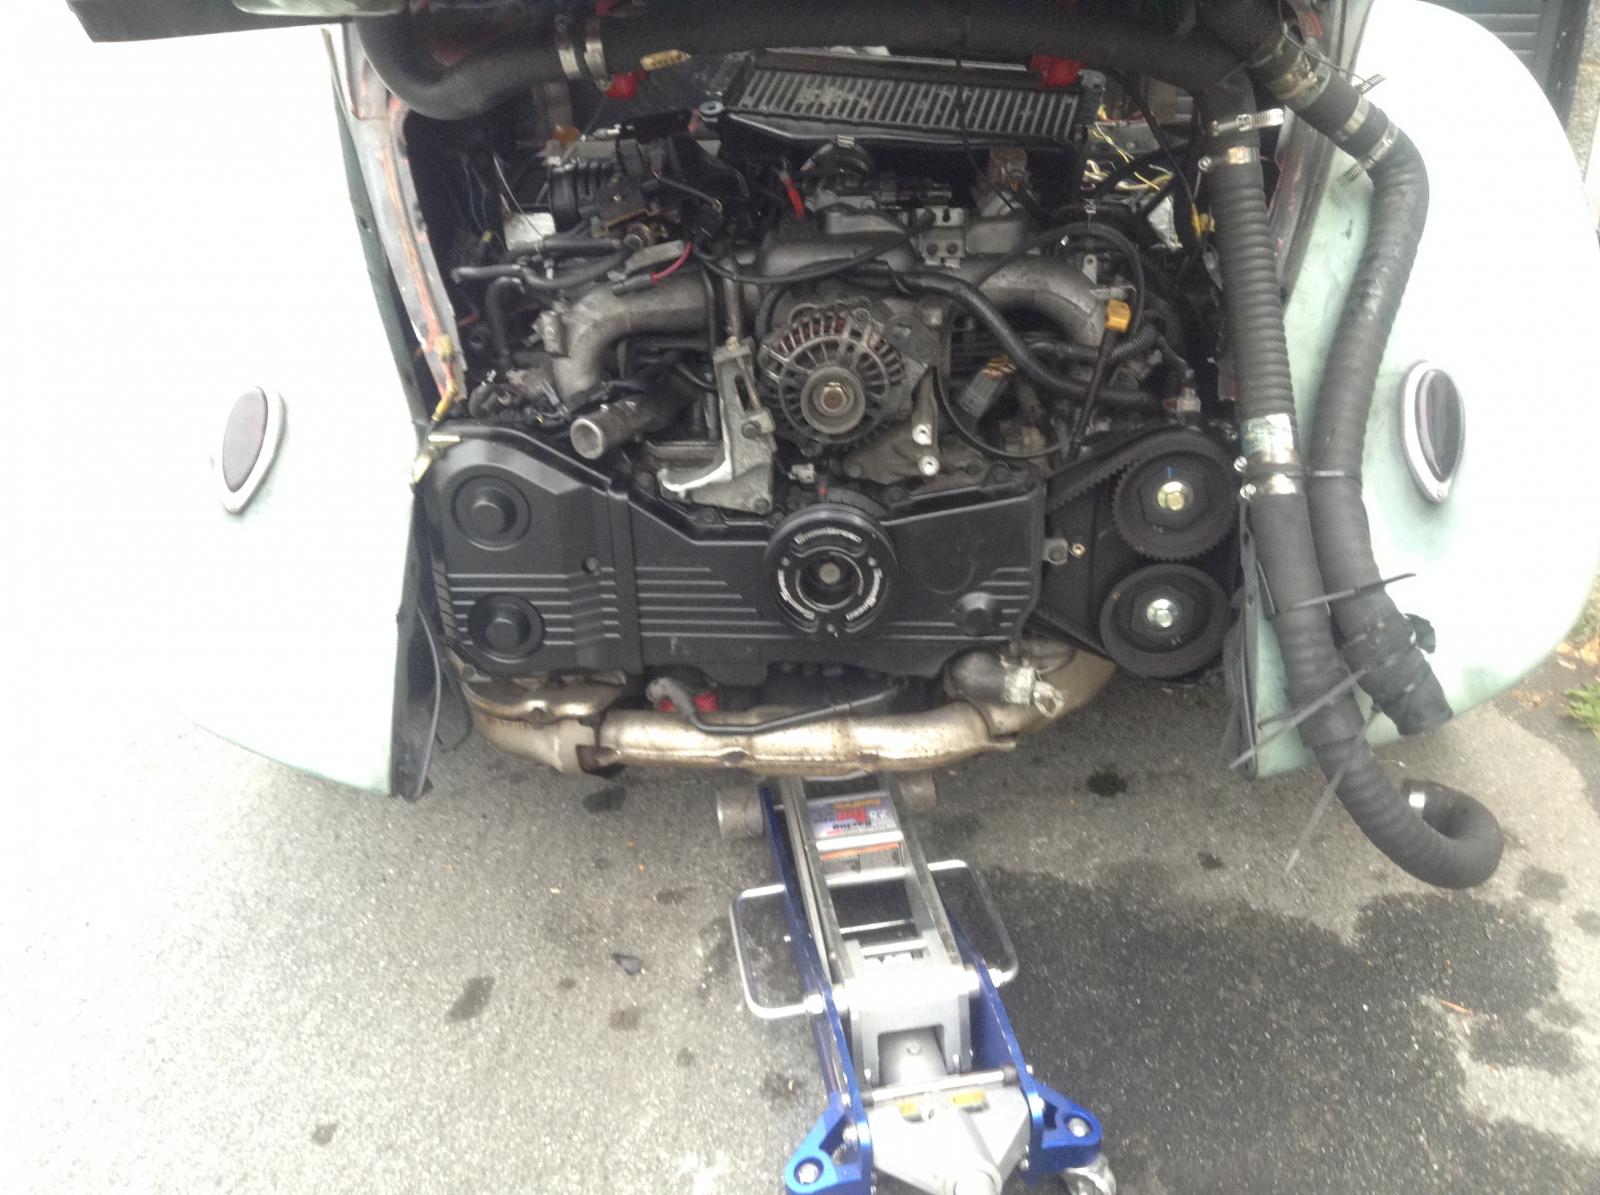
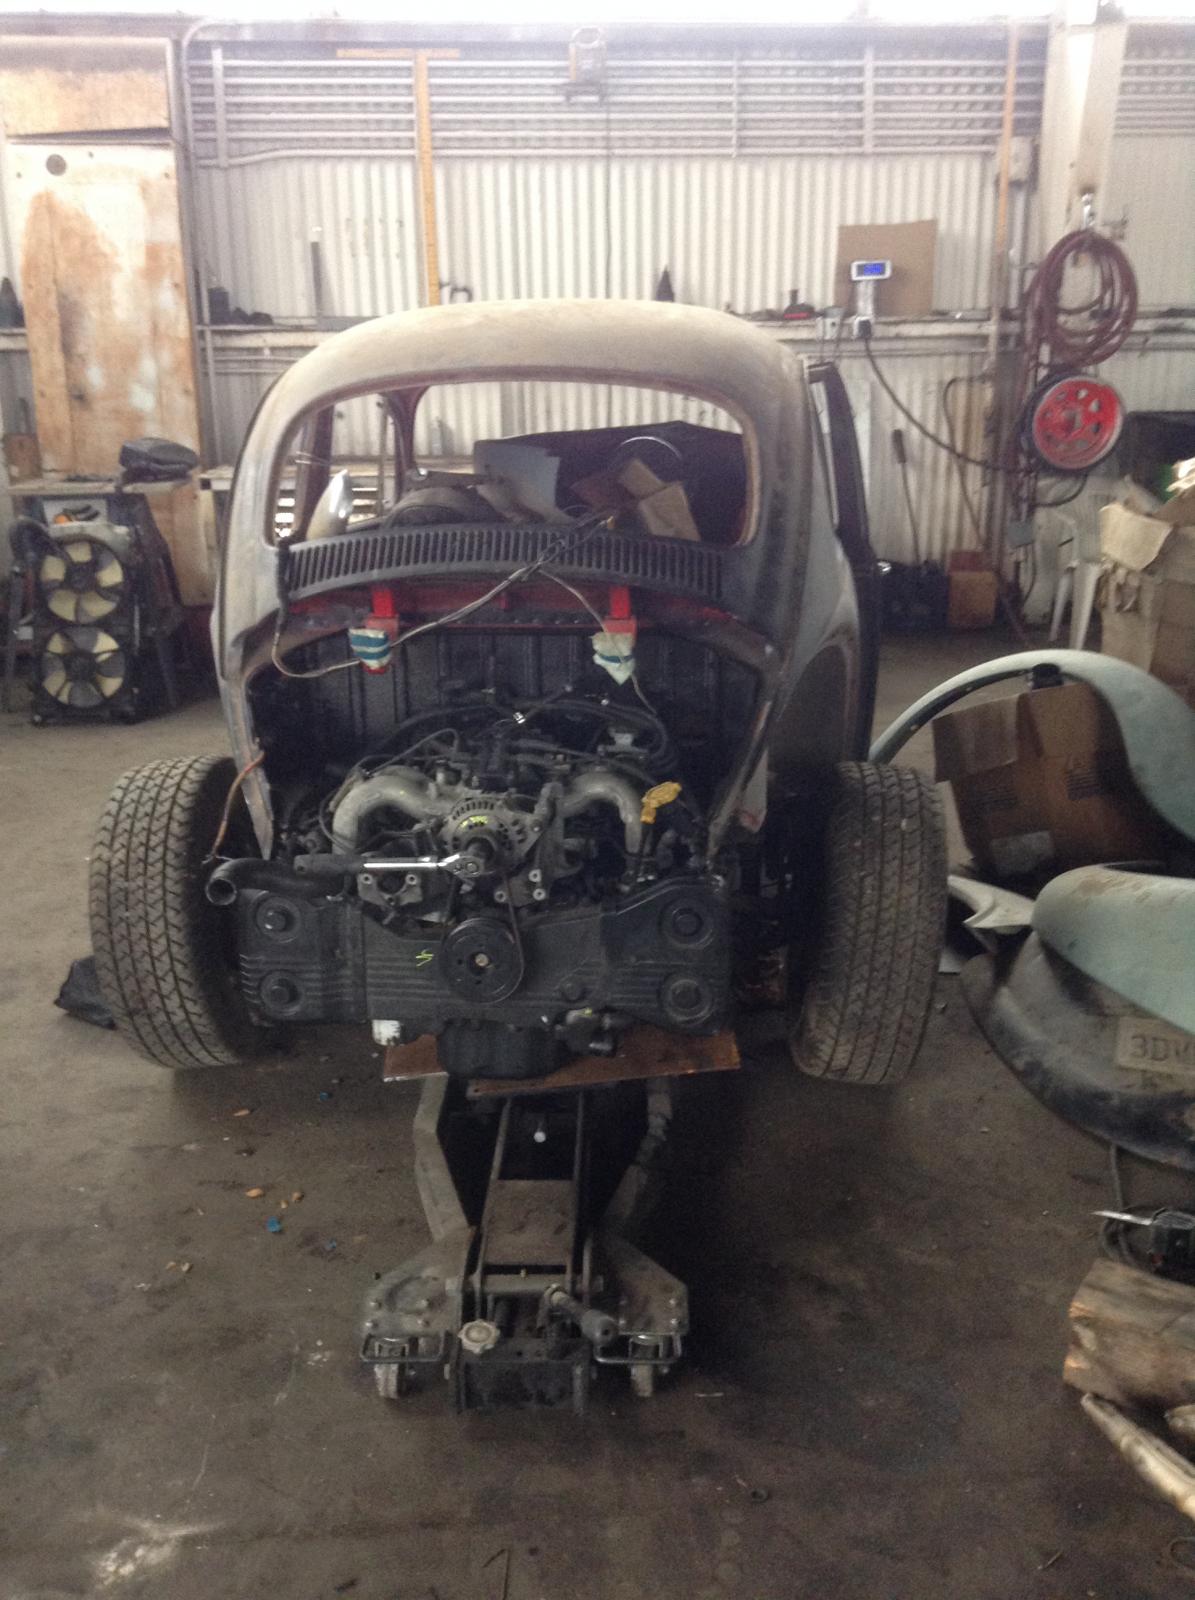
Fitting the engine.
Bodywork cutting:
The 2.2 should go in without any need to chop up your engine compartment. However, having a removable apron helps with getting the engine in and out.
The 2.5 will need to have some hacking of the engine compartment to fit in. Bumper mounts will not fit with a 2.5.
The 2.5 dual cam will need some creativity to make it fit, and may not be aesthetically pleasing. Note that 2.2 liter heads on a 2.5 will be the same width as a 2.2, and bump up compression.
The 2.0 turbo will need the firewall cut out to fit the turbo and intercooler. All stock intercoolers should fit behind the back seat if that area is enclosed.
Engine modifications for fitment:
EGR delete The egr hits the back of the firewall, and will need to be blocked off with a plate. Aftermarket plates are available or you can make your own.
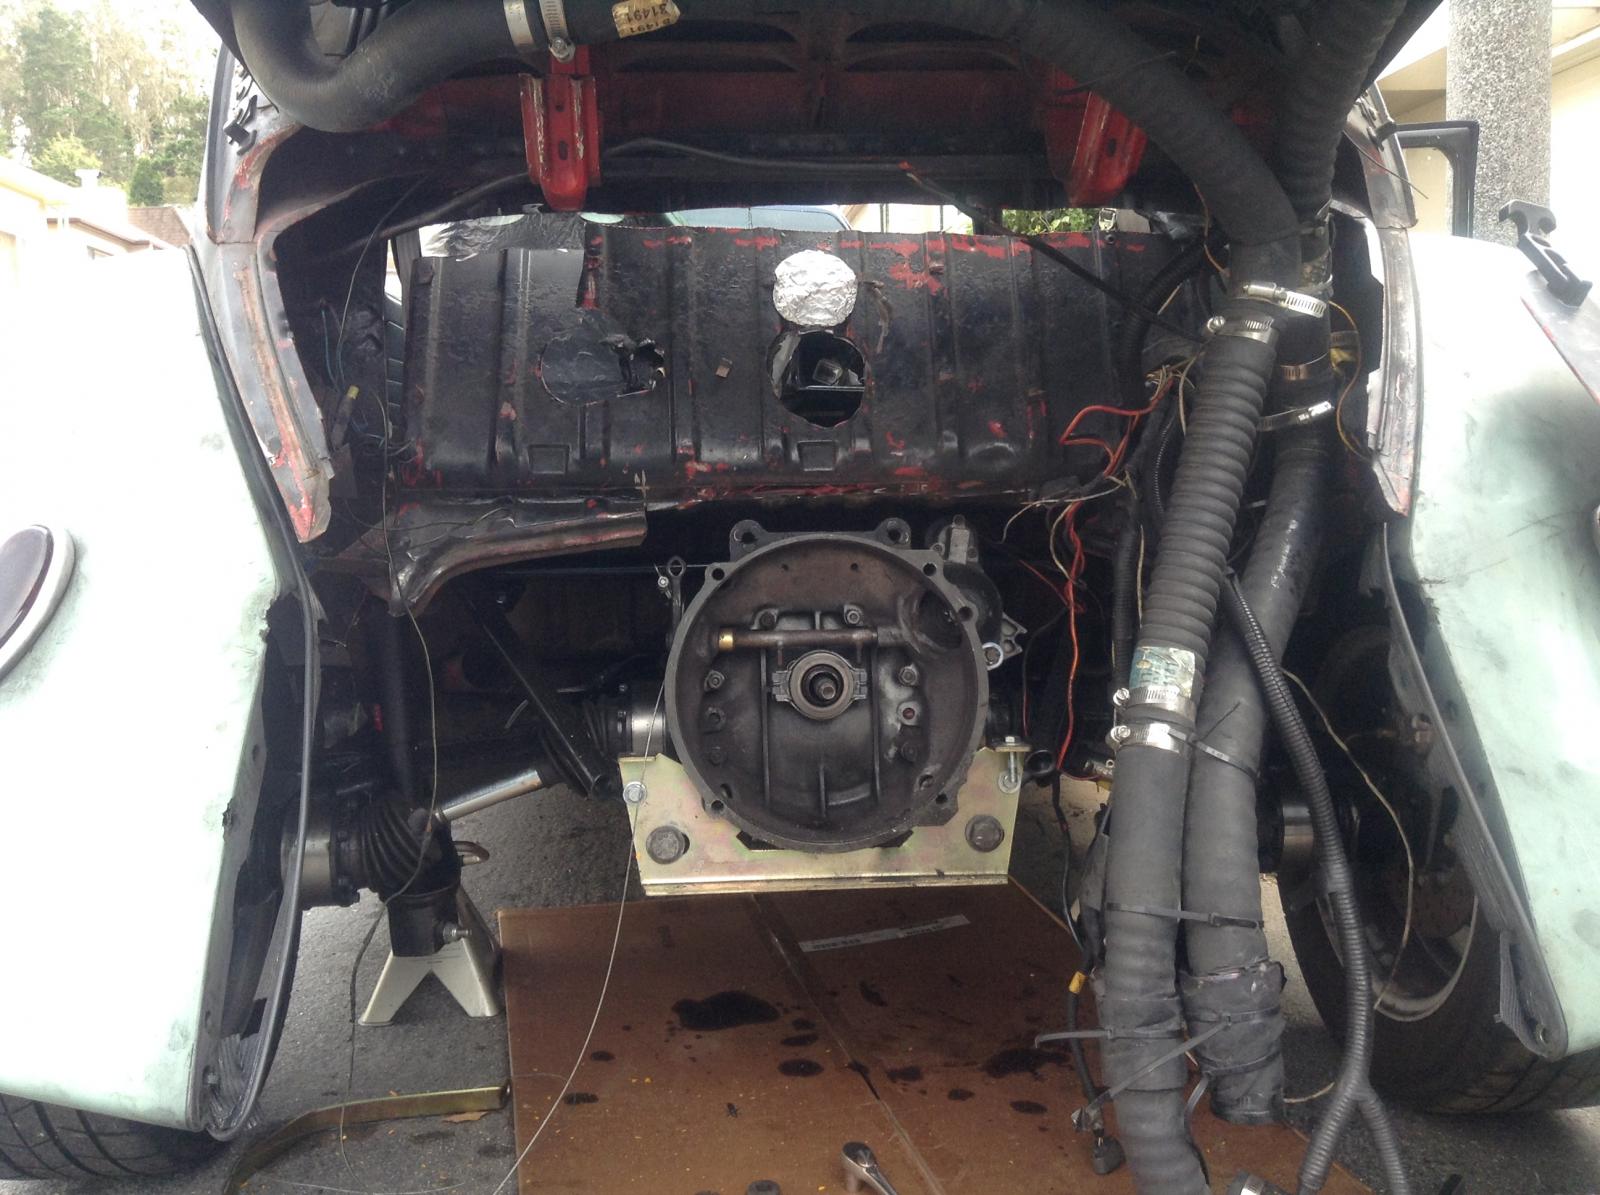
Kennedy adapter plate Order these with sunken bolts that mate the plate to the engine. The regular bolts will interfere with the rubber mounts for the tranny. Another solution is to grind or cut away the mounts to allow the bolt heads to fit.
Kennedy adapter plate stud The starter may be in the way of allowing a bolt to go on the threaded stud. You can get it on if the stud is only 75% of the way inserted into the transaxle, or you can cut the stud down.
Kennedy lock nuts are a pain to get on and off. Consider using non lock threaded nuts to save 30 minutes of threading in tight spaces.
Intake manifold This is the big issue people have. The throttle body faces straight into the firewall with no room for a filter. There are several options to solve this listed in the intake section
Heater core lines Will hit the bottom of the firewall. A large bar can bend them down. You MUST KEEP THEM FUNCTIONAL. Do not block them off. See coolant system.
Oil filler The stock oil filler will not fit in the engine compartment. It is made of high grade plastic. The plastic can be cut and the tubes rotated around to be rejoined. The plastic cannot be melted back together. Instead, epoxy should be used, and possibly additional support to compensate for vibrations, and the twisting motion of screwing on and off the oil cap. I originally used rubber and two hose clamps, but had leaks. I've seen others cut the tube and use a hose clamped over the outside, then reconnect the top part where the filler cap is in a convenient location.
Ground clearance.
Oil pan Sticks out fairly low. If you're only driving on the streets with stock height or maybe even lowered a little, you shouldn't have an issue. A skid plate is recommended to be secured to the bottom of the pan. The oil pick up sits very low, and a dent in the bottom of the pan may prevent the car from getting full oil pressure. Jacking the engine up by the oil pan can dent it without a plate.
Modified shortened pans with pickup tubes are available, though not typically cheap. Lowered cars and off road vehicles will need to consider getting a modified pan and pickup tube.
Dry sump systems are available, but can be very expensive.
Oil filter Can be an issue depending on the car. Some engines were outfitted with an oil cooler that allows coolant to flow around the mounting surface for the oil filter. The assembly drops the filter several inches lower and risks the filter to get hit with low lying objects. The solution is to remove the oil cooler and add a shorter oil union (part number 15018AA050), install a plug to block the return hose into the block (11021AA121) and an aluminum thermostat cap without the outlet for the oil cooler (11060AA060) - or just block the hose outlet well.
Exhaust Also hangs as low as the oil pan, but aftermarket headers can raise it up.
You can weld your oil pan and pickup tube yourself, but the metal is thin and can burn through easily.. Know that there are two baffle plates inside to prevent the oil from sloshing up into the crank area. If you cut out the bottom part of the pan, you can remove the lower baffle, but I would recommend keeping the top one.
Exhaust.
The subaru headers in both the single or dual port are symmetrical. Meaning you can flip them and have the outlet behind or in front of the motor. Stock N/A headers tend to hang low, and will stick out behind the apron slightly. A competent welder can be shortened and raised up, but may still drag going up steep driveways. If you're in California, the wonderfully maintained freeways can make you bottom out and throw sparks if you're on soft suspension. Aftermarket exhausts can give better ground clearance, and can be had for around $100-120 for inexpensive models, but know that you get what you pay for. Wrx/sti headers work if you have dual ports.
Running the exhaust in front of the engine will solve problems while going up steep driveways. Be sure to fit the system with the suspension in place before finalizing your system - camber compensators are recommended for swing axle cars but might cause clearance issues.
Most stock exhausts will need an oxygen sensor nut welded on. The nut - also called a nut bung - Has a thread of M18 x 1.5. A search should provide enough cheap options. Aftermarket and turbo headers usually have them welded in.
Most headers will fit other engines of the same port design (single or double). However, starting in 2006, subaru went with an equal length header that also flowed better on their 2.5 naturally aspirated engines. This still has the same port dimensions, but the stock oil pan will not work from the older cars. The newer oil pan will bolt up if the newer header is used.
O2 sensor Be aware that subaru’s use a front and rear O2 sensor, and you will only need the front. The ECU will throw a code for the rear, but it is only used for emissions. If your front does not come with the car, you will need to replace it. Depending on the year and state designation, they came with a 3 or a 4 wire. The plugs are different (one square, one triangle) and the correct one is needed. The replacement parts are denso 22641 AAOGA for the 3 wire,and denso 234-9018 for the 4 wire. A used part can also be sourced if it is in working condition.
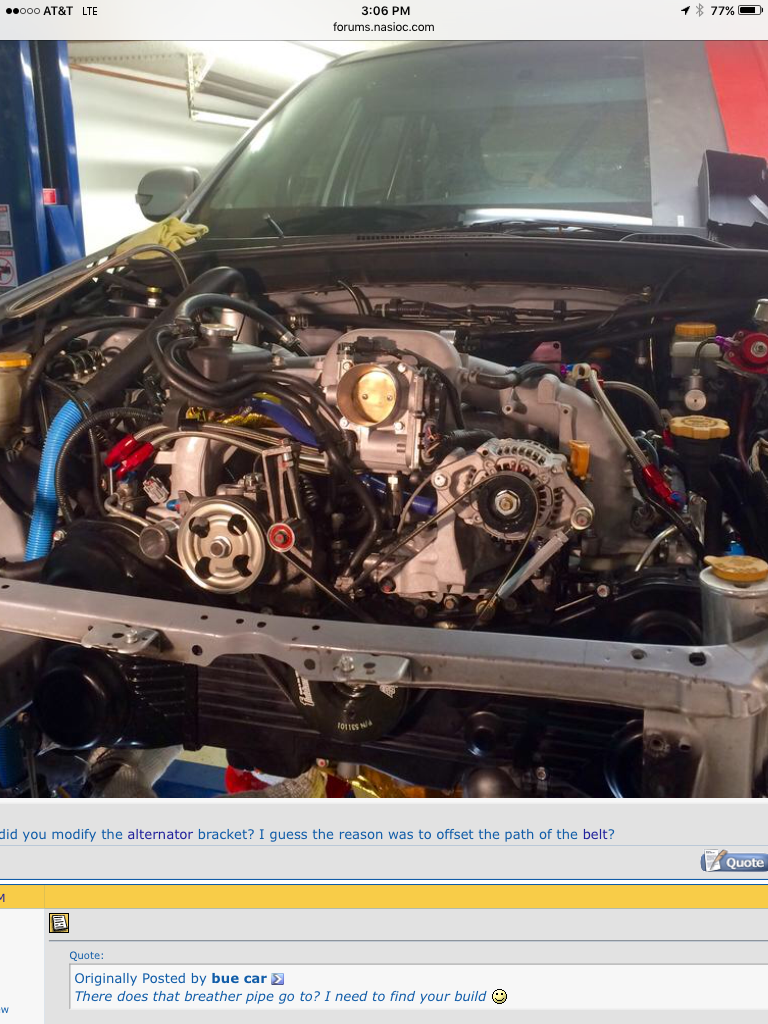
Intake.
The throttle body sits about an inch away from the firewall and faces directly into it. Several options are available to modify the intake to accommodate it.
1. Flip the manifold. The subaru manifold is symmetrical, and can be flipped. If this is done, either a bracket to mount the alternator in a different location is needed, or spacers can be used to raise the manifold. The egr pipe that comes from the head will need to be blocked. Thread sizes to block it are either 16mm x 1.5, or 19mm x 1.5. The alternator may need to be lowered depending on the height of the manifold raise. Longer bolts will need to be used with a phenolic spacer. Use new manifold gaskets when flipping the manifold. The cooling passages on the crossover pipe for the throttle body will have to be plugged, or connected to each other (easiest).
Another recently found option is to keep the alternator’s long bolt mount (right side of alternator), and flip it over where the AC lived. To adjust the height, a heim joint is used from the bottom of the alternator to the block/mounting bracket. A longer belt is needed, but still working on getting details
2. Weld a 180 degree pipe to the intake manifold and run the throttle body backwards. Two plates with a 2.5” hole in the middle are joined by a metal tube with a 180 degree bend. The plates have mounting holes that secure them to the intake manifold and throttle body. The throttle body is now facing towards the back of the car. - idle air control valves
3. Use a 2.75” OD pipe with a 180 degree bend run through the back of the firewall. It's not pretty, but it's the easiest solution. Note: if you are running a mass airflow sensor, a 2.75” to 3.25” adapter intake hose will need to be run since the MAS has a larger diameter.
4. Cut away your firewall and run the above solution, or a stock airbox, or intercooler (if turbo).
Air filter with manifold pressure sensor Just throw on a cone filter to the end of an intake tube and call it a day. If you have a mass airflow sensor (pre 2000/turbo) it'll have to be run. A silicon hose adaptor from 2.75 I.D. To a 3.25 I.D. Will be needed to adapt the intake tube to the MAS.
Air filter with a mass airflow sensor The air filter side of the MAS is not a tube. It is a flat surface with 4 bolts and a hole in the middle of it. If you're creative, a plate with tube welded (or plastic welded) to it can be the mount for a cone filter. The stock filter can also be used if the housing is cut up to just secure the filter over the mounting surface and have the filter exposed directly to the engine bay. A cheap adapter can be found for around $12, but it may need to be slightly modified.
Charging system.
The alternator on the subaru is simple. It has a post mount on the top that can be connected to the starter or battery. It also has a plug with another main power wire and a smaller wire. The large wire is connected to the top post wires, and splits off to power the fan relay. The small wire in the plug is important. This wire connects to the alternator light on the dash. The wire is charged from a power wire through the dash light to the alternator - which serves as a ground to turn the idiot light on when it's not charging. Exactly the same as it works with a vw engine. But it also serves to charge the alternator before operation. If this wire does not receive power before the motor is started, the alternator will not charge. Jumping the wire works if you don't need a dash light.
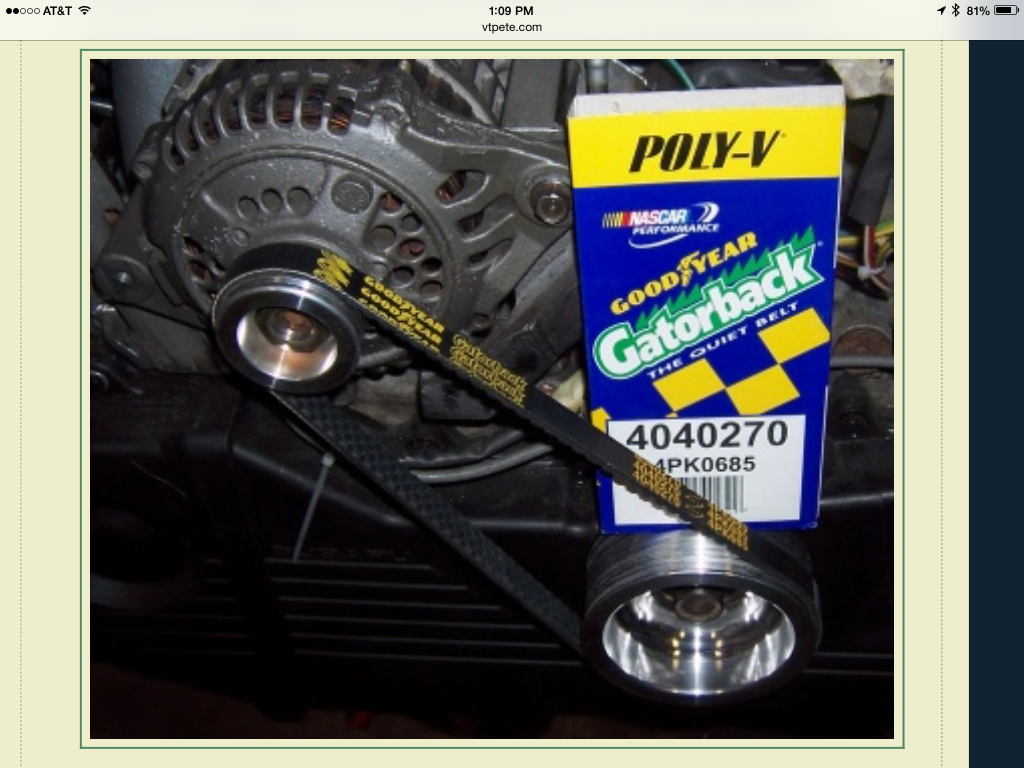
If the alternator is left in the stock position a shorter belt is needed. Assuming the power steering and AC pumps are removed, the belt needed is: GOODYEAR 4050272, with an alternative part number being 5PK0690. Moving the alternator or keeping the AC pump will need a longer belt, and will have to be measured.
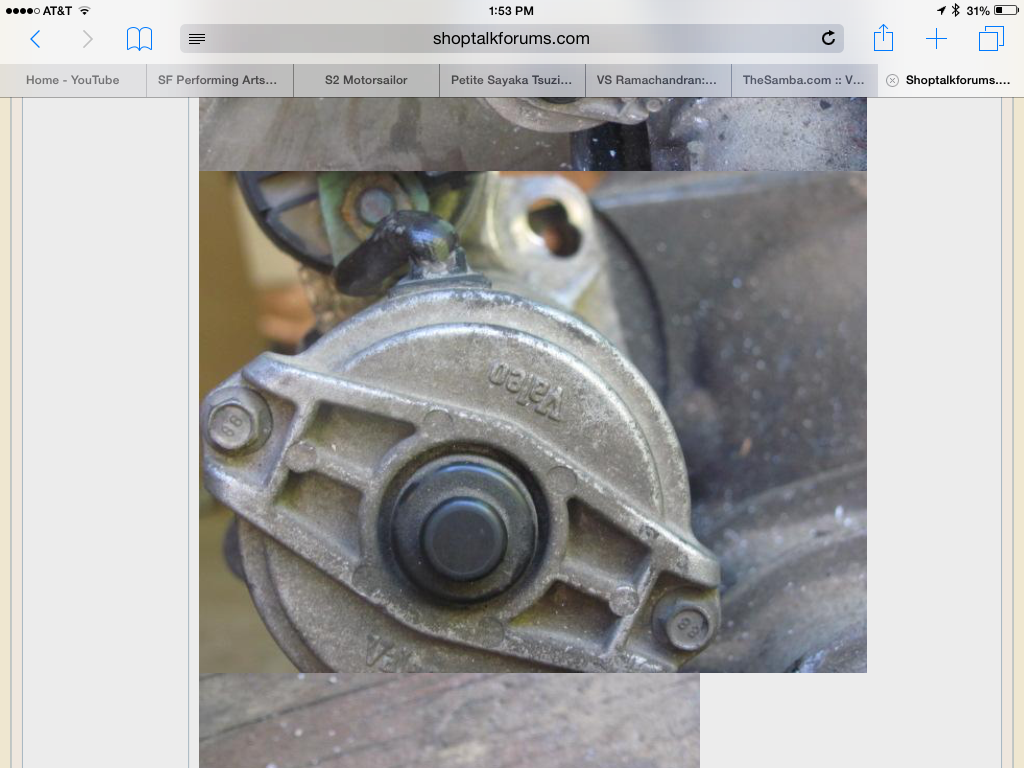
Starting system.
The stock VW starting system may be sufficient in starting the turbo engines and the 2.2. It will struggle with the 2.5, and will be scary with hot starts. Tolerances tighten up when the engines are hot, and starting power is diminished. If you are brave enough to use the stock starter, be sure your connections are all clean and in good condition.
If you are looking to upgrade starters, the VW 9 tooth TDI automatic starter from a 2003 will work with modification (other years will work, years not confirmed): part number SR0407X (not the 11 tooth). High torque vw starters do not have good reviews on forums, neither do the non bosch aftermarket VW TDI/passat starters. The Bosch ones can be had on ebay anywhere between $50-$150 used. To make this work, either use an adapter from westy venture, or drill out the holes to allow the stock bolts to fit. The bottom hole needs to be opened up slightly towards the center of the starter. The upper hole will need to be offset to fit. Mocking it up to the tranny with the engine out is easy, and using a reaming bit is fast. The only issue with running a kennedy adapter is now your engine bolt with a slotted head near your starter is now a stud coming out the other way. Spacers are needed to keep the nut far enough back away from the starter mounting area to be turned tightly.
Other options are a gear reduction, or a starter from a vanagon.
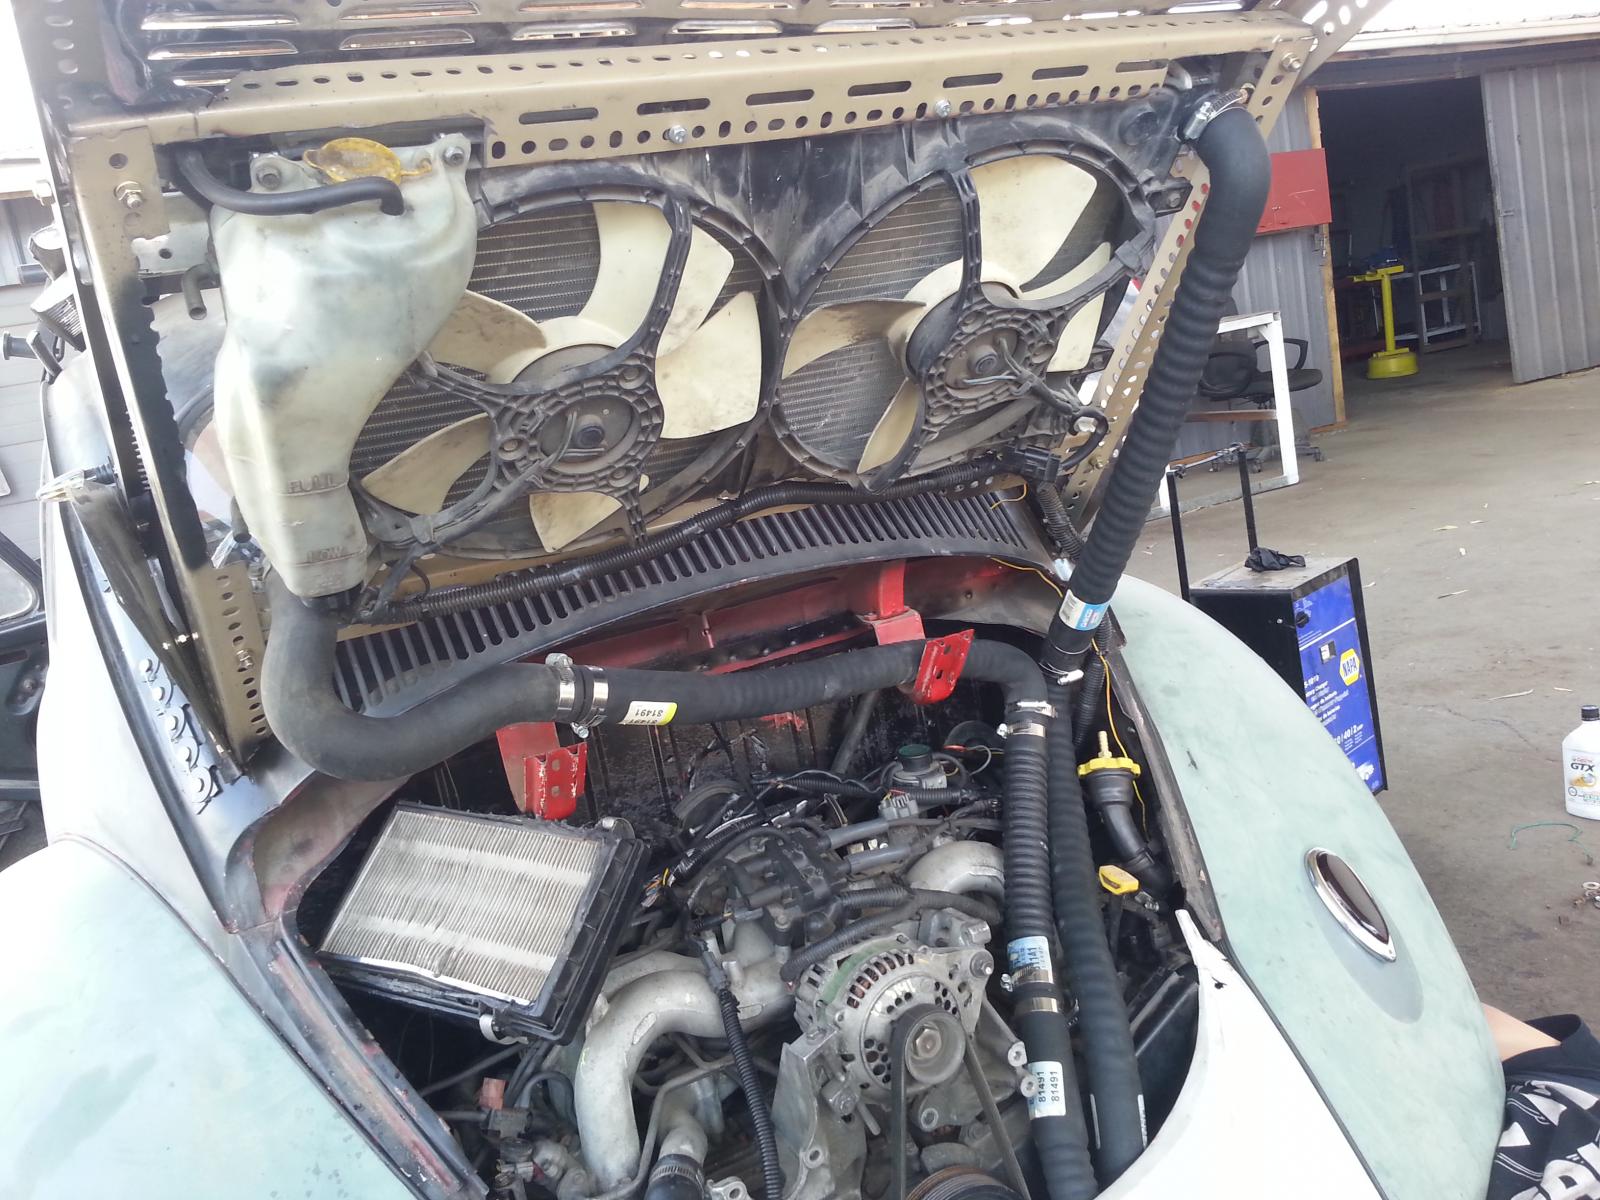
Cooling system.
Here is where creativity comes in. There are several aspects that need attention while designing the cooling system including radiator mounting and placement, wiring the fan(s), ducting the radiator, overflow bottle placement, heater core/hoses and the coolant.
Heater lines This is placed at the top for its importance. The heater lines cannot be blocked off. They flow through the engine system and are used to open the thermostat. They will have to be bent down to fit beneath the firewall. KEEP THEM FUNCTIONAL, even if they just route to each other.
Wiring The stock fan wiring for the subaru can be used. It is already fused, but may need to be modified to just have the relays to only function for the fans. The fan relay is found in the engine compartment. The ECU has two wires (OBD2) that control the fan relays, and should be kept unless an aftermarket system is used.
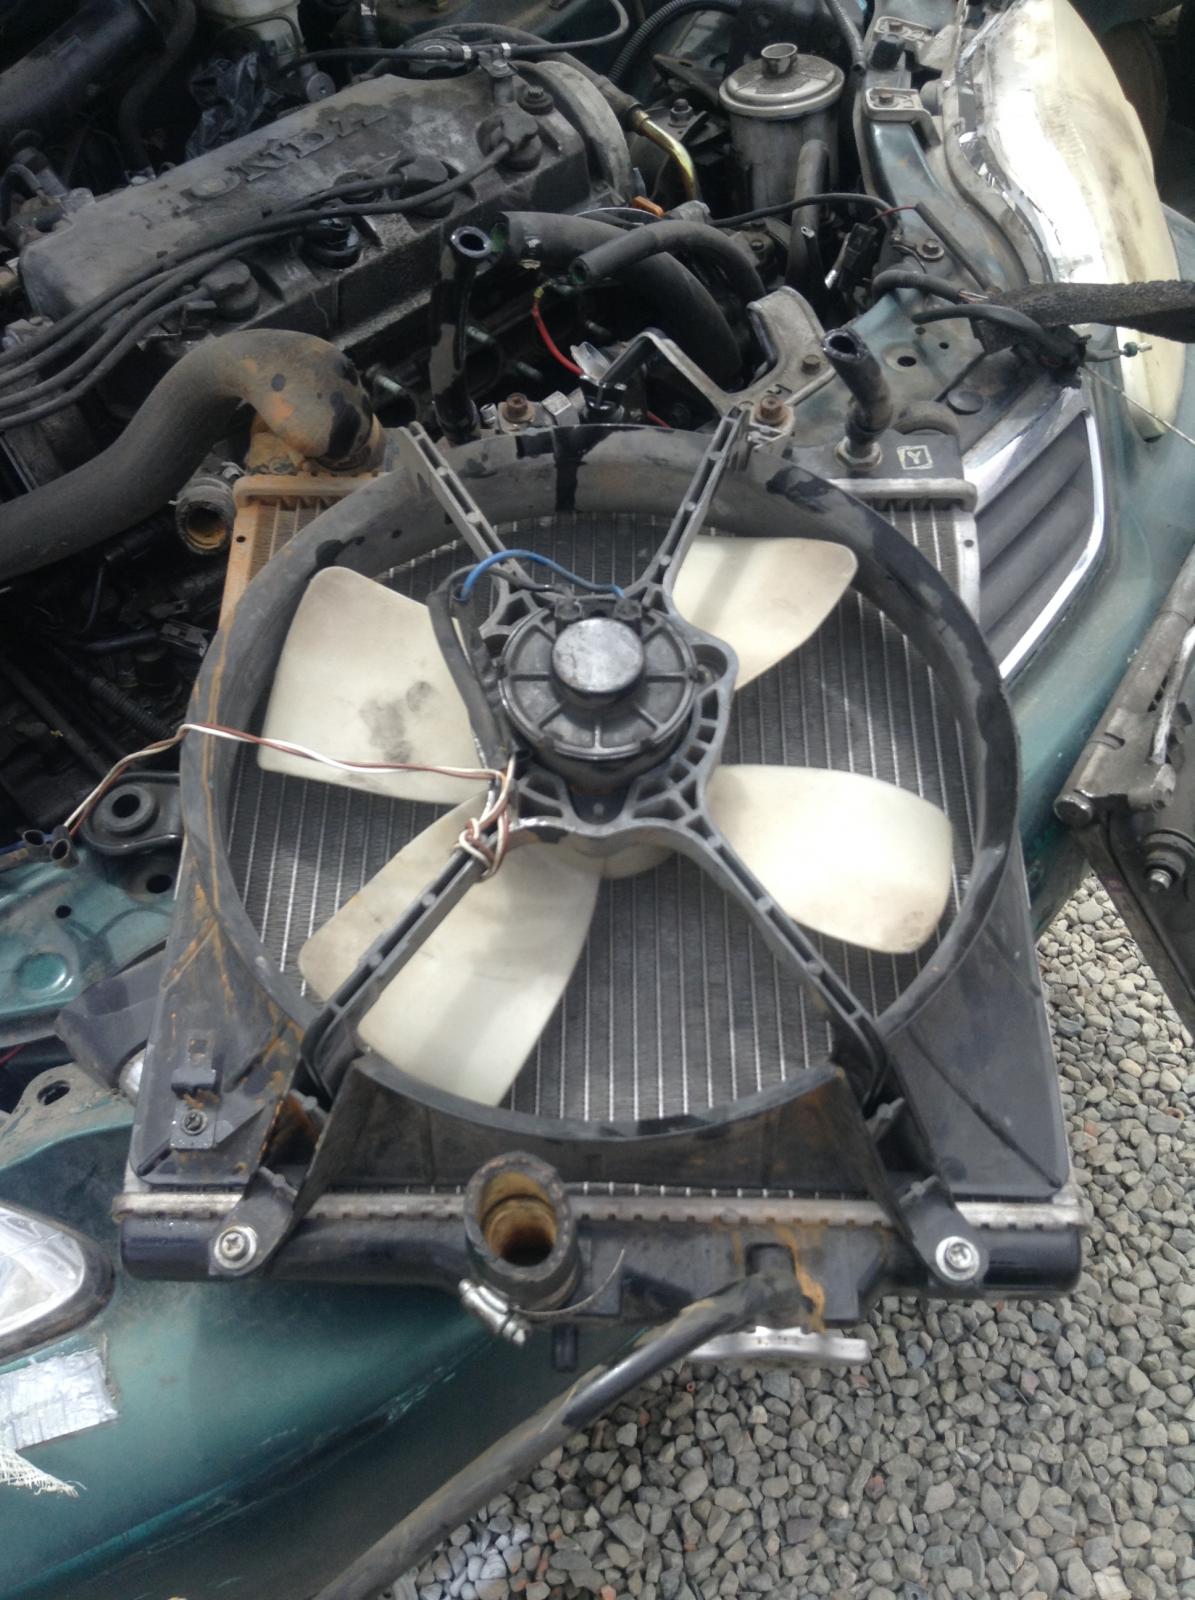
Radiator placement and size I have not seen any overheating issues by using a small radiator with a subaru engine. The additional coolant in the system typically makes up for the small size. I have been told that a front mounted setup can use a radiator from a dodge caravan, but eyeball measurements look iffy. The early 90’s civics and del sol Hondas had a very small radiator measuring 14.5”x16.5”. Regular D series engines had a 28mm (1.1”) inside diameter hose, while B series engines had radiators with a 32mm (1.25”) outlet. Some aftermarket radiators for Hondas came with the larger size (mishimoto). Know that the subaru hoses run 1.5” and an adapter will need to be run to reduce the size.
The super and standard beetle may have different dimensions and be able to hold different sized radiators. Several people - including myself - have mounted the radiator as a wing off the back of the car. Cooling on hot days at slow speeds has not been a huge issue. However, running a roof rack will significantly decrease the airflow to the radiator in this set up, and the engine will heat up on hot days at high speeds or many heavy accelerations.
Overflow bottle. Subaru's are known to break head gaskets . There is an article out explaining how critical it is to get rid of trapped air in the system to prevent head gasket issues. The easiest way to get rid of the air bubbles is to have a breather at the highest point of the cooling system, or to mount an over fill tank as the highest point. One can also tap into to coolant crossover pipe and add a breather. Otherwise, you'll have to jack up the front of your car (if radiator is in front to bleed out the air with the radiator cap. A wing mounted radiator prevents this issue.
Bleeding the system can take a lot of time to get it warm at idle with all the additional coolant.
Air likes to get trapped at the highest point in the engine where the top radiator hose connects to the coolant cross over pipe. Personally I crack it open slightly - even when warm - and let the air bubble out until it's all coolant. It may take a few times but it's the best solution that works for my setup. Doing the same with the turbo coolant line helps too.
Fans Unless you plan to only drive on the highway/track, you'll need at least one fan. The stock subaru fans can be used, but you'd need to make up your own shroud and mounting system if going with a different radiator. If using a radiator from another car, see if you can get the fans and shroud from it.
Ducting The radiator must receive fresh air and it must be directed to pass through the radiator. Having a non airtight system when directing the flow of air may cause cooling issues. For the inlet, most people remove sheet metal from under the front apron, or from the front of the apron. A scoop is typically added for under the apron cut out to direct flow. The radiator is mounted in the spare tire well, and a hole is cut out of the back to flow air through. For ducting, corrugated plastic works well for shaping, and withstanding rattling well. It's not the cheapest material, but should work well. Sheet metal is always an option, but fabrication time increases with its use. Cardboard can be used to measure the cuts, or you could fiberglass over cardboard cutouts to get the shape you want, just keep it as airtight as possible.
Hose options Running a radiator in the front can leave a lot of line exposed to the bottom of the car. Some people run lines made of copper or aluminum, but some stick with rubber. Dissimilar metals in a system can cause electrolysis. It has been recommended that if you are running copper lines, that they be grounded to the chassis to prevent electrical issues. Copper pipes should be soldered well to prevent leaks. Running rubber lines in a wing can allow you to remove the engine without draining the system. Be aware that any rubbing from the hoses on the body or engine can cause the hose to wear and fail. Zip ties are your friend, as are rubber boots in areas that might touch anything.
Coolant Subaru has special coolant designed to prolong the life of their cooling system (mainly head gaskets). The factory and dealerships recommend using their coolant. Always use distilled water if mixing water and coolant.
Sizes and hoses The inside diameter of all the hose fittings are 1.5”. Delco makes several very affordable flexible hoses that can help design a system. What makes them even better is that 3 sizes have 90 degree bends at one end of them for tight turns. They are available at autozone and are part numbers 81490 (18”), 81491 (24”), 81492 (21”), straight ended flexible hoses are also nice to work with.
Hose connectors Can be expensive if you need many of them. If you're on a budget, you might be able to use 1.5”OD aluminum pipe. Just be aware that you will not have a lip to keep your hose on, and if the hose clamps stretch from the expanding and shrinking aluminum beneath them, a hose could come off mid drive instead of just develop a leak.
Temp gauge Aftermarket gauges are not compatible with the ecu information, and will need their own sensor tapped into the cooling system. If you don't have a gauge, a Bluetooth/wifi OBD2 sender can allow you to look at the temperature on your phone (see code reader).
Wiring system.
Megasquirt vs stock ECU.
The subaru harness is not hard to convert.
Running a stock ECU allows errors codes to be easily found, the tuning remains stock, you can plug in an obd1/2 scanner. And with a wireless scanner you can monitor rpm, coolant temp, codes, manifold pressure, and still use it on other cars. The stock ECU should support about 5psi of boost without issues. Some stock ECU’s can support custom tuning or modifying input signals (see more power)
Megasquirt has several benefits. It needs minimal sensors needed to run. It supports tuning - a must for running high boost levels, or heavily modified setups. There is no massive wiring harnesses to deal with modifying, and running conditions can be monitored with the present sensors. Downsides to megasquirt include a steep learning curve to set up, it is not as cheap as a stock harness if you do it yourself, it still requires wiring, the crank pickup has to be changed for the computer to read it, and you have to fiddle with the tuning.
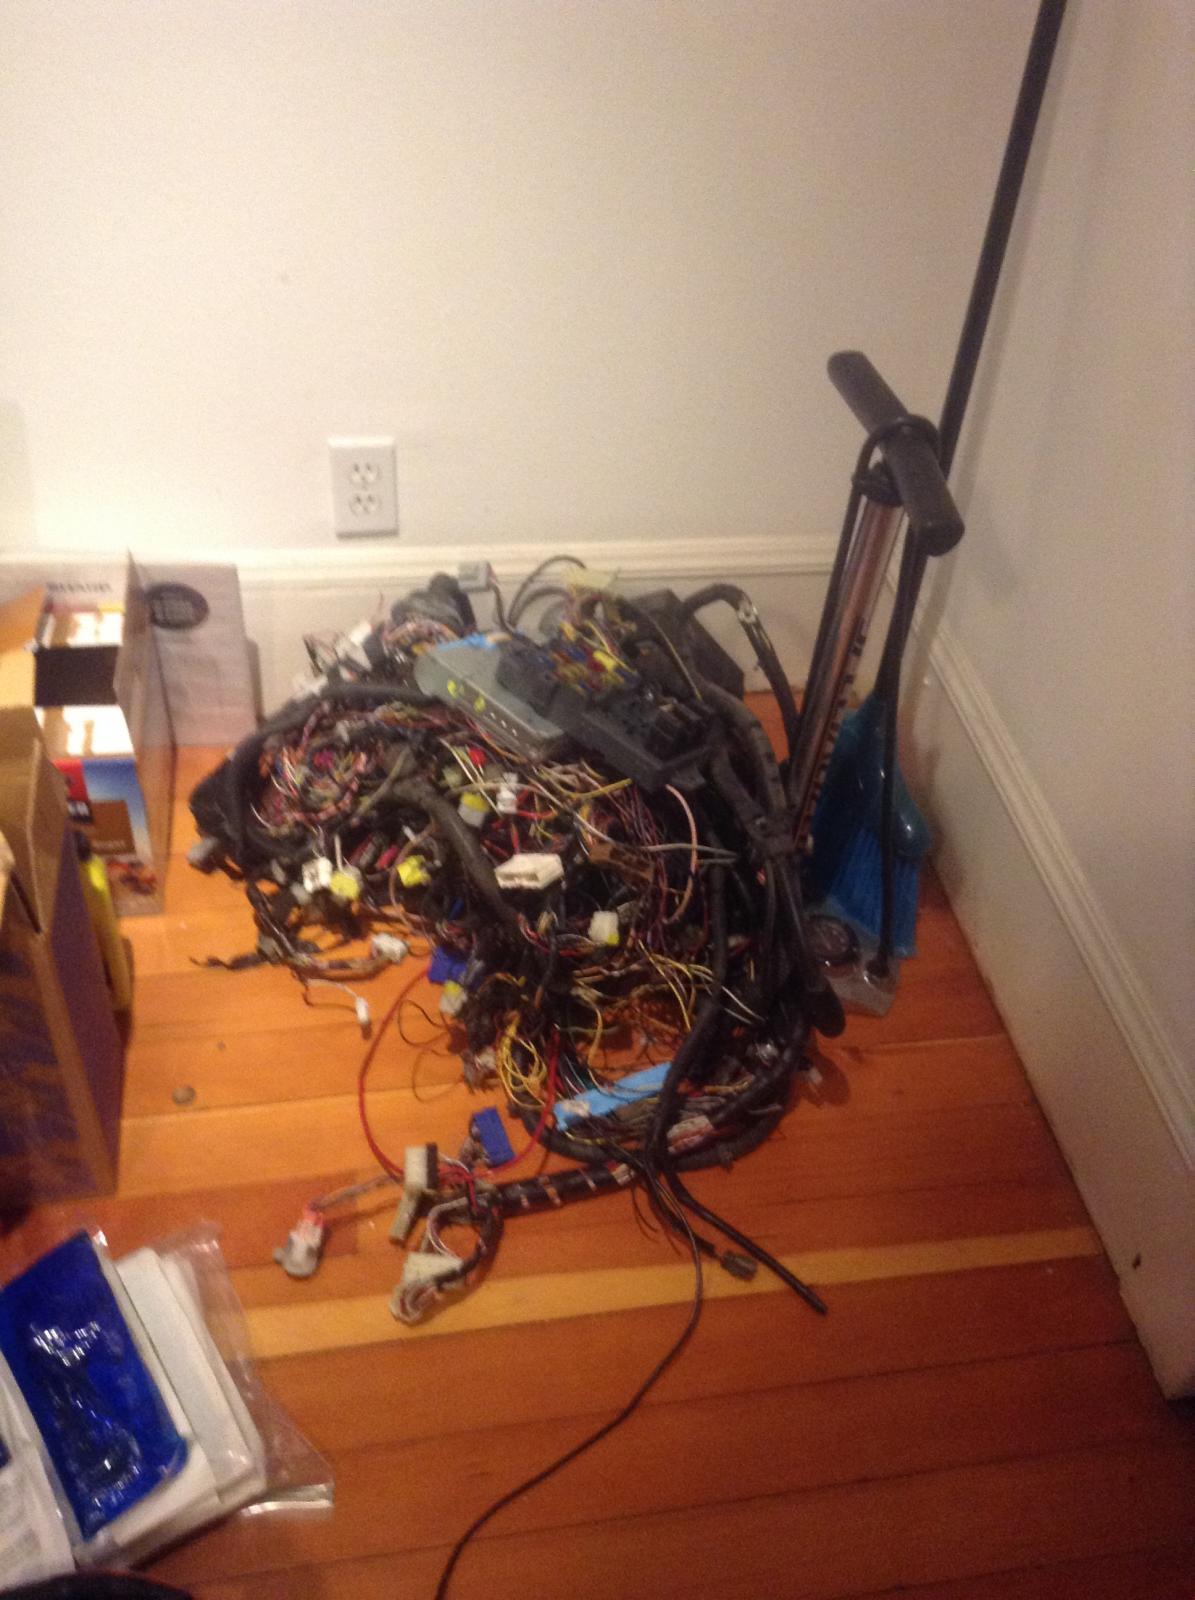
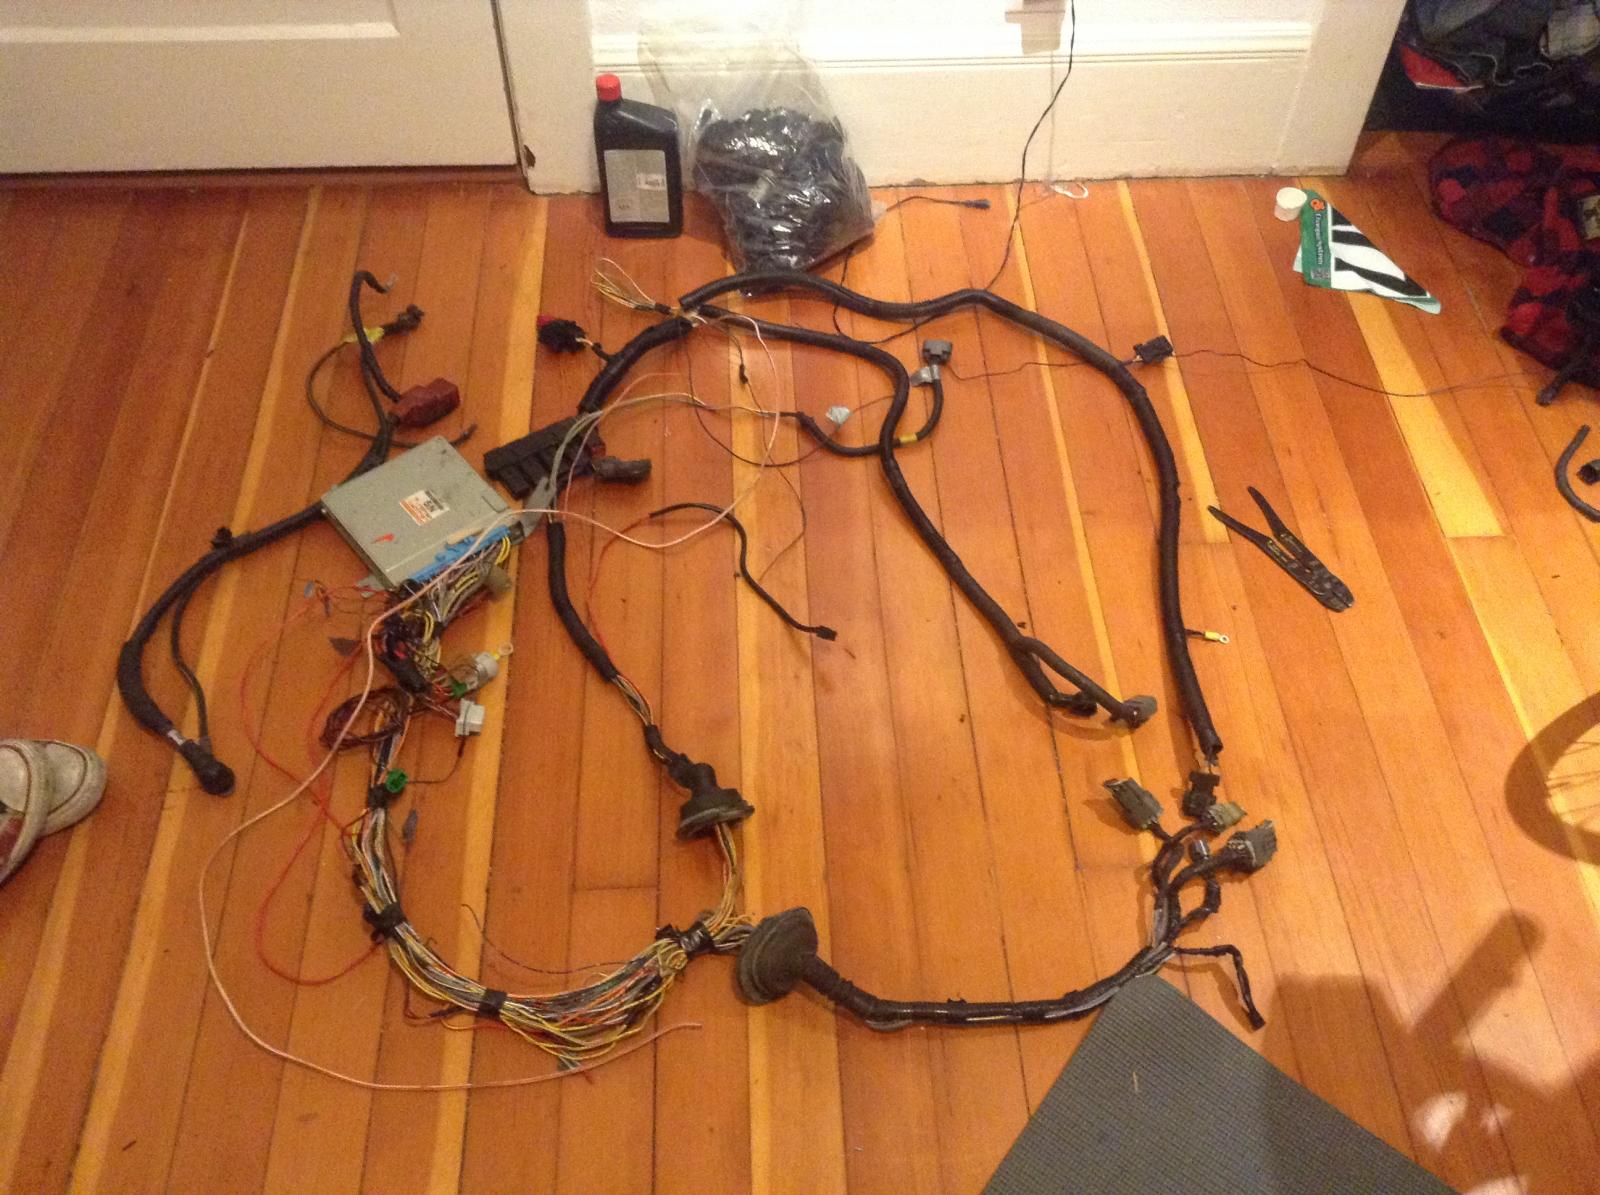
Wiring the stock ecu. The wiring harness can look like spaghetti when first opening everything up. OBD1 and OBD2 have some different requirements needed for inputs. Adaptations are also needed when running certain JDM engines on USDM wiring harnesses.
OBD1 needs the least amount of inputs. There are several guides out there to help with this. Search on shoptalkforums.com or a guy who went as busaru - website and YouTube. That covers the obd1 conversion way better than I ever could.
OBD2
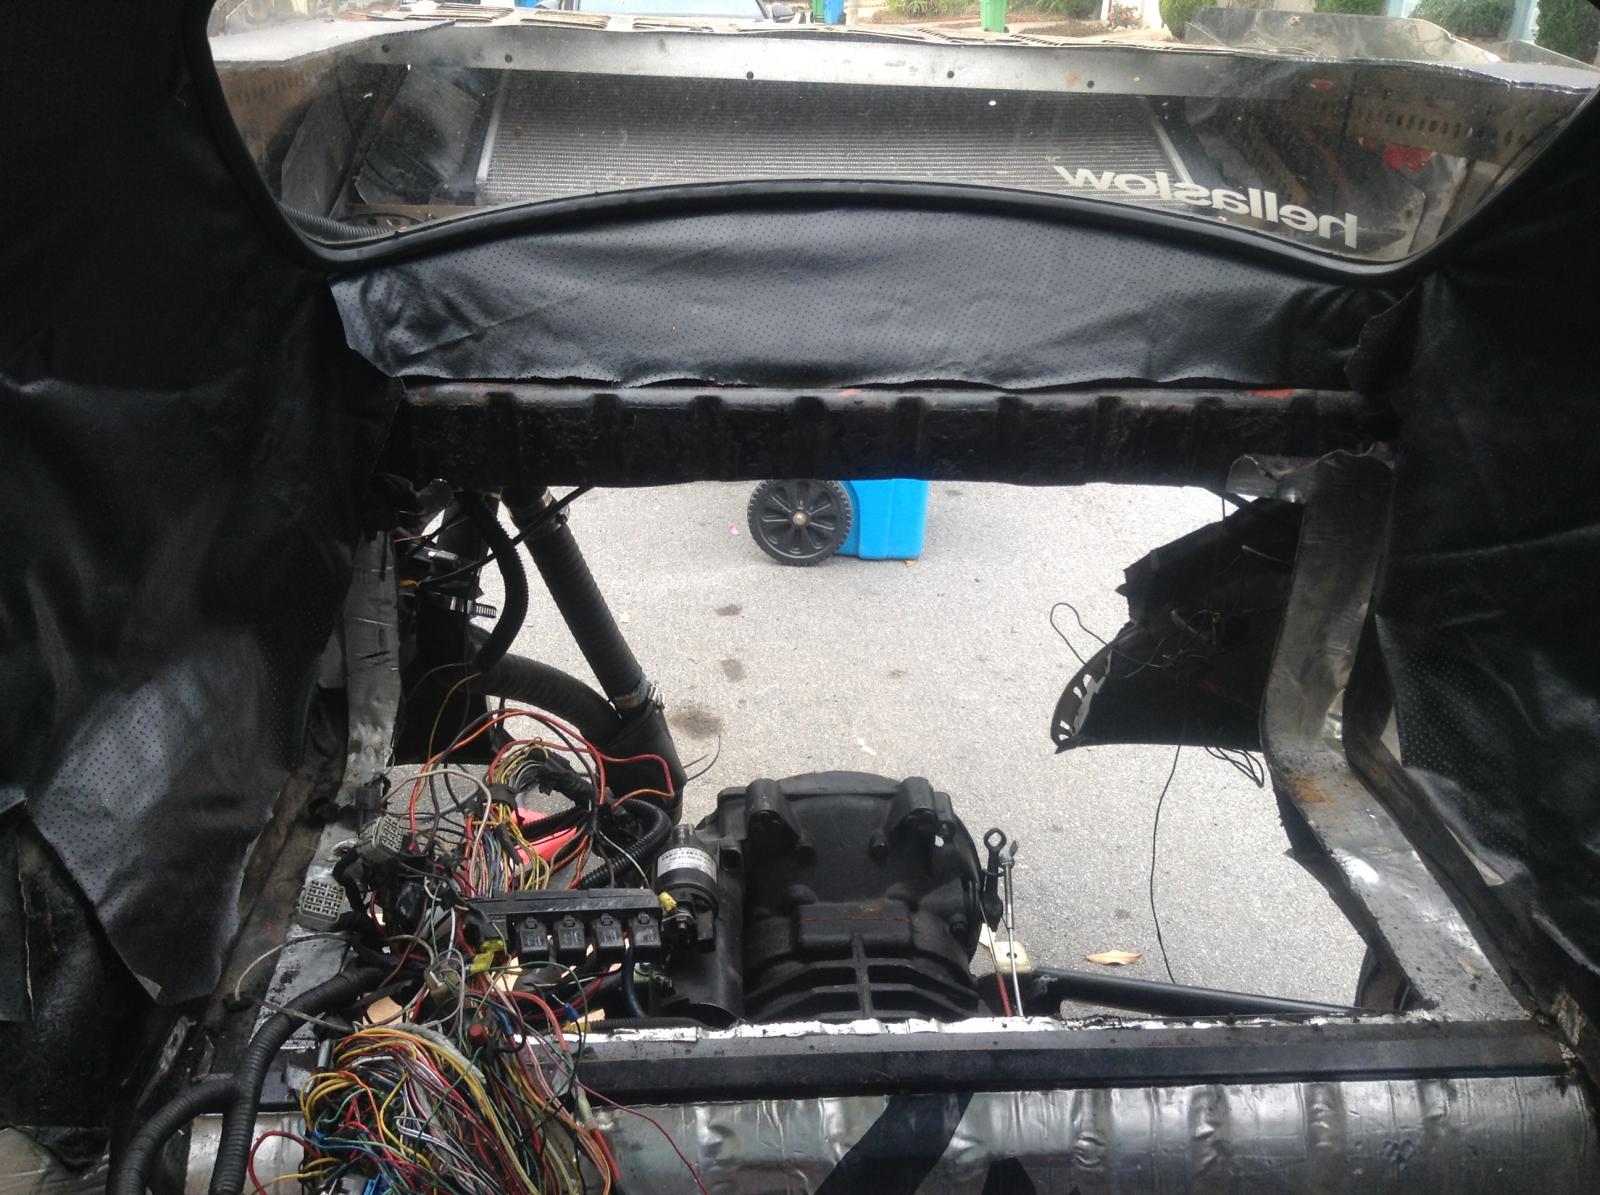
Removing the harness This task can be done in a couple of hours. I have some videos on YouTube showing how to do this.
You will need the following plugs from within the car
OBD2 port. Found in the lower the left side, under dash area.
Two green single wire plugs. Found way up under the dash, just to the left of the steering column. Easy to find when dash is removed
Main and fuel relays. Located together, the main is a square 6 wire relay, and should be brown. The fuel relay is a round 4 wire relay with a green connector. They are located beneath the dash, but close to the windshield mounted to the firewall. They are very hard to find with the dash in place.
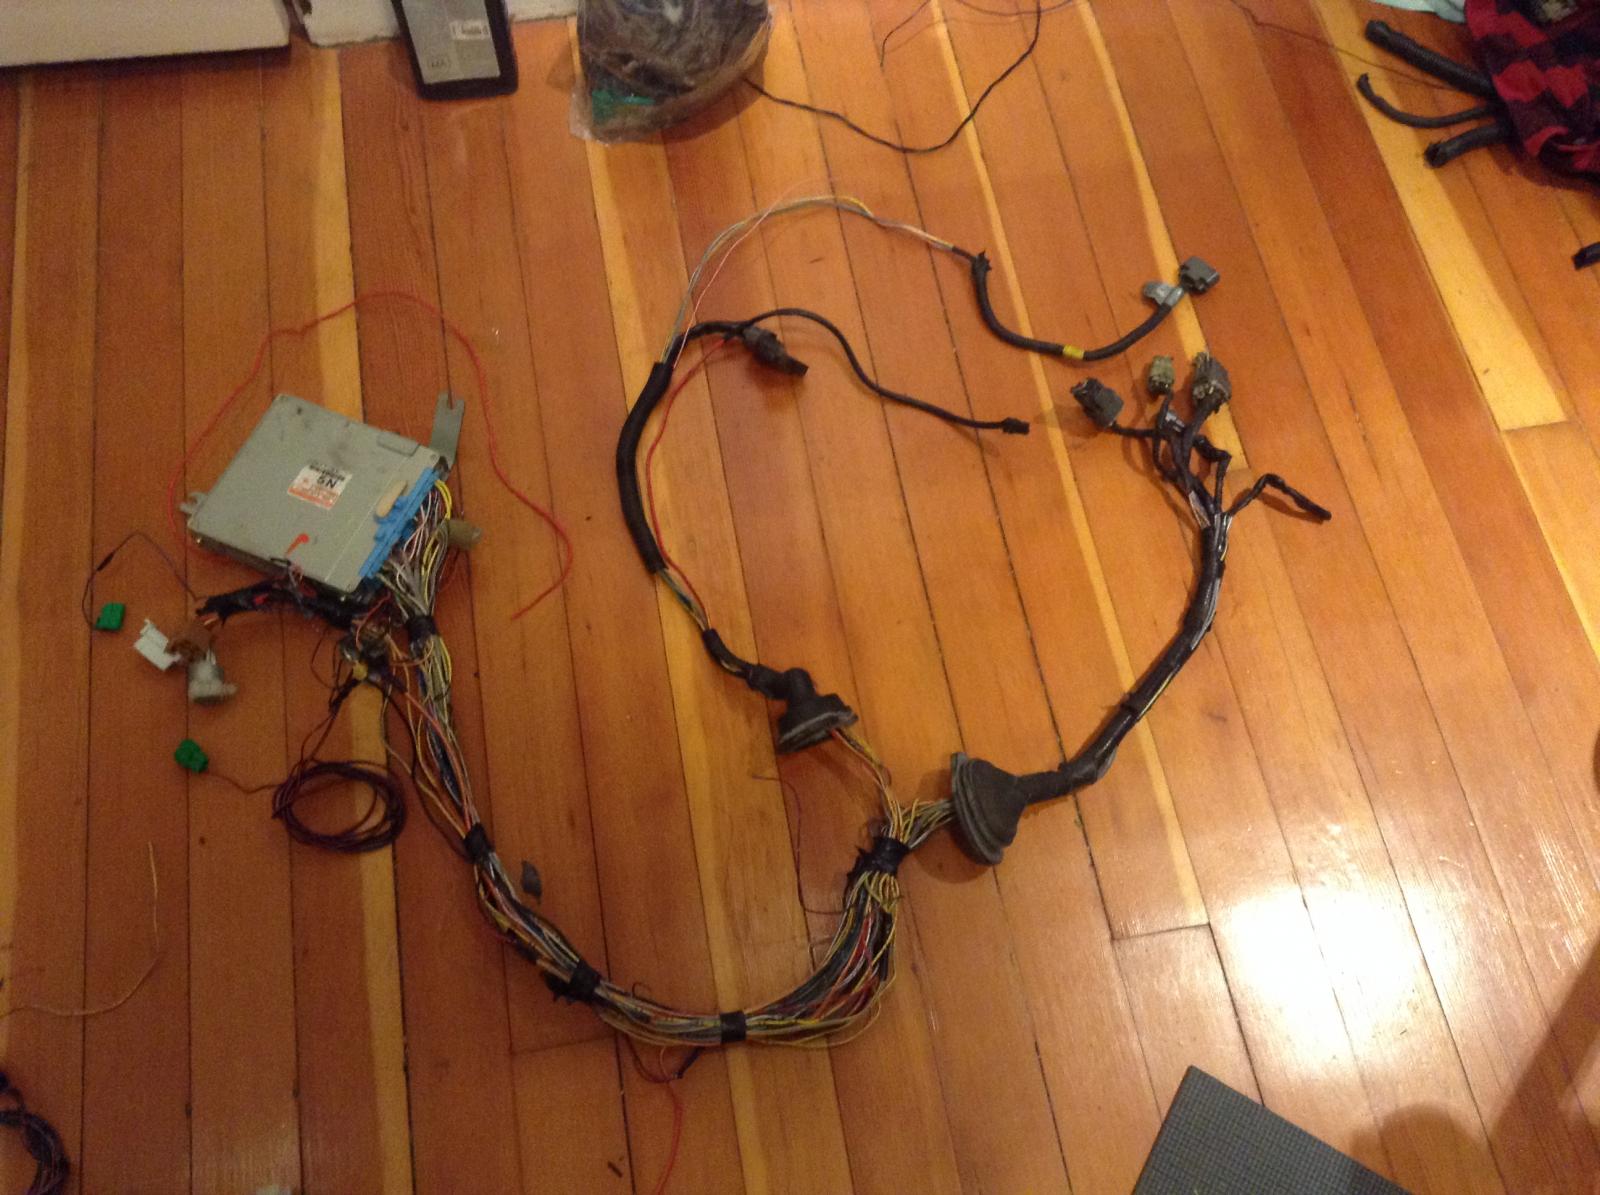
ECU. Located under the right foot area beneath a metal plate.
Those are all the relays and connections you need from within the car.
Removal.
Remove the dash. Most of the dash is held in with Phillips screws, and some 10mm sockets. Remove the OBD2 port from under the left side under dash area.
Remove the bracing and framework for the dash. Most of it is held with 10mm bolts. There are two bolts that require a special socket. It might be easier to cut the metal off the area than to find this socket.
Locate the connections mentioned above.
Remove the heater, AC, and fusebox. If you can't get the large metal dash bracing out of the way, pull it forward enough to start cutting and bashing the AC and heater boxes to pull it forward.
Cut the wires you don't need. This is tricky without pictures. The ECU wires head into the engine compartment via two rubber boots. Keep everything that goes into those boots and sort it out later. The loom will branch off to the right just before the ECU wires exit to the engine compartment, cut those wires off. The dash and heater control wires are not needed, cut them. Anything to the left of the green connectors, OBD2 port, and fuel and main relays is cut, these mainly go to the fusebox. By doing this cutting, ⅓ of the wires will be removed already.
Remove all connections from the engine compartment (see what you need and what you don't need). Push the two rubber boots inward towards the cabin.
With the AC condensor and housing pulled forward, feed the wires toward the ECU and pull out the harness.
Loosen the left fender and pull out the plastic wheel well
Remove the fan relays (4 relays next to main engine relay) or just grab the whole fusebox. Grab the battery cables too if they look good.
Cut and pull as much of the alternator wiring (white wires) as possible from under the wheel well. The wires go back to the fusebox near the left side of the footwell in the cabin.
ECU wires you need from in the car (check pin out for exact wires):
Vehicle speed sensor
Power on (Pin 1 and 2 wired from main relay)
Backup power supply (wired always hot)
Fuel pump relay control
Engine speed output (for tach)
Radiator fan 1 and 2
Neutral position switch (some need to be grounded, some open, rev limit will be 4.4k if wrong)
OBD2 pins (should be 3 of them, two others are power, one other is green test connector)
Test mode connector (to green plug)
Starter switch (to starter on)
Ignition switch (ignition on)
ECU wires you do not need
Fuel tank pressure (any of them)
Fuel temp
Fuel level
Rear O2 sensor
AC relay control (unless you plan to run AC)
Vent control solenoid valve
Rear O2 sensor heater signal
AC switch
AT diagnostic signal (if equipped with auto tranny)
Malfunction indicator lamp
AT/MT identification (cut and the ECU will read manual)
Some wires diverge off into the areas where you don’t need them (right side of car), but still have other paths that end in the engine bay. Clip off the direction you don’t need them, and keep the ones going to the engine.
Engine plugs you need
3 Main pugs to engine harness
Atmospheric pressure sensor (not included in some manual cars, debatable if needed with non turbo MAS)
Starter wire (back to ecu for sensor, can tie in with old system)
Ignitor
Front O2 sensor (make sure you know which one is which)
Mass airflow sensor
Alternator wires (plug and top post wires)
Fan relay assembly (if you want to use it, it is skinny and has 4 inline relays)
Engine plugs you don’t need
Rear O2 sensor
Air conditioner control
AC sensor? On right side of engine bay near the firewall.
ABS sensors (keep a sensor to use as a VSS)
Transmission wires and plugs
Brake fluid/pressure
Wiper fluid reservoir
The atmospheric pressure sensor tells the ecu exactly that. It is a must for turbo engines, and needed for MAP cars as well. On cars equipped with a MAF sensor, it may not even be included if a manual. Most people say it is not needed, and only helps when you have large changes in altitude.
The OBD2 port has one wire that branches off into many other connections. Cut this wire and find its connection from the pin out. The wire may be a different color from the ECU, but the other two will be the same color and can easily be found with a pin out.
The main relay shares its power wires (2) with the fuel pump relay, OBD2 port, ignition on, and main ECU power. They should be wired together with a 15a fuse.
The output power wires on the main relay split off and goes to the engine bay and ECU.
The vehicle speed sensor requires an input of around 5 volts, it can run the ABS sensor since the voltage is the same.
The fuel pump relay may have power coming from the ECU for the switch. If that is the case, ground the other wire that controls the relay. Or run the wire straight to the “power on” wire and ground the other.
For some reason, sometimes the fuel pump relay ground wire from the ecu wants to see ground. It may need to be grounded.
The neutral safety switch may vary per ECU. An automatic ECU and a manual ECU may run the same as each other with no changes. If it is wired incorrectly, it will limit revs to around 4400 RPM.
An alternator dash wire is needed to be run to the alternator from a small power supply before starting the vehicle. If the alternator does not receive a charge from the battery, it will not function and act like a dead alternator. The wire to be charged is the small black wire in the 2 prong connector on the alternator.
Late model Japanese domestic market wiring harnesses are the same as the U.S. WRX wiring harness in most cases. The earlier ej20g and I believe the ej20k engines are a 4 plug ecu and are not compatible. Active valve control system (AVCS) can be wired into a non AVCS system with an adapter kit for around $200
Fan relay wiring Use the two wires from the ECU to control the fan relay. The stock relay system is more complex than it needs to be. Rewire the system so you have one fan with one relay. The relays in their box are already fused and get their power directly from the alternator wire. The two copper tabs are the power wires, the two silver color tabs are for relay control. They are easily configured with one fused power in, one power to fan, one ground, one from the ECU wire (power on). You will be left with two extra relays.
Code reader.
OBD2 scanners are not as expensive as they use to be. A setup use a wifi sender and an app on your phone will only run around $50. The more complex apps can read manifold pressure, water temp, 0-60 times, timing, fuel ratio, and many other sensors and functions. You can also check and clear codes, and record drives to check data later. The app I use says its compatible for pre ios8 devices, but it will only monitor the codes, not sensors while driving. Be aware that apple products will not connect to bluetooth sending units, but android will. If you go this route and use an apple product, be sure to get a wifi sender.
Vehicle speed sensor (VSS).
This is a necessary sensor for an OBD2 ECU - however many people can deal with some of the inconveniences by not having one. Solutions have been creative, with one person using a pulse generator with the correct voltage to trick the ecu, and it worked for a little while before the computer learned that it was not a correct signal. Another is hooking up a pickup to the speedo cable, rj engineering solutions make a product like this, as does vdo. A good solution is to use the sensor from a subaru ABS system, and buy or fabricate a metal piece to an IRS cv flange with 4 pickups per revolution (a company does make this part). You can also put the sensor to feed directly off the 6 cv joint bolts. For swing axles, the sensor can be mounted to the backing plate of the brake, and the pickups mounted to the drum, though a successful completion has not been accomplished yet. JB weld will not stick to the drum well enough to hang on at speed. Brazing will have trouble attaching to the cast drum. I have not had it hit with a powerful welder to see if it’ll stick the metal tabs to the drum. One option to mount the sensor tabs might be to slowly drill out four holes and rivet them to the drum.
Fuel system.
The fuel system requires 2 hoses to be run. The stock subaru system uses an 8mm or 5/16” diameter hose, and should be maintained in the vw set up. Two 5/16” barbed outlets can be added to the tank by drilling out holes and threading them into the tank. The mating surfaces should be welded or brazed to prevent leaks. An AN bung fitting can be welded to the fuel tank, but they only seem to come in stainless steel or aluminum.
Most subaru's have the fuel regulator mounted to the engine fuel rail system, and can be partially hidden. If you're getting a turbo engine, make sure the regulator is not attached to the rubber return line and discarded.
The fuel filter for the subaru has a clamp for the engine compartment, and can be reused with the stock filter. Note that large amounts of pressurized air within the filter can starve the fuel system, and may need to be bled if run dry. Otherwise, any aftermarket high pressure filter can be run along the fuel line.
Fuel hose after the pump has to be high pressure fuel line. Sometimes enough can be salvaged from a subaru system to be used on a bug depending on how close you run your pump. The line can be run along the mid section of the car, or secured and run along the side of the car along the narrow channel where the body bolts to the pan. A hard line can also be run under the car or through the tunnel.
A recommended pump for a non turbo is the airtex E2000. Many have stated they use it on their V8 projects, and it’s affordable at around $70. A good pump for a turbo, or even upgraded turbo engine is the walbro 255lph pump, but may be overkill on a non turbo, or low boost setup. High boost and e85 might require a bigger pump.
Try not to mount the pump to the body of the bug without it being isolated by rubber mounts. If the bolt and body of the pump from touching any of the thin body metal, the interior will hum or buzz.
Throttle cable.
Depending on which way you mount the throttle body, you may be able to use the stock cable. There are a few issues with the throttle cable that need to be addressed.
1. Connecting to the throttle body pulley. A bicycle brake cable (5mm) larger head will secure well in the housing. To keep it in place, use one or two small zip ties to keep it there. You can also use a vw barrel end used like the stock setup
2. If the throttle body is in the stock direction, the cable pull will have to be reversed. To do this, the housing can be rotated around. You can bolt an angle with a hole in it to the left side of the engine block. The cable housing terminates here, and makes a 180 degree turn to the right side of the car and terminates where the stock housing terminates - washers can be used if the hole is too big. If you use a bicycle brake cable, I would recommend an inline cable adjuster (for a bicycle) to adjust small amounts of slack in the cable. Be sure to use the 5mm brake cable housing, and not the 4mm shifter cable housing.
3. The gas pedal setup may not have enough pull to fully open the throttle cable. For sure the roller pedal will not pull the cable enough to open the throttle body fully. To solve this with a roller style, a hole can be drilled further up on the pedal assembly to pull more cable. For a stock setup, an alternative will have to be configured.
The cable If you use a bicycle cable for the throttle body end of the system, you are left with a blank cable end. You can connect it to another cable with a barrel adjuster, but this will kink the cable slightly. If you constantly take your engine in and out, you’ll be left with a kinked up cable.
You can secure a second brake cable to the pedal with a bolt running through the (roller) pedal arm and a washer or two. The other end can be secured to the first brake cable via a “bicycle brake cable splitter”, and will be useful to removing the engine since it threads the two cables together. They use standard 5mm bicycle brake cables, one small head, one blank cable end.
One of the cables will need to be a large head brake cable (for the throttle body, and the other will have to be the smaller head style (for the cable splitter).
To protect the cable from excess rubbing under the firewall, a bicycle brake cable housing can be used (the stock wire might be too thick to use)
Hose delete. The stock subaru engine has a lot of hoses going around. The important ones (if equipped) are the Idle air control valve (IACV), and the cooling hoses to throttle body (can be blocked off or connected together). Know that if you don’t have any kind of crank case breather, your dip stick could start to push out to allow excess pressures to escape. Most of the rest of the hoses can be deleted if blocked off properly.
Options for ease of mind.
Engine bracing These engines have good torque, and need to be braced. A transmission strap can make a world of difference, but it will cause a few more vibrations to be transmitted to the rest of the car. The frame horns can be supported by a kafer bar or similar bracing system. Be sure not to run your fuel lines or mount your pump where it will get in the way of one. You can also ghetto rig some bracing by using a rear transmission strap carriage. They have holes to mount a bracing kit, and you can tie in support either to a well reinforced body panel, or to the shock towers.
Plastic oil separator plate In the rear of the engine block there is a plate to keep oil from leaking into the bellhousing area. Most of the old ones are made of plastic and can crack. New ones are metal, and seal much better. If it is leaking, replace it with a metal one. Black silicone is fine to seal it with.
Main engine seal If it’s not leaking, leave it alone, they supposedly last a very long time.
Timing belt kit (contains the items talked about below)
A full kit has a water pump, timing belt, tensioner, and pulleys. They recommend replacing at 105,000mi/10 years, but have been known to fail prematurely, and also to last longer. Don't buy a cheap kit. Gates use to be good but cheaped out and the quality suffered - but they may be back to making good ones again. Aisin kits use quality products, and manufacture many, many OEM Japanese made parts for several companies. I recommend shelling out the cash for a good kit.
Water pump The water pump is a regular failure item, and might be replaced if it has a lot of miles on it. Most fail between 100,000 and 200,000 miles. Be aware that the plastic thermostat
housing cap can be a huge pain to keep from leaking. It can warp and not seat well with a new thermostat, and leave you resealing until the leaks disappear. If you reuse it, don’t be shy with the RTV sealant. The aluminum one has a part number of 11060AA060, and resists warpage much better compared to the plastic one.
Timing belts They can fail eventually, and if you have an interference engine with higher mileage, you might consider changing it. Recommended at 105,000mi.
Timing belt tensioner This part is a hydraulically tensioned piston that forces the idler pulley against the belt. It has been known to fail and make the belt jump teeth on the pulleys and engine damage. Check for any weeping of hydraulic fluid if you disassemble enough parts to inspect it. Replaced with belt and water pump
Idler pulley The bearing in the idler pulley can fail, causing teeth to jump on the pulleys, leading to the valves hitting the pistons. Replace with pump and belt
Clutch The stock clutch might hold the power. Mine was doing fine with a 2.5 when shifting normally, but dumping the clutch on gear changes would just spin it. The stage 1 kennedy pressure plate is nice and reinforced in the throwout bearing surface area, and also needs a slightly shorter pull to engage and disengage it. The pedal gets a little heavier, and might take getting use to. For a tuned turbo engine ~275whp, the stage 1 wasn't enough, and I had to go with a stage 2 with a gene berg super street (6 puck one side, solid other). It grabs smoothly and hangs on great.
Spark plugs and wires if you can't get to them with the engine in, you might as well change the plugs while the motor is out. Wires last a while, some report over 100k with no issues. Resistance for a 99 is 4.9k-11.5k ohms, and spark plug 4 roughly 5.2k-12.3k ohms. Check your model year for exact numbers.
More power.
Lets face it, we all want to beat muscle cars. A fully weighted bug with a stock 2.5 should be good for a 14 second ¼ mile, it doesn't sound like much, but early and mid 2000’s mustangs, civic si’s and many other stock cars won't be able to beat you from a dig. But on the freeway you’ll get killed because of brick like aerodynamics.
The setup for a bug already gives a free flowing exhaust. A cone or free flowing filter can also be a benefit, as well as mounting it in a place that receives cold air. But it'll only get you so far
Lightened crank and cam pulleys are also common in the subaru community for decreasing parasitic loss. But you'll still be spending $90 for maybe a couple hp.
Franken motor Refers to an engine with parts from a different displacement block. There are several options.
2.2 with higher flowing 2.5 heads (more top end), good for a turbo setup.
2.5 with 2.2 heads raises compression to around 11:1, and should be good for about 15hp. Cometech head gaskets are needed to put the 2.2 heads on the 2.5 and are part number H1631spk051s (May be hard to order, and are not cheap). You will need to run better gas with this setup.
Ej22 single port heads found on the 96+ engines flow better than the 92-96 dual port heads. But the intake manifold will not fit the 2.5 intake manifold from 2007+ 2.2 (it will fit earlier models), so a franken motor swap with these heads will need the intake manifold. The phase 2 97+ (and some 96) use dual port exhaust manifolds, and will swap over.
Tuning Most motors people swap with are not compatible with tuning equipment. As mentioned before: ECUTEK supports all 99 and on subaru engine, COBB supports WRX engines from 2002, and the majority of other models from 2007 on. There are systems - such as greddy’s emanage - that manipulate input signals from the sensors to allow for modifications such as larger injectors, boost, timing, and fuel mixtures. If you're going to go crazy, just buy an aftermarket ecu, or go with the megasquirt option.
Boost and building a motor It has been said that the stock ecu holds around 5 psi with little to no issues. The stock injectors should hold about 6-8 psi before maxing out. You can't just go with bigger injectors because the ECU won't know it's running them. If you want to retain your stock ECU but need to modify your fuel injectors, you can run a greddy emanage system, which modifies the values from the MAS and changes the duty cycle of the fuel injectors. This will also allow you play with e85. However, most people go with an aftermarket ECU system when boosting.
How much boost can your bottom end hold? One person turbo’d his ej22 and ran 8ish lbs with e85 and saw 275hp at the crank after a tune with everything stock but his injectors. Others on forums have talked about 280hp from a 2.5.
It's been said that DOHC NA cams are not bad for a turbo if you go that route. Going with a SOHC turbo setup might be worth sending them out to delta camshaft. They cost around $100 each shipped with excellent turn around time.
Typically pistons are the weakest point in boosting Subaru engines. Wrx engines sometimes suffer from cracked ringlands (2008 especially). Luckily all ej series 2.5 piston sizes are the same and run from around $450-750 for a forged set.
Rods are the next thing to go. Luckily sti rods are fairly stout, and can handle 450-500whp Max. And used they only run about $150-175 on eBay. New forged sets run $450+ but will take lots of power. All ej engines use the same rod journal size I'm the crank aside from 96-99 phase 1 2.5 ej25D DOHC engines. All 2.0, 2.2, and turbo 2.5 run the same rods. The 96-99 NA 2.5 rods use a smaller journal for the rods, and the later NA 2.5 (ej251 and ej253) are 1.1mm longer than turbo engines.
Stock crank and rod bearing clearances are tight. Subaru also recommends 5-30wt oil. Subaru also spins lots of rod bearings on turbo engines. If you're going to modify the internals, go with bigger clearances and thicker oil. I spun a rod bearing using that light oil and will never go below 10-40wt again.
Stock cranks don't break often. They are all forged, and all pretty strong. Compatibility between them varies slightly. Early 2.0, 2.2, and 2.5 (I think) engines used a thrust bearing on #3, later engines of all sizes use a #5 bearing. The 2.0 and 2.2 engines use the same crank, and will swap over just fine as long as they are of the same thrust bearing location. Machining can be done to convert the blocks to #5 thrust.
Engine blocks are another limiting factor. The 2.0 and 2.2 blocks have thicker cylinder walls, and don't suffer from war page and cracking as much as the 2.5’s do. NA 2.5 blocks are “open deck” where only two spots support the cylinder walls. Ej255 and 257 blocks are “semi closed” and have 4 small supporting areas. Some (but not all) ej20g, and all ej22 turbo blocks (maybe some usdm 2.2 blocks too) come with “closed deck blocks” where the cylinder is supported on all sides. I believe the 2.2 turbo and some of the ej20g blocks had piston squirters built in to cool the pistons with oil. Newer blocks are said to have better iron in the sleeves. Machining can be done to install new sleeves that are stronger. Machining can also be done to create a “closed deck block”, but it runs around $1,000. Pins can be inserted around the cylinder walls for strength, but a cylinder wall hone is required. A few people (myself included) have cemented the lower parts of the cylinder walls to the case to prevent vibration. The cooling system is not affected since it's only done on the lowest lying areas.
Head studs and case bolts can help beef up high hp engines. ARP makes studs in the stock 12mm size, and reduce the stretch of the bolts compared to stock ones. This prevents the head from lifting and blowing a head gasket. They also make massive 14mm studs, but that requires machining. People make over 700hp without needing the bigger studs so it's not necessarily a needed thing. Arp case bolts prevent the case halves from moving around. They have a higher torque rating than stock, and require an align hone for the crank bores. They are also very expensive.
E85 is popular for higher powered engines. It burns cooler and cleaner, had a high octane rating, and energy per dollar is about the same as gasoline. However, not everything at the pump is exactly e85 so each fill up might produce the same air fuel ratios. It also needs to flow about 30% more to make the same power as gasoline, and can eat away at anything rubber in your system - so injector sizes, fuel pump, and lines might need to be upgraded.
Stock fuel rails are said to support lots of power before needing modification. Some say that one or two cylinders might suffer from fuel starvation - in this case, a parallel system is setup, where the fuel line splits off and feeds each side of the engine individually instead of one side then the other. Systems with big injectors may use a fuel pulsation damper.
Diy porting on heads and intake manifold can be done. The exhaust has a lot of material that can be removed. The intake casting marks can be cleaned up and everything smoothed out. Intake manifolds have a lot of casting lines. Don't make the intake on the heads smooth, they need to have some grain to them to mix the fuel and air together.
Some early heads (ej20g, super early ej25D) used hydraulic lifters in their cam over bucket setups. They didn't like to rev as high, and the later ej20g heads don't flow as well as later heads, but apparently the early ones flowed well..
Ej251 NA heads flow really well stock, mild porting and cams (delta will regrind them) can make them flow really well. The valve springs can be swapped with later ej253 springs (AVCS) that have 10% more holding power. Anything more than that and the valves might not be strong enough to handle the spring power and break. The 251 and 253 SOHC heads have pistons that match the heads because the valve reliefs are in a different location. Lower compression pistons don't contact the valves, but higher (10:1) compression ones sometimes do.
The long runners of the naturally aspirated 2.5 engines flow better than the turbo models with TGV valves. It is said that the ej253 NA intake manifold is the best flowing one, and some are seen on highly modified turbo engines.
There is a lot of info out there, search tons before you ask questions on forums. NASIOC and other sites cover almost everything you want to know.
If swapping with a subaru gears kit, the 02 and early 03 mt5 transmissions are weaker than other years. Be sure to research what you need and know that clutch types vary between years
Other helpful sites
Pin outs and wiring
https://www.xcceleration.com/
http://www.northursalia.com/modificatio ... iring.html
Parts
boxerswap.com
rj
westy
For my own information compilation:
Head cc chambers (not confirmed)
Liberty ej20g 57cc (54cc stated elsewhere)
Impreza ej20g 49cc (46.6 stated elsewhere)
Ej205 50-51cc (confirmed)
Compression ratio to piston style
Ej205 piston and ej205 (.80mm) HG
57cc head 7.9-1
49cc head 8.3-1
51cc head 8.1-1
Ej205 piston and ej20g (~1.3mm) HG
57cc head 7.3-1
49cc head 7.9-1
51cc head ?
Ej20g Pistons protrude out of the block .0010, .0027 more than an ej205, and have deeper recesses for valves.
Subaru swap info/guide (sorta reposting)
-
maurice
- Posts: 105
- Joined: Sun Apr 03, 2016 10:49 am
Re: Subaru swap info/guide (sorta reposting)
I'll try to get some pictures up, here are some videos instead
Engine anatomy - probably some wrong information
https://m.youtube.com/watch?v=3SZ6jVSy7cM
Engine harness removal
https://m.youtube.com/watch?v=qB5LvAzoL5Y
Harness part 1
https://m.youtube.com/watch?v=b4XT4d8MFGg
Harness part 2
https://m.youtube.com/watch?t=3s&v=7i2voLscTE0
Turbo engine ej20g, pre tune, pre nitrous
https://m.youtube.com/watch?v=ziiGUUWw4CA
My car currently
https://m.youtube.com/watch?v=_vBDAM-Txu4
-
maurice
- Posts: 105
- Joined: Sun Apr 03, 2016 10:49 am
Re: Subaru swap info/guide (sorta reposting)


Example of pin out


-
maurice
- Posts: 105
- Joined: Sun Apr 03, 2016 10:49 am


-
maurice
- Posts: 105
- Joined: Sun Apr 03, 2016 10:49 am
Re: Subaru swap info/guide (sorta reposting)
Reserved for future pictures
-
tacitcevian
- Posts: 1
- Joined: Sat Sep 08, 2018 8:16 am
Re: Subaru swap info/guide (sorta reposting)
Meet Superman. This boundless class nitro puller is worked by Zeek Heard of No Limit RC and (inexactly!) in light of HPI Savage parts. It sits on a 3/16-inch thick laser-slice flying machine aluminum frame extended to 48 inches in length, and it weighs 33 pounds (40 with the dually tire setup, which likewise gives it a 32-inch track width!) You'll see a great deal of laser and machine shop work all through the truck. Power originates from two LRP .32 Nitro motors changed by Neal Smith of The Nitro Shop in Canada. Two JR 9000T high torque servos handle controlling and throttle obligations. Zeek reveals to us it took 7 months of blood, sweat, cash and motivation to finish, yet it was justified, Visit here..... http://unxq.com
https://cdn.pixabay.com/photo/2017/07/0 ... 60_720.jpg
despite all the trouble when this past September Superman pulled an astounding 264.2 pounds—which may well be a world record for nitro-controlled pullers. Zeek isn't done either. He is certain with a couple of more changes 270 is inside Superman's scope. Zeek and his buddies Bari Musawwir, Tom Dixon, and Justin Haugland established No Limit RC in Orange County, Florida, and he is extremely dynamic in arranging the RC pulling scene. The team archived Superman's record-setting pull on record, and Zeek clarifies a tad bit of what went into the assemble — look at the clasps underneath!