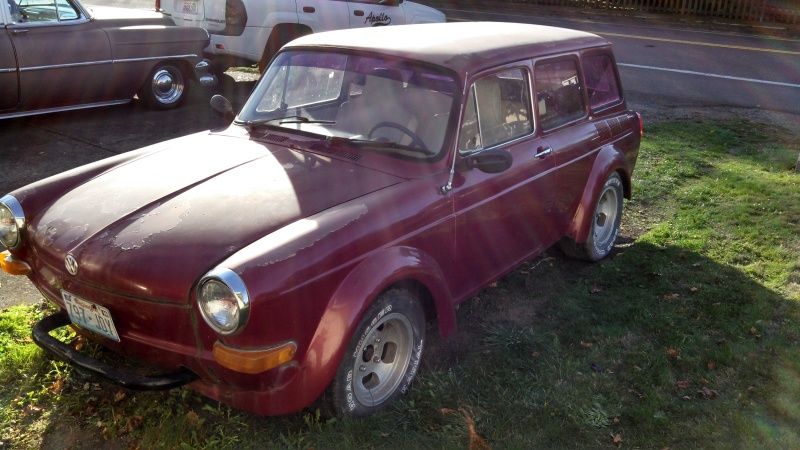
ProVolks Official Shop-Car Build Thread. . .

Notches, fastbacks, squarebacks.
User avatar
aircooledtechguy
Posts: 1709
Joined: Sun Oct 28, 2001 1:01 am

Re: ProVolks Official Shop-Car Build Thread. . .

Post by aircooledtechguy »

gearheadgreg wrote:Great solution - hardest part with angle mounts is getting them all oriented the same!
You got that right!!

So this week I focused on the rear engine hangar and the engine mounts among other things. I’ve got some severe torture in store for this car in the near future, so when I install the new motor, I’m not willing to continue running the factory rubber engine mounts. These don’t last long in a stock bus 2.0L w/ 70hp and I’ve been punishing them long enough with my Porsche 2056cc that’s probably putting out a mere 100-110hp. I don’t want to risk them with a race-prepped 2.3L running MS3 and COP. So I opted to modify a set of bus rear engine mounts and a bus mount bar (since that’s what I’m currently running) and make it a solid mount arrangement.

For this, I bolted together a mock-up motor to my engine stand so I could ensure everything fits 100%. Finally a shop full of crap pays off!! :wink: I’m also in the process of making my stub pipes and exhaust, so some of these features will be incorporated in since they also use the mount bar, however, I’m not going to be letting that cat out of the bag just yet. . .

Here’s a few photos of the solid mounts. These should transfer a lot more engine noise into the cabin. . . Oh well, it’s the cost of being able to go *really* fast. Nothing ear plugs can’t handle.

Image
Image

Here’s a couple shots of the almost completed mount bar with the part of the custom exhaust hangers welded in place. I'll let you all speculate as to what exhaust I'll going to be running. . . 8)

Image
Image

I’m only letting on to about ½ of what I’ve been up to recently. . . Stay tuned for the rest of the story. . . 8)
Cat Box
Posts: 19
Joined: Sun May 24, 2009 4:31 pm

Re: ProVolks Official Shop-Car Build Thread. . .

Post by Cat Box »

I am new to the squares.
I just read this whole thread and have been thoroughly entertained thus far.
A few pages back you had asked for examples of what has been done for flares...
I just picked this car up and thought you may like to see it....
Image
Those are cut down beetle fenders that have been mated and welded on to the fenders.
The square fender has been cut about every inch and folded over to be welded to the new "flare".
There is lots of room in there for wider tires.
The ones in the picture are 225/60/14's and it is at stock height.
Just another idea for you.
:twisted:
User avatar
aircooledtechguy
Posts: 1709
Joined: Sun Oct 28, 2001 1:01 am

Re: ProVolks Official Shop-Car Build Thread. . .

Post by aircooledtechguy »

With the new, more powerful 2.3L street/race motor that’s going in the Squarsche, I needed to upgrade to a full-on performance minded exhaust. So the stock type-4 heat exchangers and off-the-shelf bus 4into1 header was not going to cut it anymore. Since there are not any affordable systems that will work, I opted to make my own so it would fit and incorporate the muffler I wanted to use; a Bischoff S/S Porsche 911 banana can!

So I began by creating a set of stub pipes. I chose to use 1 ½” pipe for the stubs and 1 5/8” for everything else before the collector. I also wanted to try out a new idea that’s been rolling around in my head that would enable me to have leak-free stub to header connections. It involves 2 slip-joints, which cause any exhaust gasses that wish to escape to have to turn 180 degrees, then another 180 degrees and finally another 90 degrees for a total of 450 degrees all in a millisecond; that just isn’t going to happen! So these stubs will be leak-free while being exhaust gasket free too. They were kind of a PITA to make, but they came out exactly as I envisioned and they fit the bill perfectly. I still have some finish welding to do on the flanges and cleaning up on the flanges, but you get the idea. . . Once it's all tacked together, I'll go back and TIG weld every joint.

Image
Image

When building an exhaust, you have an obvious starting point for the system at the heads, but you also need to have an ending point so you can figure out how to get it all to fit. So next I mounted the muffler. Since I had never seen a 911 banana can muffler on a VW engine, I needed to come up with a muffler mount system. You just can’t mount it to the fan shroud since it’s not really made for mounting anything larger than an AC compressor, your mounting options become limited. So I decided to make the mounts attach to the main engine mount bar which is the main load bearing member at the rear and is tied into the body of the car.. The right side mount I made from ¼” steel since it has to bear the full weight on that side and the lions share since that mount is about 1' off center-line.. The left side I made out of 1/8” steel, but tied it into the AC compressor mount holes that already exist in the fan shroud. I cannot tell you for sure just how many times I mounted/dismounted the bar and fan shroud during the build process, but it was at least a couple dozen! Everything was dry fitted, then welded in place to ensure a perfect fit.

Image

Once the bare mounts were made, I needed to make a pair of cradles where the muffler will sit. I chose aluminum for this since it needed to be ¼” thick and steel would just be too ridiculously heavy for this part. All the mock-up was done with the engine sitting on my lift about 10” off the ground with the muffler sitting atop wood bucks that held it at the right position. One of the goals with this exhaust is to not have any part of the system below the bottom of the engine. Ground clearance can be an issue with the car lowered and I got really tired of my exhaust scraping occasionally as I exited a couple parking lots in my town. Plus this car should see a fair amount of track time in the future and I'll be lowering it on those occasions.

Mount holes were drilled through all materials at once so there was no chance of bolts not fitting or fitting loosely. The result is a super-solid mounting that does not rely on the tightness of the bolts to be a tight fit. Here's a few shots of the muffler cradles in place on the mock-up motor:

Image
Image
Image

Here’s some shots of the muffler in place on the new cradle on the mock-up motor:

Image

Strapped on with temporary straps:

Image

I also modified the muffler to exhaust mounting with a V-band coupler so that for track days I can easily remove the muffler and add on a Supertrapp or more basic flow-through muffler/stinger system.

Image

Now that I have a definite beginning point and ending point I needed to locate where the collector would be and begin building to the rest of the header. Stay tuned. . . 8)
dorkie
Posts: 114
Joined: Fri May 30, 2003 6:10 am

Re: ProVolks Official Shop-Car Build Thread. . .

Post by dorkie »

Beautiful. I love the muffler cradle. I don't have my engine (2.3 liter) back into my square yet, but I am imagining all of the things I can hang off of the rear engine mount. Thank you for sharing.
User avatar
Piledriver
Moderator
Posts: 22777
Joined: Sat Feb 16, 2002 12:01 am

Re: ProVolks Official Shop-Car Build Thread. . .

Post by Piledriver »

Slick work... May have to borrow your idea on the rear mount, haven't been real happy with any of the setups I have played with (including the Berrien frame horns, nice parts but won't work for me) but I keep forgetting I have welders, thanks for the reminder.
Addendum to Newtons first law:
zero vehicles on jackstands, square gets a fresh 090 and 1911, cabby gets a blower.
EZ3.6 Vanagon after that.(mounted, needs everything finished) then Creamsicle.
gearheadgreg
Posts: 300
Joined: Fri Mar 08, 2013 5:25 pm

Re: ProVolks Official Shop-Car Build Thread. . .

Post by gearheadgreg »

As always, nice work. I really like the idea of the sleeved exhaust stub, and the modular muffler mount. I've seen/heard (youtube only) Vanagons with Subaru engines using the 911 banana muffler, and they sound really good. Plus, there's lots of them out there, and lots of info on changing the mufflers from very quiet, to very free-flowing if the need arises.
Dealer for Alloy Wheels & Period H4s and Fog/Driving Lights

http://www.greggearhead.com
User avatar
aircooledtechguy
Posts: 1709
Joined: Sun Oct 28, 2001 1:01 am

Re: ProVolks Official Shop-Car Build Thread. . .

Post by aircooledtechguy »

Thanks for the kind words guys. It's fun making all this stuff fit and work.

dorkie: I'm able to hang things off my mount bar because I solid mounted the bar to the engine. That would not be possible with rubber mounts and I'd have to re-think all that. Something to think consider. . . With that said, if you were to retain the stock '68-on rubber engine hangar mounts, it would be no problem to solid mount the X-bar and do something similar to mine.

gearheadgreg: the Subie SVX 6-cylinder sounds exactly like a Porsche when going through a Porsche muffler since it has the same firing order. Oh to be able to shoe-horn one of those in. . . Actually, I've had a couple 996 engines/trans combos (6-speeds too) come up for sale locally that are VERY tempting if I were to go that route. . . It's an easy ledge to be talked off of once I look in my pockets and see the Grand Canyon staring back at me. :lol:
User avatar
aircooledtechguy
Posts: 1709
Joined: Sun Oct 28, 2001 1:01 am

Re: ProVolks Official Shop-Car Build Thread. . .

Post by aircooledtechguy »

I spent Saturday hold-up here at the shop and made it my mission to get the Squarsche's new exhaust header built and tacked together. The goals were to have a header that (1) was equal length (or darned close), (2) not have any part of it hang down below the sump and cause ground clearance issues and (3) to not interfere with access to the engine (like the valve covers, etc). I began by getting the collector positioned and tacked into place. Then it was a matter of getting all the other pipes to fit from their respective stubs to the collector while adhering to the rules.

I began with cyl. #2 since this was the longest run and the most direct shot, then I did #1. I needed those two to fit between the bell housing and the case where there's a bit of room and it's there that I installed a slip-joint for expansion and to ease in installation & removal.

Cylinder #3 & #4 were the most difficult since I also wanted to ensure they didn't interfere with the valve cover on that side. and because of that, it's easy to run out of room for tubing. Cyl. #3 was the most difficult but I got it all to fit in there and be smooth so I'm happy with it. I hope it sounds good. . .

Here's the system all tacked together and ready for finish TIG welding:

Image
Image
Image

With the muffler:

Image
Image
Ol'fogasaurus
Posts: 17881
Joined: Mon Nov 13, 2006 10:17 pm

Re: ProVolks Official Shop-Car Build Thread. . .

Post by Ol'fogasaurus »

Impressive! :shock:
gearheadgreg
Posts: 300
Joined: Fri Mar 08, 2013 5:25 pm

Re: ProVolks Official Shop-Car Build Thread. . .

Post by gearheadgreg »

Nice work.
Dealer for Alloy Wheels & Period H4s and Fog/Driving Lights

http://www.greggearhead.com
Steve Arndt
Posts: 7420
Joined: Sat Mar 10, 2001 12:01 am

Re: ProVolks Official Shop-Car Build Thread. . .

Post by Steve Arndt »

Very nice layout.
User avatar
Jadewombat
Posts: 1447
Joined: Sat Jun 22, 2002 12:01 am

Re: ProVolks Official Shop-Car Build Thread. . .

Post by Jadewombat »

Purty.
User avatar
aircooledtechguy
Posts: 1709
Joined: Sun Oct 28, 2001 1:01 am

Re: ProVolks Official Shop-Car Build Thread. . .

Post by aircooledtechguy »

I came in a little early this morning so I could fix a nagging issue to rest. Since going to Porsche 5-lug wheels, I have not had a real spare or one that I would call handy. The only affordable type I could find was at a local Porsche swap that was from a Porsche 944. While it could do the job alright, it's truly a VERY temporary spare that has absolutely no re-enforcement chords of any kind and basically no tread either. The other issue is that it's designed to be stowed in the deflated position which would necessitate carrying an air pump. . . Another thing to haul around everywhere. To make matters worse, the rim was 5" wide which made it a super snug fit into the tire well.

Image

Last week on a whim I measured the ID of the hoop on both rims and discovered that they were exactly the same. :twisted: So this morning I carefully cut the welds that hold the wheel centers to the hoops. After prepping the Porsche center and the 4.5" VW hoop, I tapped the center into the hoop.

Image

Then I bolted it to my front hub and trued the hoop on the hub by spinning it while a piece of chalk showed me the high points. Once the chalk made constant contact, I knew it was true so I tacked it in place. Then I carefully dismounted the rim and finish welded the Porsche wheel center to the VW hoop. 'Cause I know someone will say something; YES, the tire is a junker and was deflated with the valve core removed!! :wink:

Image

Viola!! A spare that is full size, can be aired fully, can be driven hundreds of miles if need be, is the same diameter as my Porsche wheels/tires and fits like stock in the tire well. Surprisingly, it only took about an hour to complete. Now I'll have to send it out for powder coating when I have a bunch of stuff get done.

Image

Before it goes in the scrap pile, does anyone want a 4-lug VW rim 5" wide with a folding Porsche spare tire?? 8)
User avatar
aircooledtechguy
Posts: 1709
Joined: Sun Oct 28, 2001 1:01 am

Re: ProVolks Official Shop-Car Build Thread. . .

Post by aircooledtechguy »

Since this car will see a race track from time to time, the fenders will be going on and off quite a bit for maintenance and adjustment track side. So I figured replacing the stock screws and installing dzus fasteners would be a good upgrade. Luckily I have a sprint car supplier showroom near by (www.speedmart.com) so I hit them-up for some aluminum dzus parts.

I had to first slightly enlarge the holes in the fenders with a burr.

Image

One thing that always slows the process is drilling the holes for the spring catches in exactly the right spot. So after pondering the problem, I came-up with this steel template that centers itself in the hole via a cut-off bolt and then you just drill through the guide holes on either side. Viola!! Perfect placement and it only takes about 2 minutes to drill ALL the rivet holes for the springs!

Image
Image
Image

Rivet the springs in place:

Image

Then fit the fender and fasten the dzus fasteners with a 1/4 turn "click".

Image

Now I'll be able to remove a fender in about 30 seconds rather than several minutes.
Steve Arndt
Posts: 7420
Joined: Sat Mar 10, 2001 12:01 am

Re: ProVolks Official Shop-Car Build Thread. . .

Post by Steve Arndt »

Good idea on the little jig.
Post Reply