HOW TO: Re-bushing Kadron Throttle Bodies

Offroad VW based vehicles have problems/insights all their own. Not to mention the knowledge gained in VW durability.
User avatar
57baja
Posts: 286
Joined: Thu Jun 05, 2008 9:48 pm

HOW TO: Re-bushing Kadron Throttle Bodies

Post by 57baja »

I've been rebuilding a lot of carburetors, particularly Kadrons for people lately, trying to make a little extra cash to feed the VW addiction. One thing that has always been difficult to research, is how to re-bush these carbs properly. There are very few people that do it, and those that do seem to guard their secrets pretty well. Rimco charges $120 to do it, and AJ charges a pretty penny, too. I figured there might be some interest in getting them done for a reasonable price... So... I tooled up, bought a drill press (which I've always wanted anyway), some metric drill bits, built a couple of jigs, bought some parts and I'm doing these now. I see no reason to hide my trade secrets from the world, so perhaps you guys could put this information to good use. Heck... maybe I could even learn a better way to do it from someone here. I've searched high and low on every forum, website, and under every rock I could find, and never found any specific info, so here's what I have so far. I may revise it as time goes on, but here goes.....


********************

So here's my super-duper triple-patented patented way to re-bush those old worn-out throttle bodies that Kadron is so well known for. If anyone has any suggestions as to how to improve this method, or any other insights, thoughts, or ideas; I'd love to hear them. I'm always eager to learn....


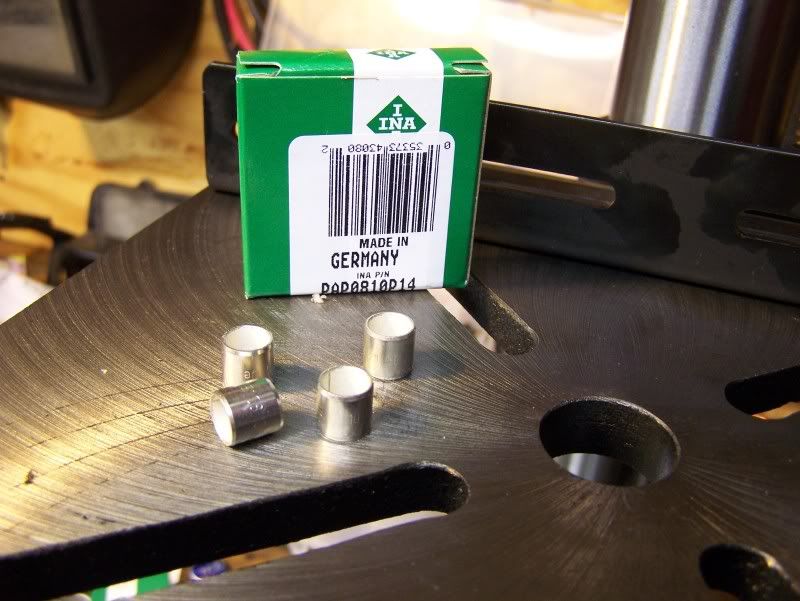
First, we start off with high-quality German bronze bushings manufactured inside in steel casings. These are impregnated with PTFE Teflon for maximum lubrication. These bushings should last for our generation, and many more after that. These are super beefy.

Image

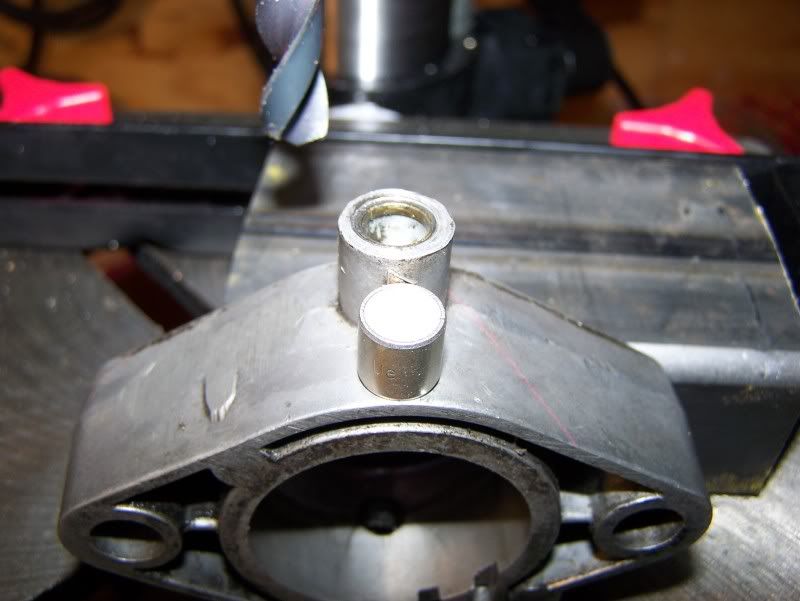
Check one out against the stock bushing still inside the carb. Look how thin and skimpy that little dude is compared to these. Like I said... You won't wear these bad boys out! They're a little expensive, but well worth it.
Image

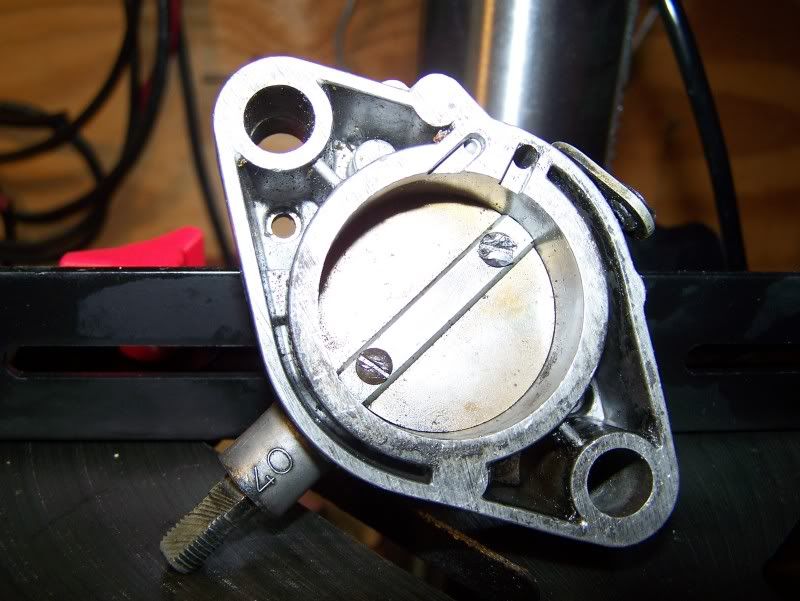
Next, we see that if you try to get the screws out of these butterfly valves, they usually do this. They get all chewed up. They peen the back of these when they put them in so you don't suck one down in your intake system. Not a bad idea. We'll return to that thought later.
Image

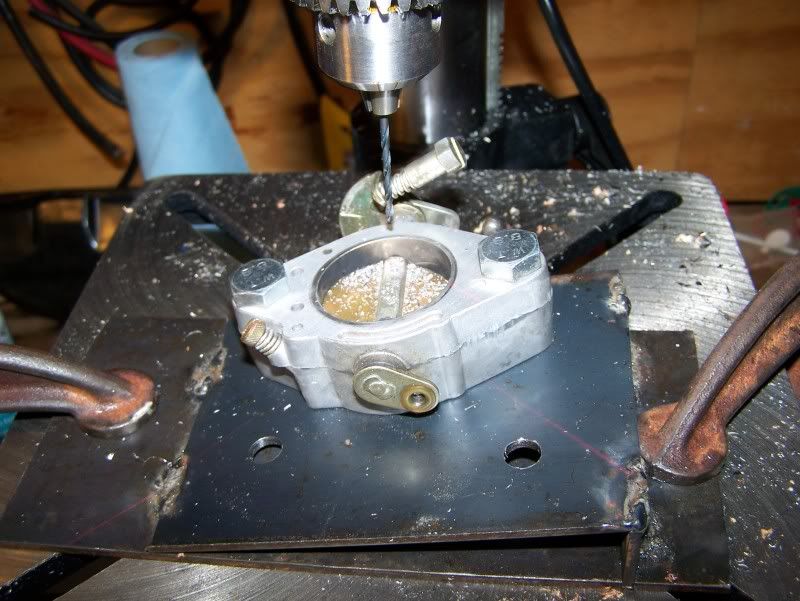
So what do you do? You drill them out. Better have some extras on hand. They'll need to be replaced, too. Also... I made a jig to hold the throttle body at he exact angle to facilitate drilling a straight hole through the retainer screw.
Image

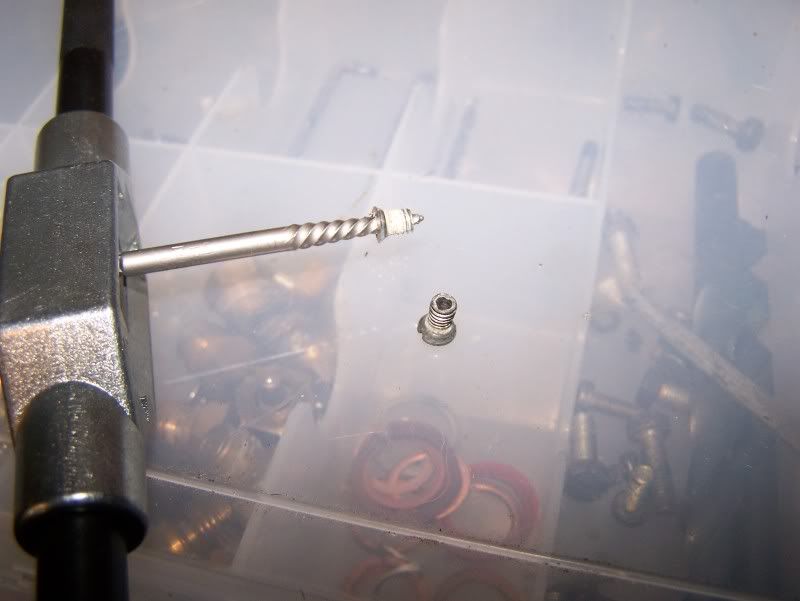
When you drill the screws out, you'll need to probably remove the threaded middle with an ez-out.
Image

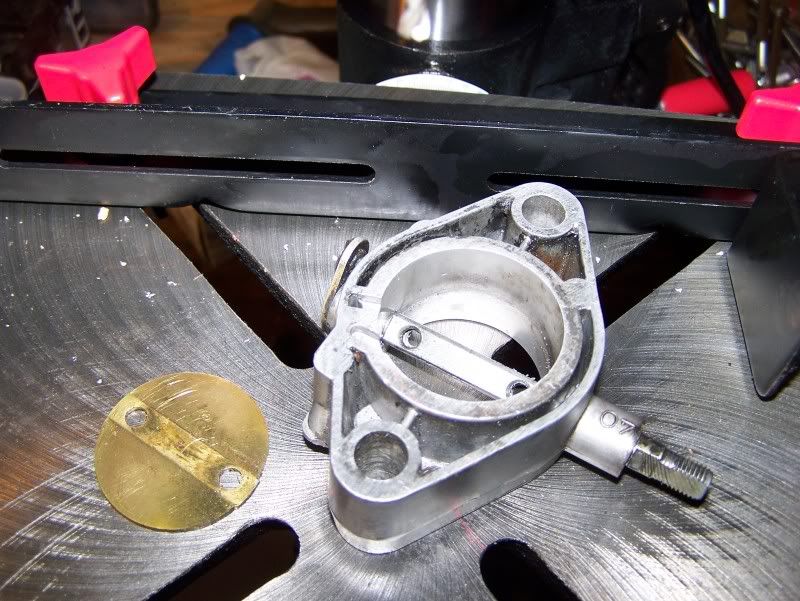
You might also need to chase the threads, so make sure you have a 4mm x 0.7mm tap handy Then, remove the throttle plate (butterfly). Remove the linkage arm and rotating stopper assembly and pull out the rod that goes through the throttle body.
Image

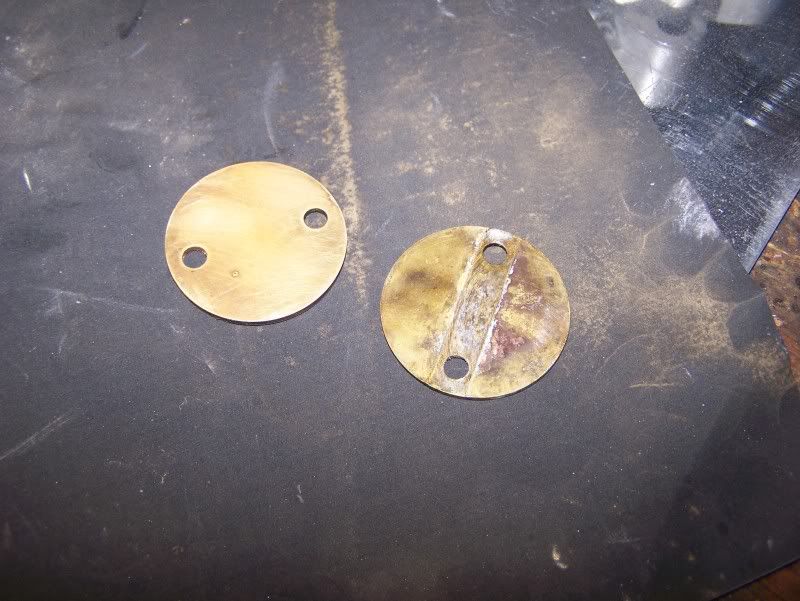
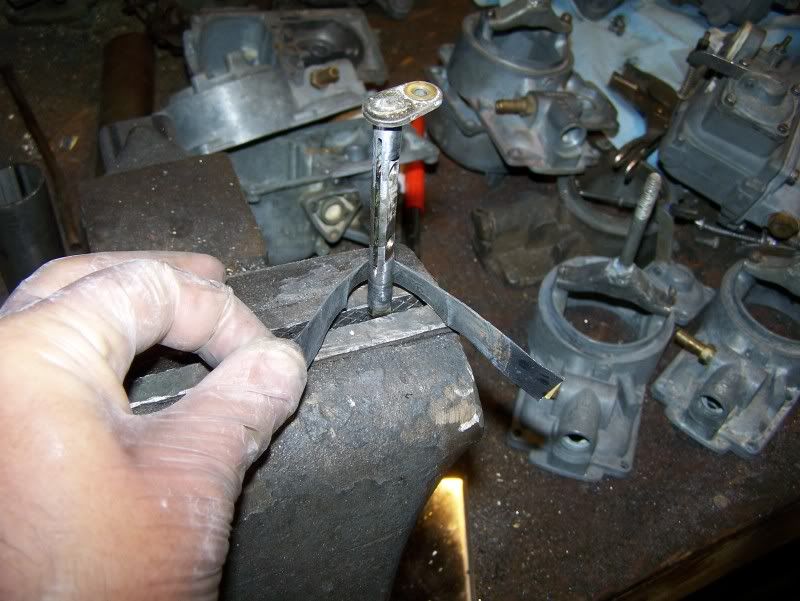
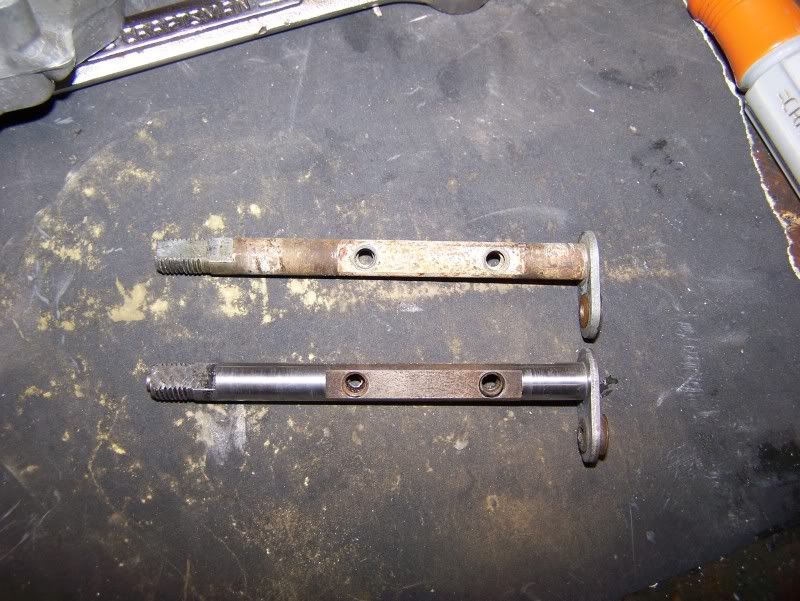
After removing the throttle body rod, I put it in a vise and polish the shaft with strips of very fine sandpaper. I also clean the butterfly. It just looks nicer that way.
Image

Here are a couple "BEFORE" and "AFTER" shots:
Image

Image

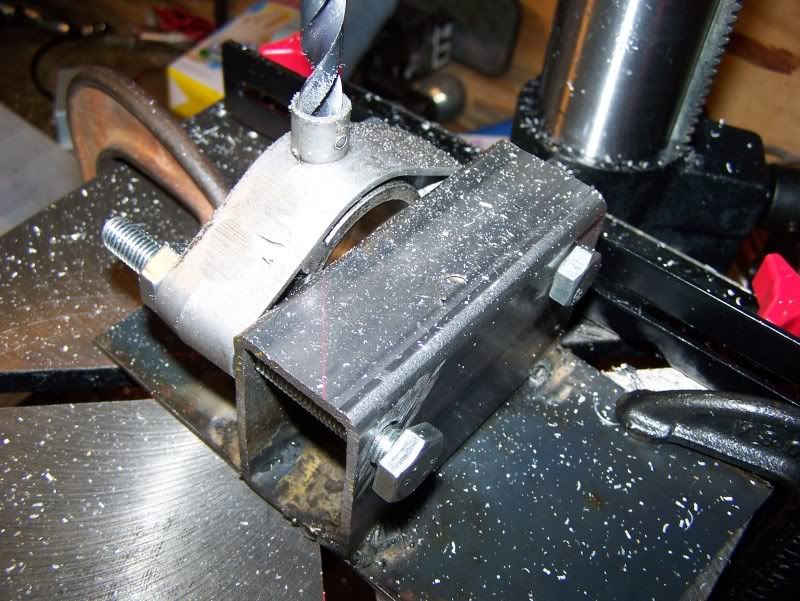
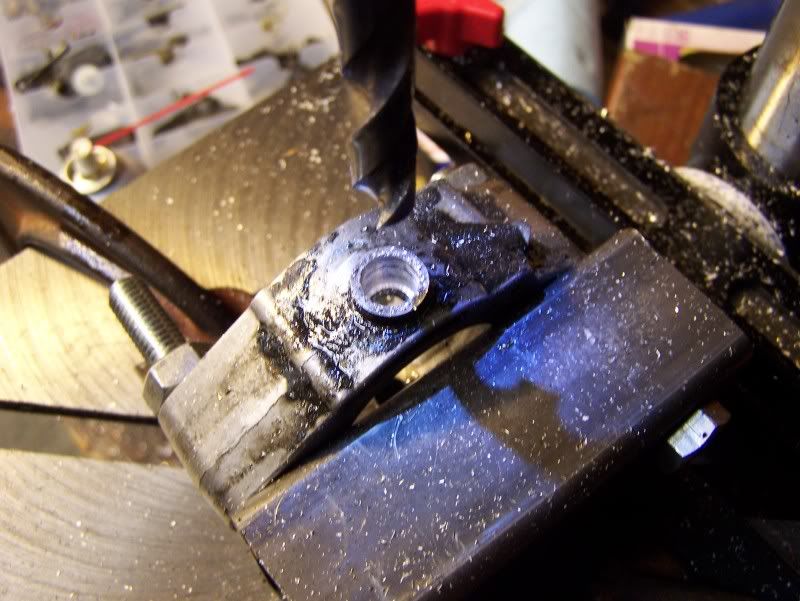
I made another jig to make the next part easy and keep the holes straight. Drill a hole in each side of the throttle body to fit the bushing. In this case, I use a 10mm diameter OD bearing (or bushing, depending on who you ask). The hole is 9.7mm deep to accommodate the bushing size.
Image

Be careful! It's super easy to drill all the way through. Holes are much harder to "undrill", I've found.
Image

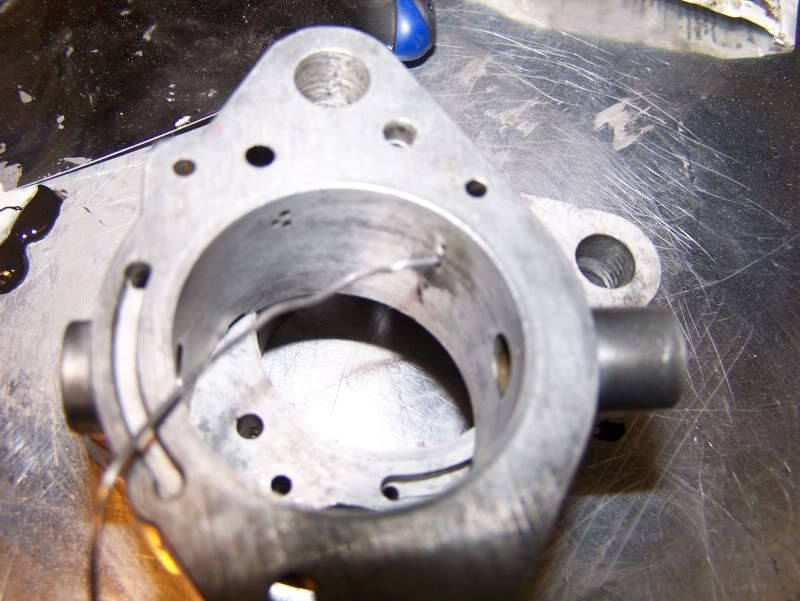
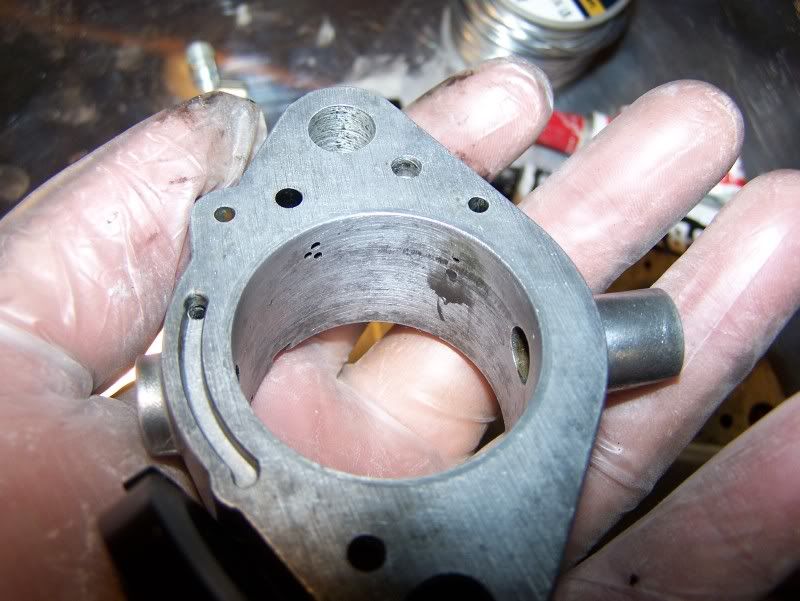
Tap your bushings in (or press, as necessary). I'm also using a little JB Weld on mine to keep them from spinning when they aluminum heats up. If I'm going to be modifying the carb for vacuum advance, I cut a small piece of .004" aluminum wire, coat it in JB weld, and fill the little hole in the throttle body as shown. Don't fill the wrong hole or your throttle body will be instant junk! This creates the proper vacuum signal for the VW distributors when adding the port for the advance on the case of the carb. The carb was pre-designed like this, but never imported into the USA with this factory option.
Image

After 24 hours, I return and sand the filler smooth.
Image

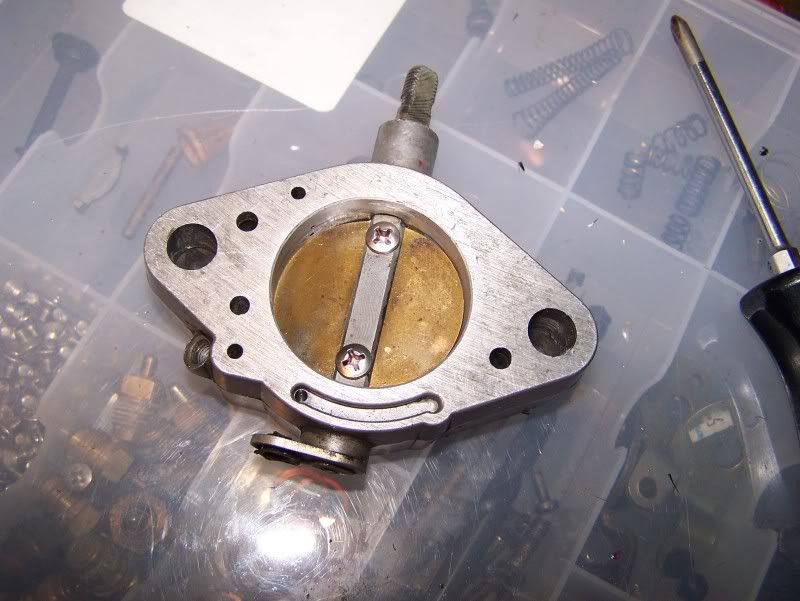
Reassemble very carefully, especially when sliding the throttle plate back inside the holder. Make sure its orientation is correct, as it sits very tightly inside the body when the butterfly valve is closed. Install your new screws and tighten them only when it seats right, checking, and double-checking everything as it opens and closes.
Image

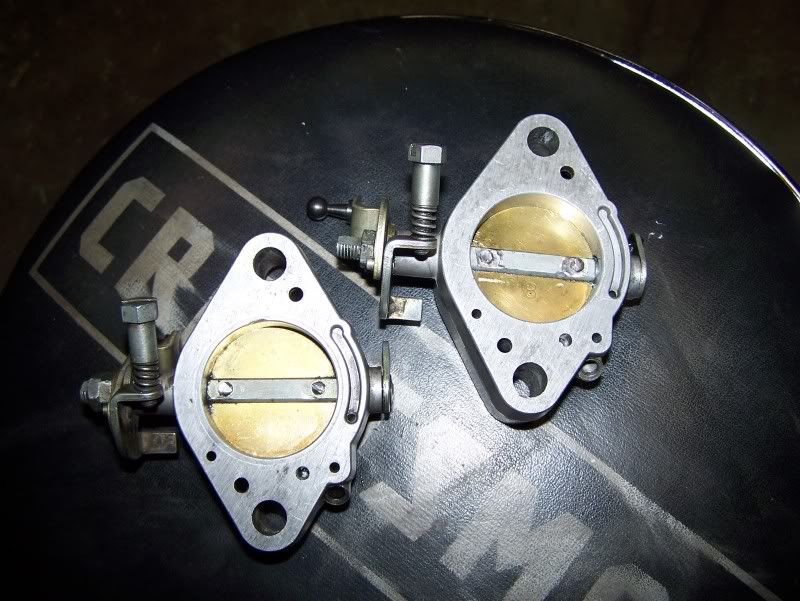
When everything's right peen the back of the screw. I also use Loctite on mine. Assemble the linkage connecting arms as needed. Remember: Stock ones have a left and right. The "Outie" is for the driver's side, and the "Innie" is for the passenger's side. Scat linkage has the ball drilled out and both offsets point the same way. The offset points out. I Loctite mine on, as well as re-bending the little thin washer.
Image


Voila, you're done!
Last edited by 57baja on Sun Feb 28, 2010 1:48 am, edited 3 times in total.
User avatar
fusername
Posts: 6806
Joined: Sun Jan 28, 2007 11:26 am

Re: HOW TO: Re-bushing Kadron Throttle Bodies

Post by fusername »

I ahve been wanting to tool up for this for ages. now that you corned the market I can finally talk myself out of it.
give a man a watch and he'll allways know what time it is. give him two and he can never be sure again.

Things are rarely just crazy enough to work, but they're frequently just crazy enough to fail hilariously.
User avatar
Leatherneck
Moderator
Posts: 17104
Joined: Sat Jul 01, 2006 6:47 pm

Re: HOW TO: Re-bushing Kadron Throttle Bodies

Post by Leatherneck »

57Baja thanks for posting that " How To" super cool post.. Hopefully some of the Kad owners will give you some business from this.

Will add it to the stickies too.
User avatar
fusername
Posts: 6806
Joined: Sun Jan 28, 2007 11:26 am

Re: HOW TO: Re-bushing Kadron Throttle Bodies

Post by fusername »

also: lazers. this forum needs more lasers, thank you for that!
give a man a watch and he'll allways know what time it is. give him two and he can never be sure again.

Things are rarely just crazy enough to work, but they're frequently just crazy enough to fail hilariously.
User avatar
57baja
Posts: 286
Joined: Thu Jun 05, 2008 9:48 pm

Re: HOW TO: Re-bushing Kadron Throttle Bodies

Post by 57baja »

Thanks guys.


LMAO... "lazers". Hope it helps someone some day.
User avatar
doc
Site Admin
Posts: 3589
Joined: Thu Mar 31, 2005 2:38 pm

Re: HOW TO: Re-bushing Kadron Throttle Bodies

Post by doc »

Great write up and pics!! 8) Thanks.

doc
winifredevw
Posts: 1574
Joined: Sun Jan 07, 2007 7:08 pm

Re: HOW TO: Re-bushing Kadron Throttle Bodies

Post by winifredevw »

57baja wrote:Thanks guys.


LMAO... "lazers". Hope it helps someone some day.
Hopefully it helps to show that carburation isn't "Black magic". Thanks for sharing your hard earned knowledge
arizonian
Posts: 55
Joined: Sat Oct 03, 2009 8:42 pm

Re: HOW TO: Re-bushing Kadron Throttle Bodies

Post by arizonian »

You can buy or grind drill bits that are meant for soft material. When drilling bronze, copper, aluminum or anything soft, the risk in using a "standard" 118 degree bit is that the material will "pull" the bit quicker and deeper than intended. A shallower bit such as 135 degree is best for aluminum.

Check out the link to the MSC catalog.

http://www1.mscdirect.com/Aircraft-Dril ... 00601.HTML

Bill in sunny Tucson
User avatar
fusername
Posts: 6806
Joined: Sun Jan 28, 2007 11:26 am

Re: HOW TO: Re-bushing Kadron Throttle Bodies

Post by fusername »

that explains what happened when I was drilling and tapping my engine block for galley plugs. snapped two and bent one 9/16 drill bits drilling 9 holes. Also hurt my wrist for about 2 weeks. Maybe its time to invest in one of those bit sharpening tools so I can cut my own head angles. The bit would cahtter and suddenly GRAB, and spin the whole engine block, or after I started holding the block tighter, it would spin me like a balarina. I do not reccomend a big powerfull drill :shock:
give a man a watch and he'll allways know what time it is. give him two and he can never be sure again.

Things are rarely just crazy enough to work, but they're frequently just crazy enough to fail hilariously.
arizonian
Posts: 55
Joined: Sat Oct 03, 2009 8:42 pm

Re: HOW TO: Re-bushing Kadron Throttle Bodies

Post by arizonian »

Silly wabbit. That's what a drill press is for. And clamps, tie down bolts, etc.

Bill in sunny Tucson
User avatar
fusername
Posts: 6806
Joined: Sun Jan 28, 2007 11:26 am

Re: HOW TO: Re-bushing Kadron Throttle Bodies

Post by fusername »

man if I had a drill press I could fit an engine block under, i'd be a happy fabricator. I'd put it right next to my band saw
give a man a watch and he'll allways know what time it is. give him two and he can never be sure again.

Things are rarely just crazy enough to work, but they're frequently just crazy enough to fail hilariously.
Clonebug
Posts: 4763
Joined: Thu Feb 15, 2007 9:28 pm

Re: HOW TO: Re-bushing Kadron Throttle Bodies

Post by Clonebug »

Hey 57Baja,

Are you still rebushing the Kadrons??

If so could you pm me??

I would like to get a set done..

Clonebug
User avatar
Skidmark
Posts: 3509
Joined: Mon Aug 28, 2006 7:19 pm

Re: HOW TO: Re-bushing Kadron Throttle Bodies

Post by Skidmark »

He is running the Kaddie Shack now... his side business rebuilding Kadrons. You can get a hold of him on the SoCal Bajas site as well.
"Your car sounds angry, and it wants to go fast all the time..."
(quote from my daughter, after driving my car)

It's not complicated, it's just expensive...
Clonebug
Posts: 4763
Joined: Thu Feb 15, 2007 9:28 pm

Re: HOW TO: Re-bushing Kadron Throttle Bodies

Post by Clonebug »

Thanks Skid,

I saw that he hasn't posted in a while and he didn't reply to my PM.

I will try him there..

thanks again

Clonebug
Post Reply