You're welcome Lee. I have LOTS more to say about it. Not sure I will get it all out tho.
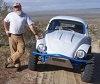
I'm about 99.9999987% sure that white buggy has a cage that goes down to the floor at the a-pillars. It is NOT a "windshield frame".
I repeat what I said before about your A-pillar NOT having to bend to vertical at the dash top. A straight line angling like that upper part of the cage would land right at the band in the outboard side of the pan. As I said before, you can bolt the cage uprights, a-pillar and b-pillar, at the base, to the inside of the body lift. It could pass right by that inner body structure cowl brace box. You could make 'L' feet to land on the floor as well as tying to the side of the lift. It could be a 'Z'. It seems that you mentioned something of the sort a while back in our PM discussions.
You could even relieve the bottom of the pillar legs to reduce invasion of interior space. Though it should not be a problem. OTOH, KISS.
Ol'fogasaurus black buggy
-
dustymojave
- Posts: 2312
- Joined: Mon Dec 01, 2008 9:08 pm
Re: Ol'fogasaurus black buggy
Richard
Lake LA, Mojave Desert, SoCal
Speed Kills! but then...So does OLD AGE!!
Tech Inspection: SCCA / SCORE / HDRA / ARVRA / A.R.T.S. OffRoad Race Tech - MDR, MORE, Glen Helen BajaCup
Retired Fabricator
'58 Baja with 955K Miles and counting
Lake LA, Mojave Desert, SoCal
Speed Kills! but then...So does OLD AGE!!
Tech Inspection: SCCA / SCORE / HDRA / ARVRA / A.R.T.S. OffRoad Race Tech - MDR, MORE, Glen Helen BajaCup
Retired Fabricator
'58 Baja with 955K Miles and counting
-
dustymojave
- Posts: 2312
- Joined: Mon Dec 01, 2008 9:08 pm
Re: Ol'fogasaurus black buggy
How about this Lee. Cross section of the A-pillar base. Thin black is the pan. Blue is a base plate 'Z'-Section. Red is body shell. Gray for body lift and roll bar tube. Brown for bolts.
You do not have the required permissions to view the files attached to this post.
Richard
Lake LA, Mojave Desert, SoCal
Speed Kills! but then...So does OLD AGE!!
Tech Inspection: SCCA / SCORE / HDRA / ARVRA / A.R.T.S. OffRoad Race Tech - MDR, MORE, Glen Helen BajaCup
Retired Fabricator
'58 Baja with 955K Miles and counting
Lake LA, Mojave Desert, SoCal
Speed Kills! but then...So does OLD AGE!!
Tech Inspection: SCCA / SCORE / HDRA / ARVRA / A.R.T.S. OffRoad Race Tech - MDR, MORE, Glen Helen BajaCup
Retired Fabricator
'58 Baja with 955K Miles and counting
-
chuckput

- Posts: 441
- Joined: Thu Sep 05, 2013 8:01 pm
Re: Ol'fogasaurus black buggy
I'm not a fabricator and you and Dusty have a lot more knowledge and experience in this area than I will ever have, but looking at you excellent drawing above I was wondering about your horizontal bolt. Would it be better to have it pass all the way through the roll bar tube with a "sleeve" welded in for the bolt to pass through?
-
Ol'fogasaurus
- Posts: 17756
- Joined: Mon Nov 13, 2006 10:17 pm
Re: Ol'fogasaurus black buggy
Sorry about getting on line so late. We just arrived on the Oregon coast after three days of cleaning out a house after my wife's brother passed away. We got a lot of cleaning out done but are only part way done. One pickup load of books to the library for them to sell and 4 pickup loads (were talking about banana boxes mostly stacked a couple high in many cases) to Goodwill. That doesn't count on the throwaway and big weights of recycle. My wife and I are beat!!!!!!!!!!! A 4 hour drive through heavy rain most of the way down from just east of Portland Oregon,dustymojave wrote: ↑Sun Jan 21, 2018 12:27 am How about this Lee. Cross section of the A-pillar base. Thin black is the pan. Blue is a base plate 'Z'-Section. Red is body shell. Gray for body lift and roll bar tube. Brown for bolts.
RollCageBase_01.jpg
Dusty, that is about what I was talking about only the bottom bolt(s) would face down. Kind of a rule in engineering, aircraft and some racing assn. is that the nut be on the bottom. That way the bolt stays in place/inside and where it can/could offer some help; only the nut and washer are lost.
Chuckput, there would be a horizontal flange that the cage would be welded to then a couple bolts from the side through the body lift might work well. Passing the bolt through a tube is not a good idea. Mainly, the contact area of the nut or bolt head would be minimal. Also think of a straight vertical line, the dia. of the underside of the bolt head, on the outside of the tube as being the only contact area of either the nut or the head of the bolt plus either would be a obstacle in the passenger compt. so that someone could get scratched up on. Done way too many of layouts like this over the years: good job Dusty!
Been too busy to think much about this.
Lee
I hope this makes sense as I am very tired!
-
Ol'fogasaurus
- Posts: 17756
- Joined: Mon Nov 13, 2006 10:17 pm
Re: Ol'fogasaurus black buggy
That bolt that looks like it goes into the cage tube would have to be two bolts to hold on a strap around the tube kind of like a the down pipe on rain gutters would have. That would make the body lift to be a very low, but usable support like the second horizontal tube on a rail would be. There might be either a doubler on the outside of the body lift or "crush sleeves" added to keep the .095 wall from pulling in on a hard roll; not sure about an "endo".
Without a body with a roof like a Baja would have a glass bodied car has very little pan support so it needs all it can get.
The pan gasket is another thing to think about as it does change the height of things.
Lotsa things to think about. Still pretty tired.
Lee
Without a body with a roof like a Baja would have a glass bodied car has very little pan support so it needs all it can get.
The pan gasket is another thing to think about as it does change the height of things.
Lotsa things to think about. Still pretty tired.
Lee
-
dustymojave
- Posts: 2312
- Joined: Mon Dec 01, 2008 9:08 pm
Re: Ol'fogasaurus black buggy
Just in case that link to that image doesn't work:Cross section of the A-pillar base. Thin black is the pan. Blue is a base plate 'Z'-Section. Red is body shell. Gray for body lift and roll bar tube. Brown for bolts.
RollCageBase_01.jpg
ABSOLUTELY!! Sleeves through the roll cage a and b-pillars would be good. And so would sleeves through the body lift tube. And I think Lee was missing the way you thought of Chuck. I'm actually applying that method to a Baja Bug I'm working on right now. In consideration of Lee's fabricating skills, that's a tall order. I consider it easier and more practical to weld the tube to the face and bottom flange of the 'Z' plate. The 'Z' plate itself could be made of 3 flat plates welded at the "bends". That still leaves the bolt holes through the lift tube. But I think those would have to just get a large "washer" plate on the outboard side of the lateral bolt holes. They could be round, square, diamond or other shapes. Could be store-bought round washers, cut from flat strap stock, or...???? I suggest a section of 2.5" x 3/16" strap to span 2 bolts that are on either side of the vertical cage tube, cut at 45s to taper to the center into a lengthened diamond. I would also suggest brazing or silver-soldering the "washers" to the lift tube to keep out salty beach water and other moisture.Chuckput wrote:
looking at you excellent drawing above I was wondering about your horizontal bolt. Would it be better to have it pass all the way through the roll bar tube with a "sleeve" welded in for the bolt to pass through?
Oh...and Chuck, thanks for the comment on my quick sketch, but I used to do far better with CAD software until Microsoft sent a virus to wipe my hard drive under the pretense of "ensuring that nobody is pirating their software". The virus was named "Windows Genuine Advantage" and it gave me 30 seconds to install my genuine Windows disc that I never had into a computer that that my former employer bought with Windows factory installed in it. Bill Gates did not become the wealthiest man in the world by operating entirely in a fair manner. Is one maybe case of piracy (that if it WAS piracy, I didn't know it, nor did my employer) any more wrong than a case of counter-piracy piracy?
You do not have the required permissions to view the files attached to this post.
Richard
Lake LA, Mojave Desert, SoCal
Speed Kills! but then...So does OLD AGE!!
Tech Inspection: SCCA / SCORE / HDRA / ARVRA / A.R.T.S. OffRoad Race Tech - MDR, MORE, Glen Helen BajaCup
Retired Fabricator
'58 Baja with 955K Miles and counting
Lake LA, Mojave Desert, SoCal
Speed Kills! but then...So does OLD AGE!!
Tech Inspection: SCCA / SCORE / HDRA / ARVRA / A.R.T.S. OffRoad Race Tech - MDR, MORE, Glen Helen BajaCup
Retired Fabricator
'58 Baja with 955K Miles and counting
-
dustymojave
- Posts: 2312
- Joined: Mon Dec 01, 2008 9:08 pm
Re: Ol'fogasaurus black buggy
Note Lee, that the bolt end hanging down is more subject to damage than the bolt head in the often damaged sheet metal channel of the pan edge. But I DO agree that in general, a bolt on a vehicle should have the head up for the reason you state. I learned long ago that bolts on the bottom of an offroad vehicle are highly subject to damage from passing objects. Skid plates, belly pans, etc. are far better off installed head down.
Concern about bolt ends sticking into the passenger compartment WAS a consideration in NOT choosing to put the bolts through the cage uprights, along with my previously stated concern about your welding the bolt sleeves into the cage tubes.
Silicon sealant works quite well for pan seal above and below the lift tubes, without substantially changing assembly height less seal. Especially for a body that is of questionable shape in the front corners.
Richard
Lake LA, Mojave Desert, SoCal
Speed Kills! but then...So does OLD AGE!!
Tech Inspection: SCCA / SCORE / HDRA / ARVRA / A.R.T.S. OffRoad Race Tech - MDR, MORE, Glen Helen BajaCup
Retired Fabricator
'58 Baja with 955K Miles and counting
Lake LA, Mojave Desert, SoCal
Speed Kills! but then...So does OLD AGE!!
Tech Inspection: SCCA / SCORE / HDRA / ARVRA / A.R.T.S. OffRoad Race Tech - MDR, MORE, Glen Helen BajaCup
Retired Fabricator
'58 Baja with 955K Miles and counting
-
Ol'fogasaurus
- Posts: 17756
- Joined: Mon Nov 13, 2006 10:17 pm
Re: Ol'fogasaurus black buggy
"In consideration of Lee's fabricating skills, that's a tall order"dustymojave wrote: ↑Mon Jan 22, 2018 2:56 pmJust in case that link to that image doesn't work:Cross section of the A-pillar base. Thin black is the pan. Blue is a base plate 'Z'-Section. Red is body shell. Gray for body lift and roll bar tube. Brown for bolts.
RollCageBase_01.jpg
RollCageBase_01.jpg
ABSOLUTELY!! Sleeves through the roll cage a and b-pillars would be good. And so would sleeves through the body lift tube. And I think Lee was missing the way you thought of Chuck. I'm actually applying that method to a Baja Bug I'm working on right now. In consideration of Lee's fabricating skills, that's a tall order. I consider it easier and more practical to weld the tube to the face and bottom flange of the 'Z' plate. The 'Z' plate itself could be made of 3 flat plates welded at the "bends". That still leaves the bolt holes through the lift tube. But I think those would have to just get a large "washer" plate on the outboard side of the lateral bolt holes. They could be round, square, diamond or other shapes. Could be store-bought round washers, cut from flat strap stock, or...???? I suggest a section of 2.5" x 3/16" strap to span 2 bolts that are on either side of the vertical cage tube, cut at 45s to taper to the center into a lengthened diamond. I would also suggest brazing or silver-soldering the "washers" to the lift tube to keep out salty beach water and other moisture.Chuckput wrote:
looking at you excellent drawing above I was wondering about your horizontal bolt. Would it be better to have it pass all the way through the roll bar tube with a "sleeve" welded in for the bolt to pass through?
I was thinking of using angle or tubes cut and joined.
"Crush sleeves" I have done before. Normally I would advise you to look at the 1" square tube going up the length of the body mount tube (you have to go way back on my string to find those pictures which Photobucket is denying the posting of them. Since I am not home on my PC it will be about a week away before I can re-post them. It was based on advice from Hotrod surplus.
The very small contact area of the tangency of the head/washer/nut of the bolt against the arc of a tube is what I was talking about. I was also concerned about my ankles and legs in the forward A-pillar on my clutch foot. Remember, it is going to be a very tight fit when getting into seats on glass buggies with cages.
The problem of the welds when forming the "Z" from-plates that would the move the tubes on the A-pillar in toward the passenger compt.
Lee
-
Ol'fogasaurus
- Posts: 17756
- Joined: Mon Nov 13, 2006 10:17 pm
Re: Ol'fogasaurus black buggy
dustymojave wrote: ↑Mon Jan 22, 2018 3:20 pm Note Lee, that the bolt end hanging down is more subject to damage than the bolt head in the often damaged sheet metal channel of the pan edge. But I DO agree that in general, a bolt on a vehicle should have the head up for the reason you state. I learned long ago that bolts on the bottom of an offroad vehicle are highly subject to damage from passing objects. Skid plates, belly pans, etc. are far better off installed head down. Yes about the down bolts and the digging in. There is another way which could be made to work but not on this one as the area has already been taken. Talk about it later tonight.
Concern about bolt ends sticking into the passenger compartment WAS a consideration in NOT choosing to put the bolts through the cage uprights, along with my previously stated concern about your welding the bolt sleeves into the cage tubes. As I said, I was very tired and now think that a U-clamp of some size/shape might work.
Silicon sealant works quite well for pan seal above and below the lift tubes, without substantially changing assembly height less seal. Especially for a body that is of questionable shape in the front corners. I was thinking about this myself!
-
dustymojave
- Posts: 2312
- Joined: Mon Dec 01, 2008 9:08 pm
Re: Ol'fogasaurus black buggy
I wasn't criticizing you Lee, I've noted your apologies for lack of welding skills. I have seen that you are capable of SOME welding Lee. But I don't expect EVERYONE to be a top-notch welder.
Welding up a Zee plate would be relatively EZ though. Decades ago, when I went to welding school, edge welding 2 plates at 90° with a gas torch and no filler rod was the VERY 1st project. It can easily come out looking like a gorgeous weld by an expert. You can do it with a MIG, a flux-core, a gas welder, or even a stick welder with small rod. The cage uprights can be welded directly to the 'Z' plates, around the base of the tube against the bottom plate, and the sides of the tubes to the vertical part of the 'Z'.
You keep expressing concern about the narrow space in the buggy for legs. But you've been driving your blue buggy with the a-pillar of the cage coming down in the same place for years. Sure you do NOT want bolt ends poking and scraping your legs, but the smooth bar should be no problem, even though your pedal assembly we recently talked about DOES move the clutch pedal to the left due to the brake pedal arm being bent to the right.
A u-clamp of strap stock around the leg of the roll cage tube with bolt flanges at the ends of the 'U' would work. But the 'u' should still be welded to the tube. You COULD even weld the roll cage tube to the body lift tube. That would render the body trapped though, and IIRC, you do not want that.
Richard
Lake LA, Mojave Desert, SoCal
Speed Kills! but then...So does OLD AGE!!
Tech Inspection: SCCA / SCORE / HDRA / ARVRA / A.R.T.S. OffRoad Race Tech - MDR, MORE, Glen Helen BajaCup
Retired Fabricator
'58 Baja with 955K Miles and counting
Lake LA, Mojave Desert, SoCal
Speed Kills! but then...So does OLD AGE!!
Tech Inspection: SCCA / SCORE / HDRA / ARVRA / A.R.T.S. OffRoad Race Tech - MDR, MORE, Glen Helen BajaCup
Retired Fabricator
'58 Baja with 955K Miles and counting
-
Ol'fogasaurus
- Posts: 17756
- Joined: Mon Nov 13, 2006 10:17 pm
Re: Ol'fogasaurus black buggy
I didn't learn to weld until several years after I retired so I am not anywhere near an expert welder.
Instead of a "U-bolt" I was thinking of forming a thicker metal strap/band then bolted to the body lift but up higher than in the middle of the lift. If I remember, the 1 X 3 X 0.095 tube has the seam in the middle so the bolts going through higher might be better for several reasons including not putting a load on the seam. That way, albeit still low just a bit higher than the middle of the tube, could add some additional support to the tube.
I put the seam on the inside and I think the loading is probably going to be on the outboard surface anyway.
Even though the three tubes going from the rear hoop to the front hoop are bend for egress. My seats in the blue buggy sit 1/2" off the pan and the cage bars are 4" above my head. I have to bend into a "V" to get a leg into the buggy then slide the torso over the sill in order to slide in. My knees have to be maneuvered to miss the dash then the trailing leg can come in then I can drop into the seat and get goosed by the latch on the harness. Not the same entrance as with a Baja. The black buggy will be similar situation for inside access but the seat can be slid back a bit but I think it will be only a bit more help and make it easier for my #10 Brogans to get in (used as a joke: https://en.wikipedia.org/wiki/Brogan_(shoes)). The blue buggy is a set location.
The body flange on the black buggy does not roll outboard but inboard so welding it to the body lift would put the cage against the body. I would prefer to remove the body or the cage but so far it isn't looking so good. One of the reasons for not getting too far ahead as I am still looking for ways and other problems that I see might come up.
When I get home I will post the pictures of my tootsies on the pedals. With the body on there doesn't seem to be a problem for myself or anyone else I have used for seating locations. Also I will post here some of the other pictures I sent you as it might help others with what we are talking about.
-
Ol'fogasaurus
- Posts: 17756
- Joined: Mon Nov 13, 2006 10:17 pm
Re: Ol'fogasaurus black buggy
Dusty, if I was to do the underbody support in the body mount tunnel again I would do it a bit differently.
This is the first pan half change I made to the black buggy pan and they were the lighter weight pan halves which I soon removed; just too flimsy for off-road use. The arrow points to the one body mount channel which is where, after building a body lift out of 1 X 3 X 0.095 wall seamed tube I decided to add something in the channel to add some more strength to the pan. What I used was a length of 1" square tube (I think it was 0.095 but I am not sure now) kerfed and welded to shape. The holes in the tubes for the bolts to go through I put crush sleeves in per the suggestion of hotrod surplus: a good idea!
When mounting the seats in the buggy when the body was still on both I (several times) and two other people climbed inside of the buggy to do a fit check for minimum and maximum fore and aft seat locatons and the seats were slid around while doing it so there was jostling going on. After finalizing the location of the seat mounts I happened to be under the pan doing something when I noticed the pan and the body lift now had a slight gap between them. The 1" tube, while strong, had slightly bent in-between the to bends in the pan (the door bends).
If I were to do this again I would not use 1" square tube again but I would gravitate more to 1 X 2 X 0.095 tube. I welded the 1" square tube to the pan but I am not sure that is necessary now with the reason being the longer, hence stronger, 2" sides.
Longer bolts would be used to clamp the body lift, pan and now a kind of rock slider together and the bolts could be mounted from underneath assuming you use castellated nuts and either wired them together or castellated the bolt and use cotter pins to keep the nuts from loosening up. The reason I would not recommend self locking nuts as there is a use and time limit on them. Most of the nylon style of locking bolts have a minimum cycle (on and off) of something like 7 to 10 cycles before they should be replaced. The locking nuts where the nut is actually oval'd has a time line on them; and example of that would be the split washer where you pull one off that has been clamped for many years and the washer is now flat.
If you were truly using the tube as a rock slider and didn't want to damage or remove/griind the heads of the bolts sliding over things then I would modify the tube to have the head of the bolt inside and welded into place. I would then mount the slider in the same way as above. A lot of extra work but it might be worth it.
For me, in the sand it is not as much of a problem.
An opinion: for what it is worth.
Lee
You do not have the required permissions to view the files attached to this post.
-
Ol'fogasaurus
- Posts: 17756
- Joined: Mon Nov 13, 2006 10:17 pm
Re: Ol'fogasaurus black buggy
(Addendum:) If one wanted to add sliders with the nuts on the bolts inside of the body they would have to cut holes in the 1 X 2 to get the bolts to face up and the bolt heads protected. The heads of the bolts would then be welded in place using a nut and tube to ensure that the bolt was facing straight up then the sides would be closed out again. A lot of work but, depending, it might be worth it.
-
dustymojave
- Posts: 2312
- Joined: Mon Dec 01, 2008 9:08 pm
Re: Ol'fogasaurus black buggy
You could also bore socket size holes through the bottom of the lower tube with bolt size holes in the top wall, so only the upper tube wall is actually clamped. The pan for my Glitterbug fiberglass buggy has 1" square x .095 tube set into the body mount bolt channel. It will get 3" tubular body lift. My Glitterbug pan has had the reinforcing tubes for decades without a lift. With a lift tube, there is really no need for an additional re-inforcing tube in the body mount bolt channel too. Convertible Bugs came with a stiffener rail on the bottom of the pan just inboard of the body mount channel.
Sliders are NOT needed on sand dune cars.
And those "too flimsy" replacement pan halves would have worked JUST FINE on your black buggy once bolted to the body, especially with the body lift tubes. If you were building a retro 60s pan rail...then maybe you would have needed the thicker pan halves.
Sliders are NOT needed on sand dune cars.
And those "too flimsy" replacement pan halves would have worked JUST FINE on your black buggy once bolted to the body, especially with the body lift tubes. If you were building a retro 60s pan rail...then maybe you would have needed the thicker pan halves.
Richard
Lake LA, Mojave Desert, SoCal
Speed Kills! but then...So does OLD AGE!!
Tech Inspection: SCCA / SCORE / HDRA / ARVRA / A.R.T.S. OffRoad Race Tech - MDR, MORE, Glen Helen BajaCup
Retired Fabricator
'58 Baja with 955K Miles and counting
Lake LA, Mojave Desert, SoCal
Speed Kills! but then...So does OLD AGE!!
Tech Inspection: SCCA / SCORE / HDRA / ARVRA / A.R.T.S. OffRoad Race Tech - MDR, MORE, Glen Helen BajaCup
Retired Fabricator
'58 Baja with 955K Miles and counting
-
Ol'fogasaurus
- Posts: 17756
- Joined: Mon Nov 13, 2006 10:17 pm
Re: Ol'fogasaurus black buggy
Again, I look at the salt and water problems hence the more or less sealed tubing. I had welded the tube to the pan's tunnel which I probably would not do now.
At the time the picture of the cheap pan halves was taken this buggy was not to be an off-road buggy. It had a Cologne V6 tied to an 091 in it. It was also after one of those 15 - 20 foot unexpected drops I took in the blue buggy when a dune crest broke away on me and caused: damage to my back, my paddle tires (the paddle blades were cut almost to the casing by the body's fenders), after seeing some badly damaged buggies come off the dunes and hearing storied of broken back glass buggies (plus the crack in the tunnel of my blue buggy). It was taken several years before I decided to not run the body on the street and that was for many reasons not related to the sand.
There are things I do not recommend using a round tube for. They don't have the rigid strength of the rectangular tube without having to "bridge" the tube. Round tubing will rack easier than a rectangular tube but will return to shape (more or less) where a rectangular tube could collapse/fold or take a "set" when twisted past a certain point. There are advantages to both styles of tube, you just have to design to the circumstances.
I know about not needing a slider on the sand (most of the time) but there are still trees on the sand dunes here and we drive through the trails in the trees often quite quickly. I also have had to reseal the bottom of my blue buggy when the sand removes the paint on the underside of the pan.
We just got woken up by a limb off one of the 80' tall Spruce trees here landed quite heavily waking all of us here up. The wind storm coming through was just finishing when we think a mi co burst hit and broke the limb off a tree. It still dark out so we haven't had a chance to see how bit is was and if any damage was done. Luckily it did just missed the power line coming in on that end of the building. We have 3 of those large trees and there are quite a few of them in the immediate area also.
Some of the 80 footers.
You do not have the required permissions to view the files attached to this post.