I found the burning oil. Under the cylinders is a small cooling tin that for some reason has some oil dripping from it. I am not sure if it is coming from a push rod seal or possibly the valve cover seal. Anyway the oil drips right onto the exhaust causing the smell. Maybe the hard cornering is throwing more oil to the right head causing it to leak worse.
Glad it wasn't caused by excessive tire spinning!
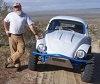
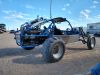
evernon's Baja Build
-
dustymojave
- Posts: 2312
- Joined: Mon Dec 01, 2008 9:08 pm
Re: evernon's Baja Build
Better pull the fan shroud off and inspect. It may have a cracked case.
Mine a couple years ago:
Oil was squirting out of the crack, even though there are no oil galleys or other pressurized oil in the area. It was dripping off the bottom edge of the case and off the middle of the cylinder fins.
Mine a couple years ago:


Oil was squirting out of the crack, even though there are no oil galleys or other pressurized oil in the area. It was dripping off the bottom edge of the case and off the middle of the cylinder fins.
Richard
Lake LA, Mojave Desert, SoCal
Speed Kills! but then...So does OLD AGE!!
Tech Inspection: SCCA / SCORE / HDRA / ARVRA / A.R.T.S. OffRoad Race Tech - MDR, MORE, Glen Helen BajaCup
Retired Fabricator
'58 Baja with 955K Miles and counting
Lake LA, Mojave Desert, SoCal
Speed Kills! but then...So does OLD AGE!!
Tech Inspection: SCCA / SCORE / HDRA / ARVRA / A.R.T.S. OffRoad Race Tech - MDR, MORE, Glen Helen BajaCup
Retired Fabricator
'58 Baja with 955K Miles and counting
-
evernon
- Posts: 304
- Joined: Wed Nov 02, 2005 7:49 pm
Re: evernon's Baja Build
580 miles & all the oil leaks have dried up. I think some of the mess was caused by a bad leak at the remote filter location when I started it for the first time. I am glad to say that the concrete is completely free of oil & the level appears to be holding steady. I was having some high rpm performance issues that I just solved. Above 2000rpm or when I would corner to the right, it would loose power. Turns out that I routed the plug wire for cyl# 1 over the top of the shroud & it was being sucked into contact with the cooling fan edge. The insulation was rubbed away & when the airflow or gravitational pull was right, it would ground out on the fan edge. Runs way better with all 4 firing. I took it for a quick jaunt down the highway for the 1st time & it is still badly in need of an alignment. If I take it to an alignment shop, are they smart enough to figure something like this out?
The next big upgrade will probably be improvement to the front suspension. The back just sucks up bumps but the front seems too firm & lacks any of the softness that the rear has. Is there a setup that fits under the hood & fenders that would be an improvement over the stock thing beam? I think I went with the stiffer option on the front Bilsteins - oops
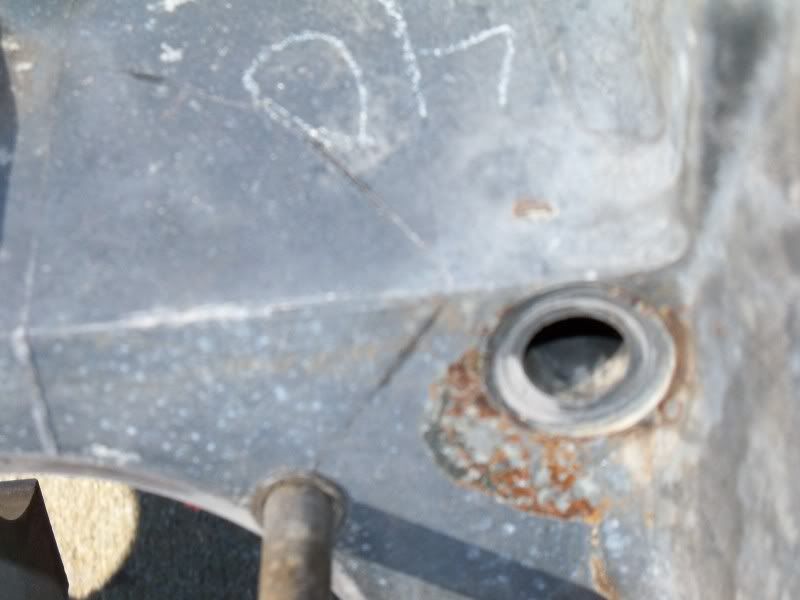
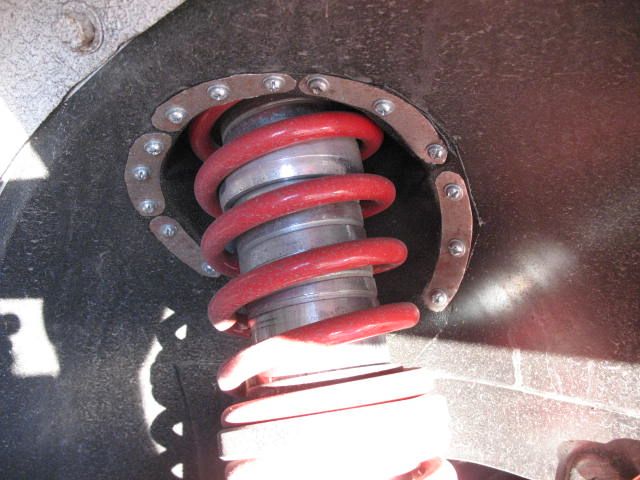
Photo shows naugahide boot around shock opening. I plugged up other holes in the back with gorilla tape and silicone.
The next big upgrade will probably be improvement to the front suspension. The back just sucks up bumps but the front seems too firm & lacks any of the softness that the rear has. Is there a setup that fits under the hood & fenders that would be an improvement over the stock thing beam? I think I went with the stiffer option on the front Bilsteins - oops
Photo shows naugahide boot around shock opening. I plugged up other holes in the back with gorilla tape and silicone.
-
Devastator
- Posts: 3493
- Joined: Tue Nov 06, 2007 6:51 am
Re: evernon's Baja Build
Gotta love the Hide of Nauga.evernon wrote:Photo shows naugahide boot around shock opening.
Devastator's Build Thread
Sandrail
2.4 liter, supercharged Chevy Ecotec
"If everything seems under control, you're just not
going fast enough."
Mario Andretti
Sandrail
2.4 liter, supercharged Chevy Ecotec
"If everything seems under control, you're just not
going fast enough."
Mario Andretti
-
bajaherbie

- Posts: 9959
- Joined: Sat Jul 15, 2006 7:07 pm
Re: evernon's Baja Build
X2
the price really went up when they got put on the endangered species list.
the price really went up when they got put on the endangered species list.
Of all the paths you take in life, make sure a few of them are dirt.
-
Piledriver

- Moderator
- Posts: 22520
- Joined: Sat Feb 16, 2002 12:01 am
Re: evernon's Baja Build
Devastator wrote:Gotta love the Hide of Nauga.evernon wrote:Photo shows naugahide boot around shock opening.
The marine grade Nauga is a really tough skinned critter, would hate to catch one by accident.
Addendum to Newtons first law:
zero vehicles on jackstands, square gets a fresh 090 and 1911, cabby gets a blower.
EZ3.6 Vanagon after that.(mounted, needs everything finished) then Creamsicle.
zero vehicles on jackstands, square gets a fresh 090 and 1911, cabby gets a blower.
EZ3.6 Vanagon after that.(mounted, needs everything finished) then Creamsicle.
-
evernon
- Posts: 304
- Joined: Wed Nov 02, 2005 7:49 pm
Re: evernon's Baja Build
So the alignment shop says that the camber is maxed out on the front beam & both tires still lean to the right. they showed me how the portion of the arms that slide inside the beam (top) were not symmetrical. The one on the left side is very cramped & the one on the right side has extra & this makes the adjusters inadequate to achieve correct camber. Has anyone seen a good post showing how a Thing beam is constructed so I can try and determine if it is possible to adjust this? On the back suspension, they were not able to adjust anything as the toe setting was already maxed out on the torsion conversion heim joint. They suggested that I needed to elongate the holes on the back plate so that the conversion plates could be mounted a little farther back enabling further forward adjustment (toe in). Guess I will drill a second set of holes behind the existing ones & grind out the middle making an inch long slot.
Seems like I am in an endless cycle of put it together, take it apart!
Seems like I am in an endless cycle of put it together, take it apart!
-
Ol'fogasaurus
- Posts: 17756
- Joined: Mon Nov 13, 2006 10:17 pm
Re: evernon's Baja Build
Be very careful with the materials edge margin when doing this. Too long and too little material on the thin side can tear/fail on you with too much loading on it.
On second thought, you probably don't need much of a slot: try to find out how much more room they need to get you where you want to go. I would mark the slot using a scribe then use a rat tail file to make the change. More control that way. You also might think about making a smaller slot in each of the two mating parts... if that is consided acceptable. Remember you have a friction/clamped together fit and two parts w/adjustments can be harder to control over one adjustable part. Just some things to think about.
Lee
-
Devastator
- Posts: 3493
- Joined: Tue Nov 06, 2007 6:51 am
Re: evernon's Baja Build
evernon wrote:Has anyone seen a good post showing how a Thing beam is constructed
I see what you did there Lee.Ol'fogasaurus wrote:Just some things to think about.
Devastator's Build Thread
Sandrail
2.4 liter, supercharged Chevy Ecotec
"If everything seems under control, you're just not
going fast enough."
Mario Andretti
Sandrail
2.4 liter, supercharged Chevy Ecotec
"If everything seems under control, you're just not
going fast enough."
Mario Andretti
-
Ol'fogasaurus
- Posts: 17756
- Joined: Mon Nov 13, 2006 10:17 pm
Re: evernon's Baja Build
Dev: 
Everon, I did a beam build using a stock beam (very similar but some of the gusseting is not there) and Thing parts; would that help?
Everon, I did a beam build using a stock beam (very similar but some of the gusseting is not there) and Thing parts; would that help?
-
evernon
- Posts: 304
- Joined: Wed Nov 02, 2005 7:49 pm
Re: evernon's Baja Build
Here are photos of the beam ends. It is obvious why everything was leaning to the right. Is there a way to re-center this?


-
Ol'fogasaurus
- Posts: 17756
- Joined: Mon Nov 13, 2006 10:17 pm
Re: evernon's Baja Build
evernon I don't see any real problems here other than the one and only Thing beam I ever saw has gussets all-over-the-place (I saw it many years ago for what it is worth) and I don't see them on yours. You can put Thing trailing arms and spindles on a stock bug beam. I started to do a string on building a BJ beam a while back and there might be some pictures still in it (see below).
FYI/FWIW: the main difference between bug and Thing, as I understand it, is that on the Thing VW fixed the problem of the lower ball-joint pulling out of the lower trailing arms during hard use; the bug BJ was pressed in from the upper surface of the trailing arm. Your BJ is pressed in from the bottom and faces down which caused the redesign on the spindle. Look at: http://www.shoptalkforums.com/viewtopic ... 4&start=60 Start at about page 5 but there might be some on page 4 too). Also, a bit down on this URL is some pix of some of the bracing on a Thing beam: http://www.shoptalkforums.com/viewtopic ... m#p1125943
Because of the redesign the spindle and the change in mounting of the lower BJ, VW also redesigned the upper BJ so that the stud part of the BJ is larger in diameter than the bugs BJ is, hence the adjuster/eccentric also has a larger hole in it and it is unique to the larger Thing upper BJ. The eccentric I have sits a bit higher off the spindle than yours does which triggered the memory. Standard VW bug ball-joints and adjusters still can be used which, because of the scarcity of the Thing adjusters, many people use the smaller bug upper BJ during the Thing spindle conversion. The stock VW upper and lower spindles also can be used for this swap; all you need is the Thing spindle.
The commercial bug BJ adjusters you can buy now days, as I was told (they do look different which is why I questioned it), is off-set reamed to accommodate lowered suspensions so the location or angle of the hole has been changed slightly to the outboard edge. Could a standard bug adjuster be reamed larger: maybe, but I was told the hole is set at a different angle; that is not a fact... just what I was told.
Lee
-
TimS

- Posts: 5723
- Joined: Fri Apr 23, 2010 10:11 pm
Re: evernon's Baja Build
I had trouble with my race car when I put new tires on it that the tires would hit the torsion bars when toed where I like it. You can get lots of tow in by rotating the arms in the springplates. Put one bolt in the springplate and then kneel down on the rear of the trailing arm before tightening it up and measuring. You'd be spurised how much toe you can get this way without moving the arms forward more.evernon wrote:So the alignment shop says that the camber is maxed out on the front beam & both tires still lean to the right. they showed me how the portion of the arms that slide inside the beam (top) were not symmetrical. The one on the left side is very cramped & the one on the right side has extra & this makes the adjusters inadequate to achieve correct camber. Has anyone seen a good post showing how a Thing beam is constructed so I can try and determine if it is possible to adjust this? On the back suspension, they were not able to adjust anything as the toe setting was already maxed out on the torsion conversion heim joint. They suggested that I needed to elongate the holes on the back plate so that the conversion plates could be mounted a little farther back enabling further forward adjustment (toe in). Guess I will drill a second set of holes behind the existing ones & grind out the middle making an inch long slot.
Seems like I am in an endless cycle of put it together, take it apart!
On both my race car and my daily driver, I've had to redo the holes in the springplate to make things work. A die grinder with on of those metal cutting raspy-type bits is handy for this, or if you have an adjustable reamer, that would probably be more ideal. Once you get the alignment where you want it, make the holes match. I've broken a few expensive drill bits attempting this.
That front end looks pretty out of wack. I'm not all that familiar with ball joint beams, but it looks like there is a piece of urethane on each side that is crushed. Would new bushings help to center things? Otherwise, does this beam have adjusters? Maybe they were installed a little off center or the grub screws are loose allowing the springs to move side to side?
Don’t ever yield your gift of dream; Your knack for gumption, too. For “It’s the crazy ones that have all the fun," if dreamers yearn to do.
-
evernon
- Posts: 304
- Joined: Wed Nov 02, 2005 7:49 pm
Re: evernon's Baja Build
So I just went and looked at the pictures on page one of this forum & it appears that the beam ends were even to begin with. The part that appears crushed is the rubber seal that is meant to keep the grease in the beam end, not a bushing. What keeps the end of the beam together (from slipping out of the end of the beam)? I understand that there is a torsion spring inside that must attach to the trailing arm somehow. Is there a chance that the whole torsion spring is sliding back & forth inside the beam moving the trailing arms out of alignment?
On the back, when I rotate the arms @ the spring plate, it also adjusts the camber so I don't see how I could adjust this to solve both problems. If I rotate the arms to get the tires vertical, they are towed in. Ill do the die grinder trick to elongate the holes a bit. I think a quarter of an inch is all that I would need to achieve the necessary adjustment on the heim. What size hardware should I be using to clamp the plates together. The alignment guy thought I should upgrade but the hardware I have now, fits the holes that were predrilled in the conversion plates. I did try & drill one of these larger and promptly ruined a bit so the conversion plate must be heat treated.
On the back, when I rotate the arms @ the spring plate, it also adjusts the camber so I don't see how I could adjust this to solve both problems. If I rotate the arms to get the tires vertical, they are towed in. Ill do the die grinder trick to elongate the holes a bit. I think a quarter of an inch is all that I would need to achieve the necessary adjustment on the heim. What size hardware should I be using to clamp the plates together. The alignment guy thought I should upgrade but the hardware I have now, fits the holes that were predrilled in the conversion plates. I did try & drill one of these larger and promptly ruined a bit so the conversion plate must be heat treated.
-
Ol'fogasaurus
- Posts: 17756
- Joined: Mon Nov 13, 2006 10:17 pm
Re: evernon's Baja Build
[/quote]Everon, in this picture it looks like the lower seal isn't there. If you can: measure the portion of the spring stack that sticks out on each end of the beam. Do not measure it from the seal but from the team itself. The measurement at each end should be the same.
Normally there is a grub screw in the middle of the beam that fits into a machined dimple in the spring stack that locks the spring stack centered in the beam.
The first question is: are you using AVIS style adjusters or Sway-a-way adjusters?
http://www.mooreparts.com/1108-AC401102A/
This is the break down of AVIS adjusters. Notice the threaded screw with the pointed end: that is the equivalent of the grub screw that holds the spring stack centered in the beam.
http://www.ebay.com/sch/sis.html?_nkw=V ... y+55+65+yr
This is the Sway-a-way adjuster which is a bit more complicated but stronger.
http://www.shoptalkforums.com/viewtopic ... &start=120 Starting here I started to add the adjusters to the BJ beam I was building: on the 8th post down from the top. It shows the stock location for the grub screw that holds the spring stack centered in the beam.
What I am getting at is that the grub screw in the adjuster may not be holding the spring stack centered in the beam. If so I am not sure what to tell you other than try to fish the swivel part back in the center if the beam and lock it in place. I have been told it can be done but it is not easy. The Sway-a-way unit basically has two grub screws (were I made my mistake) that you may have to deal with.
Please post a pix of your adjusters.
Lee