I ordered some parts last night. Appletree Automotive was having a 10% off sale so I ordered the parts to build a wider torsion housing so I can widen the chassis. I also ordered a 10x40 spun aluminum tank because it was $100 off (probably not very popular size).
The torsion setup will be the long IRS bars (26-9/16 each) with an adjuster in the middle. Instead of the bars sticking out past the spring plates, I'll use swingaxle style plates for an overall width of almost 51" compared to the stock width of 41.3". So the torsion housing will be almost 10" wider than stock.
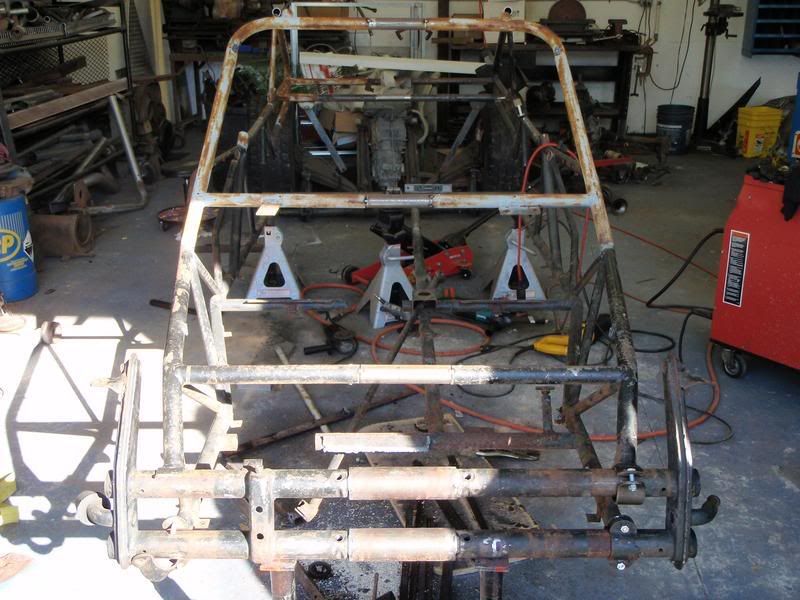
We also got the rail rolled into the garage last night and (tried) to stick a seat in the back. As the car sits, there's not enough room for 2 poly seats to sit side by side. So its going to HAVE to be widened. The seats also sit much further forward and up than I expected. So I'll have my work cut out for me.
Hi-Jumper 4 seat build
-
fl_buggy

- Posts: 1257
- Joined: Sat Sep 24, 2005 7:23 pm
No cutting yet, but I should be doing it tomorrow. I've done lots of thinking and measuring the past couple of days.
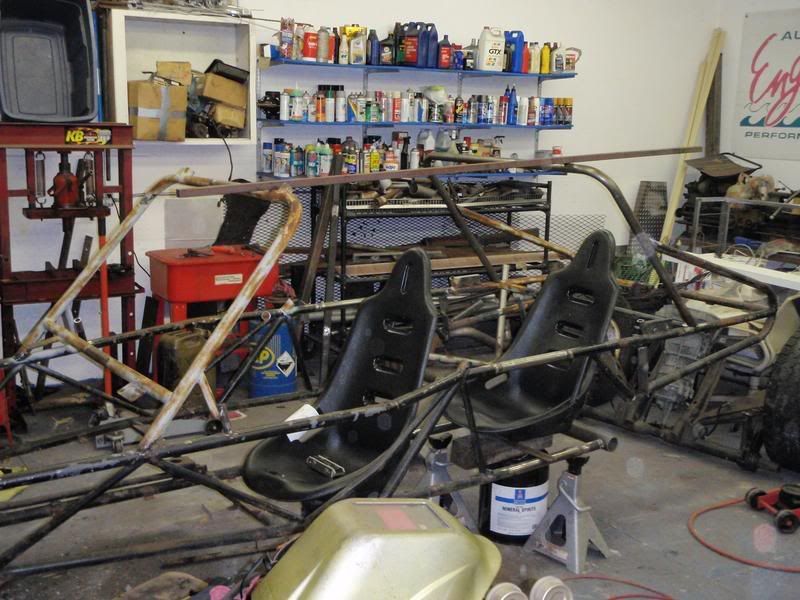
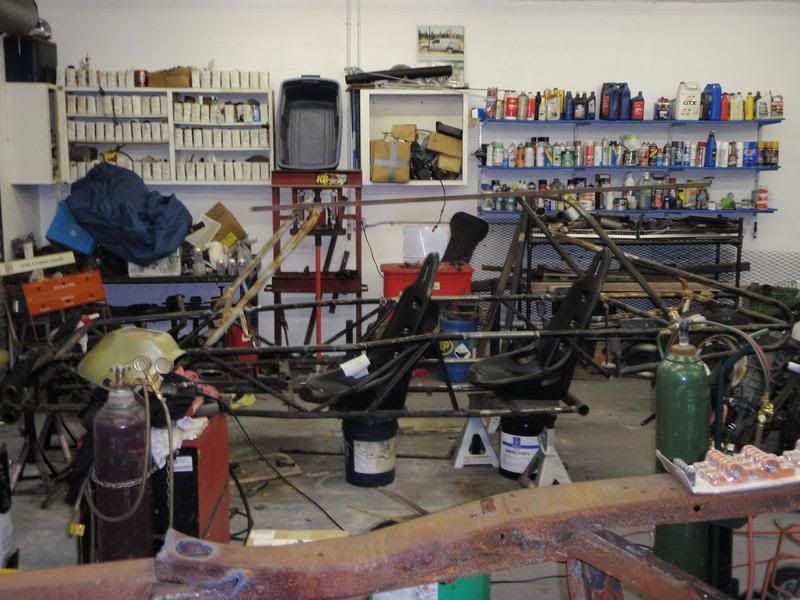
I cut out the old fuel tank and rear seat brackets to make room for the new poly seats. I put a poly seat in there and had my wife sit in it. I then made a chalk mark for where the back of the front seat would need to be for her to have decent foot room.
Next, I stuck a seat in the front, and mocked up my driving position. Once I felt comfy, I made a chalk mark at the very back of my seat. The distance between these two marks is how much I would need to stretch the frame. This number was 14".
I also realized I'm going to need to re-widen the front beam (its already 6" wider), to fit the chassis once I widen it 10". So I went to a local steel place and got some tubing for that.
-
Ol'fogasaurus
- Posts: 17768
- Joined: Mon Nov 13, 2006 10:17 pm
-
fl_buggy
- Posts: 1257
- Joined: Sat Sep 24, 2005 7:23 pm
-
fl_buggy
- Posts: 1257
- Joined: Sat Sep 24, 2005 7:23 pm
Progress and success!
The buggy is now 14" longer. It really wasn't too difficult of a job, thanks to my Dad who gave me an extra set of eyes and hands on the job.
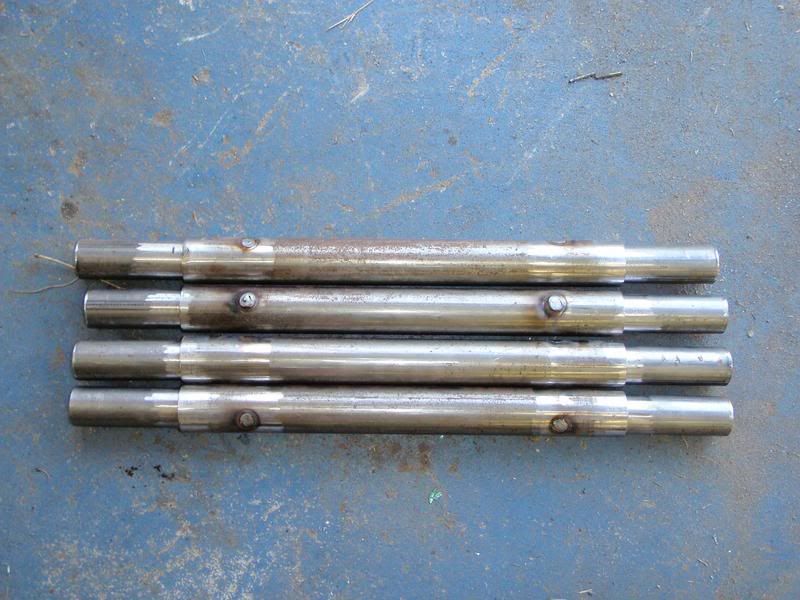
This is a picture of the 4 extensions I made. Unfortunately, the frame has a center floor bar which I forgot about, so I needed 5 Minor setback.
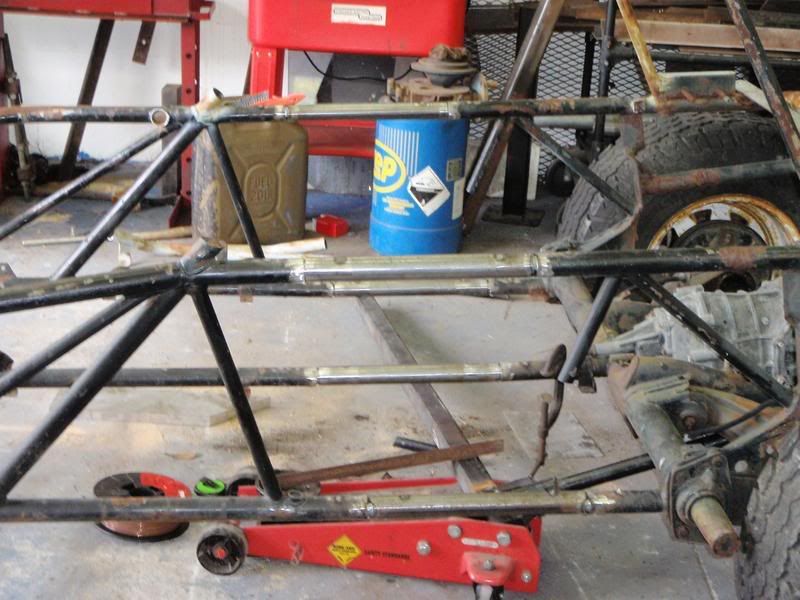
This is a picture showing the extensions tacked into the frame.
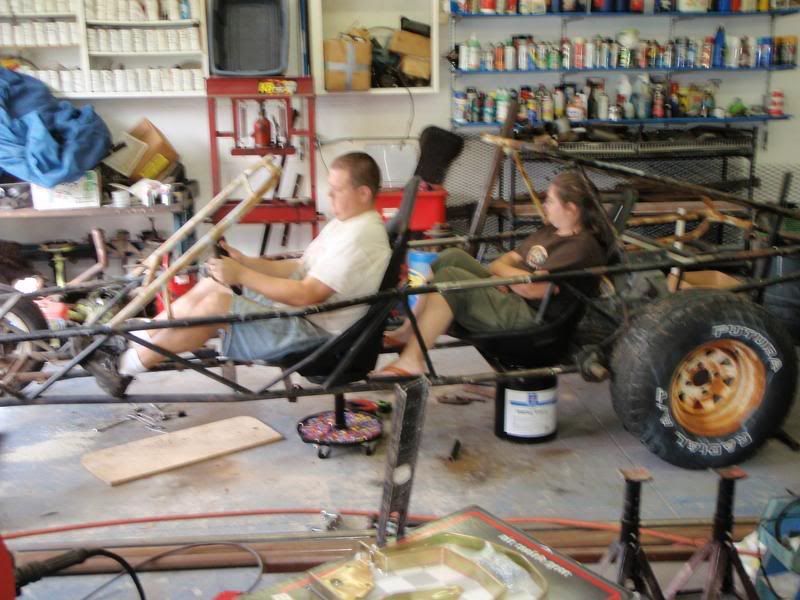
This is a picture of our new found rear seat room.
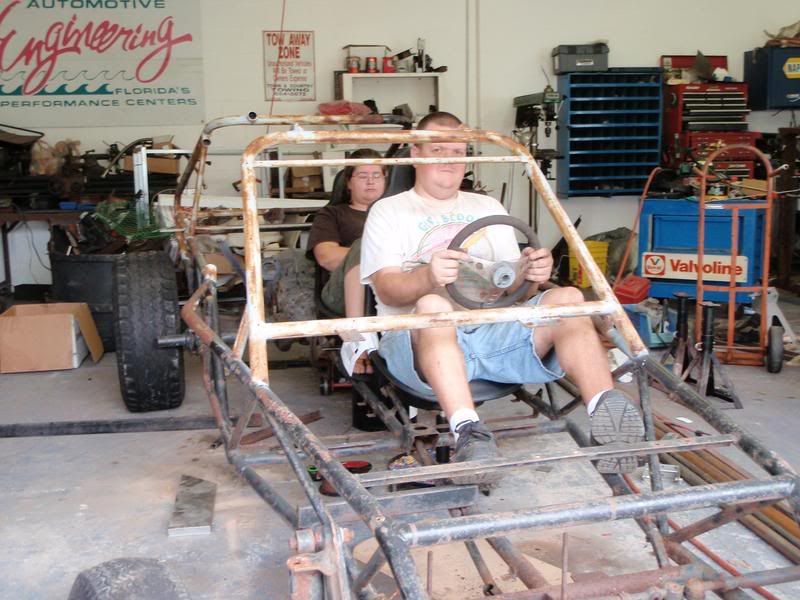
Yes, more head room is high in the priority list
So everything is heavily tacked in place. I'm going to finish welding it this week. I also want to widen the front beam so I can use that as a jig for widening the frame.
The buggy is now 14" longer. It really wasn't too difficult of a job, thanks to my Dad who gave me an extra set of eyes and hands on the job.
This is a picture of the 4 extensions I made. Unfortunately, the frame has a center floor bar which I forgot about, so I needed 5
This is a picture showing the extensions tacked into the frame.
This is a picture of our new found rear seat room.
Yes, more head room is high in the priority list
So everything is heavily tacked in place. I'm going to finish welding it this week. I also want to widen the front beam so I can use that as a jig for widening the frame.
-
Ol'fogasaurus
- Posts: 17768
- Joined: Mon Nov 13, 2006 10:17 pm
The finished job ooks like a very nice clean splice/plug addition.. The plugs themselves are pretty nice looking. Are you planning on raising the roof also? The upper bars look like they are close to being in your field of vision.
I wanted to say something about someone not looking happy sitting there on their can but I will refrain from that as it might be taken as being in poor taste.
I wanted to say something about someone not looking happy sitting there on their can but I will refrain from that as it might be taken as being in poor taste.
Lee
My opinion is worth slightly less than what you paid for it.
My opinion is worth slightly less than what you paid for it.
-
fl_buggy
- Posts: 1257
- Joined: Sat Sep 24, 2005 7:23 pm
I tried to do nice welds since these are rather important parts of the car.
Yes, I'll definitely be increasing the headroom. I'm going to give myself enough roof clearance that I won't need rollbar padding since that stuff gets torn up so quick.
She's actually quite the trooper. I think she was just bored because my dad kept taking pictures. She is extremely low maintenance (in fact, the 4 seater was her idea).
-
Leatherneck

- Moderator
- Posts: 17104
- Joined: Sat Jul 01, 2006 6:47 pm
-
Ol'fogasaurus
- Posts: 17768
- Joined: Mon Nov 13, 2006 10:17 pm
You are very lucky to have "Trooper (a complement). A lot of us would like to have a Trooper like that ourselves. 
I agree with Leather but I am sure you had already planned on that. I think you need a down tube where the windshield post join is also. My opinion though.
I agree with Leather but I am sure you had already planned on that. I think you need a down tube where the windshield post join is also. My opinion though.
Lee
My opinion is worth slightly less than what you paid for it.
My opinion is worth slightly less than what you paid for it.
-
seabeebuggy

- Moderator
- Posts: 3577
- Joined: Sun Mar 12, 2006 11:25 am
That looks good there FL.
I found a 2 seater buggy today for 300 OBO. I think i will do what your doing. It will save me a lot of cash over the long travel build.. Are you going to build a set of A Arms too?
I found a 2 seater buggy today for 300 OBO. I think i will do what your doing. It will save me a lot of cash over the long travel build.. Are you going to build a set of A Arms too?
www.BigMikesGunAndAmmo.com
Thomas Jefferson said It may be necessary for a country to have a revolution every 200 years to right the wrongs of a Government.
Got Lead?
Thomas Jefferson said It may be necessary for a country to have a revolution every 200 years to right the wrongs of a Government.
Got Lead?
-
fl_buggy
- Posts: 1257
- Joined: Sat Sep 24, 2005 7:23 pm
Thanks guys. I'm really happy with the progress so far. I'll document the whole project.
I'll be adding quite a bit of bracing and re-doing the top half of the frame. It should allow for adequate head room for front and rear passengers, and be easy to get in and out of.
Seebee, No A-arms. Widened beam and 3x5's. I'd be afraid of A-arms in the trails we ride. Unless of course they were way overbuilt.
Today I almost finished welding all of the extensions. The only thing left is the very bottoms and I'm going to way until after its widened so I can weld/smooth all of it at once. I also pulled the front beam apart and cut it down the middle so I can stretch it even wider than it is now. Its going to be 40" between the shock towers. I'll hopefully get the beam done this week so it will be all ready to widen when we get back from our cruise.
-
petew

- Posts: 3920
- Joined: Sat Oct 07, 2006 4:05 pm
that thing is gonna be long! 
you def need some more headroom. it's a pain being big. i know your pain.
you def need some more headroom. it's a pain being big. i know your pain.
aka "slowlearner"
http://drivingnotpolishing.blogspot.com.au/
http://drivingnotpolishing.blogspot.com.au/
-
fl_buggy
- Posts: 1257
- Joined: Sat Sep 24, 2005 7:23 pm
Its wider now! A very special thanks to my friends Zoomy and Neal for coming over on Saturday to help. We made a lot of progress. We ended up widening it about 7.5". Once we got that tacked up, we tackled the windshield (cutting it loose and leaning it up to gain headroom). We also got the new wider torsion housing tacked into place and then decided to tackle the rear of the roof. I really like the look of it so far. Now to finish welding, grinding and sanding.
-
Leatherneck
- Moderator
- Posts: 17104
- Joined: Sat Jul 01, 2006 6:47 pm