Steve Arndt baja build project

Offroad VW based vehicles have problems/insights all their own. Not to mention the knowledge gained in VW durability.
Steve Arndt
Posts: 7404
Joined: Sat Mar 10, 2001 12:01 am

Re: Steve Arndt baja build project

Post by Steve Arndt »

kyle_pc_75 wrote:Nice car! When's the first wheelie? :)

Are you by chance related to some Arndts in Pocatello? My friend married into that family, and they're big into classic cars.

Kyle
Most people I know from pocatello wouldn't enter a building that they knew contained a Heineken tower like that!
s
Steve Arndt
Posts: 7404
Joined: Sat Mar 10, 2001 12:01 am

Re: Steve Arndt baja build project

Post by Steve Arndt »

Here are some wiring pics of my project. The first shows how I did part of my grounding. The negative terminal goes to the body in the normal area and bolts there. I also ran an 8 gauge ground from that same point across and to my electrical distribution panel that I will show next. This way I kept my battery terminals clean without a bunch of pig tails and extra ring terminals. I had 7 wires on my + post before i rewired and cleaned things up. Now just two wires are on the positive post and one on the negative.
Image

Next up you can see the panel where I put most of the action. The larger fuse block with the integrated ground bus is directly wired to the positive terminal. The ground wire I described in the first pic runs to the fuse block ground buss for distribution from there. The smaller fuse block on the bottom is powered by a relay which is triggered by the ignition switch (relay is mounted to the small fuse block). The relays in-line are for the starter solenoid, accusump solenoid, and two extras. Mounted to the bottom of the board away from harms way, upside down, is the Redline 882C. I have extra room on top for future additions. I have a seat-delete board/panel that bolts down and covers all this stuff up.
Image

Finally a little board I made to mount the wideband. All the gauge wiring that runs from the front to the back of the car terminates at the barrier screw terminal strip. I have this diagrammed and mapped on paper for trouble shooting down the road.
Image
User avatar
bajaherbie
Posts: 9959
Joined: Sat Jul 15, 2006 7:07 pm

Re: Steve Arndt baja build project

Post by bajaherbie »

oooohhhhh, that looks nice......
Of all the paths you take in life, make sure a few of them are dirt.
Steve Arndt
Posts: 7404
Joined: Sat Mar 10, 2001 12:01 am

Re: Steve Arndt baja build project

Post by Steve Arndt »

I have been doing body work lately.
First pics show how bad the body started out. I had this car in turtle form up on its roof a few years ago. It took a lot of hammering to get the roof even close to smooth.

Image

Image

Image

The server keeps complaining "It was not possible to determine the dimensions of the image". I have them all 640x480 or 800x600 and hosted on my own site. Hmm.
Steve Arndt
Posts: 7404
Joined: Sat Mar 10, 2001 12:01 am

Re: Steve Arndt baja build project

Post by Steve Arndt »

Next pic shows the metal fitted to weld closed the quarter window crescent vents:
Since it won't let me embed the pic, here is a link.
http://myweb.cableone.net/stevearndt/baja/bajabody9.JPG

Will find out about this. Leatherneck

edit

Image
Last edited by Steve Arndt on Tue Aug 30, 2011 10:17 pm, edited 1 time in total.
Steve Arndt
Posts: 7404
Joined: Sat Mar 10, 2001 12:01 am

Re: Steve Arndt baja build project

Post by Steve Arndt »

I finished my rear light brackets, and painted the bumper with Por15.

Image

Image
User avatar
turbobaja
Posts: 2826
Joined: Fri Sep 14, 2007 4:56 pm

Re: Steve Arndt baja build project

Post by turbobaja »

Dang Steve! Looks like you had some time involved in that roof line on the drivers side. What a PITA area to have to do body work on.

How did you apply that POR-15? I like the way a single brushed coat will lay nice and smooth and usually cover in just one coat. But I can't seem to get rid of brush stripes when I go 2-3 coats for added protection. I've been temped to try reducing it and shoot it with an HVLP gun to get multiple coats to lay smooth. Nice thing about brushing though is much less masking, plus you can brush areas the paint gun couldn't even think of reaching...

When's this thing going back on the drag strip... I mean the road :twisted: ?
Karl

DON'T QUIT
User avatar
david58
Moderator
Posts: 14096
Joined: Sun Oct 23, 2005 6:14 pm

Re: Steve Arndt baja build project

Post by david58 »

Image

Image
Steve nice job on the wiring. I see you used the connectors with the plastic shroud on them. If you removed the plastic you get a better crimp and can use heat shrink tubing to seal up the connections
Hot, humid air is less dense than cooler, drier air. This can allow a golf ball to fly through the air with greater ease, as there won't be as much resistance on the ball.
Steve Arndt
Posts: 7404
Joined: Sat Mar 10, 2001 12:01 am

Re: Steve Arndt baja build project

Post by Steve Arndt »

In this pic you can see some of the wire insulators were removed and double heat shrinked for strain relief.

Image

I hate the plastic too, but I was getting impatient ;)

Karl,

I didn't do much prep work on the bumper, painted right over the old rustoleum. I used a cheap harbor freight 1" brush.

I drove it to the bus pilots may day show and shine Sunday. Driving with no door handles, windows, etc. was a rush. This was the first time the car has been on the road since 2003.

Steve
Steve Arndt
Posts: 7404
Joined: Sat Mar 10, 2001 12:01 am

Re: Steve Arndt baja build project

Post by Steve Arndt »

Here is a pic from Sunday - Bus Pilots May day show and shine. The first time this car has been driven since fall 2003. It is about a 6 mile drive from my shop to the park. No problems w/ the engine or drivetrain. I did have a body work snafu. 75mph test blast, and WHAM the hood blows open and about hits me in the face. I had a bungee cord holding it down, which wasn't enough when the air pressure got under it. I spent 50 hours fixing this hood last month, and now it is trashed! Ripped all the captive nuts clear out of one side of the hood. I made my apron "fit" the hood, so I need to fix this hood or start all over on the front end bodywork. doh!

Image

See that bungee on the hood? Well, don't try that at home it isn't enough :oops:

You wouldn't believe the wind in your face feeling driving with no windshield....
User avatar
Devastator
Posts: 3493
Joined: Tue Nov 06, 2007 6:51 am

Re: Steve Arndt baja build project

Post by Devastator »

Steve Arndt wrote:You wouldn't believe the wind in your face feeling driving with no windshield....
As a turbocharged sandrail guy, I can relate. :)
Devastator's Build Thread

Sandrail

2.4 liter, supercharged Chevy Ecotec

"If everything seems under control, you're just not
going fast enough."
Mario Andretti
Steve Arndt
Posts: 7404
Joined: Sat Mar 10, 2001 12:01 am

Re: Steve Arndt baja build project

Post by Steve Arndt »

I am trying to figure out the best way to fix this. This is the bulk of the damage from the hood flying open on the highway. It also blew off a chunk of primer/filler on the area by the wipers/mister nozzle.

Image

I think I will make a new "nut plate" that has nuts welded on the inside for the hood bolts to torque against. The hood as it is built only has 1.5 threads of engagement into a 1/8" thin steel plate that is tapped. Since I have to rebuild this whole section I may as well upgrade it. The pic shows the original nut plate still bolted to the hinge, but ripped clear out of the hood.
User avatar
turbobaja
Posts: 2826
Joined: Fri Sep 14, 2007 4:56 pm

Re: Steve Arndt baja build project

Post by turbobaja »

OUCH man! That hinge mount area looks a lot like a super beetle baja hood I've got laying around gathering dust, but I'm pretty sure yours is a standard, right? How did the hinge mounts on the body hold up??
Karl

DON'T QUIT
Steve Arndt
Posts: 7404
Joined: Sat Mar 10, 2001 12:01 am

Re: Steve Arndt baja build project

Post by Steve Arndt »

The hinges won the battle against the hood by an easy 10:1 margin. People should really question how their hinge bolts attach to their hoods. These hoods have almost no glass inside the "hinge box" area, it was hollow and weak as hell inside. The hinge plate was hardly attached, just "body work" glass, not structural. I am going to fix that right up. This was a mark v kit if I remember right. Live and learn, don't get in a rush, it is costly.
s
Steve Arndt
Posts: 7404
Joined: Sat Mar 10, 2001 12:01 am

Re: Steve Arndt baja build project

Post by Steve Arndt »

Hood hinge fix:

Here is a sequence of pics showing the damage to my hood from when it opened up "at speed" and how I fixed it.

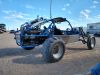
This is what I started with:
Image

The force ripped the hinge mount clear off the inside of the hood. As you can see, all these hoods have holding the hinge plate in are two little rivets and a "blob" of resin. Nice. That wimpy little 1/8" steel plate with taped holes is all that the hood has for threads to bolt onto the hinges with. This needed upgrading since they were on the verge of being stripped just from bolting the hood on a few times:
Image

Dressed up the edges of the amputated hinge mount. Beforing cleaning up the edges for repair, I used a sharpie marker to make a bunch of witness marks so I an align the hinge bolt holes close to where they were originally:
Image

I drilled out the stock 1/4" tapped hood holes and welded 8x1.25 nuts to the inside of the original bolt plate. I added a third rivet in addition to the two it had, and for good measure JB welded it as well:
Image

Here the hinge mount has had the backside packed with chopped fiberglass mat and glassed into place using my marks from earlier.
Image

I followed this with sanding, and more fiberglass work. Finally, a touch of filler and some primer. It isn't perfect looking but it is much stronger than the hood was originally. The other side of the hood survived the incident and is still as it came from MARK V fiberglass.
Image

Of course I signed and dated it so I remember to not be stupid and drive without hood latches!

s
Post Reply