Re: Drilling, tapping and plugging the oil galleries
Posted: Mon Sep 06, 2010 9:58 pm
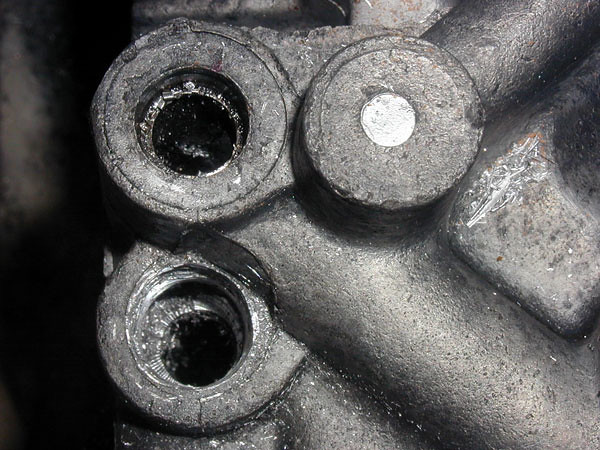
This just isn't going to work, is it...

For Your Air Cooled Pleasure!
https://shoptalkforums.com/
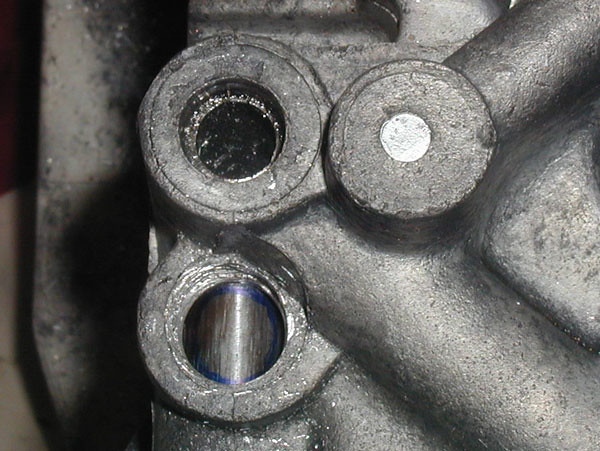
??Dangermouse wrote:This just isn't going to work, is it... Image
Image
Think you just caught my picture hosting server napping; should be displaying properly now I hope.??

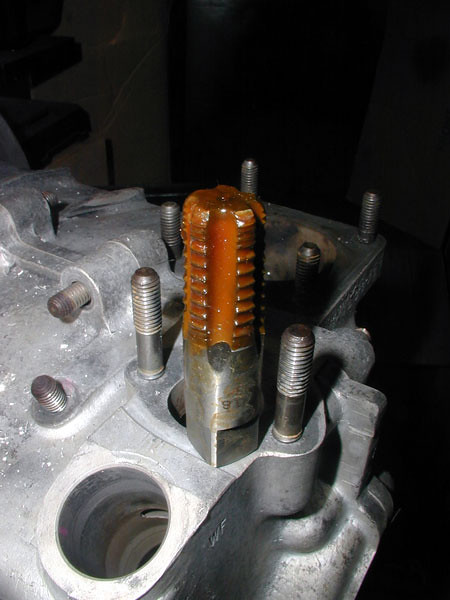
This stuff usually just peels off like a bannana peel. Take a knife and cut it from the shank to the cutting tip in one of the "gullets" of the tap, (there's probably 4 of them). After that it should peel off.Dangermouse wrote:two of the taps came covered with a thick, waxy coating presumably to protect them from rust and physical damage. How does this stuff come off??? Mineral spirits or kerosene doesn't seem to touch it...
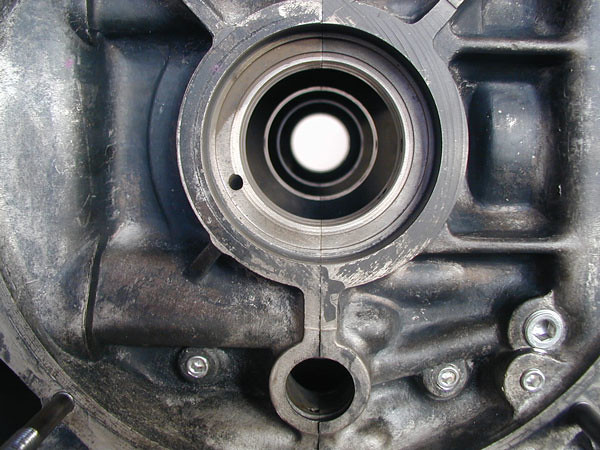
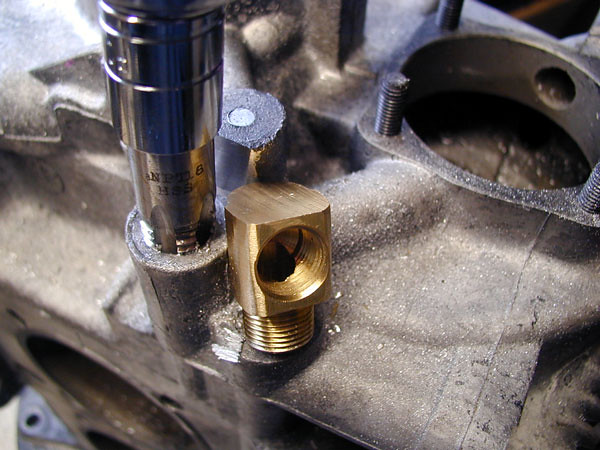
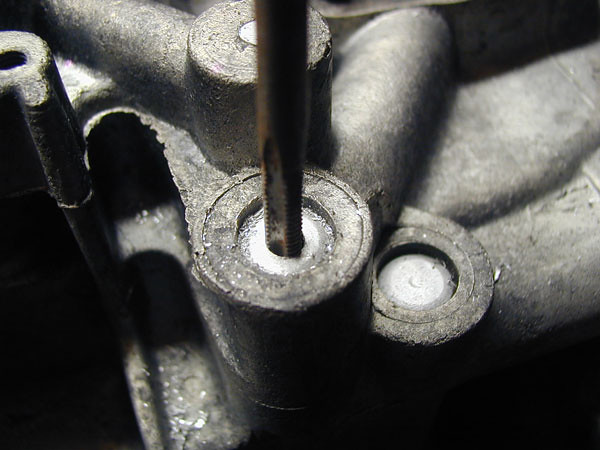
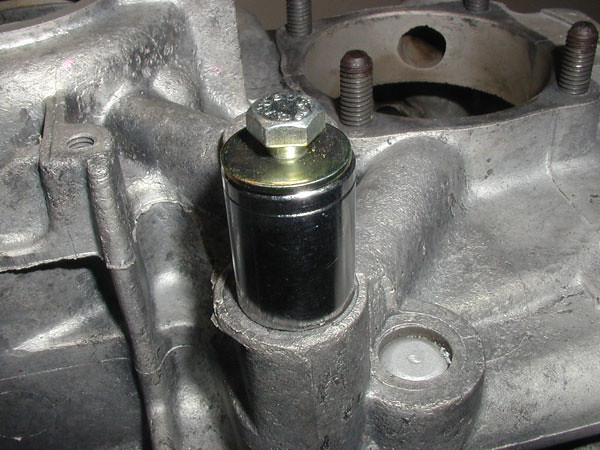
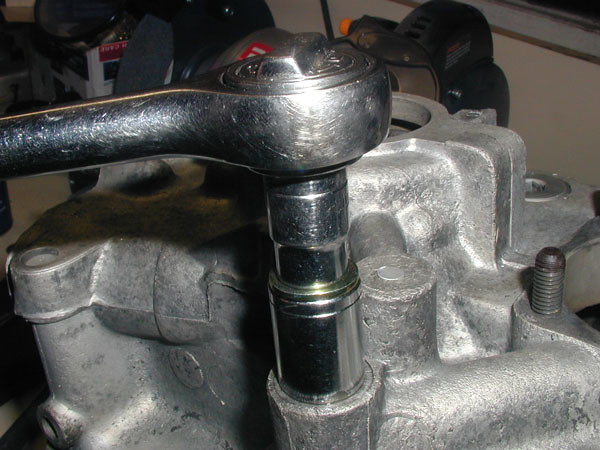
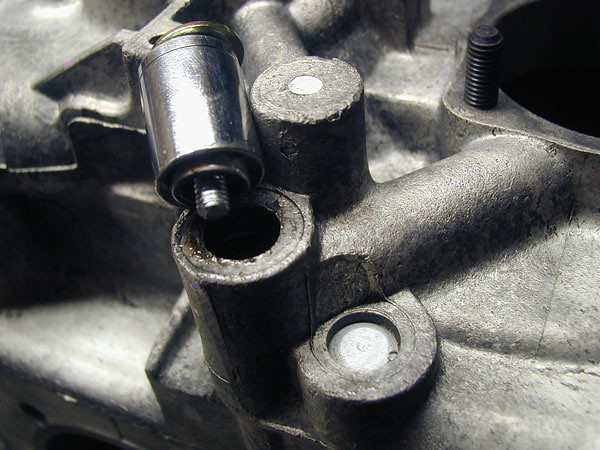
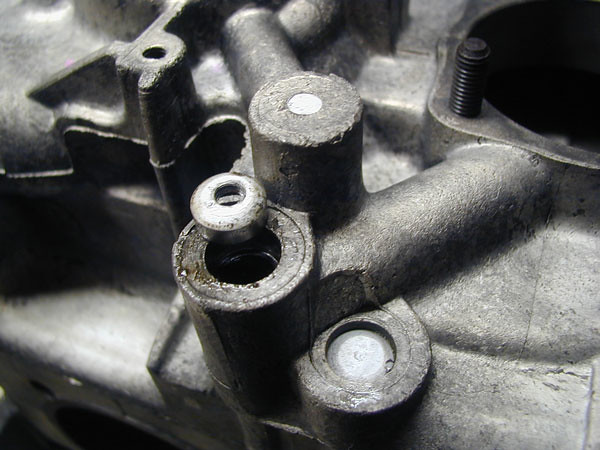
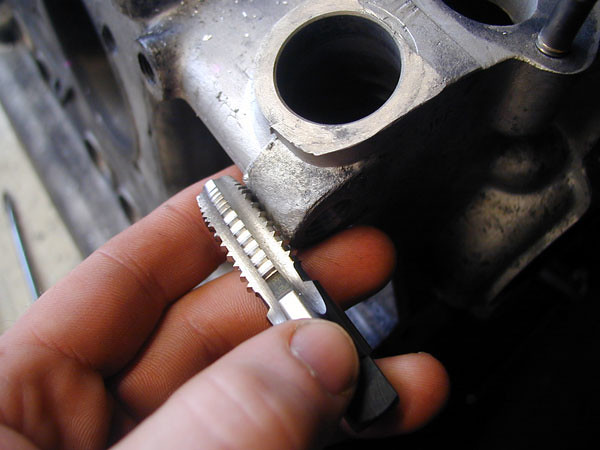
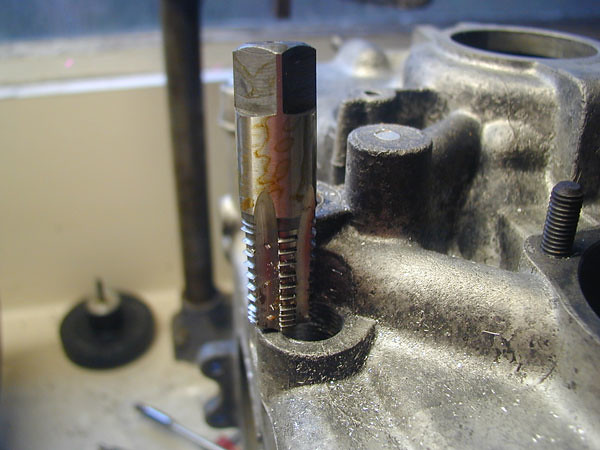
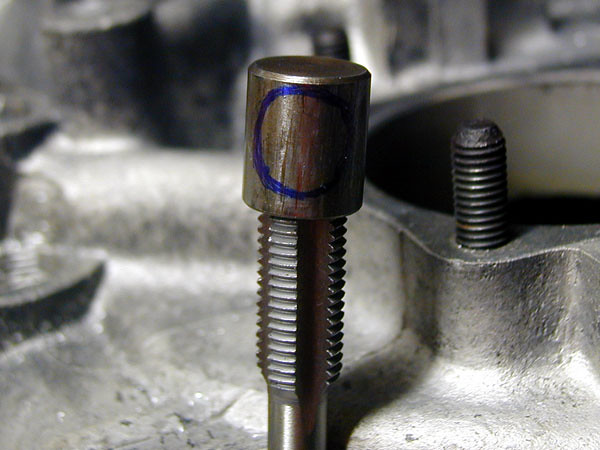
No. The tip of the tap is smaller than the hole you will be drilling so it will, likely, not cut much of a thread. Standard practice is to drill 3x the tap diameter depth. For example, 3/8" deep for an 1/8NPT, 3/4 for a 1/4NPT, and so on. The good news here is that if you drill a little too deep, it usually doesn't hurt anything since it's just a fluid passage anyway. NPT taps are "full form" taps in that they cut the complete thread profile, unlike straight cut taps that cut only the thread major diameter, the pitch diameter, and not the minor diameter, (which is cut be the drill). This is why NPT taps need so much torque and can crack thin web bosses, especially on the bigger taps, (which is why I recommended the tapered reamers for these larger sizes).Dangermouse wrote:Next, seeing as what I have are taper taps, does this mean that I have to drill into the oil passage the same depth as the length of the threaded portion of the tap?
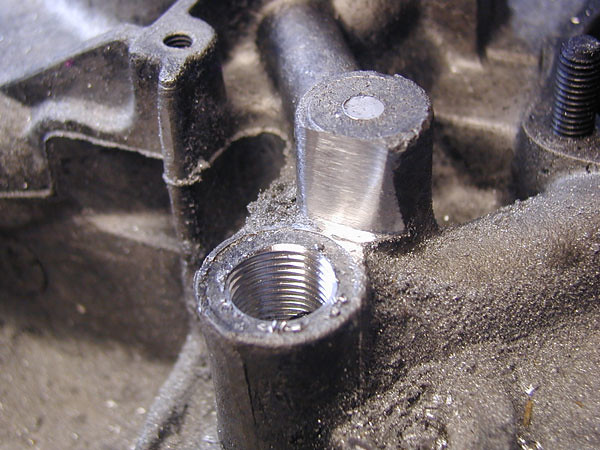
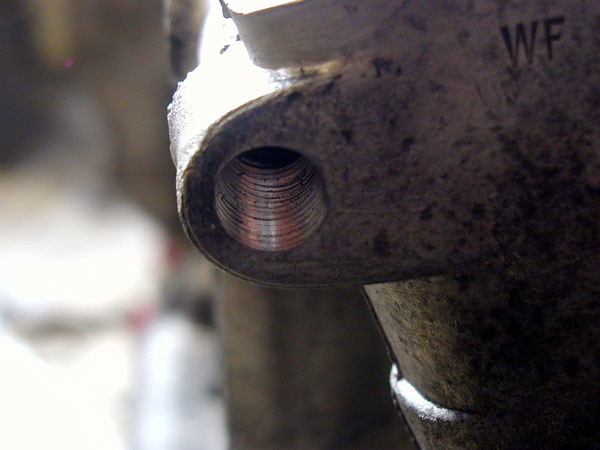
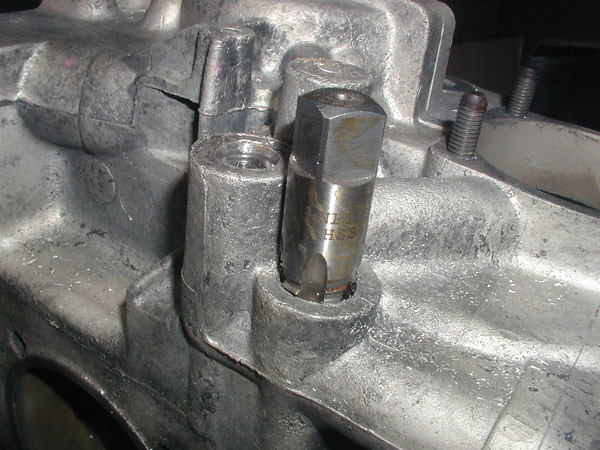
You will NOT be cutting to the full depth of the tap most likely. Tap until you have a few threads and check your plug. Tap a little deeper until the plug starts. Remove the plug and go a little deeper. re-check until you get the plug to be flush, (without sealing compound). Remove the plug, dope it up, and tighten it down. You'll get a feel for the depth after the first few holes.ALB wrote:The threads won't be fully formed until the tap is all the way into the case, right?
I said that?ALB wrote:The threads won't be fully formed until the tap is all the way into the case, right?
This stuff is more like resin than wax. A couple of hours sitting in kerosene loosened it up though.Devastator wrote:This stuff usually just peels off like a bannana peel. Take a knife and cut it from the shank to the cutting tip in one of the "gullets" of the tap, (there's probably 4 of them). After that it should peel off.Dangermouse wrote:two of the taps came covered with a thick, waxy coating presumably to protect them from rust and physical damage. How does this stuff come off??? Mineral spirits or kerosene doesn't seem to touch it...
In my first attempt, I pretty much had to go almost to the hilt on the 1/4" tap to get the plug approaching flush. It's still got a couple of threads showing but I'll leave it slightly proud of the case.Devastator wrote:The tip of the tap is smaller than the hole you will be drilling so it will, likely, not cut much of a thread. Standard practice is to drill 3x the tap diameter depth. For example, 3/8" deep for an 1/8NPT, 3/4 for a 1/4NPT, and so on. The good news here is that if you drill a little too deep, it usually doesn't hurt anything since it's just a fluid passage anyway. NPT taps are "full form" taps in that they cut the complete thread profile, unlike straight cut taps that cut only the thread major diameter, the pitch diameter, and not the minor diameter, (which is cut be the drill). This is why NPT taps need so much torque and can crack thin web bosses, especially on the bigger taps, (which is why I recommended the tapered reamers for these larger sizes).
You will NOT be cutting to the full depth of the tap most likely. Tap until you have a few threads and check your plug. Tap a little deeper until the plug starts. Remove the plug and go a little deeper. re-check until you get the plug to be flush, (without sealing compound). Remove the plug, dope it up, and tighten it down. You'll get a feel for the depth after the first few holes.
Sorry ALB. My bad. I hit the wrong quote button.ALB wrote:ALB wrote:
The threads won't be fully formed until the tap is all the way into the case, right?
I said that?
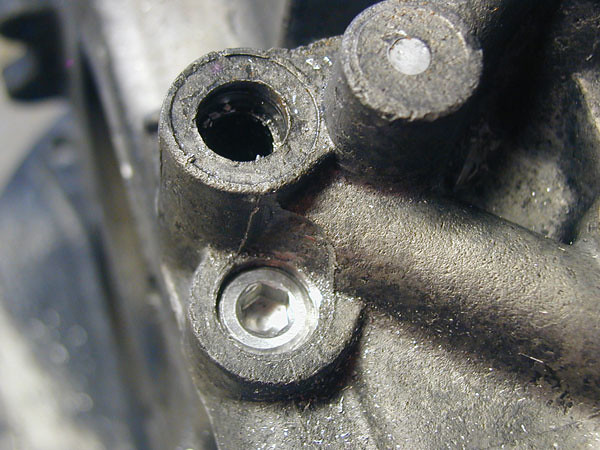

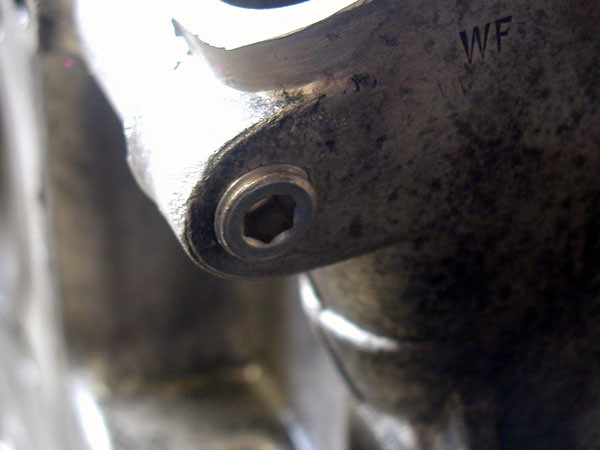
You should be fine. Remember that the other 270 degrees of the piston is still engaged in it's bore, and that there was always a hole where you are tapping, (it was just smaller).Dangermouse wrote:Will I get away with it do you think?