Here's the place for info on converting to a Type V motor!
grelland
Posts: 990Joined: Fri May 13, 2005 2:47 am
Post
by grelland Tue Jan 30, 2018 4:15 am
flat4olsen wrote: ↑ Tue Jan 30, 2018 3:52 am
Sharp eye
I´m in Denmark. I love the wrinkle finish,- my wife hates me, when I put it in her oven, though
I'm in Norway, btw
flat4olsen
Posts: 14Joined: Wed Sep 25, 2013 3:00 am
Post
by flat4olsen Tue Jan 30, 2018 4:19 am
I know
I have been following your impressive work here!
grelland
Posts: 990Joined: Fri May 13, 2005 2:47 am
Post
by grelland Tue Jan 30, 2018 9:53 am
flat4olsen wrote: I know
I have been following your impressive work here!
Sent fra min SM-G950F via Tapatalk
grelland
Posts: 990Joined: Fri May 13, 2005 2:47 am
Post
by grelland Tue Jan 30, 2018 2:27 pm
I am converting to black wrinkle finish
You do not have the required permissions to view the files attached to this post.
grelland
Posts: 990Joined: Fri May 13, 2005 2:47 am
Post
by grelland Wed Jan 31, 2018 12:53 pm
Special feeling when the next generation has both the skills and access to equipment you always wish you had yourself
Here is a shot of my son setting up the oil pump for making o-ring grooves:
dreie.jpg
And when he was happy, he started producing chips:
dreie2.jpg
And here is the result:
oljepumpespor.jpg
So with o-ring sealings on both sides of the ports, I hope my oil pressure/temp issue will be even a little bit better than last year
You do not have the required permissions to view the files attached to this post.
grelland
Posts: 990Joined: Fri May 13, 2005 2:47 am
Post
by grelland Thu Feb 01, 2018 1:33 pm
Another productive afternoon in the garage. My son worked on his own car today so I was on my own.
But I wanted to fit the lower cooling tins, so I found an old set in the parts bin and started fitting them to the engine:
akebrett.jpg
undersiden.jpg
After some grinding, I took them for a round in the blasting cabinet:
sandblås.jpg
Then a lick of etch primer and flat black paint
lakk akebrett.jpg
You do not have the required permissions to view the files attached to this post.
Last edited by
grelland on Mon Feb 05, 2018 2:08 am, edited 1 time in total.
Dan Dryden
Posts: 488Joined: Mon Nov 05, 2007 12:56 am
Post
by Dan Dryden Sun Feb 04, 2018 9:00 am
Having access to a lathe and other machining tools is fantastic. My sons are aged 2 & 6 years, so not quite ready to start helping me in the garage yet.
grelland
Posts: 990Joined: Fri May 13, 2005 2:47 am
Post
by grelland Mon Feb 05, 2018 1:00 am
The one on the left in this picture is the one that now has his own car and is doing the machine work for me
Post-24-4875-wheel_polish.jpg
So start them young
You do not have the required permissions to view the files attached to this post.
grelland
Posts: 990Joined: Fri May 13, 2005 2:47 am
Post
by grelland Mon Feb 05, 2018 3:12 pm
I can't get the wrinkle finish right....
20180206_000852-722x875.jpg
You do not have the required permissions to view the files attached to this post.
flat4olsen
Posts: 14Joined: Wed Sep 25, 2013 3:00 am
Post
by flat4olsen Mon Feb 05, 2018 9:43 pm
How do you do it? I do a light coat, let it dry for about 15 min them do the thickest coat I can apply without runs. Then I heat it in an oven at 100 Celsius for about an hour. The stuff i can’t fit in the oven is placed under a UV light for an hour or more. The heat is very imported for getting the finish right. Even distribution of the heat is difficult with the UV light, but changing the angle of light a few times works ok.
My finish after heating:
Last edited by
flat4olsen on Tue Feb 06, 2018 5:11 am, edited 1 time in total.
grelland
Posts: 990Joined: Fri May 13, 2005 2:47 am
Post
by grelland Tue Feb 06, 2018 12:54 am
Thanks, the oven is not large enough for the large parts, but UV-light was a good idea
sideshow
Posts: 3428Joined: Mon Oct 27, 2003 11:00 am
Post
by sideshow Wed Feb 07, 2018 7:11 pm
Still in love with the trigger flywheel
Yeah some may call it overkill, but you can't have too much overkill.
grelland
Posts: 990Joined: Fri May 13, 2005 2:47 am
Post
by grelland Thu Feb 08, 2018 4:31 am
sideshow wrote: ↑ Wed Feb 07, 2018 7:11 pm
Still in love with the trigger flywheel
grelland
Posts: 990Joined: Fri May 13, 2005 2:47 am
Post
by grelland Thu Feb 08, 2018 4:31 am
sideshow wrote: ↑ Wed Feb 07, 2018 7:11 pm
Still in love with the trigger flywheel
grelland
Posts: 990Joined: Fri May 13, 2005 2:47 am
Post
by grelland Tue Feb 20, 2018 5:57 am
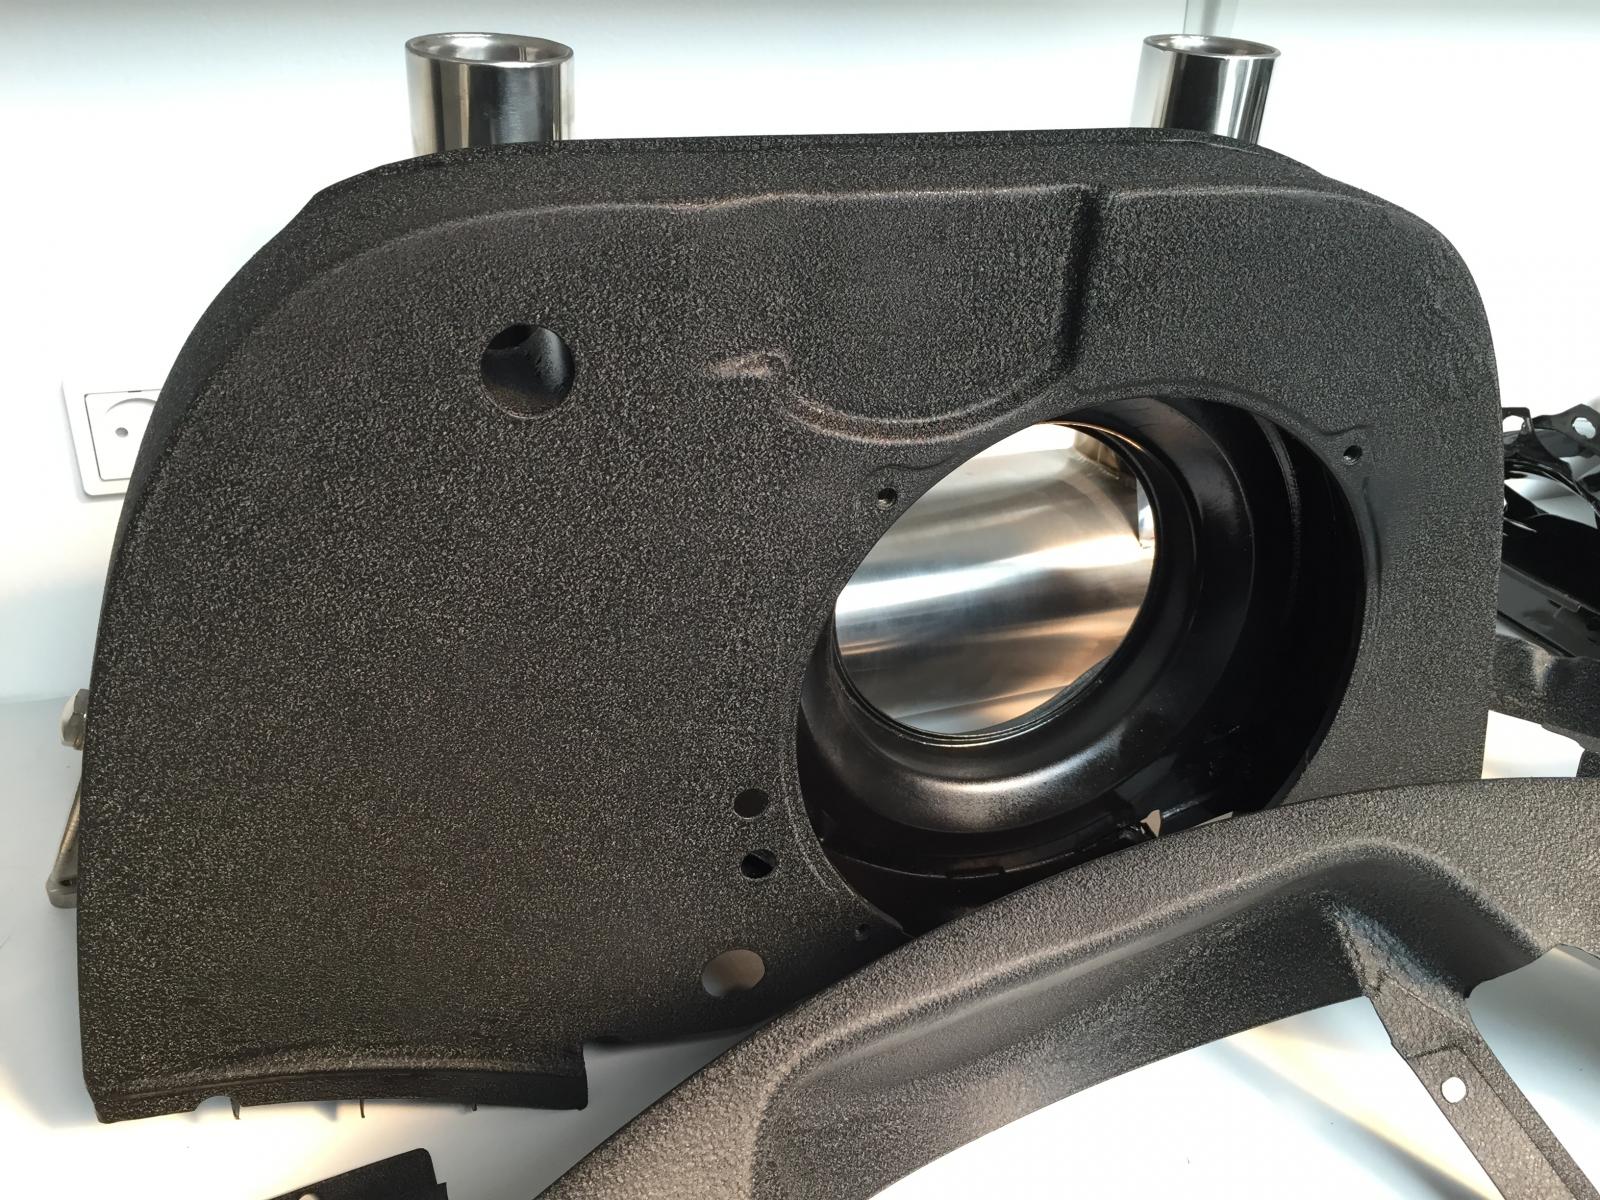
I gave up the wrinkle-finish and went back to hammerite...
20180216_210937.jpg
20180216_210913.jpg
Other than this; I am waiting for some parts so I can do the final assembly before spring comes
You do not have the required permissions to view the files attached to this post.
I´m in Denmark. I love the wrinkle finish,- my wife hates me, when I put it in her oven, though