Ol'fogasaurus black buggy
-
Ol'fogasaurus
- Posts: 17758
- Joined: Mon Nov 13, 2006 10:17 pm
Re: Ol'fogasaurus black buggy
Potential change of plans: since we worked for quite a while in mid-40s weather then got hit by rain (we got pretty wet) Thursday and Friday I am waiting to see if I caught something. When I woke up today I felt like even a soft bristle artists fine line paint brush was too much of a sharp and deadly tool to be handling 
 . We'll see later on in the day!
-
Ol'fogasaurus
- Posts: 17758
- Joined: Mon Nov 13, 2006 10:17 pm
Re: Ol'fogasaurus black buggy
I did go out to the garage to check some things and got carried up and did some additional things. I did pull the 1 X 3 off the pan and set the 1 X 2 next to it after cleaning off the protective coating. I then transferred the marks for the Truss Bar off the 1 X 3 onto the 1 X 2. I then found the center of the spreader bar and marked it.
I checked and sure enough the seam for the 1 X 2 is on the 1" leg so I marked that surface as the top as I will want to add the angle iron doubler to it. While I am sure it would hold I just want to be careful as there is going to be a lot going on with it.
I then got the fuel tank out and did some measuring. I wanted the spread of the tank mounts to be as wide as I could so I backed off the seam for the end caps to the tube itself then slid the mounts back to a 1 1/2" location. That put the mounting holes close enough to 10" each side of the center line so I marked the centerline of the spreader bar and the centerline of the tank mounts.
I then remounted the bar in place and tried to make it flex... I needed to do that task off the shock mounts but it did feel sturdy enough that I think it should be OK especially with the angle iron fully welded to the1 X 2. Fully welding it will keep the wet sand out of the tube and stop some rust potential cause by the salt water in the sand.
Got to cold so I can back in.
Lee
"Don't attribute a quote to someone until you've googled it! Abraham Lincoln said that." Candorville comic strip/Darrin Bell.
You do not have the required permissions to view the files attached to this post.
-
bajaherbie

- Posts: 9959
- Joined: Sat Jul 15, 2006 7:07 pm
Re: Ol'fogasaurus black buggy
Do you have heat in your garage?
Sent from my SM-G920R4 using Tapatalk
Sent from my SM-G920R4 using Tapatalk
Of all the paths you take in life, make sure a few of them are dirt.
-
Ol'fogasaurus
- Posts: 17758
- Joined: Mon Nov 13, 2006 10:17 pm
Re: Ol'fogasaurus black buggy
Only when my wife is mad at me .
Since the furnace is in the garage the answer is indirectly yes but really no. Even though the garage is insulated on three walls and between the garage doors (as much as possible) two of the three garage doors are opened too much plus there is a side door to get out to the shed and (when we had it) the motorhome pad that is often used plus I have one of those small refrigerators in the garage . Too hot at times in the summer and cool in the summer.
Since the furnace is in the garage the answer is indirectly yes but really no. Even though the garage is insulated on three walls and between the garage doors (as much as possible) two of the three garage doors are opened too much plus there is a side door to get out to the shed and (when we had it) the motorhome pad that is often used plus I have one of those small refrigerators in the garage
-
Ol'fogasaurus
- Posts: 17758
- Joined: Mon Nov 13, 2006 10:17 pm
Re: Ol'fogasaurus black buggy
Just got home from Boring Oregon (yep, there is such a place and it is a nice area and not the best of reasons to visit this time). When we left to go north it was 31° and when we got home it was 35°. We just missed some snow showers, we got frost in the road and freezing rain but we made it in one piece.
When in Oregon there was a question that got me thinking about the problem I have been fighting for a while; the Kaffer/Truss bar question. When I posted to http://www.shoptalkforums.com/viewtopic ... 1&t=150256 it got me thinking in a bit of another direction.
What I did here was to drop the crosspiece down to the intersection of the tower and the flat pad where the body bolt is. I was so worried about protecting the shock mount eye that I lost some direction I think. It has its good and bad points such as the angle of the support for the frame (pickle forks) is flatter so the bend on the mount will be steeper so I will have to mock that up before I go with this.
I tried to drop it lower (again) to use the stronger area of the shock mount but then the bar and transaxle fight for the same area .
This is the seat moved to the rear most position. With the changes I made to the mockup for the seats I slid the seats both forward and to the rear max positions and they look like they are not going to hit the body or the tunnel. The slave cylinders for the turning brakes will have to be remotely mounted.
This is the seat in the rear most position. I guessed at the height over the seat (the bottom of the tubes being 4" over my head with a helmet on) then dropped a diagonal down to the mount at the lower position. I did not want to make holes in the buggy but this lower location just might work assuming I brake the down tube then sleeve the join through the body. I have some measuring to do.
A mockup of possible mount structure. I might even be able to drop a screw down the body mount hole to add some support for the weld of the lower mount. The upper mount, to protect the shock mount could be cut different but again, this is a mockup.
I even had the foresight to put a tube on the steerint box to see just how far the seat was off center. Not bad, I will need only one universal and that is at the top before the mount into the horizontal bar in the front hoop of the cage.
I made a metal replacement of the rag-joint on the steering box which should allow me to use the stock joining pieces to the steering box.
Lee
When in Oregon there was a question that got me thinking about the problem I have been fighting for a while; the Kaffer/Truss bar question. When I posted to http://www.shoptalkforums.com/viewtopic ... 1&t=150256 it got me thinking in a bit of another direction.
What I did here was to drop the crosspiece down to the intersection of the tower and the flat pad where the body bolt is. I was so worried about protecting the shock mount eye that I lost some direction I think. It has its good and bad points such as the angle of the support for the frame (pickle forks) is flatter so the bend on the mount will be steeper so I will have to mock that up before I go with this.
I tried to drop it lower (again) to use the stronger area of the shock mount but then the bar and transaxle fight for the same area
This is the seat moved to the rear most position. With the changes I made to the mockup for the seats I slid the seats both forward and to the rear max positions and they look like they are not going to hit the body or the tunnel. The slave cylinders for the turning brakes will have to be remotely mounted.
This is the seat in the rear most position. I guessed at the height over the seat (the bottom of the tubes being 4" over my head with a helmet on) then dropped a diagonal down to the mount at the lower position. I did not want to make holes in the buggy but this lower location just might work assuming I brake the down tube then sleeve the join through the body. I have some measuring to do.
A mockup of possible mount structure. I might even be able to drop a screw down the body mount hole to add some support for the weld of the lower mount. The upper mount, to protect the shock mount could be cut different but again, this is a mockup.
I even had the foresight to put a tube on the steerint box to see just how far the seat was off center. Not bad, I will need only one universal and that is at the top before the mount into the horizontal bar in the front hoop of the cage.
I made a metal replacement of the rag-joint on the steering box which should allow me to use the stock joining pieces to the steering box.
Lee
You do not have the required permissions to view the files attached to this post.
-
Ol'fogasaurus
- Posts: 17758
- Joined: Mon Nov 13, 2006 10:17 pm
Re: Ol'fogasaurus black buggy
Every time I got out to the garage (and that is quite often it seems) I go over to the buggy and look at what I am doing as prejudices' (preconceived thoughts/opinions) one may have had are probably going to be less than the last time you looked at it. Today was no exception: I looked at a piece of scrap I had laying near by that looked interesting so I decided to check an see if it would fit.
The little triangle piece by the shock eye is the this time example. It fit very close and since, besides welding everything together, I plan on welding a strap across the whole assembly of braces and the spreader bar to the shock mount and shock eye. It fits in quite well.
If you have the chance don't limit yourself to what you have in mind but allow yourself to think "out of the box" too.
Lee
You do not have the required permissions to view the files attached to this post.
-
Ol'fogasaurus
- Posts: 17758
- Joined: Mon Nov 13, 2006 10:17 pm
Re: Ol'fogasaurus black buggy
Something unusual. Does it rain here on Christmas... OMG yes! Does it snow here on Christmas...
"The Emerald City’s odds of a white Christmas — which the National Weather Service defines as at least 1 inch of snow on the ground Christmas morning, are only about 7 percent — as reported by .... (no politics)
... reported 2.2 inches of snow at Sand Point with light snow continuing through the morning.
The last measureable snowfall was nine years ago, and the other White Christmas recorded for the city was in 1926 with 2.5 inches. This year gives Seattle their third white Christmas in the last 100 years." So... A big deal ???
Anyway, back to the buggy.
According to the previous pictures this is a down looking view of the top triangular piece and how it sits on the shock tower and the spreader bar. Notice the miss-match because of the change in direction of the top of the tower for the shock eye to be located in to the stock trailing arm. Since this was a scrap piece and used for a fit check the seam in the bottom makes it so I will not use it because of potential weakness. I could put a doubler on the underside or inside but not with this piece.
This is the same piece rotated (mostly, it keeps wanting to slide back into place when I have moved it then grabbed the camera) to fit the tower angle so it will have to be custom made but the diagonal line is pretty close. I am still thinking if the down tube of the roll bar will be able to catch it because of some of the fiberglass body stuff might be in the way. It would be good to transfer/distribute some of the potential loading back up and forward via. the roll bar.
Lee
You do not have the required permissions to view the files attached to this post.
-
Ol'fogasaurus
- Posts: 17758
- Joined: Mon Nov 13, 2006 10:17 pm
Re: Ol'fogasaurus black buggy
I went out and measured the offset (gap caused by the turn in the shock tower is about 1/4"to 3/8"which makes an unusual shape to the triangular support. It would be interesting to do using a band saw alone. The tube would be difficult to reshape also. Going to be interesting!
Lee
Lee
-
Ol'fogasaurus
- Posts: 17758
- Joined: Mon Nov 13, 2006 10:17 pm
Re: Ol'fogasaurus black buggy
We got back a while ago from finally picking up the new tube for the Truss Bar. We were on the trip to Broing Oregon when it came in so today, after waiting until the snow and ice started to melt before we could attempt to go down the hill (we get "garbage snow" here. Wet snow and when you walk or drive on it it turns to slush then immediately freezes. There were 4 cars in a wreck at the bottom of the hill Christmas Eve when the street was closed off .
While waiting for the temperature outside to climb to over 36° I got to look at the top brace to the spreader bar. I had the triangle you saw in the picture then I also cut a piece of 1 X 3 X .095 wall to the same dimension and tried to form them to the shape of the top of the shock tower.
I tried to bend the .095 wall piece first but it became very apparent that I would need to add some heat to change the bends and shape of the triangle shaped legs (see the pix below) plus the two legs were so close together that getting anything between them to hold things in place was going to be difficult. Add to that the gap between the legs got smaller. I then tried to re-form the shape of the lighter walled triangle which was a yes and no.
Two pictures of the same thing but one with a flash and the other w/o. As I said, I would not use a piece of stock with the seam in the mix because of the strength loss and this shows why. I bent the first (inboard leg) pretty easily but when I tried to bend the outboard leg the inside wall the welded seam would also bend so I had to straighten it out and start over. I think that happened three or four times before I gave up. The used part of the rectangular tube has to end up being kind of a three sided parallelagram due to the change in direction of the legs.
One of the things I knew was that the outer triangulated leg would have to be a bit longer before the taper could be cut. This is because of the longer distance/length before it was parallel to the other leg to start the taper. Been there done that many times before. Just another thing to make life a little more complicated I guess (sigh). I'll try it again using a length of scrap w/o a seam and see what happens when this amature tries it.
Still finding out what I can and can't do with this problem.
Lee
While waiting for the temperature outside to climb to over 36° I got to look at the top brace to the spreader bar. I had the triangle you saw in the picture then I also cut a piece of 1 X 3 X .095 wall to the same dimension and tried to form them to the shape of the top of the shock tower.
I tried to bend the .095 wall piece first but it became very apparent that I would need to add some heat to change the bends and shape of the triangle shaped legs (see the pix below) plus the two legs were so close together that getting anything between them to hold things in place was going to be difficult. Add to that the gap between the legs got smaller. I then tried to re-form the shape of the lighter walled triangle which was a yes and no.
Two pictures of the same thing but one with a flash and the other w/o. As I said, I would not use a piece of stock with the seam in the mix because of the strength loss and this shows why. I bent the first (inboard leg) pretty easily but when I tried to bend the outboard leg the inside wall the welded seam would also bend so I had to straighten it out and start over. I think that happened three or four times before I gave up. The used part of the rectangular tube has to end up being kind of a three sided parallelagram due to the change in direction of the legs.
One of the things I knew was that the outer triangulated leg would have to be a bit longer before the taper could be cut. This is because of the longer distance/length before it was parallel to the other leg to start the taper. Been there done that many times before. Just another thing to make life a little more complicated I guess
Still finding out what I can and can't do with this problem.
Lee
You do not have the required permissions to view the files attached to this post.
-
dustymojave
- Posts: 2312
- Joined: Mon Dec 01, 2008 9:08 pm
Re: Ol'fogasaurus black buggy
Sometimes I think you would get very claustrophobic inside that box you build around yourself.
You could simply use a piece of 3/16" flat stock.
That rectangular tube with the seam on the narrow side would not be a problem. In all my years of race car Tech Inspection, including crash inspections. I have NEVER seen an electro weld tube fail along the seam. And I've seen tubes collapsed lengthwise like an accordion. Many times though, I've seen 4130 tubing crack lengthwise or across the tube from impact. Welding it narrow side to the face of the cross member as you show it above renders the seam totally meaningless anyway. You have 2 flat triangular gussets this way.
Richard
Lake LA, Mojave Desert, SoCal
Speed Kills! but then...So does OLD AGE!!
Tech Inspection: SCCA / SCORE / HDRA / ARVRA / A.R.T.S. OffRoad Race Tech - MDR, MORE, Glen Helen BajaCup
Retired Fabricator
'58 Baja with 955K Miles and counting
Lake LA, Mojave Desert, SoCal
Speed Kills! but then...So does OLD AGE!!
Tech Inspection: SCCA / SCORE / HDRA / ARVRA / A.R.T.S. OffRoad Race Tech - MDR, MORE, Glen Helen BajaCup
Retired Fabricator
'58 Baja with 955K Miles and counting
-
dustymojave
- Posts: 2312
- Joined: Mon Dec 01, 2008 9:08 pm
Re: Ol'fogasaurus black buggy
Oh...And this is what a white Christmas looks like.
2008
Cameron can show you even more. And right now, I expect Tim can do pretty well too.
2008
Cameron can show you even more. And right now, I expect Tim can do pretty well too.
You do not have the required permissions to view the files attached to this post.
Richard
Lake LA, Mojave Desert, SoCal
Speed Kills! but then...So does OLD AGE!!
Tech Inspection: SCCA / SCORE / HDRA / ARVRA / A.R.T.S. OffRoad Race Tech - MDR, MORE, Glen Helen BajaCup
Retired Fabricator
'58 Baja with 955K Miles and counting
Lake LA, Mojave Desert, SoCal
Speed Kills! but then...So does OLD AGE!!
Tech Inspection: SCCA / SCORE / HDRA / ARVRA / A.R.T.S. OffRoad Race Tech - MDR, MORE, Glen Helen BajaCup
Retired Fabricator
'58 Baja with 955K Miles and counting
-
Ol'fogasaurus
- Posts: 17758
- Joined: Mon Nov 13, 2006 10:17 pm
Re: Ol'fogasaurus black buggy
“Sometimes I think you would get very claustrophobic inside that box you build around yourself.”
Nah! Over the years I have seen so much bad stuff that I have become kind of “gentle paranoid”. Probably most of it was poor workmanship but one never knows unless one did the job itself and even then….
“I have NEVER seen an electro weld tube fail along the seam. And I've seen tubes collapsed lengthwise like an accordion.”
Like this ?
I am not sure if this a blowout or what but this is kind of looks like I remember seeing in a seam failure.
This is a burst tube but similar to what I described in the paragraph below.
I have seen the seam split and pull apart kind of like a failed zipper on a ditty bag or a coat in both short (usually) and long separations. Mostly on rectangular tubing and on the short wall which is why the doubler over the seam. When it is on the long wall of a rectangular tube I seem to remember that the tube bent/folded like a round tube would. If you asked me the circumstances I couldn’t tell you but in my mind’s eye I do remember the visual instance.
The seam here bent/failed only at the welded seam join and that was while I was trying to re-form to sides of the tube. If I drilled a hole in the seam to put a stop in place the seam would have been weakened that leg considerably. At work; to do anything with a seam was a no-no but again but I don’t remember ever using anything but a tube and that was for jet engine mounts and that was for much higher loads than one usually finds in a car unless the car is dropped from an airplane 6 miles up and not using a parachute.
You do not have the required permissions to view the files attached to this post.
-
Ol'fogasaurus
- Posts: 17758
- Joined: Mon Nov 13, 2006 10:17 pm
Re: Ol'fogasaurus black buggy
A couple of things: I pretty much know what is available in AL from where I worked for such a long time but when it comes to what is available in steel I am often in the dark. With the problem on the Truss/Kaffer bar idea I am playing with I've had to change my mind more that once hence the different attacks at it and there is another thought coming up (at the bottom of this post) but first:
I was watching one of the auto build shows this am when the subject if cleaning up joints and their seals before painting came up (the answer was yes, clean well, anti-rust paint, then re-seal then you can re- paint!) which brought up one of the problems I have that has often been characterized as... OVER KILL! and that is the over welding of joins and over building.
What you have to remember is that I am dealing with is that I ride in/om salt infused sand which is similar to what those of you who live in the "rust belt", where they salt the roads, have to deal with also.
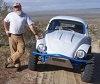
This is the Pacific Ocean on a calm day. but there is salt spray hanging in the air most of the time.
This is a couple of miles inland but even here there is still salt, not only in the sand, but still in the air even after rain. When going out for a ride then coming back in the windshield usually needs to be washed inside and out to get the salt off so you can see clearly before you go back out on the sand. One reason a windshield is not there anymore.
On the new structure I am working, on all the seams and ends of tubes need to be closed to keep the sand and salt out. The seat mounts are also going to have doublers under the pan and they will have to be sealed also. Even with fenders each ride gathers more sand inside the cab. The floors are thin and even a little rust can be a problem.
As Dusty said that I have to take the build as a whole which I do but then I break it down into sectons/jobs but still keeping in mind the whole build. Now I am dealing with the rear section of the build; hence the spreader tube in the rear for the Truss/Kaffer bar and the connection of the cage's down bars to... whatever. My plan is to double up the 1 X 2 edges the full length of the rectangular tube but now, on the upper corner surface I have changed my mind and now I think it will be on the aft side of the tube. This a change now since I am thinking of dropping the diagonal tube off the roll cage to it. The other change is two-fold, the one 45° brace that goes to the shock eye is way too complicated (it can be done) but now I think I will just go with a 3/16 piece of flat stock instead of the tube shaped piece. This is because of the angle change and the tapering cross-section to the shock eye. I have to go to my metal supply shop and see if they can get me a length of 1/8th wall Tee shaped material (https://www.bing.com/images/search?q=St ... ORM=IRIBIP). This is to help with the 1/8th wall triangular shaped structural material and the way that I think the loading will/should go (I hate these sleepless nights).
I now have found a second place for material than the salvage yard; a bit more expensive but they can deal with stuff the salvage yard doesn't normally carry. The salvage yard can get it but I have to buy a 20' length of it instead of the length I want. I'll have to take sections of what I want to match up with me when I go.
Lee
I was watching one of the auto build shows this am when the subject if cleaning up joints and their seals before painting came up (the answer was yes, clean well, anti-rust paint, then re-seal then you can re- paint!) which brought up one of the problems I have that has often been characterized as... OVER KILL! and that is the over welding of joins and over building.
What you have to remember is that I am dealing with is that I ride in/om salt infused sand which is similar to what those of you who live in the "rust belt", where they salt the roads, have to deal with also.
This is the Pacific Ocean on a calm day. but there is salt spray hanging in the air most of the time.
This is a couple of miles inland but even here there is still salt, not only in the sand, but still in the air even after rain. When going out for a ride then coming back in the windshield usually needs to be washed inside and out to get the salt off so you can see clearly before you go back out on the sand. One reason a windshield is not there anymore.
On the new structure I am working, on all the seams and ends of tubes need to be closed to keep the sand and salt out. The seat mounts are also going to have doublers under the pan and they will have to be sealed also. Even with fenders each ride gathers more sand inside the cab. The floors are thin and even a little rust can be a problem.
As Dusty said that I have to take the build as a whole which I do but then I break it down into sectons/jobs but still keeping in mind the whole build. Now I am dealing with the rear section of the build; hence the spreader tube in the rear for the Truss/Kaffer bar and the connection of the cage's down bars to... whatever. My plan is to double up the 1 X 2 edges the full length of the rectangular tube but now, on the upper corner surface I have changed my mind and now I think it will be on the aft side of the tube. This a change now since I am thinking of dropping the diagonal tube off the roll cage to it. The other change is two-fold, the one 45° brace that goes to the shock eye is way too complicated (it can be done) but now I think I will just go with a 3/16 piece of flat stock instead of the tube shaped piece. This is because of the angle change and the tapering cross-section to the shock eye. I have to go to my metal supply shop and see if they can get me a length of 1/8th wall Tee shaped material (https://www.bing.com/images/search?q=St ... ORM=IRIBIP). This is to help with the 1/8th wall triangular shaped structural material and the way that I think the loading will/should go (I hate these sleepless nights).
I now have found a second place for material than the salvage yard; a bit more expensive but they can deal with stuff the salvage yard doesn't normally carry. The salvage yard can get it but I have to buy a 20' length of it instead of the length I want. I'll have to take sections of what I want to match up with me when I go.
Lee
You do not have the required permissions to view the files attached to this post.
-
Ol'fogasaurus
- Posts: 17758
- Joined: Mon Nov 13, 2006 10:17 pm
Re: Ol'fogasaurus black buggy
Yesterday afternoon and this AM (before I was driven out of the garage due to cold) I got to play around with the buggy. My plan to stiffen up the spreader bar due to maybe putting the cage down tubes to is isn't working quite as well as I had planned. I knew there would be a weight gain but not as much as it got and not as fast as it did .
These are two tries at what I had it mind. Both tests are 1 X 2 rectangular tube doubled by angle iron.
As you can tell, I am not the best welder in the world and don't weld much anymore so please be kind with the comments. The longer of the two coupons is with 1" X 1/8th wall angle iron. They welded together quite easily and at the settings I used there was penetration based on looking at the inside of the tube. I might want to go a bit higher though just to make sure the angle iron was properly heated. The change in weight was much more than I thought it would be. You carry around each stick by itself and know that there will be a change but when lifting both together... Wow!
The second coupon is the same size and wall thickness rectangular tube but instead of 1 X 1/8th wall angle iron it is 3/4 X 1/8th wall angle iron and is quite a bit lighter albeit the length is different but you can feel the difference proportionally.
Before I get too silly with welding I am going to see what is available in the same stock size but with a different wall thickness.
I am still playing with the steering and looking into different ways of getting things aligned so they work well together and reach the driver properly.
I made a solid connector rather than the stock rag joint or the new replacement ones (shown in the picture) that people say aren't that good. I made the piece out of 3/16" stock. It seems to work but I also need to answer a few other questions about the fancy looking goodies.
Lee
These are two tries at what I had it mind. Both tests are 1 X 2 rectangular tube doubled by angle iron.
As you can tell, I am not the best welder in the world and don't weld much anymore so please be kind with the comments
The second coupon is the same size and wall thickness rectangular tube but instead of 1 X 1/8th wall angle iron it is 3/4 X 1/8th wall angle iron and is quite a bit lighter albeit the length is different but you can feel the difference proportionally.
Before I get too silly with welding I am going to see what is available in the same stock size but with a different wall thickness.
I am still playing with the steering and looking into different ways of getting things aligned so they work well together and reach the driver properly.
I made a solid connector rather than the stock rag joint or the new replacement ones (shown in the picture) that people say aren't that good. I made the piece out of 3/16" stock. It seems to work but I also need to answer a few other questions about the fancy looking goodies.
Lee
You do not have the required permissions to view the files attached to this post.
-
Piledriver

- Moderator
- Posts: 22520
- Joined: Sat Feb 16, 2002 12:01 am
Re: Ol'fogasaurus black buggy
The stock rag joint works great., and any auto parts store sells them, as they are used in a lot of applications for good reason.
The bling urethane bits lack any reinforcement and will eventually crumble away as urethane is ~guaranteed to eventually to do in a shear application.
They really should be illegal, that stupid has been known for decades.
The bling urethane bits lack any reinforcement and will eventually crumble away as urethane is ~guaranteed to eventually to do in a shear application.
They really should be illegal, that stupid has been known for decades.
Addendum to Newtons first law:
zero vehicles on jackstands, square gets a fresh 090 and 1911, cabby gets a blower.
EZ3.6 Vanagon after that.(mounted, needs everything finished) then Creamsicle.
zero vehicles on jackstands, square gets a fresh 090 and 1911, cabby gets a blower.
EZ3.6 Vanagon after that.(mounted, needs everything finished) then Creamsicle.