I just went out and checked my other set and they are sold by Bug Pack; the package has a small tube of donut snot in the shrink wrap package; I got my bushings from a local VW parts house many years ago. What I call donut snot is a messy evil concoction that you rub on the inner surface; when you use it, I would wear some throwaway gloves. There are aftermarket choices you can use too that may or may not work better.ProctorSilex wrote:Lee,
Where did you get your bushings? I have these for my T1.
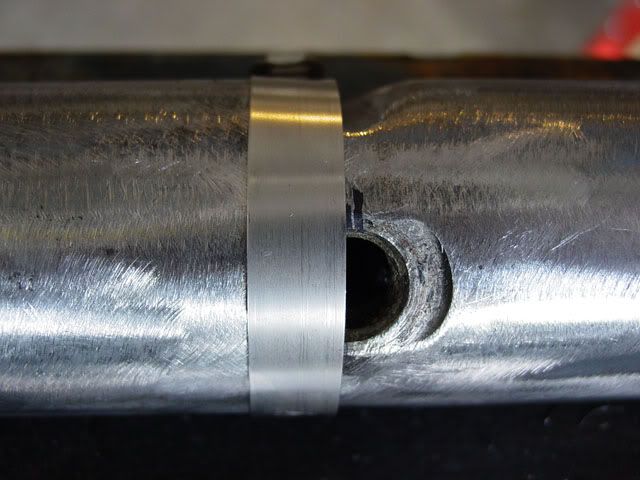
Have you tried fitting the trailing arms into the plastic bushings? Do you have any problems sliding the trailing arms into your bushings?
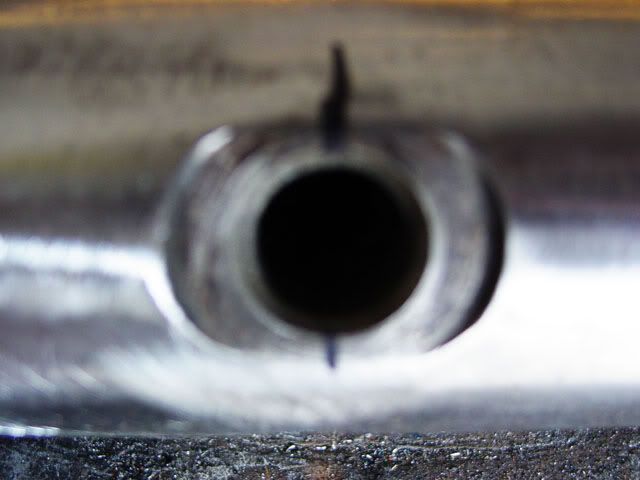
The doughnut that goes to the inside of the torsion housing needs to be lubed before you slide it on the spring plate and make sure things are clean before you do anything with the snot! The fit was tight but I don't remember them being any more of a problem than the stock ones were (they were oblong which is why I replaced them); more of an irritation putting things back together. At the time I got them the stock ones were not readily available and I wasn’t too sure of the other black ones which I have since heard may be better.
When I first put the donuts on they did not squeak; it was when I took the spring plates off again, to reset the preload I got dirt on them and had to wipe them out which took the lube also, that was when they got noisy. There are lubes you can get that will quiet them down but with so many other noises they haven't been a high priority… yet. Since I have a glass bodied buggy, a lot of those noises and squeaks’ are somewhat filtered out or the sound is bounced away. It is when someone leans against my car that you hear what sounds more like a groan than a squeak but then a lot of the guys I know, if they sat on me I’d groan too. My GoPro is the thing that catches the high pitched noises so I turned the sensitivity down or turn the volume down.
Lee