slayer's buggy build

Can't afford the rare and extreme car of your dreams? Well just build one.
User avatar
slayer61
Posts: 125
Joined: Wed Jul 14, 2021 10:32 am

Re: slayer's buggy build

Post by slayer61 »

So a while back I bought a donor motor that I knew was locked up and wouldn't turn over
Donor motor.jpg
Donor II.jpg
I probably paid too much for it, but I still believed it was a bargain, because it was complete.
Upon tearing it down, I found that it had lived it's last life as a VW engine. The case was assembled with a .050 over line bore, and still had a giant gouge to deal with where the crank had spun the main bearing
20211031_101818.jpg
Well, dammit.... I have sheet metal, distributor, Kads and a flywheel for my purchase price... :evil:

I ask my boss, also a VW guy, if he has a spare case laying around and he says yes! Says he was gonna make a coffee table out of it one day. And since he only needs a "coffee table" quality case, he is willing to swap straight across for my roached piece! :shock:

Turns out it's an AS21 case, still a 1600 and only .010 over line bore and no gouge to clean up! WOOT! :D
Donor_1[1].jpg
Donor_2[1].jpg
You do not have the required permissions to view the files attached to this post.
User avatar
slayer61
Posts: 125
Joined: Wed Jul 14, 2021 10:32 am

Re: slayer's buggy build

Post by slayer61 »

So the windshield arrived yesterday. I'm pretty happy with it. I had Dino cut it down a couple of inches for a "chop top" feeling. I will get it solid mounted this weekend, with any luck.
20211116_174635.jpg
20211116_174813.jpg
You do not have the required permissions to view the files attached to this post.
Ol'fogasaurus
Posts: 17760
Joined: Mon Nov 13, 2006 10:17 pm

Re: slayer's buggy build

Post by Ol'fogasaurus »

When chopping the windshield first make sure you can get short arms and wiper blades to wipe the glass w/o problems. When I bought my blue buggy there were arms and blades on it but they really didn't work well as they hit the windshield frame and jumped giving a couple spots that did not clear.

Lee
User avatar
slayer61
Posts: 125
Joined: Wed Jul 14, 2021 10:32 am

Re: slayer's buggy build

Post by slayer61 »

As always, thanks Lee, but this is a "Sunday driver" only. If I get stuck out in the rain, I will have bigger problems. Ssshh. Don't tell the CHP or DOT, but I won't be running any wipers. :mrgreen:
Ol'fogasaurus
Posts: 17760
Joined: Mon Nov 13, 2006 10:17 pm

Re: slayer's buggy build

Post by Ol'fogasaurus »

Where I live to get a street legal vehicle it has to have operating wipers and a windshield. The windshield is two-fold... but mostly for several type of protection besides hooking a top et al to it.

By-the-way, "they" will often stop you to look at/enjoy it it or to do inspections checking for being street legal. I had min inspected on the trailer and it still had plates on it but when the officer saw the turning brakes I caught hell over it and was told he "better not see it on the street".

Lee
User avatar
slayer61
Posts: 125
Joined: Wed Jul 14, 2021 10:32 am

Re: slayer's buggy build

Post by slayer61 »

So another hobby :snipersmile: :2gunfire: has slowed me down just a little bit..., oh ya... and Christmas cost a buck or two... :oops:

But the ball is still rolling. I have been in touch with one of our vendors about building a roll cage for me, and we have a date nailed down. As I have no motor yet, the buggy will be trailered to the fab shop. I spent part of Sunday making sure the body, windshield and hood were bolted down solid for the trip. First time outside of the garage since the purchase back on Memorial day...


Image


Image


Image


Image
Ol'fogasaurus
Posts: 17760
Joined: Mon Nov 13, 2006 10:17 pm

Re: slayer's buggy build

Post by Ol'fogasaurus »

Dune house diary 081 copy.jpg
This is my blue buggy when it came back from having the cage built.
Dune house diary 076 copy.jpg
This is with the top down.

One thing though, mine is the basics for the cage, it really needs a couple more bars to make it stronger.

With the way your buggy is sitting it looks like street use. If so, the common hoop on a buggy is nothing but dangerous, so a cage is a good idea. If youi decide to go off-road, then there are some additional things I would suggest you have/do.

Good start though!

Lee

Addition: the three bars going from the rear hoop to the front hoop have a slight bend to them making it easier to get in and out of. The center bar is used to get in and out of also, grab onto it and pull yourself up out of the seat somewhat. It is also good as a video tape camera mount.

Lee
You do not have the required permissions to view the files attached to this post.
User avatar
slayer61
Posts: 125
Joined: Wed Jul 14, 2021 10:32 am

Re: slayer's buggy build

Post by slayer61 »

Update 1/22/2022
My buggy has been dropped off at Late Night Air Cooled in Chico for roll bar fab & installation.
Thanks so much for going the extra length to meet me Brian. Much appreciated & looking forward to doing more business with you
20220122_075410.jpg
20220122_075420.jpg
20220122_080023.jpg
You do not have the required permissions to view the files attached to this post.
User avatar
slayer61
Posts: 125
Joined: Wed Jul 14, 2021 10:32 am

Re: slayer's buggy build

Post by slayer61 »

So I got some "for your approval" photos from the roll cage fabricator last night, and I'm right pleased with the outcome. It was just as I asked for! 8)


Image


Image


Image
Ol'fogasaurus
Posts: 17760
Joined: Mon Nov 13, 2006 10:17 pm

Re: slayer's buggy build

Post by Ol'fogasaurus »

2260198 copy.jpg
Could you get a better copy of this please?

I am fighting the same area on my black buggy to mount the cage. Since I have a body lift, I can use it for shear mounting but I would like to have some attachments to the floor in case of "endos" rather than just rollovers. I think end-over-end might be more common in the sand than in other driving environments.
IMG_2678 copy.jpg
IMG_2683 copy.jpg
I have to tilt the rear cage back also in order to get the 4" head clearance from the cage. The body can stretch some in certain applications as well as the cage can dig into the sand hence the 4" advice.

The two down bars are + and -. In the way for the rear-view mirror but stronger support for the hoop.

Lee
You do not have the required permissions to view the files attached to this post.
Ol'fogasaurus
Posts: 17760
Joined: Mon Nov 13, 2006 10:17 pm

Re: slayer's buggy build

Post by Ol'fogasaurus »

2260198 copy copy.jpg
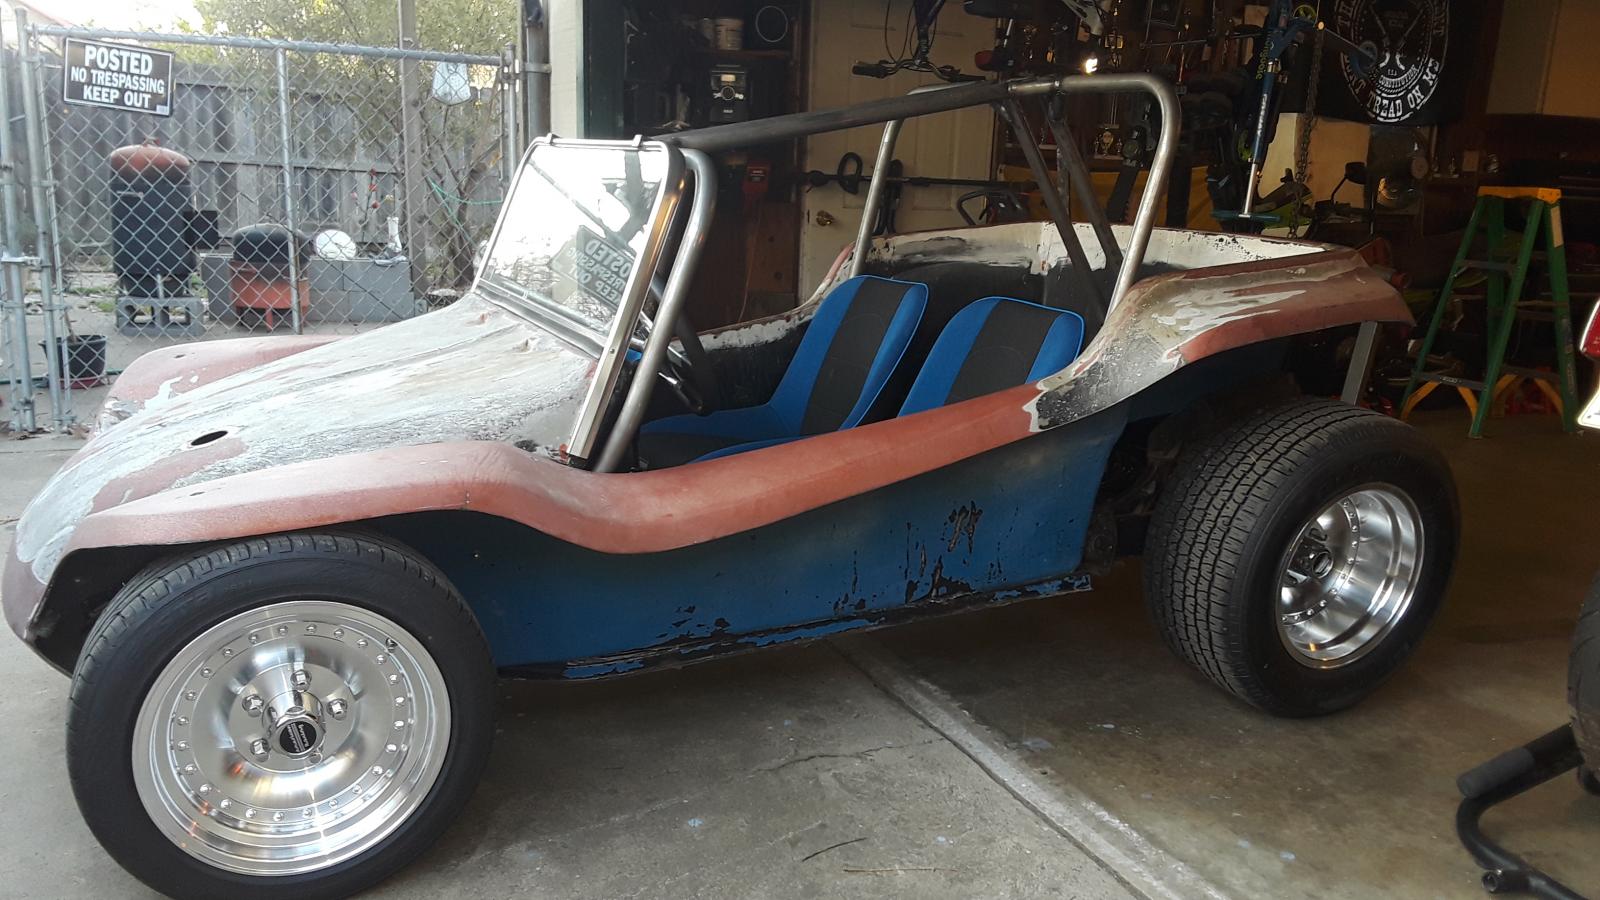
This is about as close as I could get cropping the pix. It is similar to what I was looking at doing myself but just not as long of a lower mount tube.

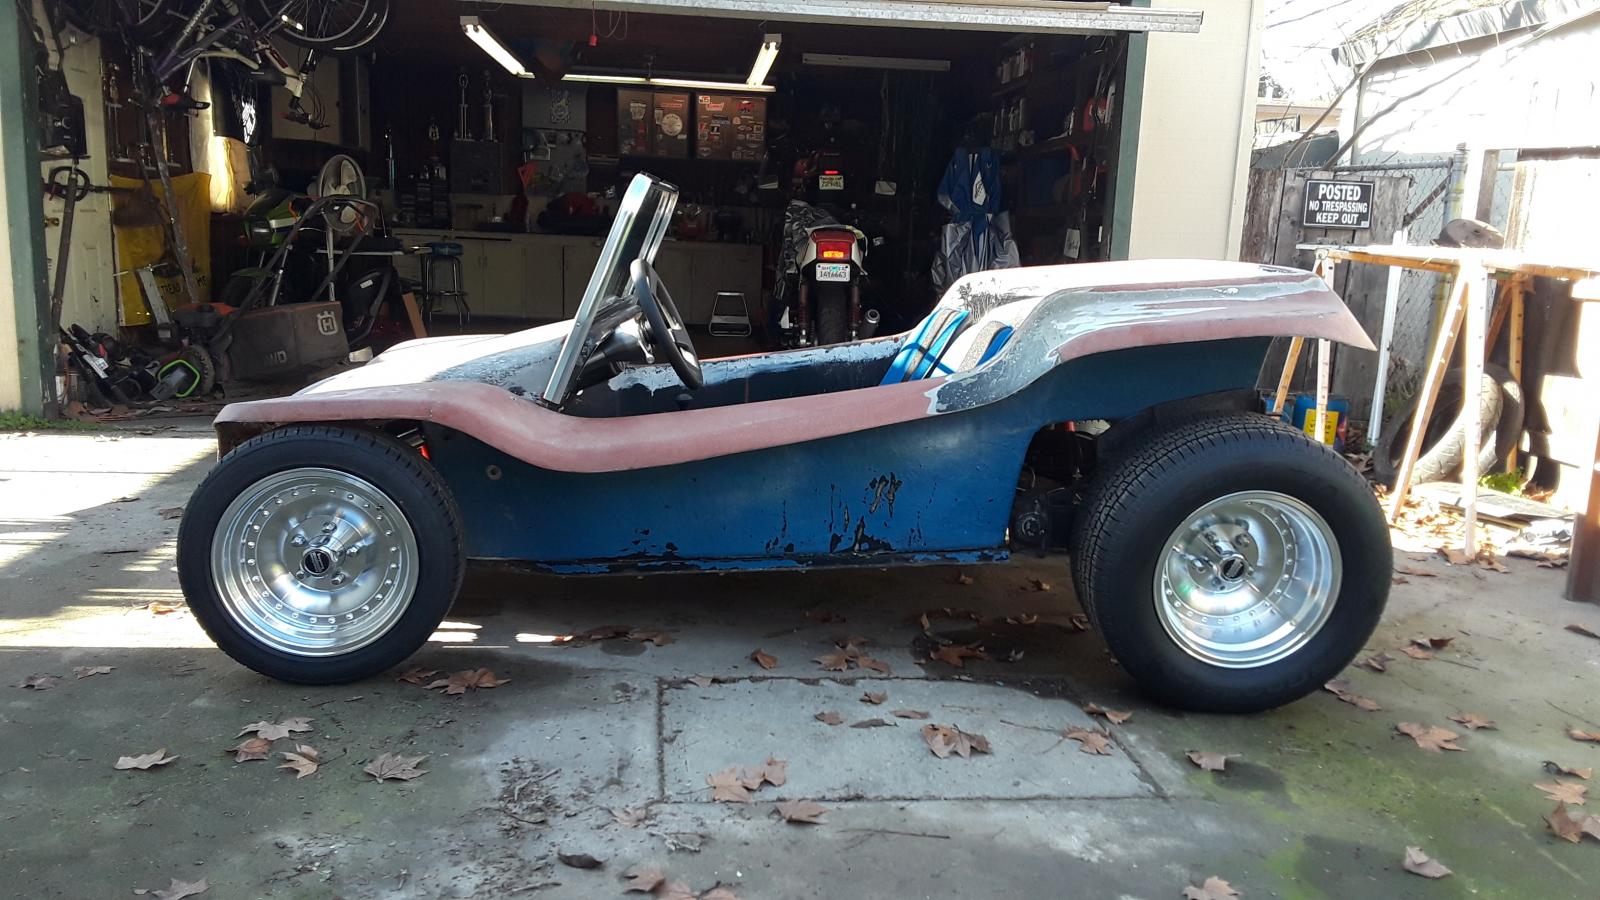
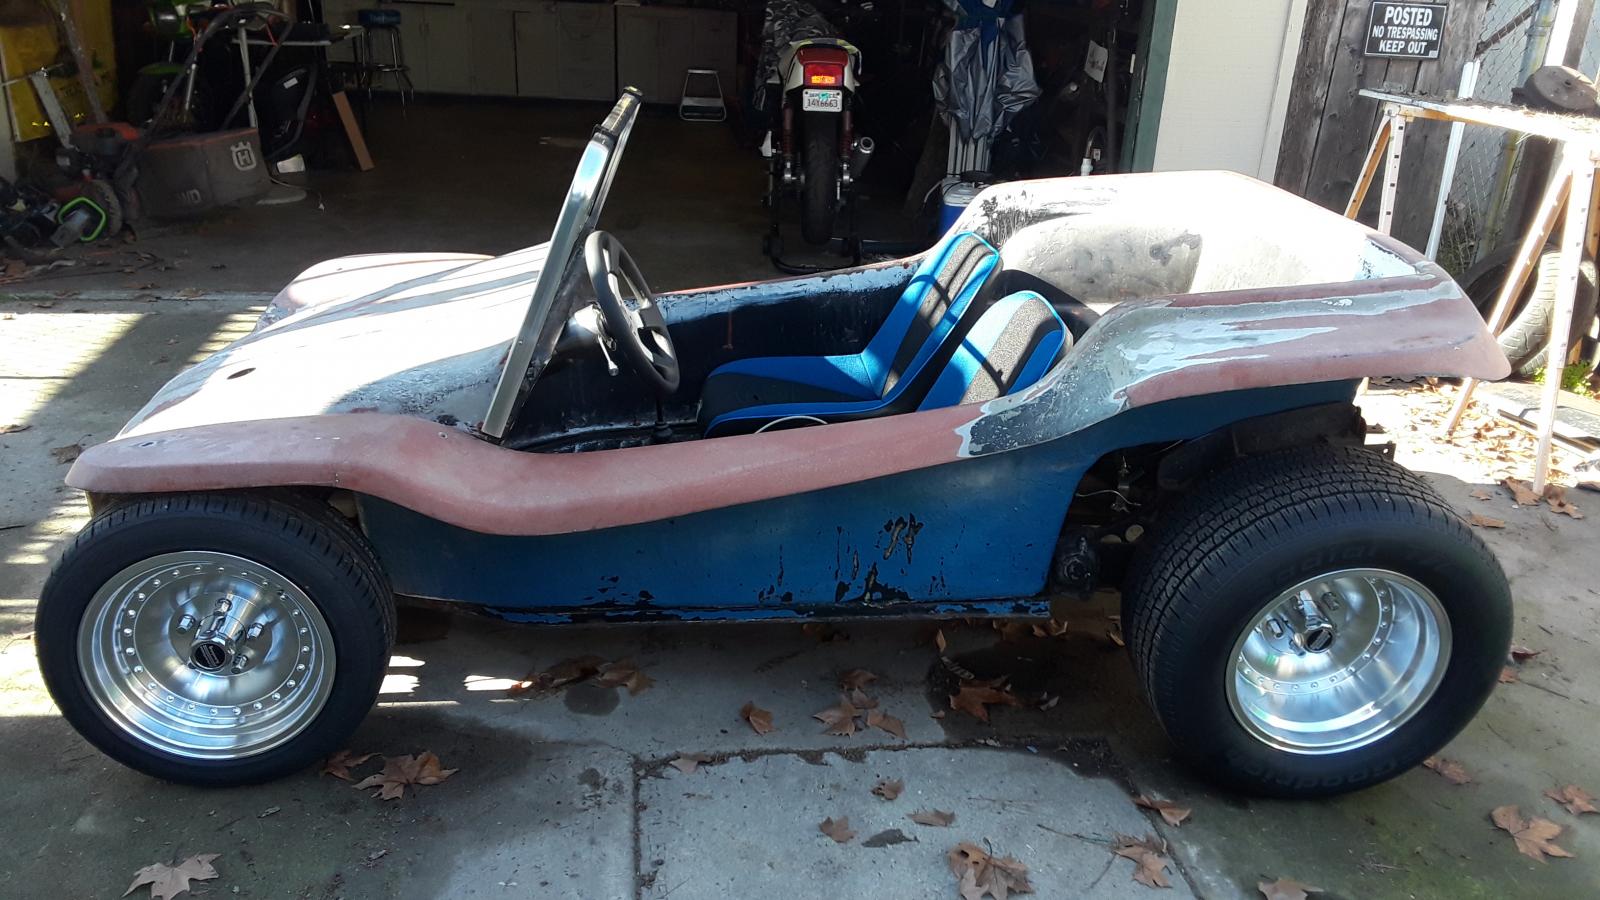
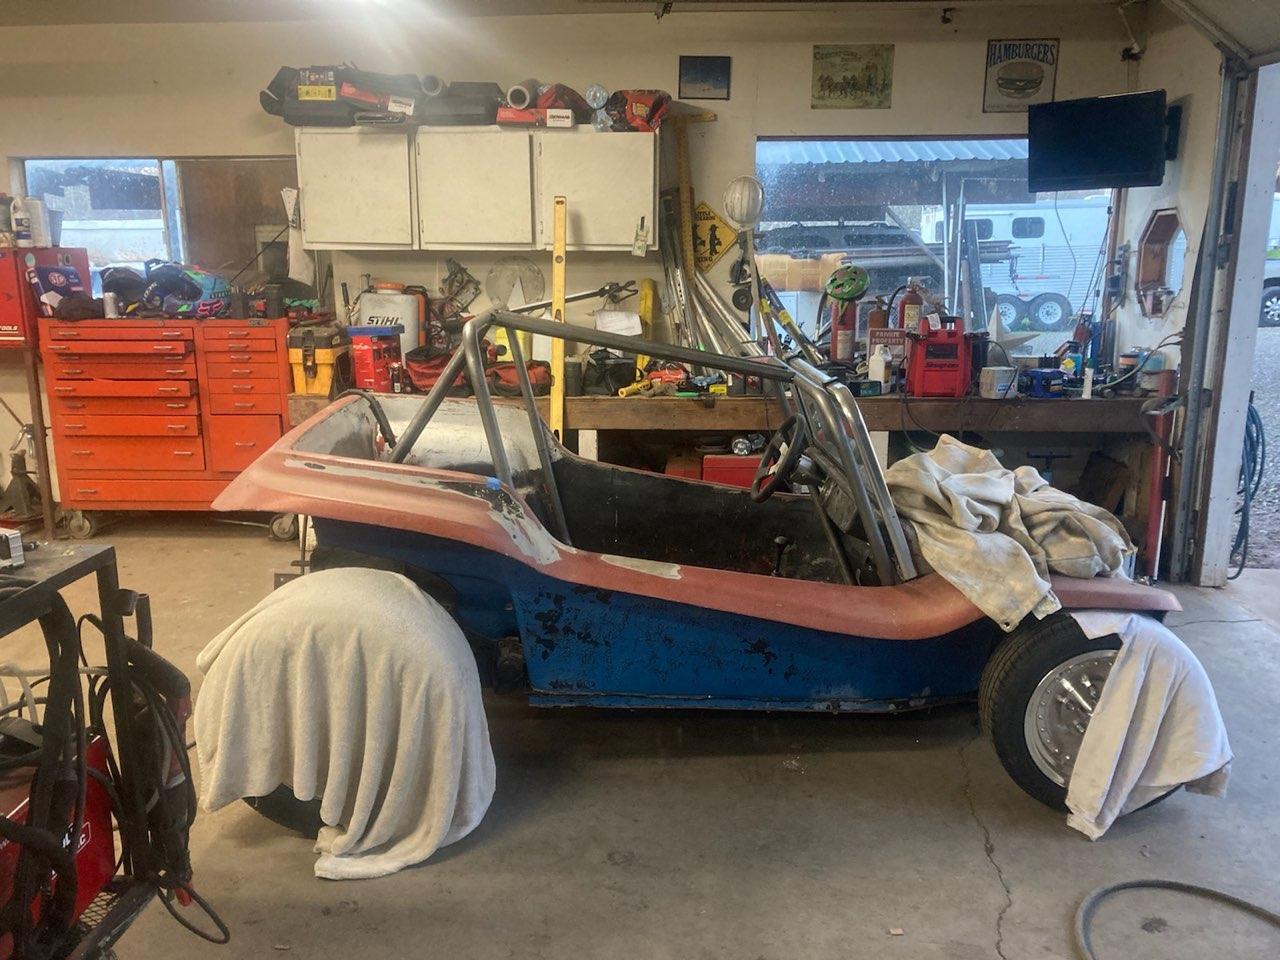
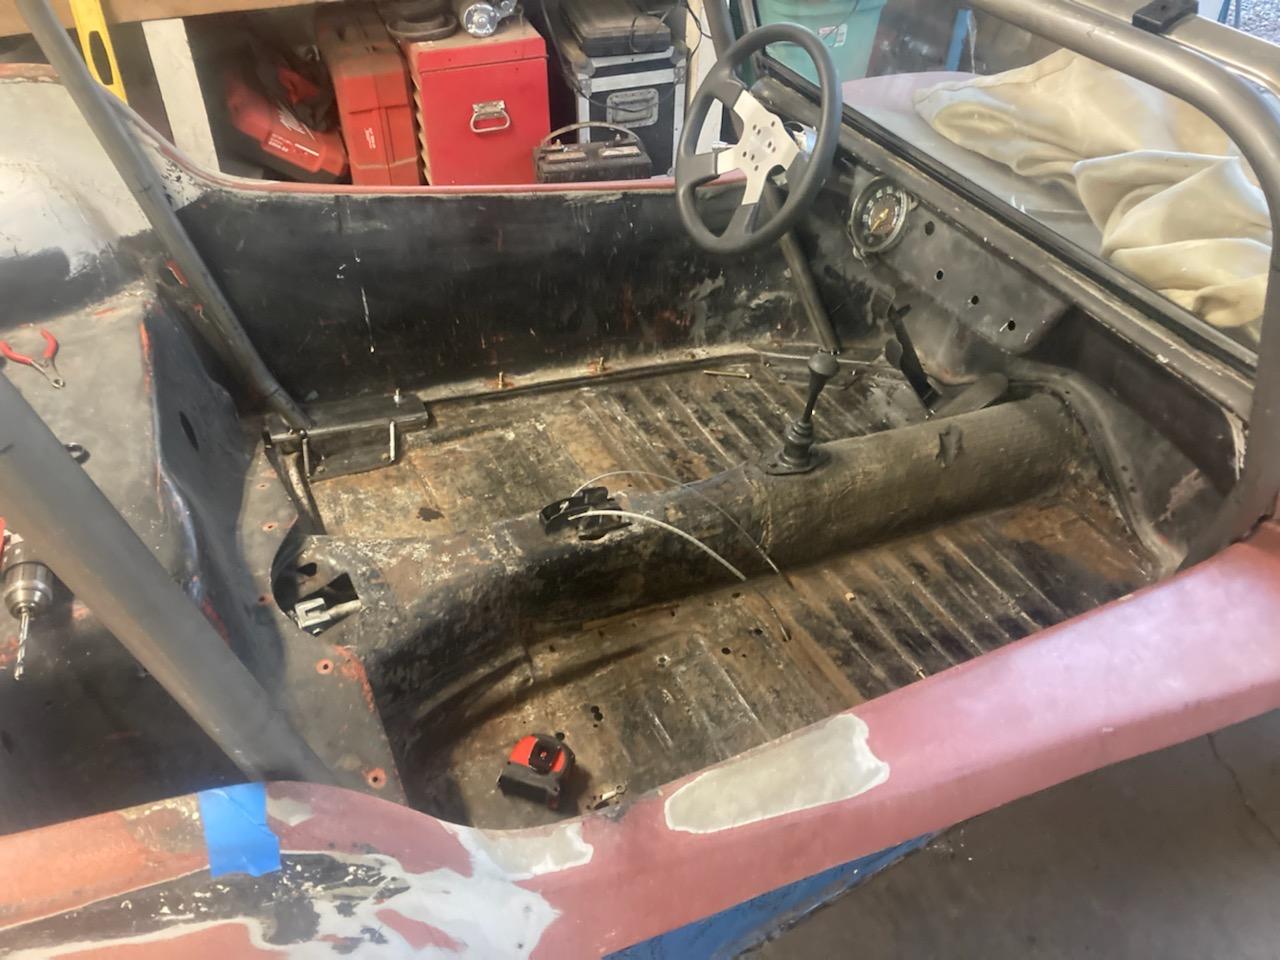
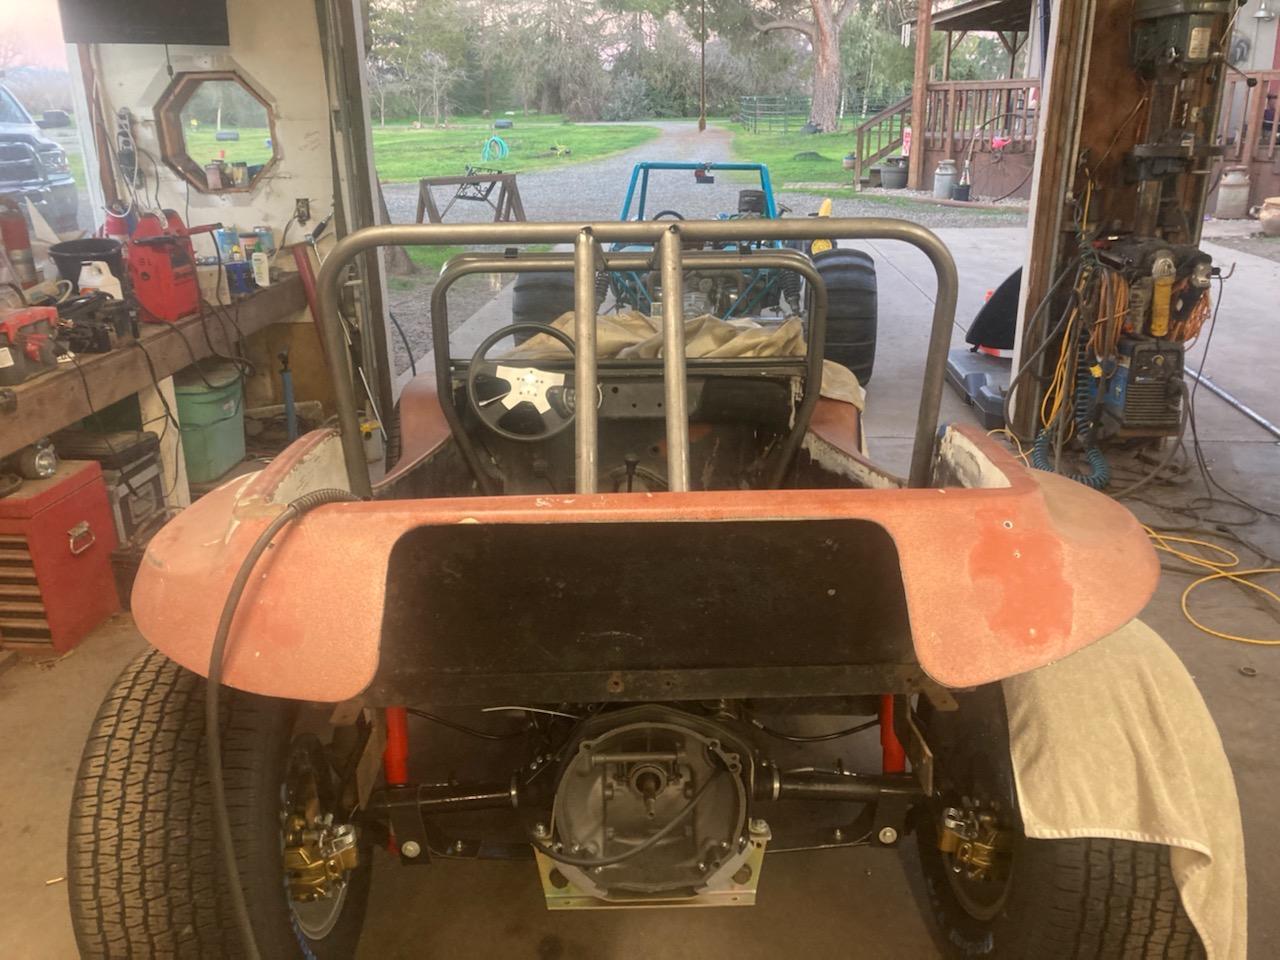
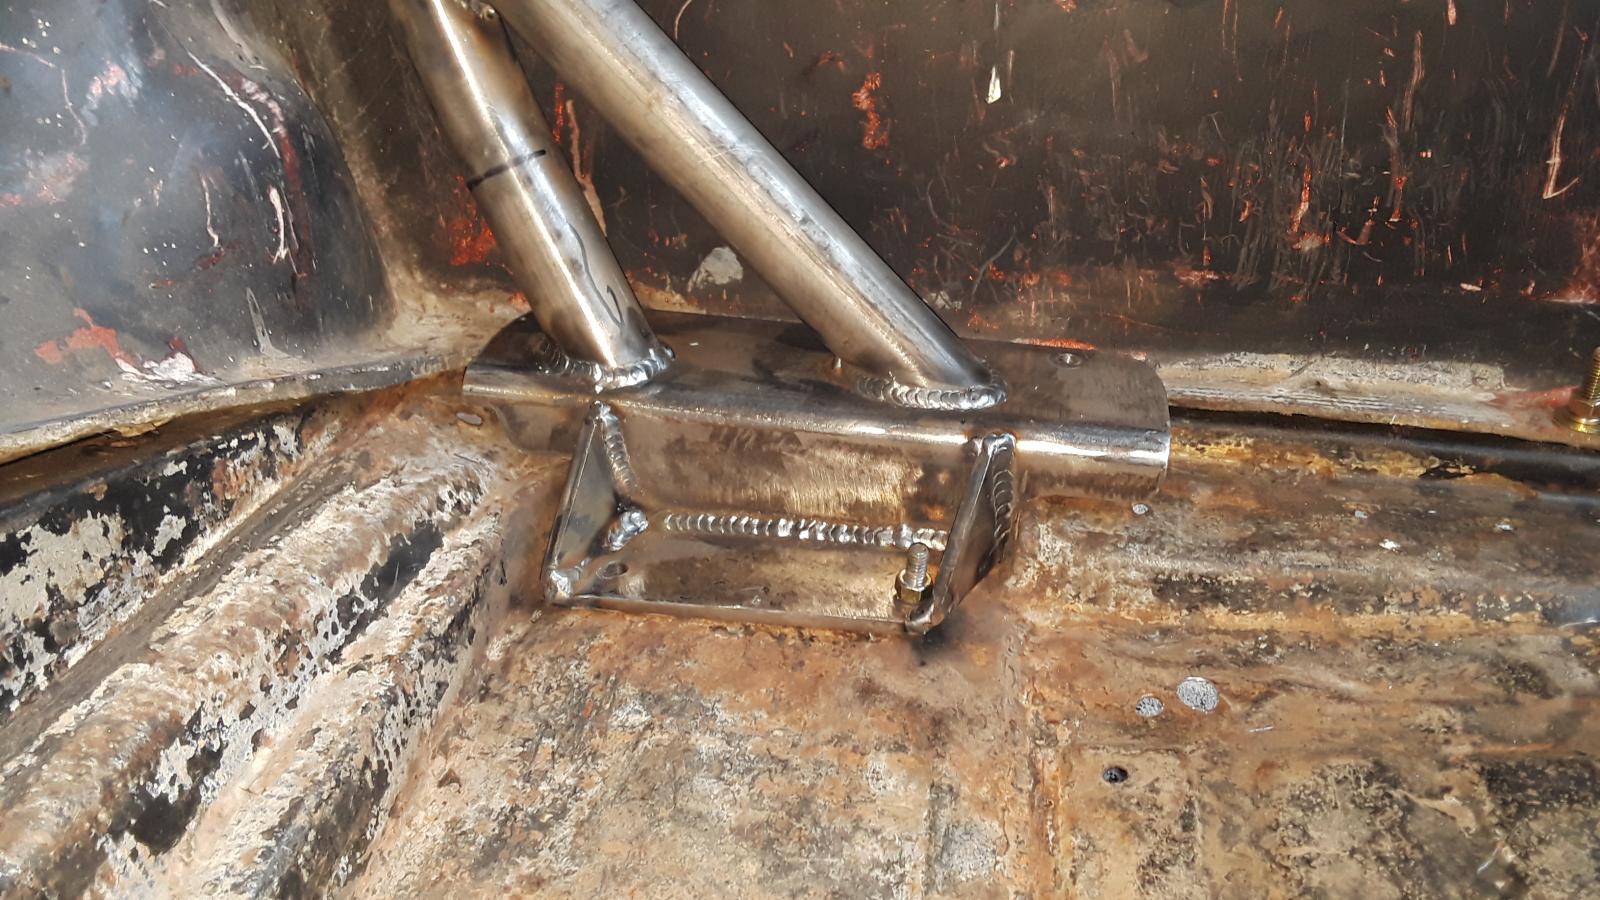
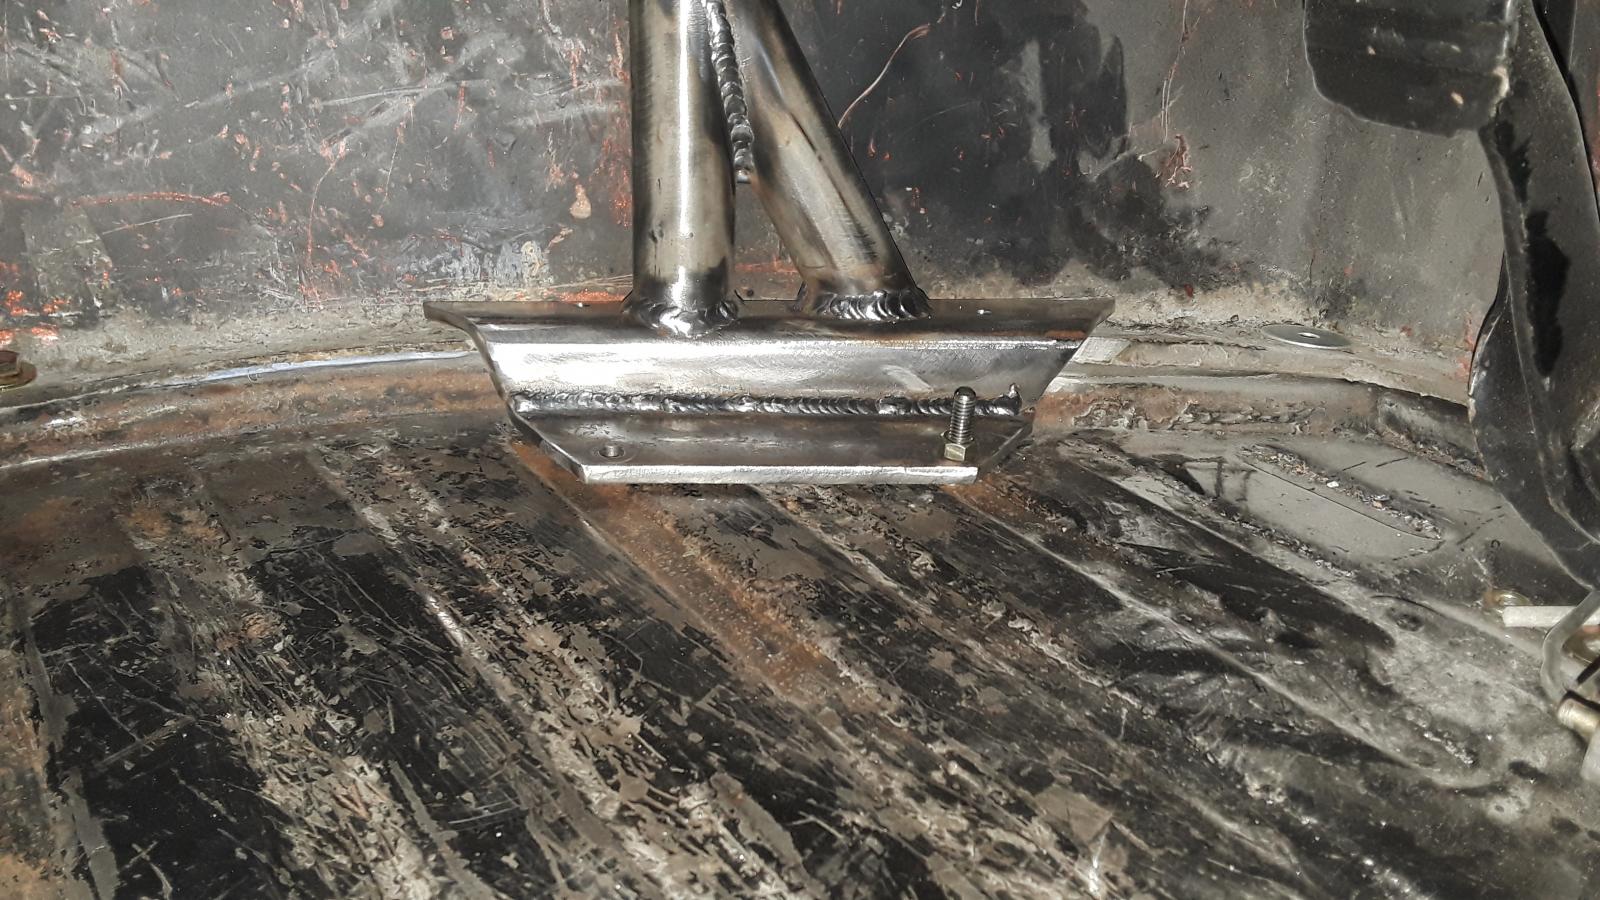
I have the body lift I can attach the hoop to but that would be in shear when rolling over or especially doing an end over, so I wanted to attach it to the floor also but since the floor is thin walled (I replaced the rotted floor with new pan halves, but they were too light of weight material, so I found some thicker material pan halves to replace the thinner ones. The pass side pan half is great, but the driver's side isn't as the forming at this same place this pix of is flawed.

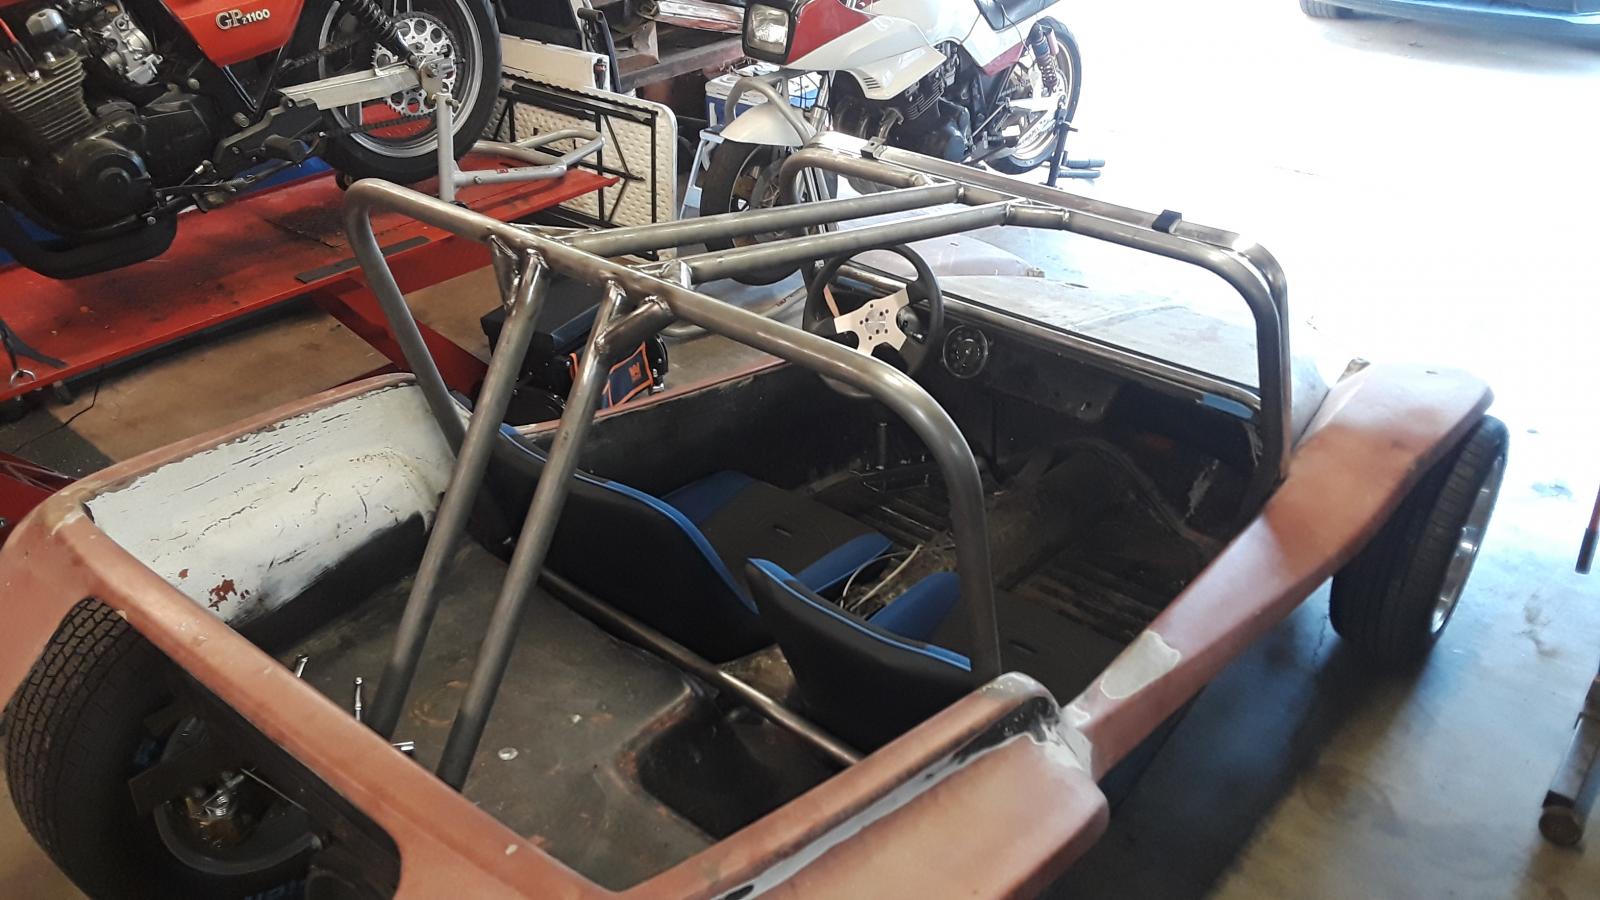
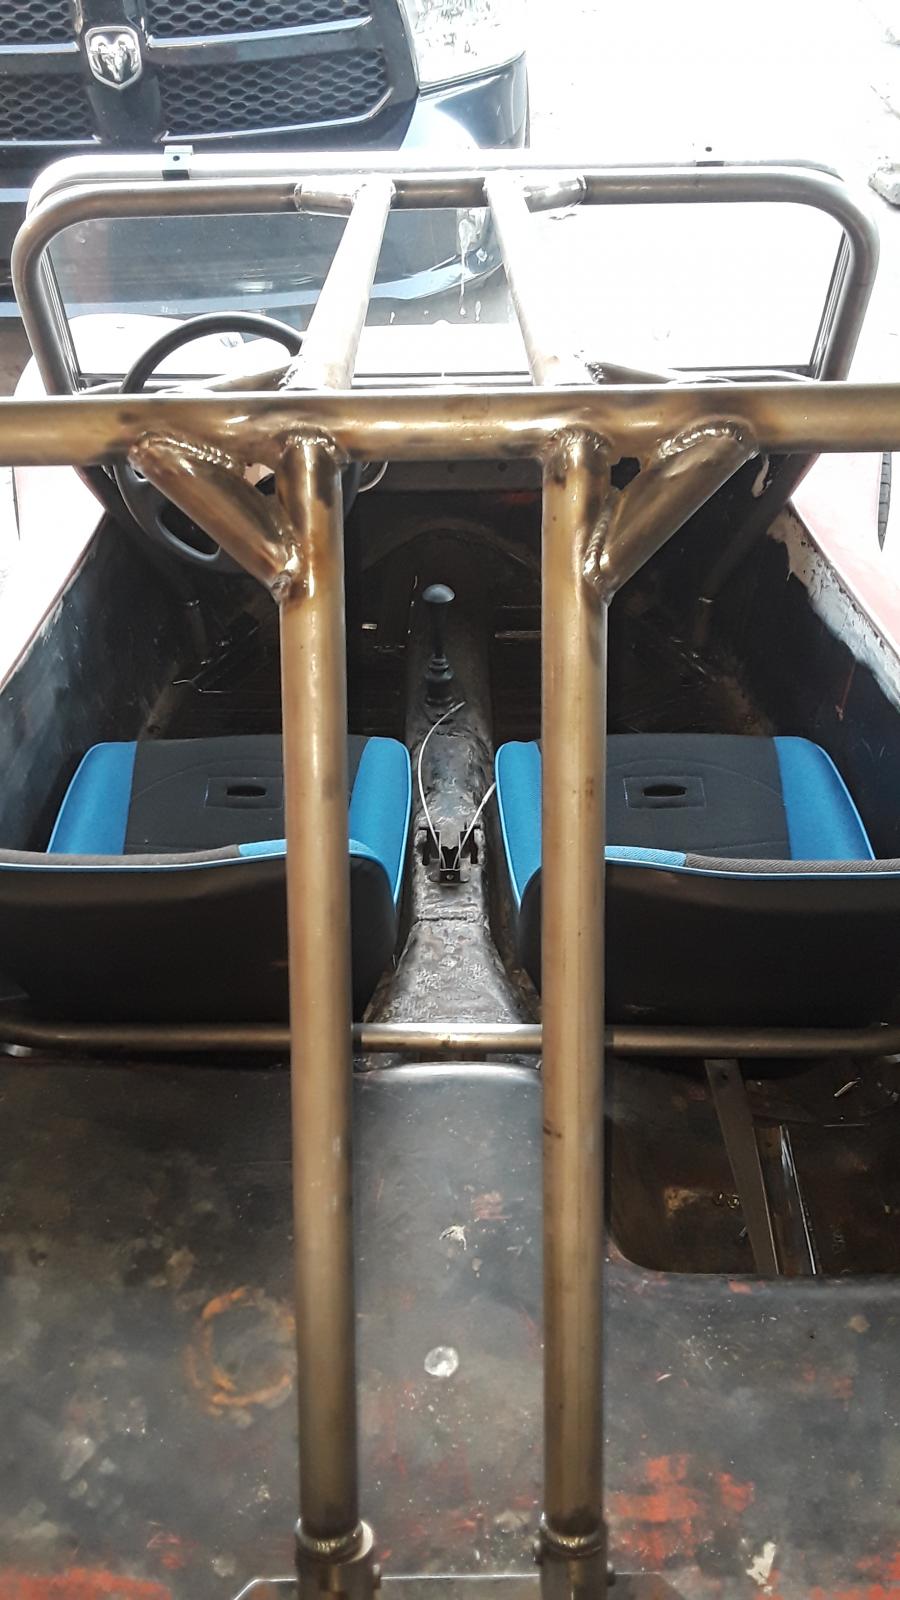
The tube, if it is welded tube is dependent on where the seam is. It the seam is on the short side of the tube then no. If it is on the bottom side of the rectangular tube, is it probably OK but if it is on the upper side, then probably not.

I also see some things I hadn't gotten that far of that is a good idea to keep the tube from folding like the end caps would help do.

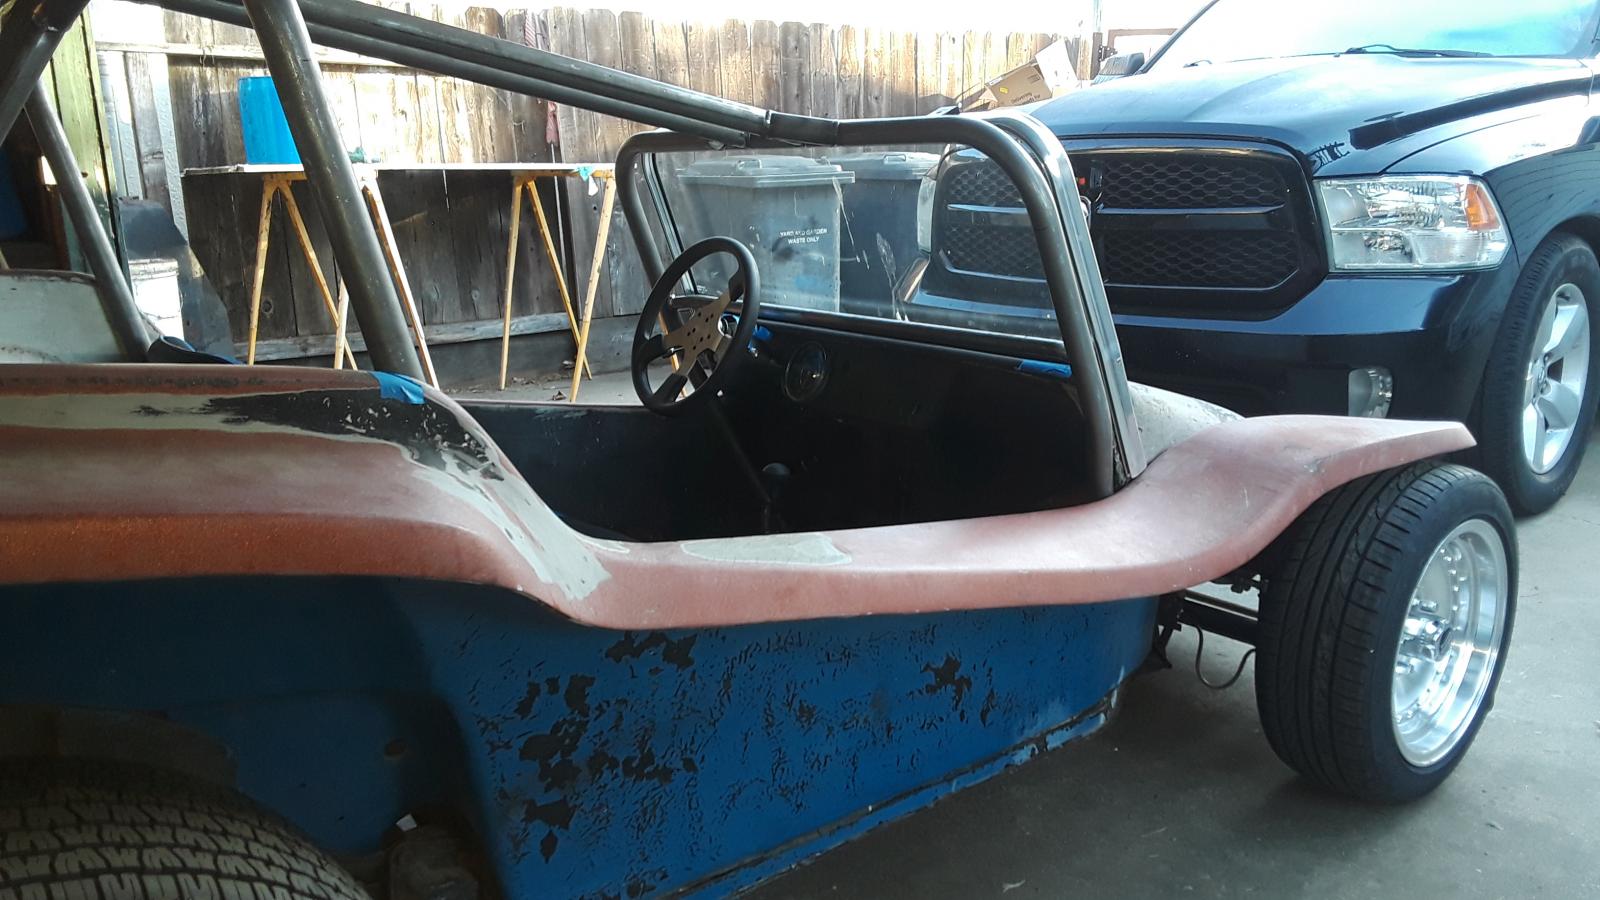
The reason I couldn't mount the cage to the top of the body lift is that the body itself is stiffening flanged facing inboard rather than like yours where the body's upper flange turns outboard.

I would cap the ends for several reasons mostly for additional strength especially because the tube is kind of long and some flexing of the tube where the cage bar is connecting could distort.

I also am not sure about the lower bend in the hoop being there especially where it is placed. I understand why they are doing it but bends are/can be weak which is why I mention it. Looking at options it is probably what they are going to have to live with. It also depends on just how the buggy is going to be used also.

This build I will be watching for information.

Thanks!

Lee.
You do not have the required permissions to view the files attached to this post.
Ol'fogasaurus
Posts: 17760
Joined: Mon Nov 13, 2006 10:17 pm

Re: slayer's buggy build

Post by Ol'fogasaurus »

Dune Buggy rebuild 10-1-06 091.jpg
This is the cage that was built for me. I hadn't built the body lift at the time the cage was built so the cage was on the body mount. There are some strengthening things from the tube to the flat mount I haven't added yet :oops: but I should get to it soon.

Lee
You do not have the required permissions to view the files attached to this post.
User avatar
slayer61
Posts: 125
Joined: Wed Jul 14, 2021 10:32 am

Re: slayer's buggy build

Post by slayer61 »

Lee,
I would be glad to get some more pics up after the car comes back from fab. These were just the shots the fab shop sent for approval. The cage was tacked up but needed final welding and assorted tabs welded on still.
Ol'fogasaurus
Posts: 17760
Joined: Mon Nov 13, 2006 10:17 pm

Re: slayer's buggy build

Post by Ol'fogasaurus »

Yes, you did say it was a mockup approval pix and I did notice the tacks.

My black buggy is a full-length VW pan so there are other things to play with on it such as 6" seat adjustment and within the group all 6" is needed.

I did go out and do some checking of where I am at on this and my height from the bottom of the body lift to the first level of the pan is roughly 1/2"... or less. Also, if I can I want the cage to be removable but that is also a maybe too. On my blue buggy the cage is removable which has been a good thing, so I am spoiled about that.

With the V6 in the rear the weight change also affects the setup also.

Anyway, as always, older buggies are a rough start but yours is looking good.

If you are going off-road then remember to support the front beam. The bottom support is available commercially, but the upper beam tube support and the FG don't buddy up too well.

Lee
User avatar
slayer61
Posts: 125
Joined: Wed Jul 14, 2021 10:32 am

Re: slayer's buggy build

Post by slayer61 »

So I took off from work on Friday & made the trip up to Chico to pick up the buggy. It's quite the pain in the ass at 2 1/2 hours each way, but Bryan at Late Night Air Cooled did a fantastic job. Thanks very much Bryan. Much appreciated, I couldn't be happier with the results.
Image


Image


Image


Image


Image


Image
Post Reply