Hello there.
I have been a lurker on this sub-forum for a while, but since I quite recently decided to start an oxyboxer project, I figured I could use the opportuity to share the progress with you, but also seek advice as I move along.
I have quite recently finished a long lasting EFI project on my curret engine, a 1835cc T1 that is running like a charm in my Ghia. here's a link to the thread on the fuel injected sub-forum: http://shoptalkforums.com/viewtopic.php?f=23&t=105351
I am located in Norway, so I will not have the possibility to have any parts machined at one of the experts in the US, but I have some contacts with the right equipment here, so I guess I will be fine.
The plan is roughly as follows:
wbx case with removed water jackets
stock 76.4mm crank
cima/mahle 94mm T1 p/c
EMPI 5.500 H-beam rods
relocated head studs
CB 2253 camshaft
SuperFlow heads
Pauter 1:1.3 rockers
Megasquirt EFI
Throttle bodies from Suzuki GSXR600
T1 Fan shroud
The target is good driveability with around 170-180 hp. Will be used as a daily driver, but occational trips to the drag strip and circuit course are likely.
The main reasons why I want to build an oxy-boxer is the fact that I like the idea of using original German case and crank as a base, then the fact that the case is in aluminum, and also the 5-bolt flywheeel mount.
I have mostly hand-tools in my garage, but I do have access to some machining tools in the shop at work, but I have no experience in using these...
This will not at all be a fast project, as I have some experience in projects taking its time... The Ghia took me 12 years to finish, the 1835 come 4-5 years... But I do really love these kind of projects, and the planning, discussions and solutions I come up with as I move along is just as rewarding as the end target.
So come on, give me feedback, and hopefully good advice as this engine is born.
Roy, Norway
Oxyboxer build thread
-
grelland

- Posts: 990
- Joined: Fri May 13, 2005 2:47 am
Oxyboxer build thread
Last edited by grelland on Thu Dec 02, 2010 9:02 am, edited 1 time in total.
-
grelland
- Posts: 990
- Joined: Fri May 13, 2005 2:47 am
Re: Oxyboxer build thread
I should start with a "before" picture, and this is a picture of the case as I picked it up from my local VW-parts dealer:
You do not have the required permissions to view the files attached to this post.
-
grelland
- Posts: 990
- Joined: Fri May 13, 2005 2:47 am
Re: Oxyboxer build thread
as can be seen, I trial mounted a CB pulley, and as the following pic shows, it will foul this mounting tab of some sort. I guess that will just have to be cut off, once I fire up my angle-grinder...
You do not have the required permissions to view the files attached to this post.
-
grelland
- Posts: 990
- Joined: Fri May 13, 2005 2:47 am
Re: Oxyboxer build thread
Then we come to the first question.
It has to do with the seal behind the pulley. It seems that the wbx case uses a different seal in the rear end (the one against the pulley). So while the T1 pulley fits on the crank, the T1 style spiral that slings the oil back into the case, is in open air.
I see on Rocky Jennings' page that he offers a seal kit that seal towards a T1 crank, but is there such a kit also available for a wbx crank?
You do not have the required permissions to view the files attached to this post.
-
Steve Arndt
- Posts: 7404
- Joined: Sat Mar 10, 2001 12:01 am
Re: Oxyboxer build thread
Why not try to utilize the vanagon crank pulley and stock crank seal?
-
sideshow

- Posts: 3428
- Joined: Mon Oct 27, 2003 11:00 am
Re: Oxyboxer build thread

One of these pulleys is not like the others:
* 11'o clock wasser stamped steel
* 3'o clock wasser cast iron three grooves
* 7'o clock aftermarket knock off of a heavy pulley, lightened and turned down to match wasser case seal
Well since the wasser pulley has to clear a water pump and sometimes drive power steering or perhaps air conditioning they are a little longer. No joy in recycling an OEM one.
Lucky for me I found a sympathetic lathe and operator and was pleasantly surprised that the screw depth was not enough to require a steel sleeve (jiffy sleeve that I purchased just in case designed to repair damaged cranks). So maybe I got lucky in starting with a steel aftermarket type one pulley and trimming it to fit.
Yeah some may call it overkill, but you can't have too much overkill.
-
grelland
- Posts: 990
- Joined: Fri May 13, 2005 2:47 am
Re: Oxyboxer build thread
Thanks for the input, I also got some advice that I should machine down the T1 pulley to the same outer dimension as the stock seal. Will have a look at that option then.
-
buildabiggerboxer
- Posts: 621
- Joined: Wed Mar 25, 2009 12:50 pm
Re: Oxyboxer build thread
Hi grelland, theT1 style pulley is too short to align with the waterpump pulley, but as your not using this it can be used, they work fine with the stock pulley seal if you machine off the scroll, i have a dry sump T1 pulley on my wasser, but i dont use the water pump, it has electronic water pump. my 5-1/4" pulley had to clear the lower 'boss' so this was removed.
good luck with the project and welcome by the way.
good luck with the project and welcome by the way.
-
grelland
- Posts: 990
- Joined: Fri May 13, 2005 2:47 am
Re: Oxyboxer build thread
thanks for the replies. I will look into machining down the spiral section then.
Does anybody know the dimension on this then?
Does anybody know the dimension on this then?
-
buildabiggerboxer
- Posts: 621
- Joined: Wed Mar 25, 2009 12:50 pm
Re: Oxyboxer build thread
Just skim till its gone, its only about 1mm, less on the aftermarket stuff.
-
grelland
- Posts: 990
- Joined: Fri May 13, 2005 2:47 am
Re: Oxyboxer build thread
not that critical with respect to the seal, in other words?
-
grelland
- Posts: 990
- Joined: Fri May 13, 2005 2:47 am
Re: Oxyboxer build thread
A fellow Norwegian did the same thing earlier this year, and he took it down to 48mm, so I will do the same.
I am in the "collecting parts" mode these days, and so far I have sourced a lot of parts, including a set of 94mm barrells.
But in my search for pistons, I have both a set of Wisecos and Mahles on hand, and I am quite aware of the difference in the two, but I am wondering if any of you knows whether I can use the Wisecos, as these are made for "stroker" cranks, which normally is >82mm, and I will be using a stock 76.4mm one.
-
buildabiggerboxer
- Posts: 621
- Joined: Wed Mar 25, 2009 12:50 pm
Re: Oxyboxer build thread
the wiseco's will likely be too short with a 76 crank then, just put them side by side on a pin for a quick check, but you could use them with a 5.5 rod, with the relevant deck mock ups obviously... 
-
grelland
- Posts: 990
- Joined: Fri May 13, 2005 2:47 am
Re: Oxyboxer build thread
I do have 5.5 rods, and I have not cc'd the heads, but if I recall correctly did the guy that used them before ran something in the range of 12-12.5 in comp, so I assume the combustion chambers are quite small, so I will need quite much deck to get to a streetable cr. Maybe that works ok then...
-
grelland
- Posts: 990
- Joined: Fri May 13, 2005 2:47 am
Re: Oxyboxer build thread
Time for an update, I guess.
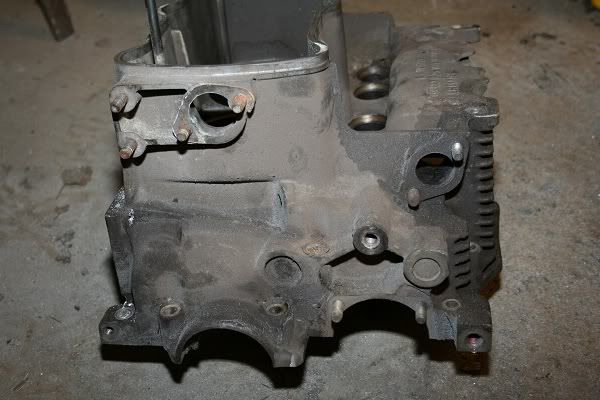
First of all, I pulled out the angle-grinder yesterday, and cut away the water-jacket on one side. It starts to look ok, and I took it all the way down to the surrounding surface, but made sure I did not touch the sealing surface for the sylinders

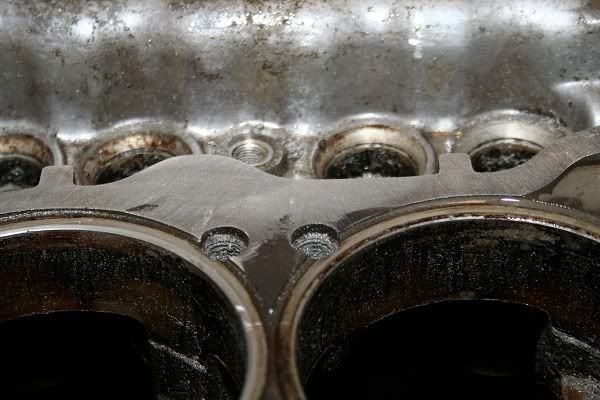
And a closeup of the surface:
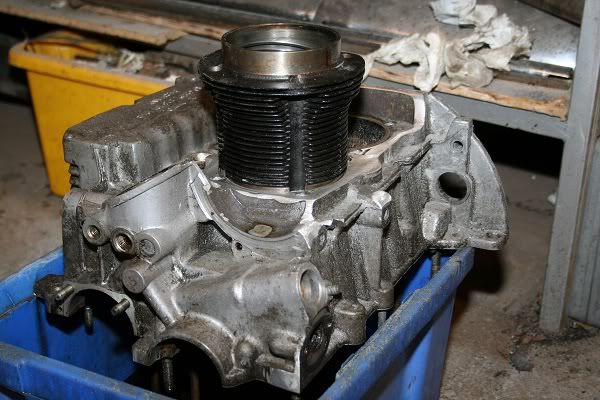
I also trial-mounted a cylinder to check the fit, and as expected the OD of the barrel is smaller than the opening in the case, but at least it resembles an air-cooled engine now:
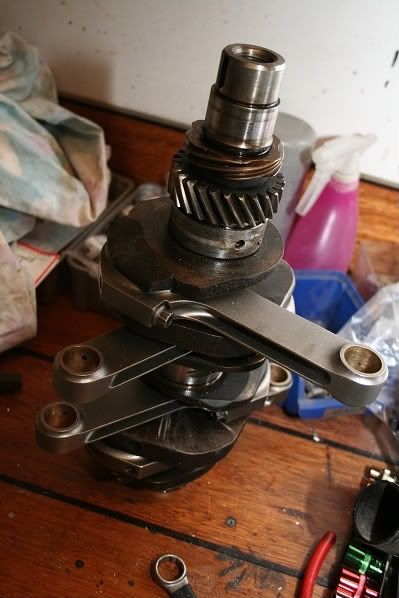
I cleaned up the crank, and trial mounted the H-beam rods, and two of them are a bit thight, but I will try out with some plasti-gage to check the bearing clearance
I will be using a pair of dual MC throttle-bodies, and will thenm fabricate the intakes, so here is the beginnings of the intakes:
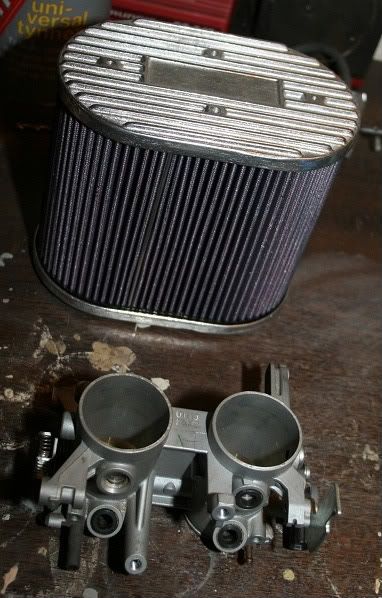
Here's a shot of the TB's along with the filters I will be using:
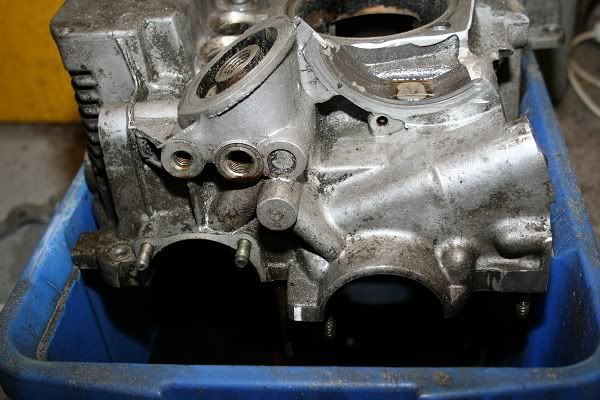
I will be getting a kit of T1 oil galley plugs, but if someone could point out what places to drill and tap, and what size plugs I will be using where, in the following pics, I would be very grateful:
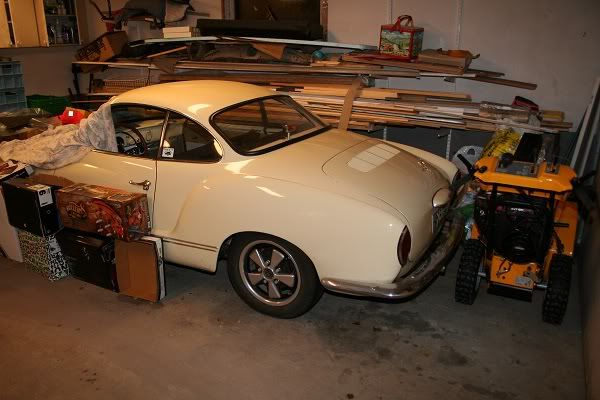
And finally a shot of the hosting car, sitting in my garage awaiting the snow to go away, and its new engine to be finished:
First of all, I pulled out the angle-grinder yesterday, and cut away the water-jacket on one side. It starts to look ok, and I took it all the way down to the surrounding surface, but made sure I did not touch the sealing surface for the sylinders
And a closeup of the surface:
I also trial-mounted a cylinder to check the fit, and as expected the OD of the barrel is smaller than the opening in the case, but at least it resembles an air-cooled engine now:
I cleaned up the crank, and trial mounted the H-beam rods, and two of them are a bit thight, but I will try out with some plasti-gage to check the bearing clearance
I will be using a pair of dual MC throttle-bodies, and will thenm fabricate the intakes, so here is the beginnings of the intakes:
Here's a shot of the TB's along with the filters I will be using:
I will be getting a kit of T1 oil galley plugs, but if someone could point out what places to drill and tap, and what size plugs I will be using where, in the following pics, I would be very grateful:
And finally a shot of the hosting car, sitting in my garage awaiting the snow to go away, and its new engine to be finished: