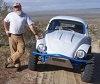
I am pooped! I spent some time in the garage then when it got a bit warmer I had to go out and do the first mow of the year. We/'ve had so much rain lately that the ground was very soft so it felt like I mowed a 2 hundred mile by 4 hundred mile of 40' to 60' fir trees using a electric tooth brush with a short charge cord (yes, I have an electric mower).
I'm still playing with mocking up things. This is the stock commercially made upper front beam support. The bend and the body where the fender and hood join is where the beam support stops the body from being put on the pan.
I got a scrap 1 1/2 inch tube that I use for mockup and after measuring the distance from the beam to where the mockup support from the A-pillar ends I got a rough dimension (even with a formed bend in the tape or the tape measure) of between 15" and 16"s then I added some extra. I then notched one end of the tube to be close to the dia. of the beam then using an air rasp I got the notch closer (not perfect). I then figured out the distance where I might have to start bending the tube so, with the seam on the side (you don't bend the seam area) I marked a center line then a secondary pair of lines 1" on each side of the center mark then marked my cuts. For marking for cutting I use a hose clamp's width for marking the cuts.
Then using my band saw I cut through the tube using the marks to each of the stop lines. When done I tired to make the first bend. Too much back bone so I remarked the stop line 1/2 inch closer to the backbone which worked. The band saw blade it pretty narrow so after each bend I recut the bend relief with the band saw. Using the commercial upper beam support I roughly figured out the start and end of the bend (it turned out I needed two of them) then it the two bend areas I used a cutting wheel to widen the necessary bends until I got what I wanted. Remember... this is a mock up using the keft way of doing things and even with welding the kerfs it is not a structural part as the grain has been disturbed. One the reasons they use DOM (Drawn Over Mandrel) as there are no seams this way. Much stronger than seamed tube.
The notch fits good enough for this mockup but clamps will be needed. At the upper end I did use a sleeve to join the two 1 1/2" dia. tubes but no thumb screws. I will have to take another pix to show what the hoop area looks like as it might be better than I thought.
Lee
Ol'fogasaurus black buggy
-
Ol'fogasaurus
- Posts: 17759
- Joined: Mon Nov 13, 2006 10:17 pm
Re: Ol'fogasaurus black buggy
You do not have the required permissions to view the files attached to this post.
-
dustymojave
- Posts: 2312
- Joined: Mon Dec 01, 2008 9:08 pm
Re: Ol'fogasaurus black buggy
I would have reversed that "stock" tube and put the bend closer to the firewall to get more clearance You;re making it nearly identical to how it came from the factory.
Richard
Lake LA, Mojave Desert, SoCal
Speed Kills! but then...So does OLD AGE!!
Tech Inspection: SCCA / SCORE / HDRA / ARVRA / A.R.T.S. OffRoad Race Tech - MDR, MORE, Glen Helen BajaCup
Retired Fabricator
'58 Baja with 955K Miles and counting
Lake LA, Mojave Desert, SoCal
Speed Kills! but then...So does OLD AGE!!
Tech Inspection: SCCA / SCORE / HDRA / ARVRA / A.R.T.S. OffRoad Race Tech - MDR, MORE, Glen Helen BajaCup
Retired Fabricator
'58 Baja with 955K Miles and counting
-
Ol'fogasaurus
- Posts: 17759
- Joined: Mon Nov 13, 2006 10:17 pm
Re: Ol'fogasaurus black buggy
Down at the dunes now working my fanny off. Part of the crew is gone then the last will leave tomorrow leaving my wife and I do finish some other things.dustymojave wrote: ↑Sun Mar 28, 2021 8:13 pm I would have reversed that "stock" tube and put the bend closer to the firewall to get more clearance You;re making it nearly identical to how it came from the factory.
As to the mockup I don't have a good pix here to post): the bend I made starts closer to the beam and is supposed to be longer but (yet) shallower bend or bends and starts closer to the beam than the commercial one does. The mock-up's bend's tightness/shape is not fixed as there is room to enlarge the kerfs to get a tighter or longer bend if needed. The area where there are kerfs, between the larger two bends, have a tiny arc but then there is a tighter bend at the top; to get the alignment for a straight line into where the tube from the A-pillar comes into the area It much easier to make the starts for Kerfs when the tube is straight.
The problem with the commercial bent tube is contact with the body where the body's (wing shaped) front fender and hood join the center of tube's bend is is where the problem. The interference was towards the as the middle of the commercial tubes bend (which is a higher and tighter) as that was where the hood and fenders of the body join is very low.
Without the body lift those joins would almost be on the beam pan itself... it is that tight (the only pix here has the front tire in the way. I really haven't measured the need which is why I played with the mock-up bend in the commercial support. I want the body back on then I can put the bent piece in place to verify the bend or re-bend it to fit the body sitting on the body lift. It's easier to work with the slightly bent piece than with a straight piece of tube.
I hope this writeup makes sense.
I was hoping I would hear from your input this idea. Not the only one but a start.
Lee
-
Ol'fogasaurus
- Posts: 17759
- Joined: Mon Nov 13, 2006 10:17 pm
Re: Ol'fogasaurus black buggy
I did have the bent tube facing the other way for a while but it created other problems such as worse miss-alignment to the body/pan or with my legs hitting the beam and yes, the bend is a bit smaller but pretty much parallel to the bends in the pan as it is inboard of the pan to match the body and body lift. This body is not like most buggy bodies as the upper structural flanges stop the use of the cage hoop on the body mounting flanges of the pan and have to be inside on the floor of the pan. There also is going to be some FG work in the area of the front hoop as the body has a AW $#it piece of body structure blocking the area where the front hoop of the cage has to go.dustymojave wrote: ↑Sun Mar 28, 2021 8:13 pm I would have reversed that "stock" tube and put the bend closer to the firewall to get more clearance You;re making it nearly identical to how it came from the factory.
Again, it is mostly the pan's shape, my using the pedal assy that I have in there that block a lot of things. I have tried several different shapes from a straight line from the A-pillar to the beam (it goes outside of the pan's shape so this is why a tube buggy/sand rail's or after market Baja's front beam support tubes are more straight in this area) to shallower bends but they all came up short. I don't like the idea of bends in this area as it weakens the design/strength of the cage but either I am missing seeing something or there is no other way. I'll keep looking though!
You are right on one thing and that is that I am going to have to complete the changes to the other front beam such as adding the suspension stops on the suspension arms and the way of stiffening the shock towers so I can tell what/where the tie-rod ends are going stop on compression (hang is not a problem I think) in comparison to the beam support I am working on and the clamping method for the upper front beam support (I still think I am going to have to modify the lower clamp for the grease fitting).
When dealing with things they almost always get to be more complicated than one thinks when everything gets tied together.
Lee
-
Ol'fogasaurus
- Posts: 17759
- Joined: Mon Nov 13, 2006 10:17 pm
Re: Ol'fogasaurus black buggy
Back from the dune area where a bunch of us did some upkeeping that was needed to be done. The weather was off and on rain, sun and wind. I heard that the Winchester Bay beach area was closed because of heavy waves and there was small craft warnings along the southern dune area too.
A lot of the ACVW places around here that I knew about have closed down so to work on the mockup I had to make a couple of temp clamps for the front beam supports. All the scrap I had that was large enough in dia. was some 1 1/2 fairly thick walled tube so I played with that.
The rusty pin here is something off a rail-road train that had been scrapped but had an outside dia. of 2 1/2" (which is close to the front beam dis. so, I tried to spread some 1 1/2" tube using the beveled ends of the pin... didn't work as it was too thick and I didn't want to add heat and since it was seamed tube I got Leary of going too far and not knowing what could happen so I cut the seam and tried to spread it again under a more controlled situation. Didn't work that way so I spread the cut and all it did was oval soooo... I cut the tube in half then used the pin as a mold to hammer the two pieces into usable 2" inside dia. mounts. That worked very well thank you. This is the underside of the mount but it hasn't been drilled for the grease fitting on the beam yet nor have to two pieces have clamping flanges added yet.
This shows the one mount in place with the bent shaped 1 1/2" tube sitting on it (the bend isn't correct as far as I can tell... just a starting guess until the body goes back on the pan.
Dusty Mohave said I would have the suspension go through it's travel to see if there is going to be a problem with the tie-rods. He is correct but since I am already above the commercial braces I think I am OK but it will do the suspension check anyway just-in-case. I won't use the torsion leaves but since this is a BJ beam the ball-joints themselves will limit the travel up and down.
The other thing is the full formation/bends of the brace isn't set yet until the body goes back on.
I also lengthened the front beam piece some so it fit tightly in the clamp (the same dia. material I used to make the clamps) that grips the two sections of bent tube together.
The hoop tube ("saddle" is often the slang term for something bent like this) in front of the firewall is not 90° so the fit isn't perfect but this is pretty much where the mockup is so I can try other things to see what may or can work. I think the low saddle idea I made for just in front of the body firewall will be used but I will have to figure out how it will be braced since the FG body firewall isn't that strong. The two diagonal tubes from the front is the beam will be used as the frame head can twist or bounce as the body is not there to support it.
Many years ago I got to talk to a guy who had a commercial ACVW junk yard and there was a short conversation on buggy pans. He said that the area from the Napoleon's hat area to the shifter hole often was swayback due to the lack of support to the beam mounting area. This is a "for what it is worth". I heard he close the area down probably in the late 90s or early 2000s.
Lee
I don't know why the bottom pix isn't where I put it but has been happening quite a bit lately.
You do not have the required permissions to view the files attached to this post.
-
Ol'fogasaurus
- Posts: 17759
- Joined: Mon Nov 13, 2006 10:17 pm
Re: Ol'fogasaurus black buggy
It is looking more and more like I am going to have to change what I want to do with the cage; e.g.; supporting the front beam and the pan's head. The main problem is the plastic firewall of the body. Unlike a rail the front of the pan narrows in which complicates what I think should be done and the two bends end up being somewhat of weak spots even bent out of DOM.
I haven't given up yet but that point is getting closer and closer.
I will leave the lower beam support in place to help with bending the ends of the front beam (what the two sets of supports are originally for). I have seen a couple of glass buggies and a BJ or two with the pan head twisted (a long time ago) mostly from seeing how far they could jump and landing on the front end and not landing level . One of the guys who used to ride with us landed wrong with no truss/kaffer bar and his engine almost was dragging on the sand when he stopped.
Lee
I haven't given up yet but that point is getting closer and closer.
I will leave the lower beam support in place to help with bending the ends of the front beam (what the two sets of supports are originally for). I have seen a couple of glass buggies and a BJ or two with the pan head twisted (a long time ago) mostly from seeing how far they could jump and landing on the front end and not landing level
Lee
-
Ol'fogasaurus
- Posts: 17759
- Joined: Mon Nov 13, 2006 10:17 pm
Re: Ol'fogasaurus black buggy
During doing other things when I went out to the garage I pushed the mockup around and although it (in an incomplete lightweight mockup) felt strong it wasn't that strong to deal with a hard nose first and off-angle landing or someone smacking into the buggy at speed.
I know the lower beam supports will stay there which should help some but I still want to figure out something that is safer as a whole... if possible.
Lee
I know the lower beam supports will stay there which should help some but I still want to figure out something that is safer as a whole... if possible.
Lee
You do not have the required permissions to view the files attached to this post.
-
Leatherneck

- Moderator
- Posts: 17104
- Joined: Sat Jul 01, 2006 6:47 pm
Re: Ol'fogasaurus black buggy
Been so long since I saw a stock VW steering box I thought you cut your beam.
-
Ol'fogasaurus
- Posts: 17759
- Joined: Mon Nov 13, 2006 10:17 pm
Re: Ol'fogasaurus black buggy
If you are talking about the BJ beam build I was doing it turned out that the shock towers were so rusted out from the inside that it was unusable so I started a new one but got side tracked off it.Leatherneck wrote: ↑Sat Apr 17, 2021 10:32 pm Been so long since I saw a stock BE steering box I thought you cut your beam.
I still have the Thing stuff and intend to use it mainly because of the potential of pulling the lower BJ out of the arms. BJ travel isn't anywhere near K&L but I am not sure if the body I have will accept it. I have the stock stuff to do the conversion though. The problem there is that the potential for the additional suspension travel and bouncing around might destroy the body's especially the front fenders ruining the hot rod look I am after (I do wish I had a "C-Cab" body though
Hopefully I can get back to the beam build before too long.
Lee
-
Leatherneck
- Moderator
- Posts: 17104
- Joined: Sat Jul 01, 2006 6:47 pm
Re: Ol'fogasaurus black buggy
Yup, that was it. Auto correct got me.
-
Ol'fogasaurus
- Posts: 17759
- Joined: Mon Nov 13, 2006 10:17 pm
Re: Ol'fogasaurus black buggy
I've pulled the upper supports and the front hoop for the front beam out and just thinking about it now. Got some ideas from several of you guys which I appreciate and thought about them... a lot. Some were things I had already thought about so I went back and looked at them again looking for both the good and bad; e.g., "cause and effect" (which is what I had to do when I was working in engineering) about each. I always end up at the same problems... the pedal assy I used being in the way and the thin fiberglass the body is made out of, the mounts for the front beam are not that structural, et al. Right now the lower beam supports are still in place to reduce the chance of bending the ends of the front beam and will remain there no matter which way I choose to go.
I am back playing with the steering shaft and it's connection to the stock steering unit and it's relationship to the driver's seat and the firewall which come down to the FG body again. I also need to figure out if I need universals (how many if any) and the connection to the steering box (splines and dia.).
I also need to pull the engine and trans back out so I can put the body back on to finish off the locating of the fuel tank mount to figure out the locations of the mounting holes for the tank itself getting it to sit in the center of the access hole in the rear of the body. This will also allow me to do some checking on what I can do on bending and locating the upper front beam supports... if any. The "S" shape bends of the upper support going back through the fire wall to the A-hoop of the cage as the bends can be a weakness... or not. Trying to protect the buggy and the occupants in it.
There are also a couple of other things in the area that need to be lengthened and fixed as one area especially as the welding is pretty bad and doesn't look strong at all. I did find the proper piece I had built for the boxing of the shock tower in the rear so I will try to get that fixed correctly.
Lee
-
Ol'fogasaurus
- Posts: 17759
- Joined: Mon Nov 13, 2006 10:17 pm
Re: Ol'fogasaurus black buggy
Dustymohave and I have been emailing back and forth for the last couple of days about the quandary I feel I am in on supporting the front beam and other things on my black buggy. He had some ideas that I guess I wasn't understanding and I had some things that were needed to be known also.
I hope he doesn't mind if I post this but it does have what may be some usable ideas which were more than proper for me to look into and I have done so many times today.
This is my pedal and throttle assys' in the black buggy. This is all aftermarket stuff and is quite often used in "rails" but not so much in dune buggies as the area between the body mounts and the tunnel are so close. Rails don't have the as narrow front area that attaches to the beam... that and the body narrows in front.
I don't normally wear this kind of shoe out on the dunes but wear what are often referred to as "indoor track shoes" which are narrow in the toe area, light weight and don't have a raised heel.
The top pix is normal driving apparel (I wear a 10 1/2 shoe but one of the guys in the group wears a size 12 and I used him to verify what I was doing (height wise of him and his shoe) and can work this setup and the horizontal bar in the cage mockup is not in the way for him.
The lower pix is the heel and toe settings I made to the brake pedal and throttle pedal and is an OK distance for use. In the second pix. you can see the top of the brake pedal when it is mostly forward which is more than normal brake use distance would be. The seat sits in the body very low, about 3" above the floor which is more like a rail would be. Part of the reason is to keep the humans inside of the body rather than being so high to the top of the "door area" like you see with some dune buggies where the legs of people are even with or slightly above the sill height of the body.
The diagonal here (although it isn't 1 1/2" dia.) is in a position where it does not interfere with the pedal work. For what it is worth the upper bar here is level.
A "plan view" of the forward running upper part of the cage which would go down to help support the front suspension beam.
A modified version of what Dusty has done might work for what I need but the body has to go back on the pan so I can locate things closer to where they might end up being. The idea of the forward support supported by a diagonal then the forward support connecting to the cross bar of the front hoop of the cage might work but I need the body on to really check things out. Can't do it today as the neighbor who helps me is gone and it is supposed to start raining later today and I don't want to get the bare metal wet and rusty. We'll see what goes on tomorrow. I might have to pull the engine and trans for some other work first  .
.
This will give you some idea of how low things are on this body. It is the join between the fenders and the hood area which may or may not be a problem. One of several reasons the body is going back on for a while.
Lee
I hope he doesn't mind if I post this but it does have what may be some usable ideas which were more than proper for me to look into and I have done so many times today.
This is my pedal and throttle assys' in the black buggy. This is all aftermarket stuff and is quite often used in "rails" but not so much in dune buggies as the area between the body mounts and the tunnel are so close. Rails don't have the as narrow front area that attaches to the beam... that and the body narrows in front.
I don't normally wear this kind of shoe out on the dunes but wear what are often referred to as "indoor track shoes" which are narrow in the toe area, light weight and don't have a raised heel.
The top pix is normal driving apparel (I wear a 10 1/2 shoe but one of the guys in the group wears a size 12 and I used him to verify what I was doing (height wise of him and his shoe) and can work this setup and the horizontal bar in the cage mockup is not in the way for him.
The lower pix is the heel and toe settings I made to the brake pedal and throttle pedal and is an OK distance for use. In the second pix. you can see the top of the brake pedal when it is mostly forward which is more than normal brake use distance would be. The seat sits in the body very low, about 3" above the floor which is more like a rail would be. Part of the reason is to keep the humans inside of the body rather than being so high to the top of the "door area" like you see with some dune buggies where the legs of people are even with or slightly above the sill height of the body.
The diagonal here (although it isn't 1 1/2" dia.) is in a position where it does not interfere with the pedal work. For what it is worth the upper bar here is level.
A "plan view" of the forward running upper part of the cage which would go down to help support the front suspension beam.
A modified version of what Dusty has done might work for what I need but the body has to go back on the pan so I can locate things closer to where they might end up being. The idea of the forward support supported by a diagonal then the forward support connecting to the cross bar of the front hoop of the cage might work but I need the body on to really check things out. Can't do it today as the neighbor who helps me is gone and it is supposed to start raining later today and I don't want to get the bare metal wet and rusty. We'll see what goes on tomorrow. I might have to pull the engine and trans for some other work first
This will give you some idea of how low things are on this body. It is the join between the fenders and the hood area which may or may not be a problem. One of several reasons the body is going back on for a while.
Lee
You do not have the required permissions to view the files attached to this post.
-
Ol'fogasaurus
- Posts: 17759
- Joined: Mon Nov 13, 2006 10:17 pm
Re: Ol'fogasaurus black buggy
I finally got the engine and trans pulled out today but it took over 4 hours to do it by myself.
I have never had an inanimate object try so hard to kill me in my life; it fought me from the second I started to pull it to when I got the assy back on the engine stand. Luckily one of the neighbors was walking by when the assy, a bit over waist high off the floor, rolled over and helped me get the engine and trans assy, now on the floor, back upright and the engine hoist chains back in position. After roughly 60 years of pulling engines out, rebuilding then putting them in have I had anything like this happen. I did not use bad words or low standards of hand signals though. Oh, the engine and trans were both empty of any liquids so it wasn't that that caused the roll over. For what it is worth, where I had put the chains may have been too low making the assy top heavy but I had used the same locations several times before with even no hint of problems.
I have to get the trans mount off the assy, which should be easy tomorrow, then I can work on the fuel tank mount before the body can be put on maybe this weekend or before. The rain expected is what will change things as the body has to be put on outside.
Lee
I have never had an inanimate object try so hard to kill me in my life; it fought me from the second I started to pull it to when I got the assy back on the engine stand. Luckily one of the neighbors was walking by when the assy, a bit over waist high off the floor, rolled over and helped me get the engine and trans assy, now on the floor, back upright and the engine hoist chains back in position. After roughly 60 years of pulling engines out, rebuilding then putting them in have I had anything like this happen. I did not use bad words or low standards of hand signals though.
I have to get the trans mount off the assy, which should be easy tomorrow, then I can work on the fuel tank mount before the body can be put on maybe this weekend or before. The rain expected is what will change things as the body has to be put on outside.
Lee
-
Leatherneck
- Moderator
- Posts: 17104
- Joined: Sat Jul 01, 2006 6:47 pm
Re: Ol'fogasaurus black buggy
Glad it didn’t kill ya Lee. Really glad you didn’t use any bad words.
-
Ol'fogasaurus
- Posts: 17759
- Joined: Mon Nov 13, 2006 10:17 pm
Re: Ol'fogasaurus black buggy
After seeing some people hurt while doing certain things I learned mighty quickly that you stay as far way as you can but still get the job done. I was running/moving so fast a couple of times that if I used any low words the wind passing by me as I was beating feet would blow them back into my mouth so no one would hear the anywayLeatherneck wrote: ↑Thu Apr 29, 2021 11:19 am Glad it didn’t kill ya Lee. Really glad you didn’t use any bad words.
You learn a lot when looking for detail hints from inanimate objects. At least they usually give you a hint unlike a lot of people
Been sunny here so I have to get a bunch of things done before the rain tomorrow.
Lee