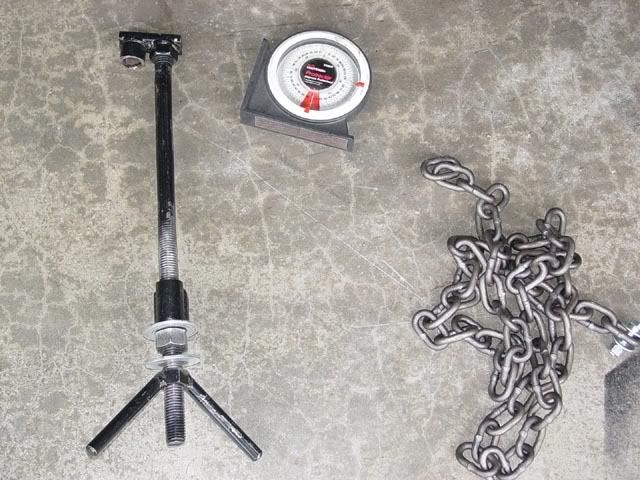
These are the other than normal tools you should have. Be sure to use eye protection and gloves if you can. Stay back and keep your hands away as things can come loose and bite. Rather than feeling around, get a flash light in there. Use pry bars rather than screwdrivers.
After having built my lift kit, the extra preload I had put in many years ago wasn't needed so I took some of it out. I had gone by the instructions in Baja Bugs & Buggies by Jeff Hibbard and installed what he thought was pretty much as much pre-load as you would want to install. With the light glass buggy body it was really too stiff but it did keep the tires and the body from coming in contact as much.

started by jacking the car off the ground, leveling it out, and putting jack stands at each corner. I then put the jack under the shock tower to lift the tires up enough to remove them (This was taken of the right side during the adjustment there. The brown bar you see is a torsion bar.
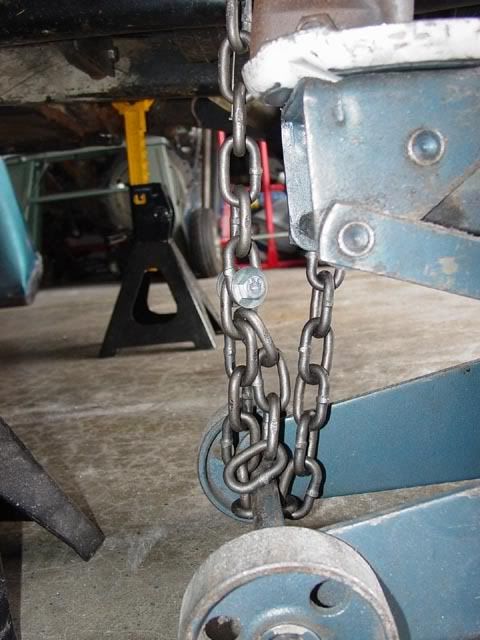
With the tires off, I added a chain to the cross bar that goes under the rear seat and brought it down and under the axle of the jack. The chain is a 5 foot length of 1/4 inch steel chain. I forget what the bolt is but it was about an inch and a half long. Use a washer at each end to keep the head from pulling through.
Jack the trailing arm up using the floor jack on the lower shock mount. You want the trailing arm and spring plate assembly to be high enough to make sure that the spring plate is off the stop. I had already notched the spring plate 1/4 of an inch to get additional travel. With the 091 Bus transaxle, bus CVs, and the notch spring plate I get a drive axle angle of 18 degrees at full hang. Also, I am using the double spring plates.
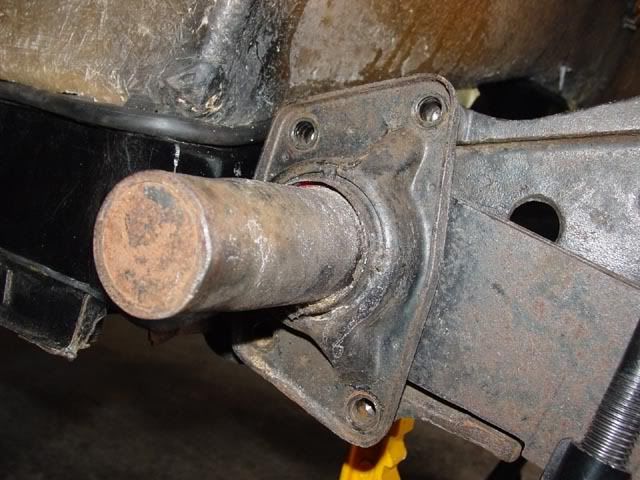
With the rear suspension jacked up, remove the 4 bolts for the end cap that retains the spring plate.
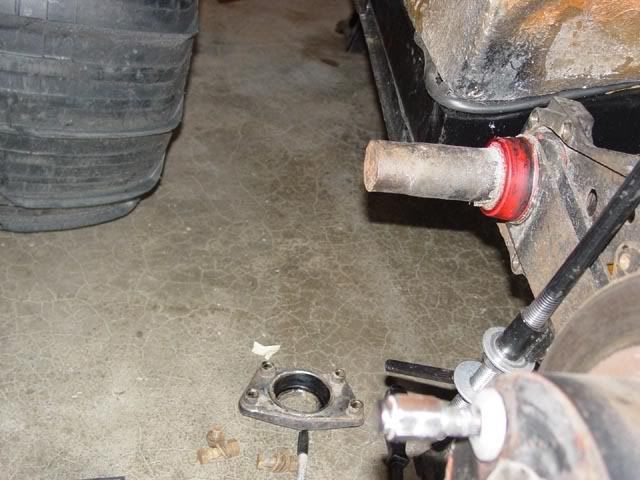
This is the grommet that is under the cover. This one is Urethane, normally they are black. Remove it and keep it clean.
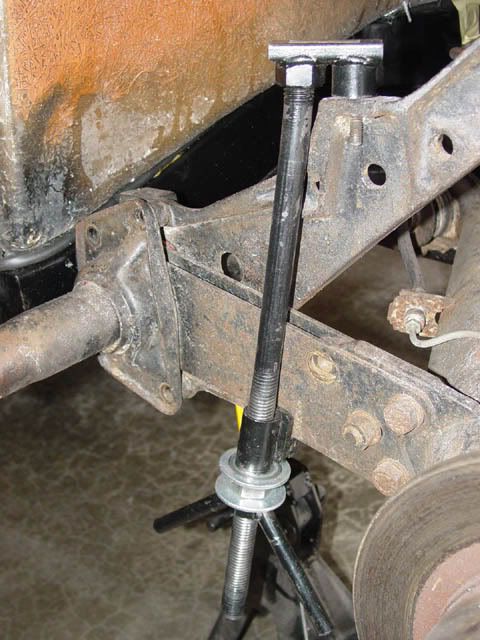
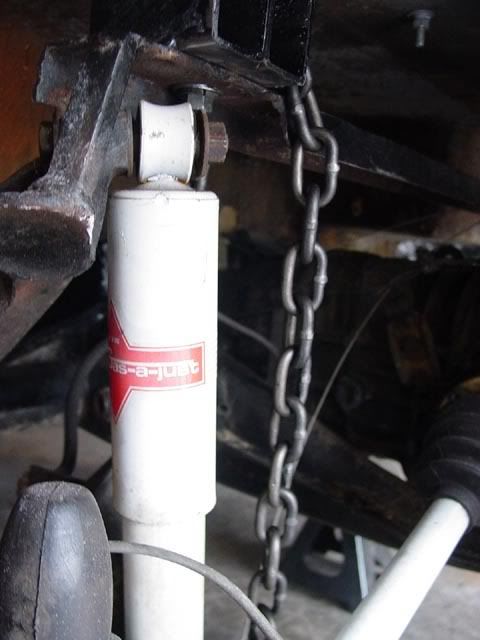
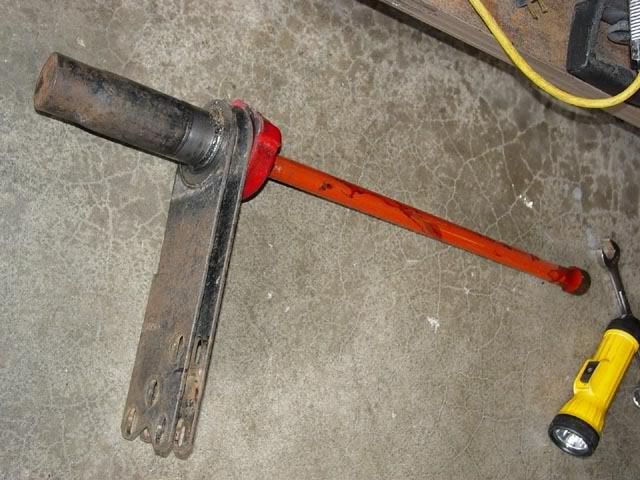
You will need to insert a bolt in the body mount on the top of the casting. The cup on the end of the safety tool will fit over the bolt head and not slide off that way (we hope). I use a tool designed for changing spring plate but not without modifying it first. I have had a couple of them and I found that adding a couple of washers at the right place keeps them from hanging up. I also add a nut ahead of the wing nut and use the wing nut as a back up/jam nut. When I need to adjust things, I use the nut instead of the wing nut.
(Note, this was taken after the preload was taken off the spring plate so it will not look quite like this. The angle of the spring plate will be different before the spring plate is off the stop)
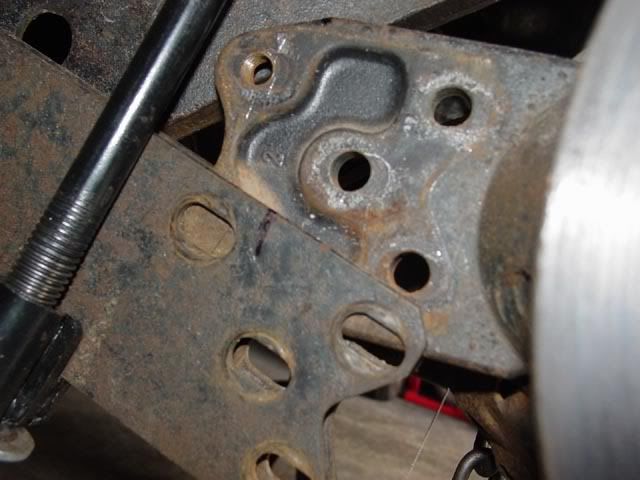
Un-bolt the trailing arms and move them up and out of the way. They may still be partly in the way (in my case with the double spring plates they were caught inside until the arms were fully unloaded.
The hard part is next. (Please be careful and stay out of the way. Accidents can happen even with all the safety features I use. During this side change, the spring plate somehow jammed and hung in place. It looked like all the preload had been taken out but it didn't look like I though it should so I left the back up bar on and worked to free the hand up. When it finally got loose the whole thing jumped some but then I had the back up bar up pretty tight.)
You will need to work/worry the spring plate out past the stop. Once the trailing arms are removed and while the spring plate is moved outboard, the tool, I was referring to as a back up tool, is now the only thing between you and the spring plate unloading. The spring plate can unload very quickly so keep you arms and hands away from there as much as possible. Using a couple of pry bars worry the spring plate out past the stop (as shown above). It is not going to be that easy so do little bits of moving from the top and bottom of the spring plates. What is causing the spring plates to move slowly is the preload against the splines that are at each end of the torsion bar. The last little bit of movement of the spring plates past the stop, you can use a pry bar as a ramp to get the spring plate the last of the way over the stop. Once it is where you can maneuver the spring plate over the stop start letting off on the preload using the nut you added to the safety tool.
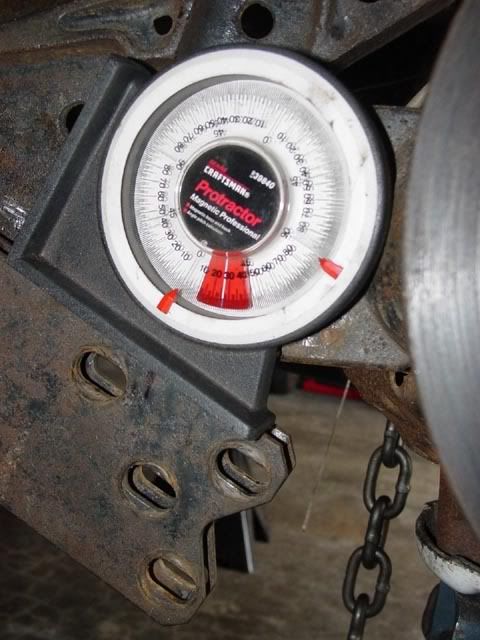
Once the spring plate is sitting with no preload measure the angle is sits at. You will need to know this to compare with where you want to be. Stock "Drive Axle" (IRS) angle is 20-degrees, plus or minus 30 minutes. Swing axle models can be 17-degrees, 30 minutes plus or minus 50-minutes (without equalizer spring) or 20-degrees, plus or minus 50 minutes if you have an equalizer spring.
Once you get all the preload out and the tool wants to hang loose, the you can remove the spring plate. There are 40 splines on the inner side of the torsion bar and 44 on the outer end of the torsion bar. You will also notice that there is either an "R" for the right side torsion bar or an "L" for the left side torsion bar. Do not move the bar from side to side as it will fail very quickly if you do.
Rotating the torsion bar using the inner splines, one spline movement is equal to 9-degree, 0-minutes. The outer bar splines will change things 8-degree, 10, minutes. By moving the inner bar one direction and the spring plate the other direction a 50-minute change can be accomplished.
In my case, I had about a 35-degree angle measured at the spring plate. I settled for about 30-degrees by moving the torsion bar and spring plate back and forth. This is a trial setting and it may need to change later.
Once you have the angle you want, using the safety tool move the spring plate up (adding the preload) and move it back onto the stop. You might need a toe-tapper to get the spring plate and torsion bar in the last quarter of an inch as the preload is going to make itself known. I wire brushed the threads of the bolts then bolted the trailing arms back onto the spring plate. Lastly, I installed the outer grommet and cover back on. You might want to chase the threads in the torsion tube for the cover as they can be rusted. I fought one bolt for two days before I went out and got a tap. The cover was back on within and hour.
Be careful, you are dealing with springs here.
I hope I put everything down. I am sure I will be corrected or added to.
I hope this helps someone. Lee.
This will all be remove and painted this fall when I change trailing arms and re-hang the shocks. Fun and Games.