Page 2 of 2
Posted: Fri May 22, 2009 11:03 am
by kaiser
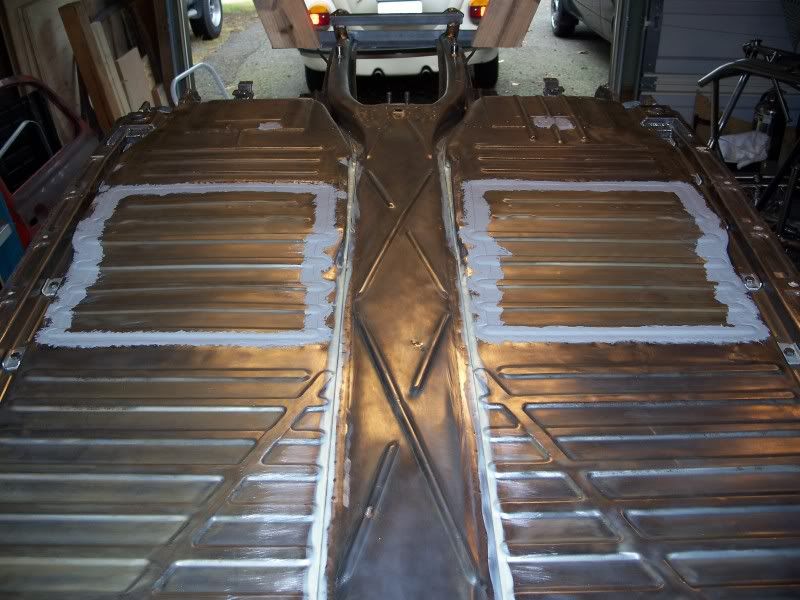
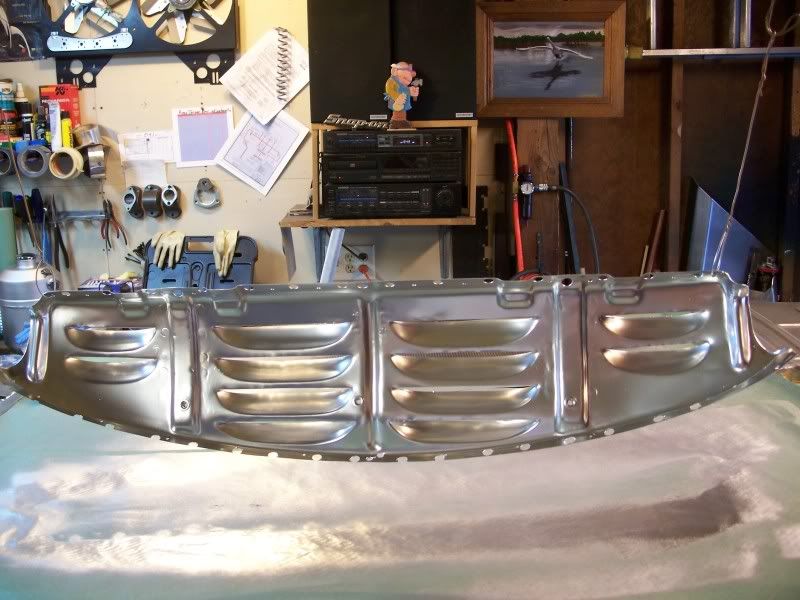
i did it on the inside of the pan, for grip and look. por15 gets kinda funny looking after a while. it's uv sensitive.
my entire pan (inside) had a nasty case of flaky surface rust(solid just flaky), so i por'd it and bed lined it.
my car is far from a beauty queen, justy a rusty, low bug with a big motor. lol
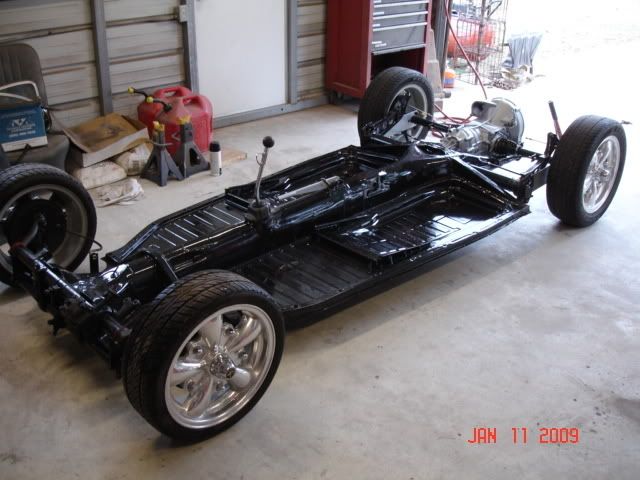
the underside of my pan is original and in excelent shape.
Posted: Fri May 22, 2009 11:16 am
by MNAirHead
INteresting..
WE always hydrochoric.. clean.. nutrallize.. etch primer.. seal primer.. then 3m body shotz.
Tim
Posted: Fri May 22, 2009 11:54 am
by kaiser
thats the difference with por15, it prefers to bond to rust.
Posted: Sat May 30, 2009 2:05 pm
by bugdust69
Posted: Sat May 30, 2009 5:41 pm
by hpw
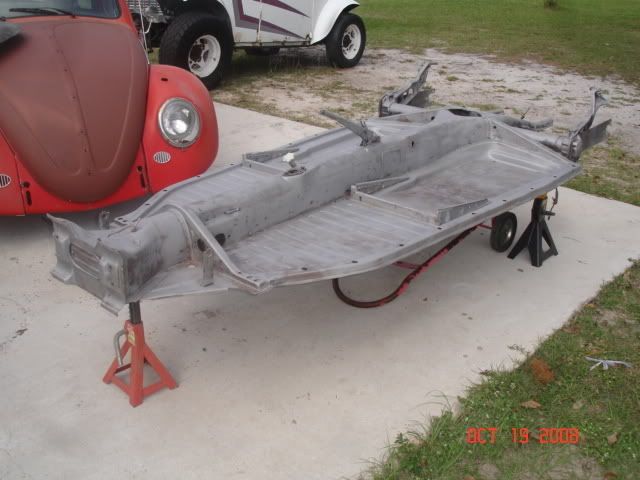
bugdust69, looks good........I am at the stage now with my pan of how to
prep it for paint...contemplating sand blasting (I can get it done for 100.00)
How did you deal with the sand that got into the tunnel?
Posted: Mon Jun 01, 2009 12:34 pm
by MNAirHead
$100.. I'd send it out for blasting.
Posted: Mon Jun 01, 2009 12:53 pm
by turbobaja
If I had it to do over again I'd definately have the pan (media) blasted OFF the body before starting with this build. $100 is a screamin' deal, even if you gotta get in there with a vacuum and get out the remaining debris yourself. At least the parts that count will be clean and etched. In my case, I welded the body to the pan in a variety of places, so removal is out of the question.
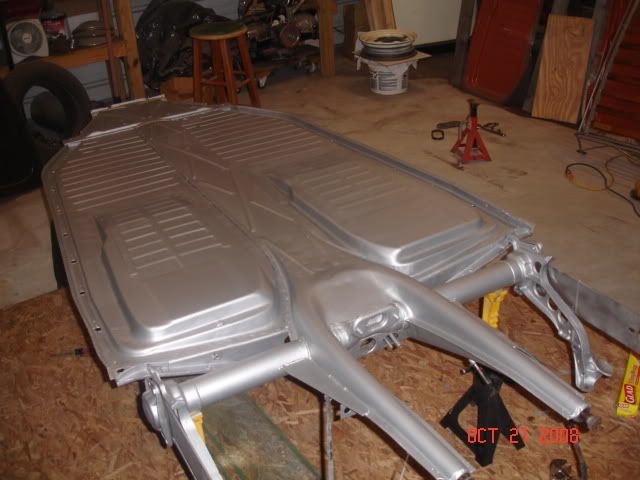
That's a beautiful pan there bugdust. Looks like a real clean job. I'm not familiar with Masterseries products, but they look nice

.
I've used POR 15 quite a few times, I'm impressed with it's durability. I've seen the sun fade this stuff before too like kaiser pointed out. Otherwise it's great stuff. Good to know it can be sanded and top coated.
Posted: Tue Jun 02, 2009 7:38 pm
by bugdust69
I tried to keep as much sand out as I could but quite a bit got in anyway. I stood the pan up on each end and flipped it over and blew air through it each time.
I blasted mine myself. I'd pay to do it if I had it to do over again.
Check out
www.masterseriesct.com
It's comparable to por but half the price.
Posted: Tue Jun 02, 2009 7:40 pm
by MNAirHead
I charge $450 to prep and paint a pan + paint supplies.. your $100 is a steal.
Posted: Wed Sep 09, 2009 5:37 pm
by turbobaja
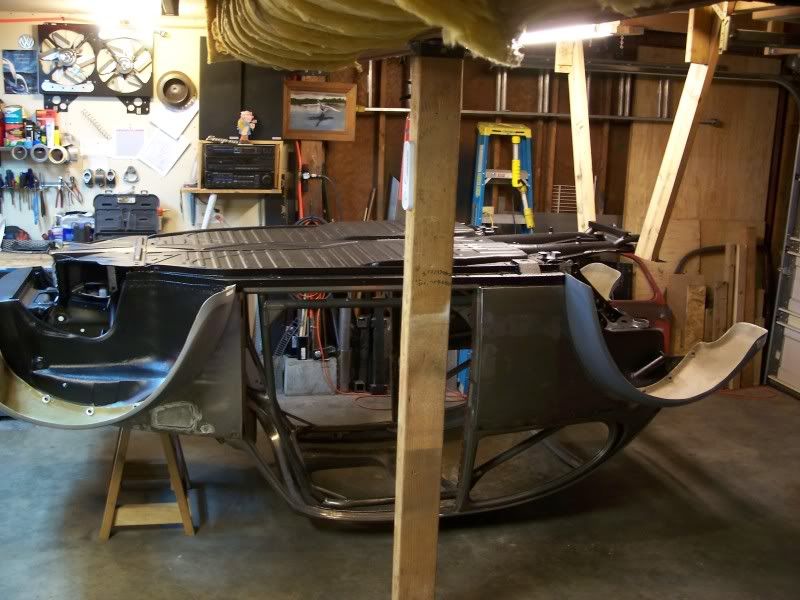
Posted: Sun Sep 13, 2009 9:48 pm
by turbobaja
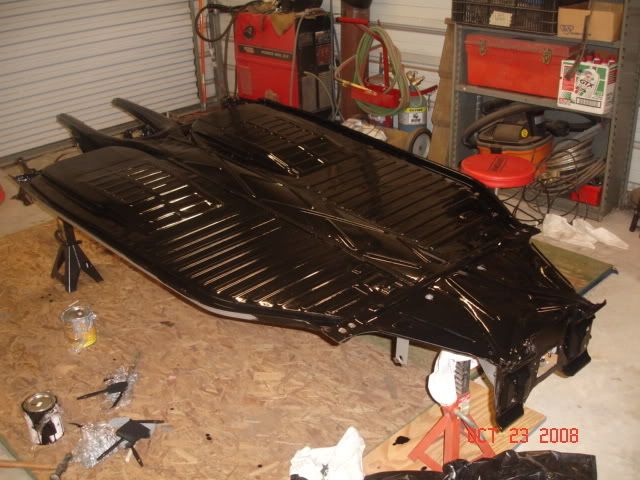
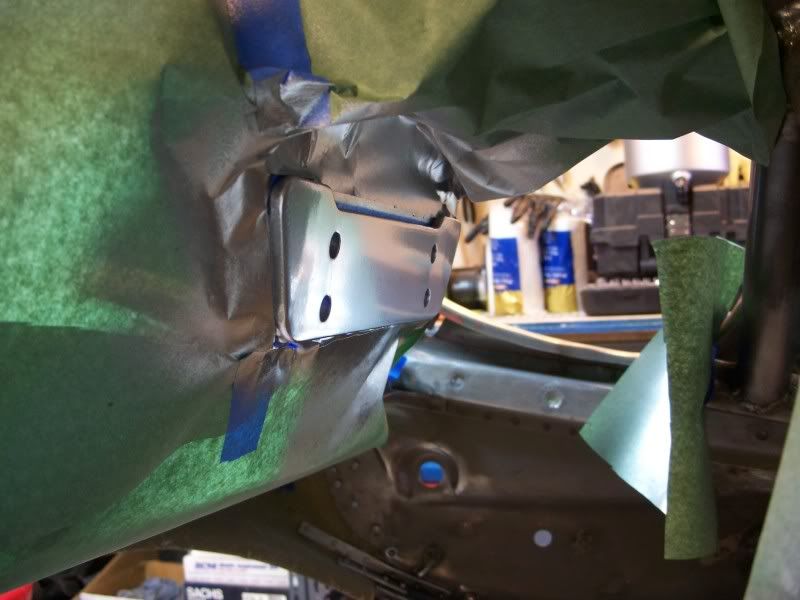
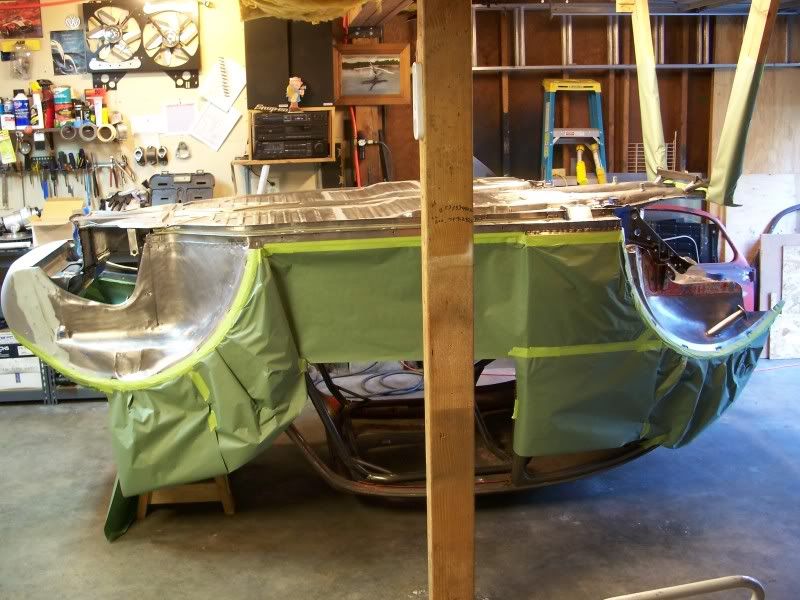
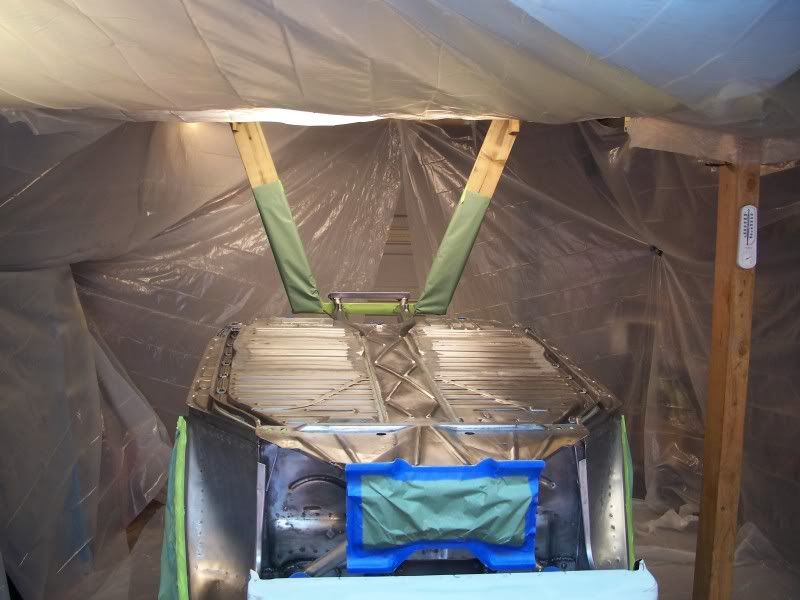
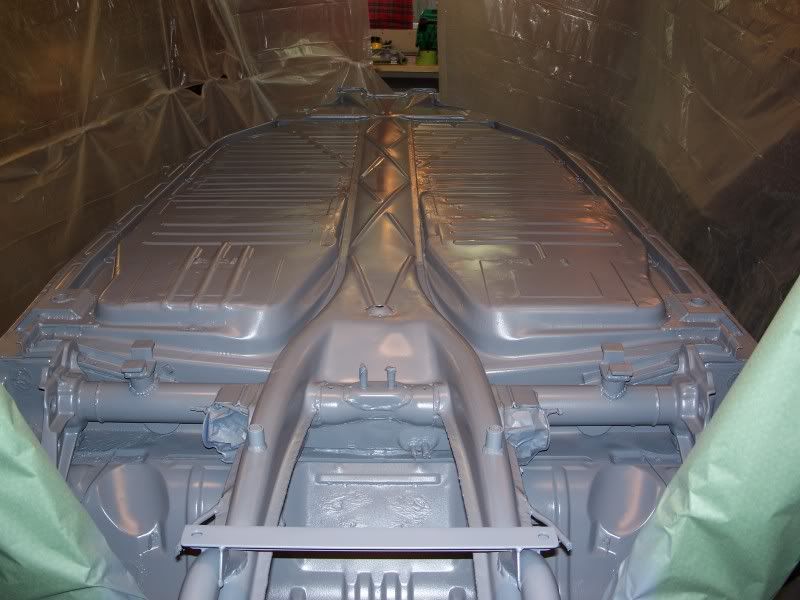
The deed is done! I finally got my pan painted! What a pile of work it ended up being. I took 4 days "vacation" last week after the holiday to try and knock this pan job out for good. I worked on it about 8 hours each day, for six days straight, and just finished up this evening about an hour ago. My finger tips are raw from sanding all the little cracks and hidden areas. Then all the cleaning and degreasing untill the rags couldn't find any more dirt. Finally it got masked off and cleaned one last time.
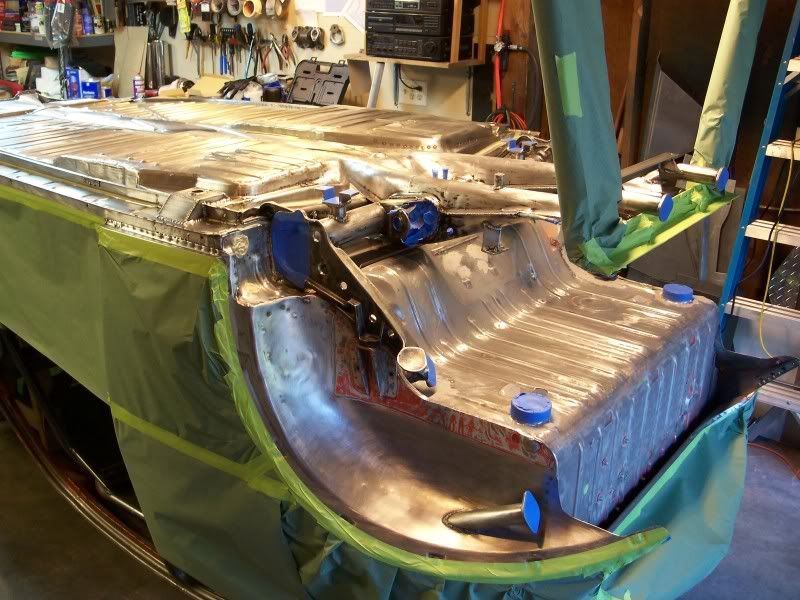
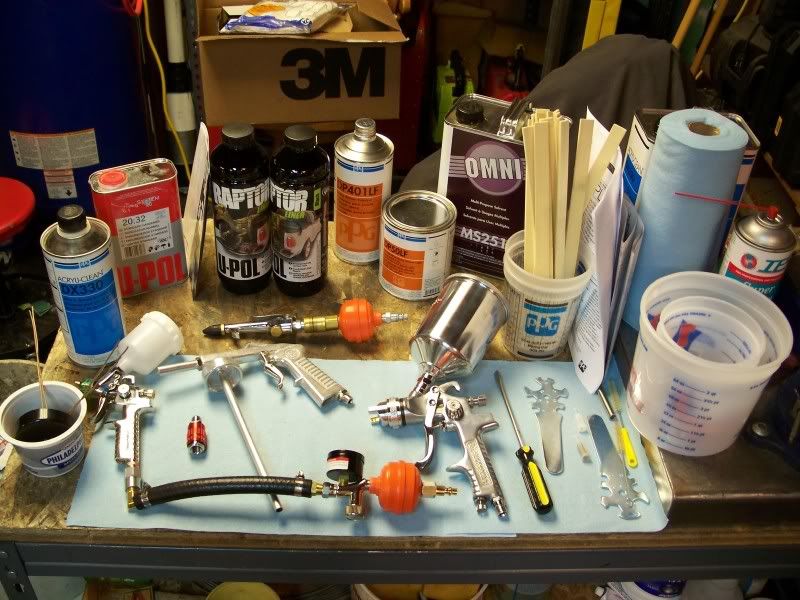
Then I got my small detail gun cleaned and ready, and mixed up my first batch of epoxy primer/sealer. It has to sit for 30 minutes after mixing to get the catalyst going. After a few practice shots I dialed in a small spot pattern to reach into all the hard to reach areas. I was affraid the small tip (1.1) would be a problem with the primer. It calls for a 1.4-1.6 tip size. It ended up working fine, just took a little longer, which was expected with all the 'trim' work that had to be done with the small gun. Once there were only large areas left to coat, I switched to a larger gun (and cup) with 1.4 tip, it really layed down the primer nice over the larger areas. I mixed up the second batch of primer and repeated the process of small gun, big gun. Total of 3 pints (2 pints primer to 1 pint catalyst) of material were used on the 2 coats.
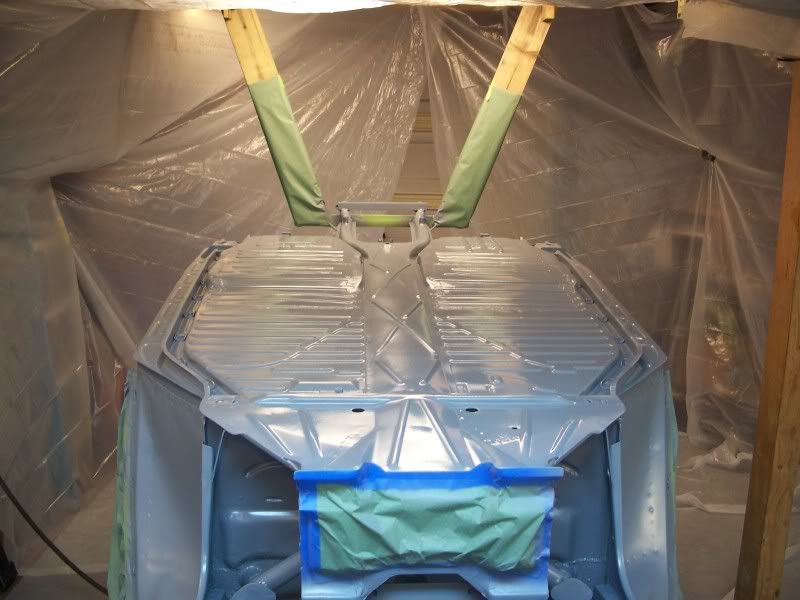
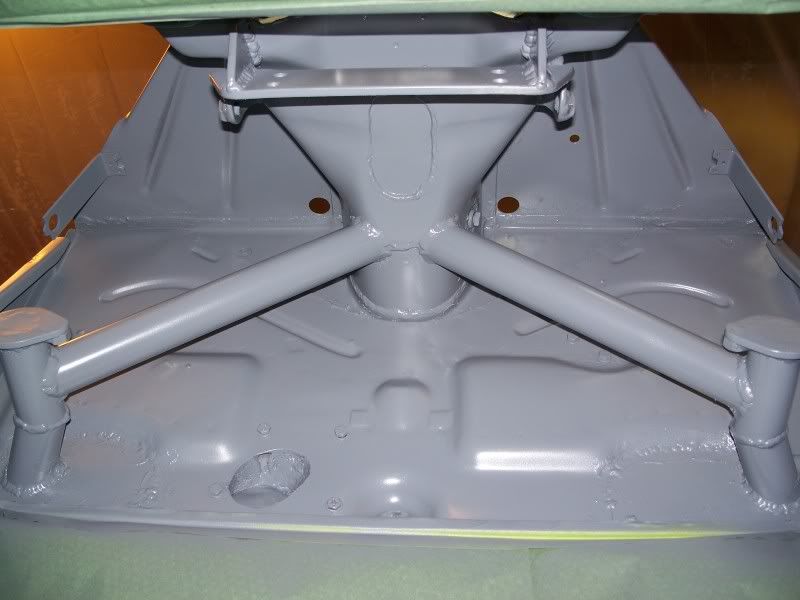
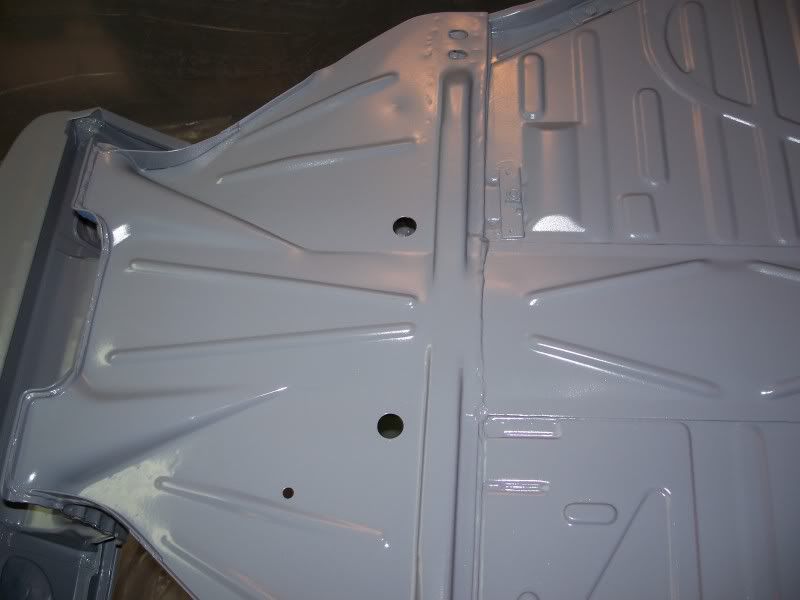
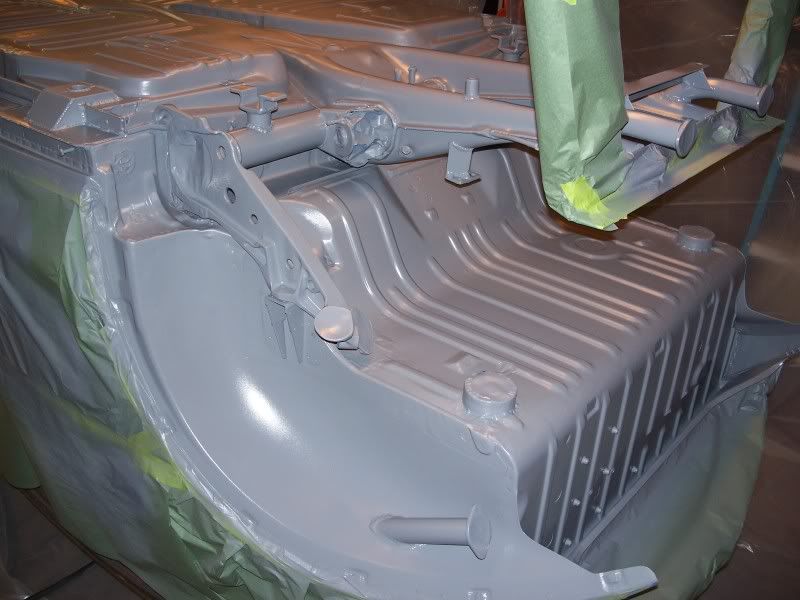
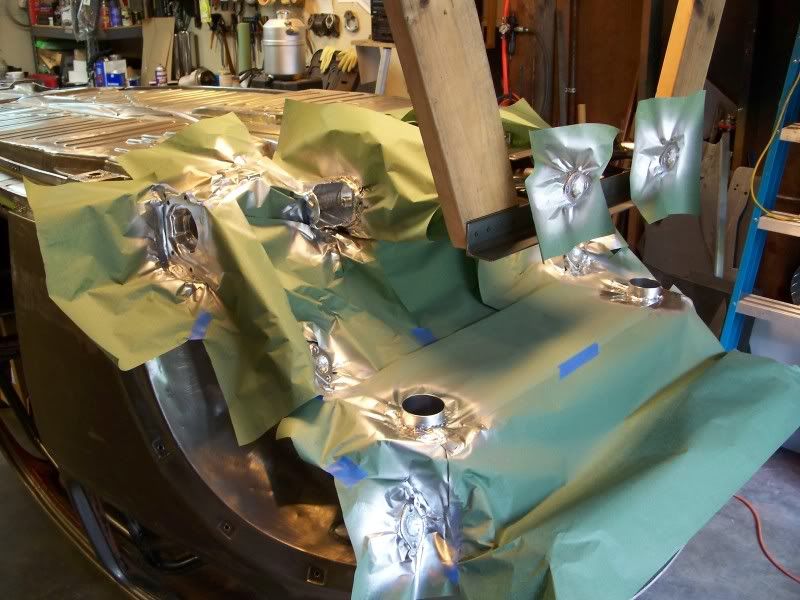
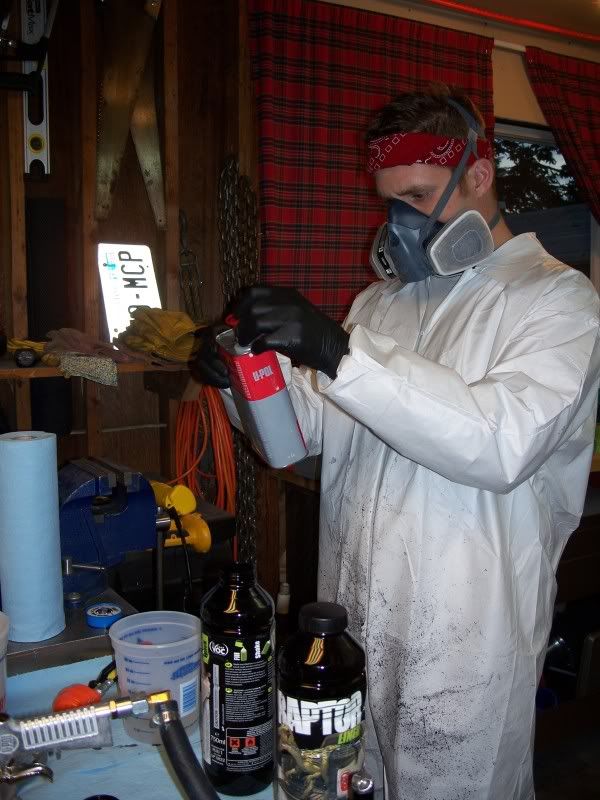
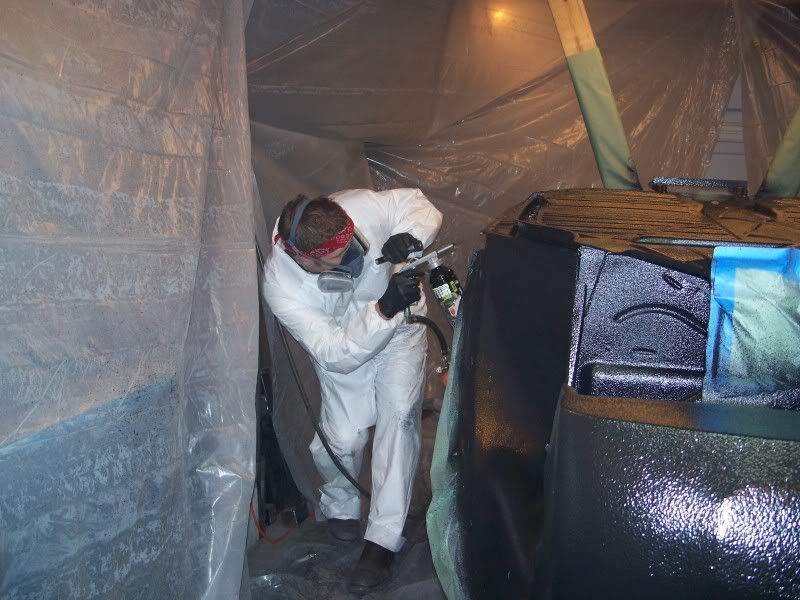
I waited about 90 minutes before starting with the urethane Raptor bed liner. This stuff comes in 4 bottles with 750ml of bed liner in each bottle. One bottle at a time, 250ml of activator is added and mixed well. Then thread the bottle onto the gun and go to town. Getting this stuff into all the hard to reach areas was pretty tough. But coating the surfaces that matter was easy and fast. It took all 4 bottles to get the job done. I gave the first coat (3 bottles) 1 hour to cure so I could get a bite to eat. The last one was done almost entirely on my knees, so I could see up into the areas I'd missed standing up. I'm sure I'll find a couple missed spots once I flip the body back over.........but I hope not.
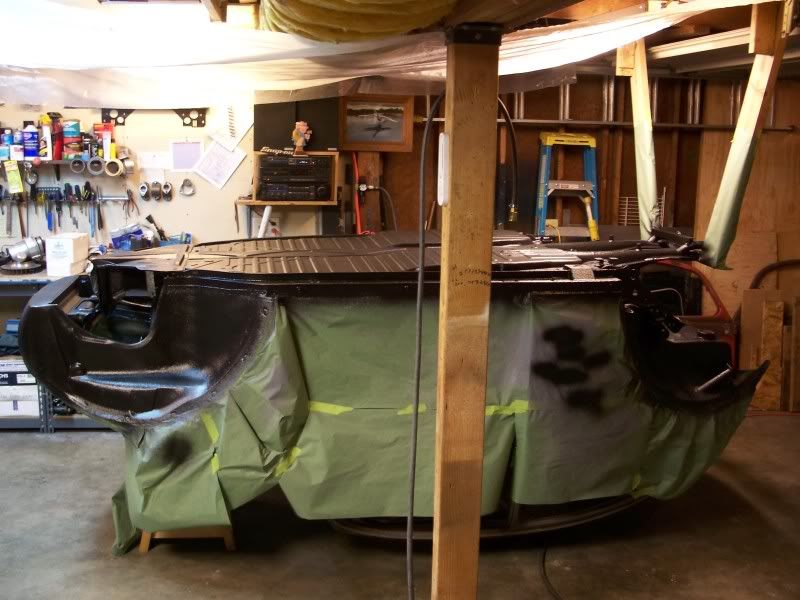
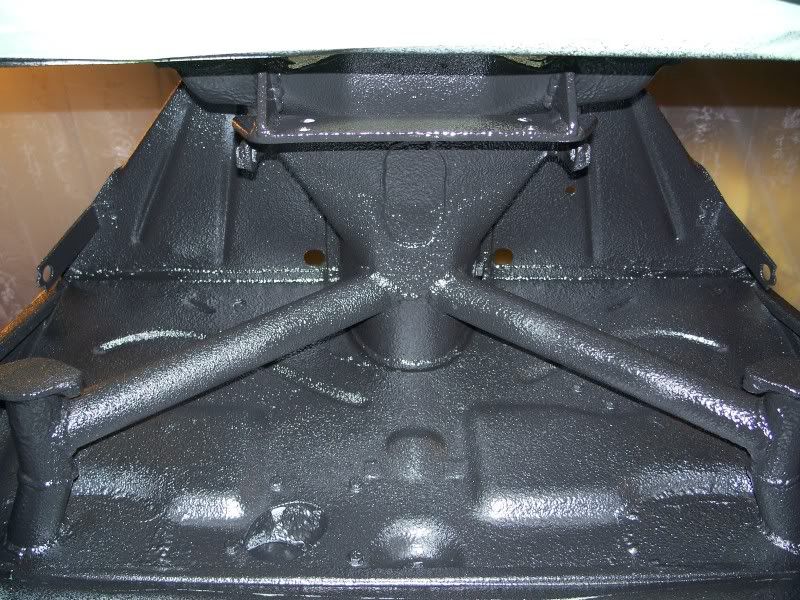
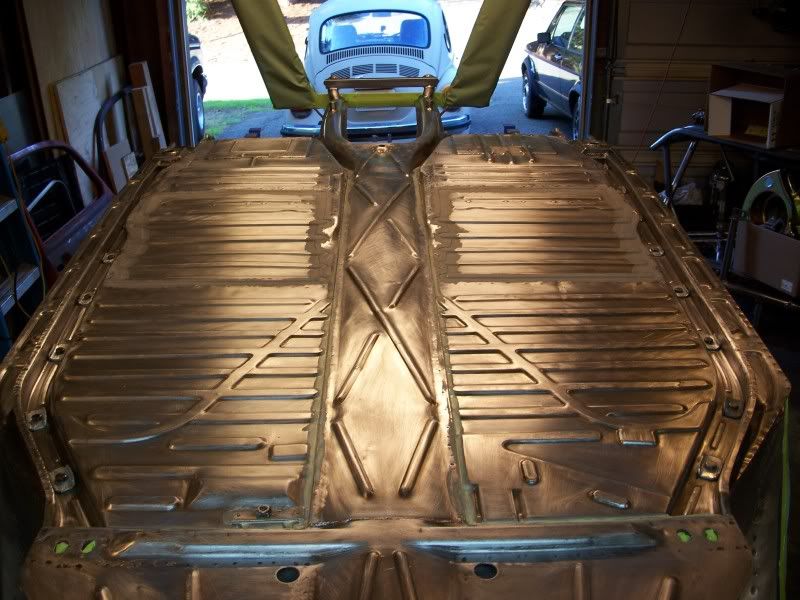
So, there it is........coated.......done! I've got a few hours of carving off masking tape, trimming edges, and cleaning bolt holes before it's ready to flip back over, but basically....
The End

Posted: Sat Sep 19, 2009 5:49 am
by hpw
Very nice
Posted: Sun Sep 20, 2009 1:36 am
by dstar5000
Nice JOB and also love that rotisserie!

Don
Posted: Sun Sep 20, 2009 6:09 am
by david58
Glad to see you got this pan done now get back to work I want to see your car done.

Posted: Sun Sep 20, 2009 9:06 am
by turbobaja
david58 wrote:Glad to see you got this pan done now get back to work I want to see your car done.
Thanks for the whip crack !
.
After only getting this far in 6 years of "building", I need a little motivation from time to time. I feel like I've got a nearly complete baja-in-a-box: assembly required! Once the body is done it should come together ~easily

.
In the mean time, I'm finding more things that can be done easier up-side down. The cieling and foot well area are easy to get at like this, so I'm getting them cleaned up for painting now. I've also got the fenders mounted up for a little trimming and possible reinforceing. I'll pick up some more Raptor bed liner to line the fenders with.