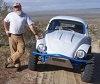
Budget street legal rail (re)build (WARNING: pic heavy)

Offroad VW based vehicles have problems/insights all their own. Not to mention the knowledge gained in VW durability.
User avatar
Marc
Moderator
Posts: 23741
Joined: Thu May 23, 2002 12:01 am

Re: Budget street legal rail (re)build (WARNING: pic heavy)

Post by Marc »

GoMopar440 wrote:FWIW: The red seals drop right into the holes easily with no constriction at all. No force is required to get them in there, they just drop in place. Looking at that last pic I posted, I can see a size difference between the two holes, with the larger of the two openings being towards the flywheel. Everything I see here points to the red seals being the correct ones for those holes.
If "normal" large-passage seals (021 117 151A) fit comfortably, there's no reason to use the adapter seals in this case (pun intended). Mystery remains as to why they do, but it's a moot point...just wanted to be sure that there was no constriction happening.

IIRC the torque spec for the m8x1.25 cooler hardware is 14lb-ft...I just go by feel, probably closer to 18. That'd be excessive for the one step-stud you're using, the m6x1.0 threads into that soft-alloy case could give up beyond ~10 - so go easy on that one.
User avatar
GoMopar440
Posts: 258
Joined: Sun Apr 12, 2015 8:56 am

Re: Budget street legal rail (re)build (WARNING: pic heavy)

Post by GoMopar440 »

Yea, I'll probably have to back those nuts off a wee little bit then. LOL

I didn't have a crows foot socket wrench for the two nuts near the cylinders so I used a regular wrench on all of them. I just tightened all three nuts until the gap between the adapter and the case was even all the way around.
Home made rail (street legal), 1600 DP, 34PICT-3, T3 brakes, 4-1 glass-pack exhaust, 31's in back and 7.00x15's up front. Link to build thread: viewtopic.php?f=28&t=147561&p=1227553#p1227553
Ol'fogasaurus
Posts: 17881
Joined: Mon Nov 13, 2006 10:17 pm

Re: Budget street legal rail (re)build (WARNING: pic heavy)

Post by Ol'fogasaurus »

GoMopar440 wrote:
Lee, if you were referring to the sheet metal bodywork on the rail, it's just been done to try out some ideas. I got the material for free so I didn't loose out anything by giving it a go. The free metal was coated steel that was used for a large dog house roof at one time, hence all the random holes here and there. I knew I was going top be replacing this frame soon so I've been trying out different ideas on it. I saw that post about the bead rolled panel edges, and if I had a bead roller I'd definitely do it that way.

The ball joint front will be staying with the old frame since it's welded to it and bent anyway. I'm planning on getting a conversion beam from Bugzilla on TOS for the new frame. It's got the BJ tube spacing but uses king/link pin arms and spindles. I'll have to get a different caliper bracket to use the T3 brakes on the new beam AFAIK. However, by using this type of conversion beam, the Thing spindles won't be an option anymore. At least there are a lot more options for aftermarket lift spindles for the king/link spindles though.
I have seen/heard of the Bugzilla beam which should be a good choice.

While I can't justify it; the bead roller and a combination shear, brake press, and roller are still on my list of wants. I have been told by a friend who sells metal forming equipment that they are not the best but there is a limit to work space and I am there. I have recently built another adjustable work height work stand which will allow me to interchange/mount a bead roller and other tools on it. The main drawback is you have to store the conversion platens too so it is kind of a win/no-win situation.

While I have a combo lathe/mill I really don't know how to use it so it gets used occasionally and I can't afford the tooling I would like to have. Very jealous of those who can and have access to those tools.

I am retired too but when I started working as a drafter back in the mid-60s I did design not only brackets and such but some specific flat panels (AL and CRES) and occasionally, besides other methods of forming "Tin", I did get to use (design for) bead rolling as well as flanged holes (sometime referred to here as dimpling but there are other types of flanged holes also too. Dimpling, to me, is something very different and usually found in thicker materials like 1/8"or more) including flanged slots. While it is good to have practice material like you have it is also good to use it to practice forming like you did. CWB has gone several steps up the ladder and it is good to see him show what can be done).

Before getting to the bottom of your posts this am, I did see the e-brake handle I missed the first time (late at night). Good to see you fixed this problem as I still see supposedly street legal rails here with them for sale (rails haven't been street legal for many years here. Waiting to see what the new rules will or will not be assuming they get included in the side-by-side rules the companies who sell them are pushing for now days) using them.

Keep up the good work and posting it also.

Lee
User avatar
GoMopar440
Posts: 258
Joined: Sun Apr 12, 2015 8:56 am

Re: Budget street legal rail (re)build (WARNING: pic heavy)

Post by GoMopar440 »

Luckily here in Montana we have the option of either getting ATV plates (depending on wheelbase and width), or regular car and truck plates on rails. The ATV plates have restrictions on where you can drive (no highways), but the requirements are easier to meet. You'd probably be surprised at some of the stuff I see running around here on the streets in town. Regular plates have no restrictions on where you can go, but you have to have most of the same equipment as a car or truck. Safety glass windshield, wipers, hi/lo beams headlights and indicator for hi beam, turn signals, brake lights, running lights, separate mechanical E-brake, etc. I didn't find any specialized requirements for stuff like ABS, air bags, crumple zones, 5 MPH bumpers, etc. so it's definitely doable for the average guy to be able to meet the requirements here. Also, both types of plates require you to carry insurance.

As far as using your mill/lathe combo machine, try looking up Youtube videos by a person with the username "Tubalcain". He does a lot of instructional videos geared towards teaching novice machinists how to get started working on machining projects.
Home made rail (street legal), 1600 DP, 34PICT-3, T3 brakes, 4-1 glass-pack exhaust, 31's in back and 7.00x15's up front. Link to build thread: viewtopic.php?f=28&t=147561&p=1227553#p1227553
User avatar
GoMopar440
Posts: 258
Joined: Sun Apr 12, 2015 8:56 am

Re: Budget street legal rail (re)build (WARNING: pic heavy)

Post by GoMopar440 »

I just measured the case oil cooler holes and this is what I found.
1st hole (closest to flywheel)
- large opening = .555
- small opening = .318
2nd hole (closest to pulleys)
- large opening = .548
- small opening = .304

I double checked the red seals and they do drag, very slightly though, when I put them in the holes. Not enough to see any measurable compression of the center passageway though. Next I tried the green seals, and they were loose in the holes. I could wiggle them around in there a bit.

By the numbers posted earlier, my case seems to fall somewhere in the middle of both ranges. I went ahead and used the green seals since that is what is supposed to go in this engine. The green seals let the oil cooler adapter sit flat on the engine case as I got them torqued down. The same torque with the red seals had left a gap between the case and the adapter. Should I keep the green ones in there or go back to the red ones?

While I was out in the barn I took the PICT carb off of the tall intake and compared the base gasket to the ones on the top of the shorter T3 intakes. There's about .300 wider spread between the studs on the PICT. With the way the short intake is built, I'll have to remove the outer stud and slot that hole about .150 away from center. I'll have to slot the opposite hole in the carb .150 towards the center and also mill the top side of the carb base to provide clearance for a nut. The intake bore is close enough to the gasket ID that I shouldn't have to do anything to it. I'll just gasket match the phenolic spacer at both ends, putting a very slight taper in it, just so I know there won't be anything to trip up the airflow.
Home made rail (street legal), 1600 DP, 34PICT-3, T3 brakes, 4-1 glass-pack exhaust, 31's in back and 7.00x15's up front. Link to build thread: viewtopic.php?f=28&t=147561&p=1227553#p1227553
User avatar
Marc
Moderator
Posts: 23741
Joined: Thu May 23, 2002 12:01 am

Re: Budget street legal rail (re)build (WARNING: pic heavy)

Post by Marc »

GoMopar440 wrote:... Should I keep the green ones in there or go back to the red ones? ...
I'd go with the conversion seals - if they end up leaking this can be revisited, but they should work.
User avatar
dustymojave
Posts: 2314
Joined: Mon Dec 01, 2008 9:08 pm

Re: Budget street legal rail (re)build (WARNING: pic heavy)

Post by dustymojave »

Welcome to the dark side!

I've been referring to other folks' builds on STF-ORF in my posts on GoMopar's TOS build thread all along. So I expected he had read a fair amount.

I see a lot of similarities between our new fellow and a number of the regulars. His plan is to replace his current frame with a new Beeline similar to Ed No1clyde's buggy. And his plan for sometimes daily driver use and what the car will need to meet the demands of that usage in Montana falls in line with a number of other builds on this forum. Larry's (uh60ce) Chenowth and Ed's buggy both have aspects which will be good reference for GoMopar.
Richard
Lake LA, Mojave Desert, SoCal
Speed Kills! but then...So does OLD AGE!!
Tech Inspection: SCCA / SCORE / HDRA / ARVRA / A.R.T.S. OffRoad Race Tech - MDR, MORE, Glen Helen BajaCup
Retired Fabricator
'58 Baja with 955K Miles and counting
User avatar
Marc
Moderator
Posts: 23741
Joined: Thu May 23, 2002 12:01 am

Re: Budget street legal rail (re)build (WARNING: pic heavy)

Post by Marc »

When you go to get the rail inspected for "street-legalness" are they going to need to affix a VIN plate or sticker to it? That's what they do in WA when you bring in an assembled vehicle. Just curious, since you're apparently planning to replace the chassis afterwards.
User avatar
GoMopar440
Posts: 258
Joined: Sun Apr 12, 2015 8:56 am

Re: Budget street legal rail (re)build (WARNING: pic heavy)

Post by GoMopar440 »

The PO of the T3 I bought for parts somehow got the state to put "DUNE" (for Dune Buggy most likely) in the vehicle model section of the title. I could possibly use that title as is since I'll be swapping in the T3 tunnel, with that VIN, over to the new frame for the E-brake mount. That would be a last resort though. I'm planning on getting a state issued VIN for the new frame so I don't have to answer a lot of pointy questions when (not if :twisted: ) I get pulled over. Getting a state VIN is a fairly easy process to do here from what I've researched. So there's really no reason not to do it that way and keep it completely legal and legit.

Here in Montana when you get a state issued VIN, you have to bring your own tools to install the VIN plate with rivets right there in front of the officer/inspector before they let you leave. I was told they're sticklers about that and don't make any exceptions to that rule. No tools, no VIN.

Richard, Thanks for filling in everyone here about the project background. All I really did so far was try to get almost a years worth of progress and pics transferred over to the new thread here. I condensed it quite a bit, probably too much, as I left out most of those details you mentioned. Sorry bout that. I'll go over to TOS and copy that post where I spelled out the intended use and plans for this rail and post it over here. That's the easiest way I know how to get all that info into this thread.

Marc, I'll leave the green seals in place as you suggested and just keep an eye out for leaks whenever I start it up.
Home made rail (street legal), 1600 DP, 34PICT-3, T3 brakes, 4-1 glass-pack exhaust, 31's in back and 7.00x15's up front. Link to build thread: viewtopic.php?f=28&t=147561&p=1227553#p1227553
User avatar
GoMopar440
Posts: 258
Joined: Sun Apr 12, 2015 8:56 am

Re: Budget street legal rail (re)build (WARNING: pic heavy)

Post by GoMopar440 »

I've been reading and researching the stickies and build threads here, and over at TOS, for quite a while now. I'm adding this info here to give more details about this rail, possible engine and suspension mods, my goals and planned use and limitations. I originally made this post on TOS to answer questions about my rail so I could get educated guesses/replies about my engine upgrade questions. I was thinking about sticking the mostly stock T3 engine (single oil valve case) in the rail and then rebuilding the T1 engine (dual oil valve case) as a 2180.

Use and Location
I live in the mountains of Montana at about 5K feet above sea level. Driving through some of the passes around here I can easily get well over 7K feet above sea level. The 4.0l V6 in my small pickup feels like a 2.3l 4 cylinder at these altitudes. Whatever I do, I'll eventually end up having to deal with that issue one way or another. Either by making the engine larger (ie: the 2180 I'm thinking of) or by adding a forced induction system (turbo) to compensate for the thinner air up here. I'm leaning towards the 2180 since to go that route I'll have to tear the engine all the way down to install the stroker crank and I'll have a basically brand new engine when done. No mysteries of the PO to come back and haunt me later. I've had to deal with enough of that junk already :roll: . As far as my intended use for the rail, I'll be using it probably 80-90% as a daily driver and the rest of the time as a light off road use vehicle. Camping, dirt roads, exploring some of the mountain trails and ghost towns around here, stuff like that. No high speed wide open desert runs for me any more. My doctor, my wife and my back all put the veto on those type of activities for me anymore. I do kind of miss it every now and then, and then my right foot eventually gets a little bit heavier and heavier. That is until I hit that first big pot hole or washboard and the pain shockwave travels up my spine to kick the a$$ in my brain and tells me to reel it back in. Ah well, it was fun while it lasted. :(

Tires and Suspension
I'm happy with my current tire sizes (31-9.5x15's out back and 7.00x15's up front) so I'll be sticking with them for the foreseeable future. The suspension will stay fairly stock as far as geometry goes, but I may update some of the stock pieces with heavier duty ones. My rear trailing arms may be bent (have to measure them to be sure) so I might replace them with some after market arms. Probably 2.5x2.5's of some sort. The longer and wider arms will help with stability and reduce the need for high angle CVs. On the front axle I am thing of getting a conversion beam from Bugzilla. That will allow me to mount it in the same place as the (bent) BJ beam I have now, but let me use the more common king/link arms on it. Parts availability for the king/link setup is the main reason for this. The beam I get will probably end up being about 6" wider to match up with the wider rear. The wider beam should also help fix the tire scrub I'm getting after swapping to the taller front tires. I'll be sticking with stock torsion leaves and bars for a while. Coilovers may be an option much later on, but stock is fine for now.

Weight
Until it's done it's anybody's guess really. I'm planning on building a Beeline Pack Rat frame and setting it up to be a full bodied (fg or aluminum body) street legal vehicle. As a ball park guess I'd say it will be somewhere between 1500 to 2000lbs. I know that's a wide margin to work with, but until I have more of the pieces firmly sorted out there's too many variables to narrow it down any further.

HP (wants and needs)
I like HP but don't want to go much over 100 HP (150 tops) so I don't have issues with the reliability of the power plant and grenading transaxles as a result. If I ever get away from the ACVW power plant sometime down the road, I have a few other options available to me. Either a Corvair (I have a freshly rebuilt one sitting under my workbench in wraps) or a '90-94 Subaru EJ20 (22?), either one would most likely be kept NA for cost and simplicity. Either way, I'm looking at a self imposed upper limit of about 150hp. EJ25's are around as well but they cost more, have OBD2 and are interference engines. Boomskis are a lot more expensive if you snap or jump a timing belt on the EJ25 engines. My thoughts are that I should be able to build an ACVW up to about that HP range since I'll want to have a transaxle in the rail that can take at least that much HP. I'm not after numbers so much as having enough to play with but not so much to be more likely to compromise reliability. I think I'd be happy with anywhere between 100 to 150 HP out of whatever I build. With those thoughts in mind, I'm leaning towards either building a new Rhino case with the strengthening mods or getting an 091 and stuffing it into the new frame as I build it. I'd like 930 CV's but I don't really want to pay for them. Since I'm not going for long travel suspension, I think Type 2 CV's would be a better solution in my case. Given that I don't have a gigantic stockpile of spare VW parts to draw from, either trans option is going to add significant cost to the project. That may slow down or set back the new frame I want to build to replace my current twisted one.

Torque (my favorite engine subject :twisted: )
Closely related to HP, but often not given the attention it deserves. As you may have guessed by my username, I'd been working on big block Mopars for quite a while. I got out of them mostly because the money I was dumping into them was getting stupid expensive. When I retired from the military that also ended almost all of my discretionary income for the big buck toys. With my back messed up my job prospects were looking from slim to grim, unless I wanted to be a greeter at wally world. Rolling Eyes No thanks. Sorry, got off track there for a bit... Anyway, I like torque. I want that stump pulling torque. Pulling the house off it's foundation torque. Stuff like that. I like the feeling of being pinned back in my seat when I mash the skinny pedal on the right. But I know all too well that you got to pay to play. This is one place I want to set a goal for the engine that is based solely on my personal desires. I can't lie about that to you guys, or to myself. If I did I'd always be regretting it. Torque. Gotta have it in whatever I do for, or to, the rail engine. Enuf said.

RPM's and MPG's
Simply put, I'd like to get better MPG's than my current DD gets now, which is about 20-21 MPG. I would think that shouldn't be too hard to do, even for a bored and stroked ACVW. For RPM's I want to have the engine turning optimum cooling RPMs (?) at highway cruising speed (70-80MPH). I don't know how much having a completely open rail and trimmed tins will effect the proper cooling RPMs. The ring and pinion I have in the T3 SA trans should be 4.12:1 IIRC. I'm not sure what R/P ratio is in the T1 IRS trans axle that's in the rail right now. I'll want whichever R/P ratio will work best with the 31's to meet these goals, even if I have to find a different ratio elsewhere.

Carbs (Dual or Single)
My current plan is to use the short T3 intakes and a pair of Solex 34PICT-3's. This is still not set in stone though because I see the merits of both single and dual carb setups. Single is easier to setup with half the parts, but requires heat to keep the fuel in suspension and keep the carb from icing up. Carb icing can be a big problem around here given the cold temps and high altitudes I'll be driving in. Duals have the potential for more power if the engine can utilize it, but is more difficult to setup. Duals also warm up quicker being directly over the heads which is a big plus for me. Carb icing is probably the biggest reason for wanting to go with duals over a single carb. I've read good and bad stuff about EMPI products in general, but there seems to be a good track record for the HPMX carbs they are putting out now. Wimpy dual linkage and filter mounting setups being the most common negatives I've come across. Those are both external to the carbs though so they don't bother me so much. I'll probably just make up my own solution for a linkage when it comes down to it. It's cheaper for me that way and I get to play on the mill and lathe and express my creativity to solve those problems. To me that kind of stuff is actually quite fun to do.

Heads
Here I'm on the fence with not too much direct knowledge to go on. I know that I'd like to keep the valve sizes reasonably small since I'm not trying to build a upper RPM drag engine here. Smaller valves, all other things being equal, have been proven to maintain that low end torque at the cost of upper RPM HP. That's fine with me as long as I can cruise on the highway (70-80 MPH around here) and not be absolutely topped out when I get there. I'm trying to find the right balance here to make the whole engine package happy to work together.

Cam
This is probably the place I need the most help figuring out. I hope I've given enough details about the rail and it's intended use here to give enough data for someone to help me come up with a few options to choose from. Right now there is just way too many options for me to figure out without some help. If I ask a vendor I'm sure whatever they're selling is what they'll try to steer me towards. Not necessarily what is the best option for my application.

Induction (N/A, EFI or Turbo)
The altitude is the is the key factor here. EFI would be nice up here, but I'd like to keep it simpler than that if possible. I don't have any EFI parts so I'd be starting from scratch there. Once the rail is jetted properly for my altitude, I'm willing to live within the limitations of that jetting setup. Turbo would be the easy power path, but I'd want to know the condition of the engine before just strapping one on and crossing my fingers. I figure if I'm going to have to build the engine anyway, I may as well go big when I do. That way I can get the added torque that comes from a bigger cc engine.

Pistons and Cylinders
I'm not locked into this engine size (2180) for any real reason, other than the fact that it's big enough to offer added torque over a smaller engine. I've read in a number of different places that thick walled cylinders were the way to go for long term reliability so that's what I'm leaning towards using. If they have the potential to cause problems I don't mind stepping down to a true 92mm setup or something similar.

Exhaust
Similar to the heads and valves, bigger isn't always necessarily better. I already have a plain EMPI 1&1/2" 4 into 1 stinger that came with the rail when I got it. The stinger was bent so I got a new bolt on mid-pipe and added a glass pack muffler to it. The entire exhaust will be sand blasted and then I'll Cerokote it once that's done. That stuff is very durable so it should last me a long while. I already have a few colors of Cerokote on hand, so that's one thing I won't have to buy.
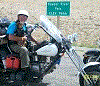
Home made rail (street legal), 1600 DP, 34PICT-3, T3 brakes, 4-1 glass-pack exhaust, 31's in back and 7.00x15's up front. Link to build thread: viewtopic.php?f=28&t=147561&p=1227553#p1227553
User avatar
Marc
Moderator
Posts: 23741
Joined: Thu May 23, 2002 12:01 am

Re: Budget street legal rail (re)build (WARNING: pic heavy)

Post by Marc »

GoMopar440 wrote:...Here in Montana when you get a state issued VIN, you have to bring your own tools to install the VIN plate with rivets right there in front of the officer/inspector before they let you leave. I was told they're sticklers about that and don't make any exceptions to that rule. No tools, no VIN...
That's interesting. A riveted-on plate would be comically easy to remove and use elsewhere, though, so it seems rather pointless.
WA uses metal-foil stick-on VIN plates which the officer applies. Supposedly they're tamper-proof, but one still wonders considering all of the solvents available. My trike was titled in OR where they stamped the assigned VIN right into the framehead (again, how hard could it be to find a similar number-punch set and stamp the same thing into another frame?) ...the part I found humorous is that OR assigned VINs start with the letter "O"; when I brought it to WA and applied for a title here they couldn't enter the VIN in the computer system since for reasons-unknown it won't accept that - apparently the two states' DMVs don't communicate all that well. The local license agent called the main DMV office for advice and they resolved it by substituting a numeral "0" :roll:

AA is now making thickwall 92s that have the same 96mm lower register as the "classic" 92s (or late 90.5s) instead of the 97.25mm register used on 94s, so you don't have to whack the case clear out to the headstud inserts. When the TW 92s first came out they were 97.25mm so you had to have them turned down on a lathe to do this...be sure to get the right ones.

82mm stroke is really pushing the limits for a stock rod, even if better bolts are fitted. Several ways to go here, IMO for your purposes it'd probably be best all-around to use 5.5" H-beams. Generic Chinese rods aren't real spendy, but I don't trust the bolts - fitted with genuine ARPs they should do the job for you for less $ than the "name-brand" ones.

I presume you won't have any trouble cutting your pushrods to length. There are myriad choices in cams for both stock 1.1:1 rockers and aftermarket 1.4/1.5:1, the "best" for you would depend upon more variables than mentioned so far - but I suspect there's really no need to go whole-hog for this application, there're plenty of stock-rocker grinds that should suit your purposes (you'll still need to upgrade the rocker shafts/shim setup, but that's not a big expense). Something comparable to a Bugpack 4063-10 would give ample top end while still having some grunt down low, but you might even want to go smaller to help pull those big tires off the line. We used an Engle 100 in my son's 88x82 motor (out of expediency, mostly - it was all I had handy that'd clear the crank/rods) and it still pulled strong to 5500+ with dual Webers. In a Baywindow Bus, First gear was unnecessary until he stepped up to 17" rims; with them it still had the power to push it through the air at 100MPH :) ....point is, you're going to want a wide torque band for your usage (especially since the gearing will probably be less-than-ideal) even if it means sacrificing 15-20 peak HP. It's a whole lot easier to live with a cam that's a little too small than one that's too big, so choose conservatively. Many 1.1:1 grinds will tolerate 1.25:1 or even 1.4:1 rockers, too, making it fairly easy to step it up a little down the road if necessary.
cbeck
Posts: 245
Joined: Tue Oct 20, 2015 5:17 pm

Re: Budget street legal rail (re)build (WARNING: pic heavy)

Post by cbeck »

I love my 4063 cam. Its been in a 1776 and a 1915. Doesn't pull well below 3000, pulls real hard above that.Hoping to salvage cam and lifters for the stroker motor I want to build. Mopar, I hope to talk to my engine/trans builder in the next week or 2 about whether to go 3 rib w/a middle 4.?r@p or a type one with close ratio 3+4 to go with my 31 rear tires. Let you know what I decide.
User avatar
Marc
Moderator
Posts: 23741
Joined: Thu May 23, 2002 12:01 am

Re: Budget street legal rail (re)build (WARNING: pic heavy)

Post by Marc »

cbeck wrote:I love my 4063 cam. Its been in a 1776 and a 1915. Doesn't pull well below 3000, pulls real hard above that...
Sounds right for stock stroke. It was my "go-to" grind for circletrack 1775/1835 engines that mostly needed good power from 4000-6500 but could still wind to 7200+ on a long straight. The inherent torque from an 82 stroke should make it viable at 2000-2500 (assuming the C.R. is high enough) which is why I mentioned it as a reference grind for this build...if you graph out a 4063 you'll see that it has significantly more area "under the curve" than most other cams with the same published numbers. Discovered it many years ago when plotting out a bunch of cams in search of something comparable to the old Sig Erson VW207 grind, which had worked well for us. It's advertised as 296° but it acts more like some competitors' ~"302°" cams.
User avatar
GoMopar440
Posts: 258
Joined: Sun Apr 12, 2015 8:56 am

Re: Budget street legal rail (re)build (WARNING: pic heavy)

Post by GoMopar440 »

They may use proprietary rivets like a lot of the OEM manufactures do/did. That would make it harder to relocate the VIN, but still not impossible. Either way, that's just the law of the land here. If I wanna play, I gotta play by their rules.

It'll be next year (2017) before I'm able to address any internal engine upgrades. This year will be the frame swap and street legal stuff. I probably won't be able to get much more than that done this year due to my limited budget. I should be able to tinker with the dual carb setup since I have most of the parts on hand for that already. I'll just need to fab up a center linkage for it and then jet the carbs.

You're right, cutting push rods to fit if needed won't be a problem. Done them before on some other engines (SB & BB Mopars) and they're pretty easy. Should be even easier than I remember since I'll only need to do half as many for a 4 cyl engine. I haven't decided on ratio rockers or not yet. I'm leaning towards stock ratio arms initially so I can swap higher ratios in later if I want to play around with it.

I'm want to keep the torque curve usable from idle. I prefer having it available to get moving in traffic around town. I know I'll loose some top end as a result, but I'm not going to be racing this thing. A cam tailored for racing would be mostly useful mid to top end. That's not what I need for a daily driver.

Cbeck, I'll be very interested to hear which R/P ratio you decide to go with and how well you like it. It sounds like you're looking at making a similar decision to what I'm contemplating for mine.
Home made rail (street legal), 1600 DP, 34PICT-3, T3 brakes, 4-1 glass-pack exhaust, 31's in back and 7.00x15's up front. Link to build thread: viewtopic.php?f=28&t=147561&p=1227553#p1227553
User avatar
GoMopar440
Posts: 258
Joined: Sun Apr 12, 2015 8:56 am

Re: Budget street legal rail (re)build (WARNING: pic heavy)

Post by GoMopar440 »

Today I worked on mating up a Solex 32PICT-3 carb to a short T3 dual carb intake. The way the carb is built, I could only remove the stud by the vacuum ports, not the one under the float bowl. On the T3 intake, I could only remove the stud farthest from the center of the engine. That dictated the orientation of the carb (float bowls towards the outside of the engine) on the intake.

The biggest hurdle was the studs/holes in the PICT were spaced .300" farther apart than the studs/holes in the T3 intake. To fix this so the parts would mate up I first clamped the intake in the vise on my mill. I used a small bubble level to align the surface the carb sits on to the mill table. Next step was to find the center of the threaded hole where I pulled the outer stud. Then I moved the table so the end mill was .150 farther away from center, but still inline with both the hole and the stud. I used a end mill that was just barely larger than the OD of the threads on the studs (.310 IIRC). I plunged the end mill into the intake and when it was through, I had a figure eight shaped hole. It was very close to the edge, but the end mill didn't break through the end of the cast intake.

On the carb I had to remove the stud near the vacuum ports. Then I clamped it upside down in the vise, once again using the bubble level to align the carb body to the mill table. On this part I had to find center on the hole and then move the end mill .150 towards the center. I plunged the end mill through the carb body to make another figure eight hole and then removed it from the vise. Next I had to turn the carb body 90*, with the milled hole on facing up so I could mill out the area above the new hole. I used the same end mill and ran it across the area the nut would have to sit and clearanced everything that was in the way. I cut through an unused vacuum port in the carb body, so I'll use some JB weld to fill that area solid just to be on the safe side.

When I sat the carb on the intake, I noticed the carb stud was too short to allow me to use a washer. I pulled that stud out and installed a spare longer one I picked up at the hardware store last week. Now I was able to get a lock nut and washer onto both studs. Before I could bolt it together I needed to slot one hole in the phenolic spacer as well as the two gaskets above and below it. After that was done it bolted together fine. I looked down the venturi and adjusted the gaskets and spacer as I was tightening the nuts down That allowed me get them as close to center as possible. It looks like about 1/16" sticking out at most, so I'll only need to do minimal work to get the carb, intake, spacer and gaskets to all line up.

Photobucket is acting weird again today and won't let me upload the carb and intake pics. I'll update this post with the pics after I can get them uploaded.

EDITED to add pics. PB is still acting wonky but I was finally able to get the pics uploaded.
Image
Image
Image
Last edited by GoMopar440 on Wed Jan 20, 2016 6:55 am, edited 1 time in total.
Home made rail (street legal), 1600 DP, 34PICT-3, T3 brakes, 4-1 glass-pack exhaust, 31's in back and 7.00x15's up front. Link to build thread: viewtopic.php?f=28&t=147561&p=1227553#p1227553
Post Reply