Page 3 of 8
Re: Budget 100x71 Build
Posted: Sun Dec 27, 2020 11:06 am
by cal 67
Re: Budget 100x71 Build
Posted: Sun Dec 27, 2020 6:29 pm
by cal 67
Re: Budget 100x71 Build
Posted: Sun Dec 27, 2020 6:33 pm
by twodollardoug
So do you press them in dry? Or use green loctite?
Re: Budget 100x71 Build
Posted: Sun Dec 27, 2020 8:06 pm
by cal 67
twodollardoug wrote: ↑Sun Dec 27, 2020 6:33 pm
So do you press them in dry? Or use green loctite?
I have press-fit loctite, but regular interference-fit and oil works great. I need a #2 drill bit to get about .004" interference. I'll taper one end and leave the other blank till I come up with a length.
Re: Budget 100x71 Build
Posted: Sun Dec 27, 2020 10:22 pm
by twodollardoug
Gotcha. Please take photos when you press them in. I would like to see how you support the pushrod when you press them.
Re: Budget 100x71 Build
Posted: Sun Dec 27, 2020 10:54 pm
by cal 67
Okay. I'll try. I just use two lifters on each end, and drive them in with a mallet.
Re: Budget 100x71 Build
Posted: Mon Dec 28, 2020 8:22 pm
by cal 67
Re: Budget 100x71 Build
Posted: Mon Dec 28, 2020 11:06 pm
by Eddie010
Thats way Cool, you made your own tapered pushrods.
Re: Budget 100x71 Build
Posted: Tue Dec 29, 2020 9:40 pm
by cal 67
K. Last pushrod post! I promise!

Wanted to see how one looked with the end on.
1. Oil
2. Use old lifter on solid surface
3. Tap opposite end with rubber mallet
4. Only went 3/4 down. Had to heat up the rod, then it went down easy


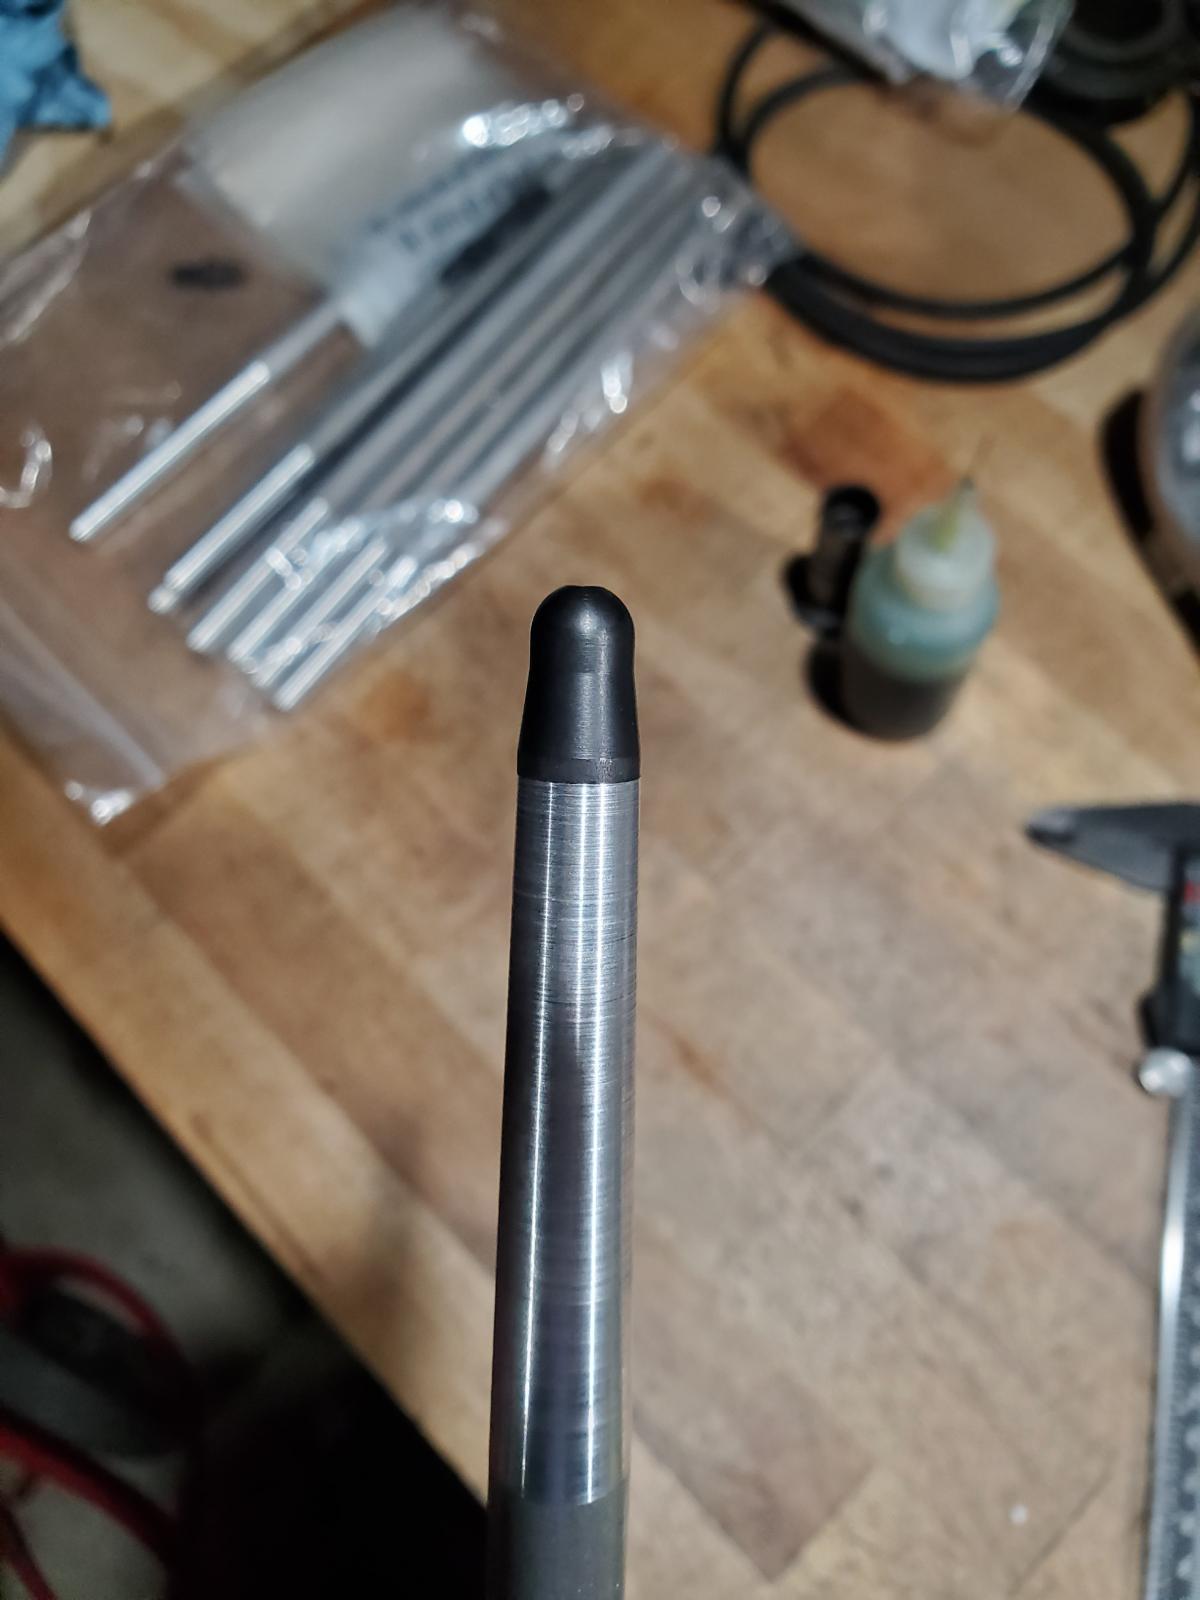
Waiting on welding gas. Waiting on valves. Waiting on my Q cam. I guess I'll do some mocking till then...
Re: Budget 100x71 Build
Posted: Tue Dec 29, 2020 10:12 pm
by wreck
that is a great idea for strong alloy pushrods . how much longer are the comp cams ends ? I need longer than stock pushrods because of the rocker spacers and stroke etc
Re: Budget 100x71 Build
Posted: Tue Dec 29, 2020 10:29 pm
by twodollardoug
The last time I used the lifter trick I was breaking the lifters. I didn't think to heat them up.
Re: Budget 100x71 Build
Posted: Wed Dec 30, 2020 4:43 am
by cal 67
twodollardoug wrote: ↑Tue Dec 29, 2020 10:29 pm
The last time I used the lifter trick I was breaking the lifters. I didn't think to heat them up.
Also depends on the interference-fit and lube. Some steel pushrods have a lot of unneeded interference - about .012". You can see the end bulge out. Stock 1600s bulged too. Silly, IMO. The ends can't go anywhere.
Re: Budget 100x71 Build
Posted: Wed Dec 30, 2020 4:54 am
by cal 67
wreck wrote: ↑Tue Dec 29, 2020 10:12 pm
that is a great idea for strong alloy pushrods . how much longer are the comp cams ends ? I need longer than stock pushrods because of the rocker spacers and stroke etc
.5625" (9/16"), but I don't know how you'll get the ends off without removing at least .200" from each end to get the tips off. Maybe a slide hammer with some hook attachment? To make it longer you'd have to avoid trimming too much of the pushrod.
Re: Budget 100x71 Build
Posted: Wed Dec 30, 2020 5:36 am
by wreck
thanks , yes it will be a struggle to remove the ends . I might be able to weld a nut to one end and fit a grease nipple , weld up the other and use a grease gun to hydraulic out the ends .That Q cam looks pretty huge . 289deg at 0.050 .
Re: Budget 100x71 Build
Posted: Wed Dec 30, 2020 11:01 am
by Clatter
subtaf wrote: ↑Sat Dec 26, 2020 11:06 pm
Love the experimentation and your work with this build.
I'm following along closely as I'd like to build a slightly down tuned version of this with a stroke around ~76mm (can always be talked into more) and peak hp a bit over 6000rpm. Shooting for 180~200hp.
With the infilling required in the chambers do you think starting with a basic 2L AMC head would require much the same amount of work or are the intake ports far smaller?
Keep the posts & photos coming please.
I can answer this one..
AMC castings don't have the 914 2.0 plug location.
You leave a lot of power on the table if the plug is hidden in the side of the chamber like all the other heads.
Even though you could weld the chambers and old plug hole up, and build a pad for the 914 2.0 plug,
making up a fixture to machine in the new plug location would be a task.
One that is far easier to solve by buying the AA 914 2.0 heads in the first place..
Maybe if you have access to a machine shop and some extra time?


 Wanted to see how one looked with the end on.