The welds are great! The bracing looks fine, The doubler on the floor is similar to what I am looking at doing (but stronger which is a good idea because of the thickness of the material the floor of the pan is, but I do have one question:
Got a pix of this as I think it is very important in the design.
Lee
slayer's buggy build
-
Ol'fogasaurus
- Posts: 17881
- Joined: Mon Nov 13, 2006 10:17 pm
Re: slayer's buggy build
You do not have the required permissions to view the files attached to this post.
-
slayer61

- Posts: 134
- Joined: Wed Jul 14, 2021 10:32 am
Re: slayer's buggy build
Lee,
the bracket in question bolts through the body and into the structure below.
Also, each of the "feet" of the cage have matching "doubler" plates under the floor
the bracket in question bolts through the body and into the structure below.
Also, each of the "feet" of the cage have matching "doubler" plates under the floor
You do not have the required permissions to view the files attached to this post.
-
slayer61
- Posts: 134
- Joined: Wed Jul 14, 2021 10:32 am
Re: slayer's buggy build
Oh ya, forgot to mention, there are roll cage "couplings" on that rear attachment point in case the cage needs to come out for some reason & I won't have to reach around the engine to remove the rear kicker/diagonal brace
-
Ol'fogasaurus
- Posts: 17881
- Joined: Mon Nov 13, 2006 10:17 pm
Re: slayer's buggy build
It was the mount on the tunnel I was curious about. It looked like you might have made the cage removable which is the fight I am having with my cage and myself. In most buggy bodies the lower mounting flange folds to the inside and the upper structure folds into the fenders for more structure. My upper flange fold in towards the inside of the body which is the problem I have with making the cage removable.
My trans is a 091 6 rib which sits on top of the tunnel rather than inside of it so it would be in the way so I would have to come up with something different if I wanted to do that.
What I was looking at was the mounting bracket that the down tubes are snuggled into. It looks a lot like some of the things I have been playing with but wasn't sure if it is a good idea or not. What is the tube wall thickness you are using for the cage and what is the wall thickness of the mounts they fold into. Also, are they set in at an angle or are the cage tubes bent to slide into a 90° fitting.
One of the things you have done is the two tubes to support the top of the cage in the middle which can bend in an endo. When a toy rolls over and the cage is dam(n)aged you can usually tell what has happened by the damage done to the cage (that is the idea of the cage isn't it). After my almost endo (end over end flip) I am very conscious now of the damage the cage would get hence my obsession with the downward loading (shear in my case because of the body lift I plan on attaching at least partly to).
It wasn't too long after I bought my Honda Pilot that one of my stepsons endo'ed it. No real damage done but another awareness bit. Then there was the guy I knew who was part of another group of guys who broke his neck in a roll over which it think (based on some things said) was mostly an endo. The guy was fully loaded and not just on fuel and oil (if you know what I mean).
I would also put some "X" pieces in the rear hoop also 'cause endos aren't the only thing that can happen.
Lee
-
Ol'fogasaurus
- Posts: 17881
- Joined: Mon Nov 13, 2006 10:17 pm
Re: slayer's buggy build
This isn't the best pix I have but this shows the problem in front. The front hoop should come through the cowl and down to the body lift but there is a area that you can see a bit of that was designed into the body shape that is there for the installation of the windshield frame. It blocks the installation of the front hoop but that, being my first attempt at FG work failed. But what this does show is how the inside upper structure is bent and inside of the body itself which is causing the hoops front and rear from being fully attached to the body lift without a lot of zig-zag for the hoop mount to be directly connected to the body lift like it should be.
"Cause and effect" can be a pain in the poo-poo!"
Lee
"Cause and effect" can be a pain in the poo-poo!"
Lee
You do not have the required permissions to view the files attached to this post.
-
Ol'fogasaurus
- Posts: 17881
- Joined: Mon Nov 13, 2006 10:17 pm
Re: slayer's buggy build
Slayer, how thick was the material that was used here for the hoops to connect to? I am looking into making some bending jigs as what I think I need to do is a bit more complicated.
Thanx Lee
Thanx Lee
You do not have the required permissions to view the files attached to this post.
-
slayer61
- Posts: 134
- Joined: Wed Jul 14, 2021 10:32 am
Re: slayer's buggy build
It's every bit of 1/4" and has matching plates underneath. They are made to cover the 3/4" pipe in the gap of the perimeter on the bottom.

-
Ol'fogasaurus
- Posts: 17881
- Joined: Mon Nov 13, 2006 10:17 pm
Re: slayer's buggy build
Thanks slayer, I think I see what you are doing. Is the tube/pipe for strengthening the outer edge of the pan or is it for something else. I did a 3" body lift then added a 1" square tube in the outer edge of the pan to give me a 4" rectangular reinforcing of the outer edge of the pan. The lower tube is pretty close to level with the floor of the pan.
One other option is to put a 1" X 2" tube in the underside of the edge of the pan. Not as strong but should make a big difference especially if this is a street bug or maybe something else that is deeper for track use.
It has given me some ideas on my problem with the roll bar cage I have been arguing with myself over.
Lee
I should have put in that the rectangular tube does better with the longer sides taking the loads. The 1" square tube can take a bend set easier than the rectangular tube would. Wall thickness also comes into play.
Lee
You do not have the required permissions to view the files attached to this post.
-
slayer61
- Posts: 134
- Joined: Wed Jul 14, 2021 10:32 am
Re: slayer's buggy build
Nothing so complicated as that... it was there when I bought it, and I don't know any better!Ol'fogasaurus wrote: ↑Thu Feb 17, 2022 6:57 pm Thanks slayer, I think I see what you are doing. Is the tube/pipe for strengthening the outer edge of the pan or is it for something else. I did a 3" body lift then added a 1" square tube in the outer edge of the pan to give me a 4" rectangular reinforcing of the outer edge of the pan. The lower tube is pretty close to level with the floor of the pan.
001.JPG
One other option is to put a 1" X 2" tube in the underside of the edge of the pan. Not as strong but should make a big difference especially if this is a street bug or maybe something else that is deeper for track use.
It has given me some ideas on my problem with the roll bar cage I have been arguing with myself over.
Lee
I should have put in that the rectangular tube does better with the longer sides taking the loads. The 1" square tube can take a bend set easier than the rectangular tube would. Wall thickness also comes into play.
Lee
I'm also too lazy ignorant to do anything about it. Electrician by trade, not a welder/fabricator.
-
Ol'fogasaurus
- Posts: 17881
- Joined: Mon Nov 13, 2006 10:17 pm
Re: slayer's buggy build
[/quote]
Nothing so complicated as that... it was there when I bought it, and I don't know any better!
I'm also too lazy ignorant to do anything about it. Electrician by trade, not a welder/fabricator.
[/quote]
That you are trying to do a build kind negates the "Knowledge part" of your last line.
I knew "squat" about VWs, welding and that kind of thing when I got started building dune toys back in the early 90's. I had a "tech designer" rating at work which is where I picked up some knowledge and by talking to others when out on the dunes. I paid a lot of attention when I saw stuff being towed back into camp which is where I picked up a lot of questions to be answered and what happens when "OOPs" are made (some of the oops were accidents while others were just ol' plain "brain farts").
Keep up posting what you are doing 'cause you never know when you have helped someone else.
Lee
-
slayer61
- Posts: 134
- Joined: Wed Jul 14, 2021 10:32 am
Re: slayer's buggy build
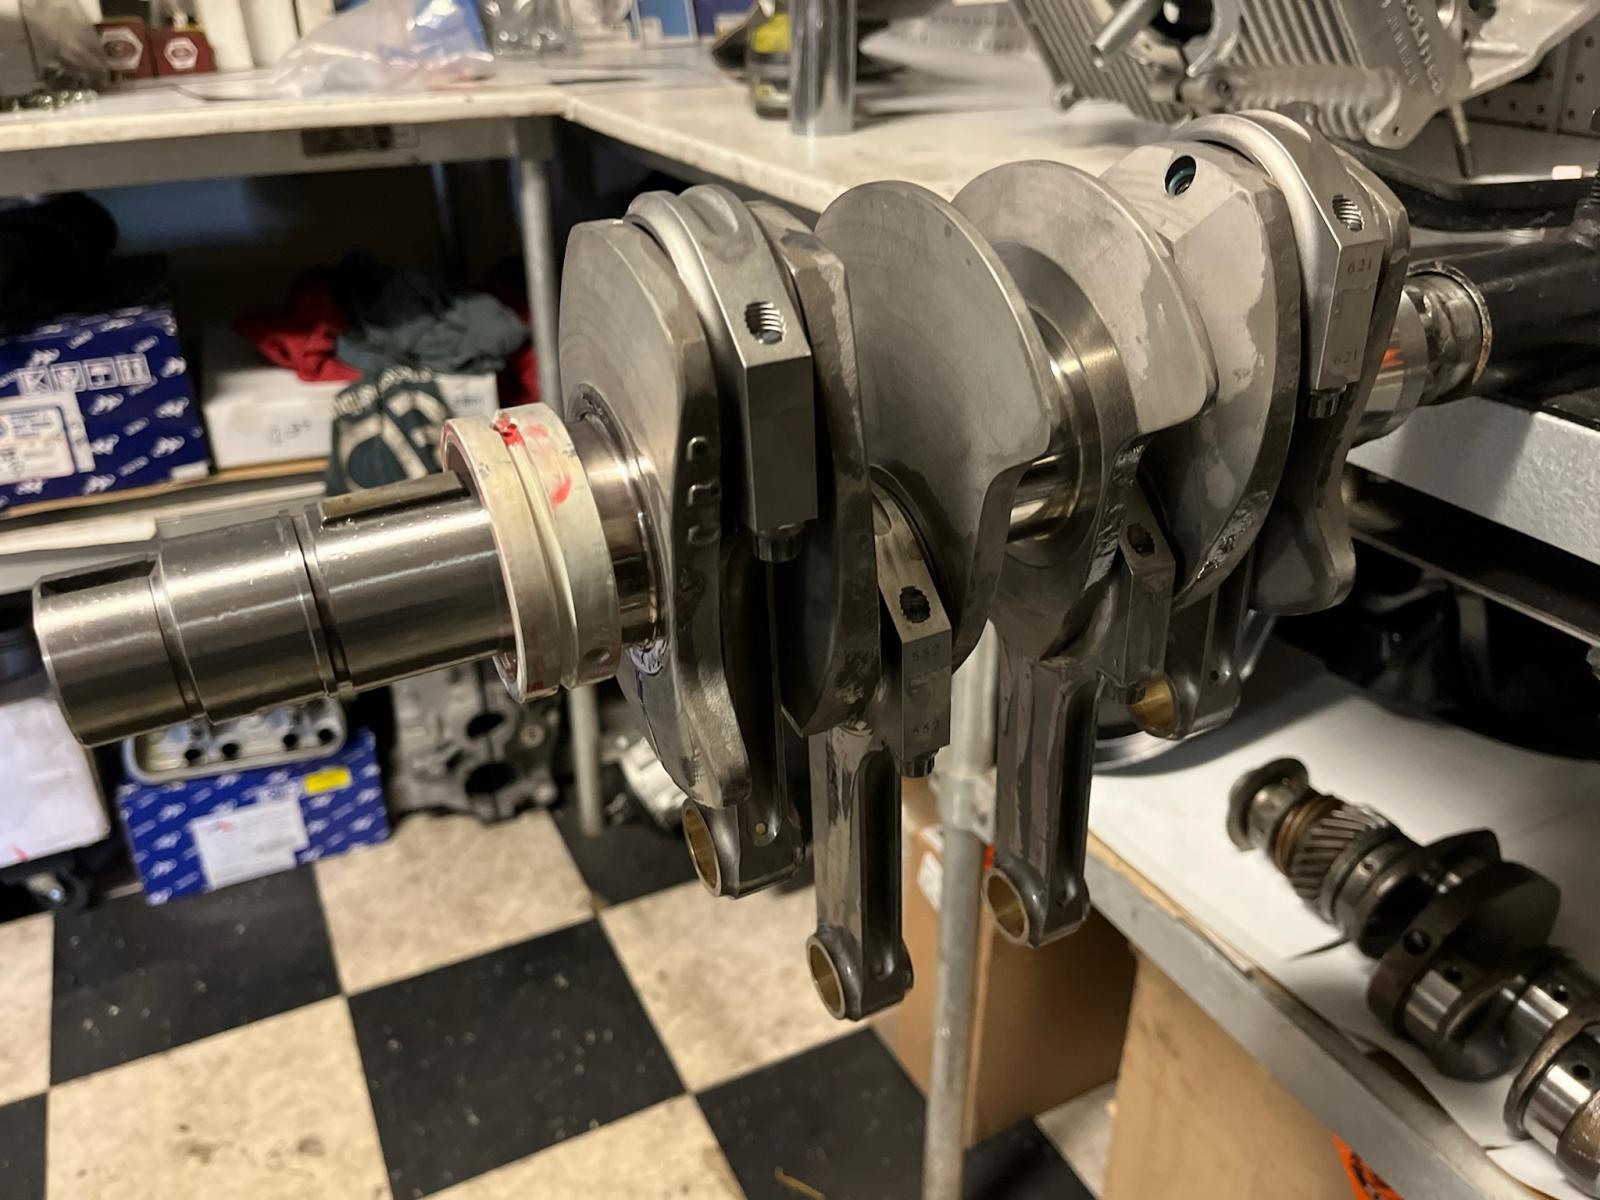
Update 6/6/22
The cases are back from Brothers' Machine in Ontario. They were sent for the usual "Go-Fast" prep. Line bore, bore cylinder spigots & clearance for stroker crank.
The cases are back from Brothers' Machine in Ontario. They were sent for the usual "Go-Fast" prep. Line bore, bore cylinder spigots & clearance for stroker crank.
You do not have the required permissions to view the files attached to this post.

-
slayer61
- Posts: 134
- Joined: Wed Jul 14, 2021 10:32 am
Re: slayer's buggy build
Some of the recent Bug-O-Rama loot will find it's way on to my buggy build. One of those pieces was a very nice oil cooler/fan combo with AN fittings & some hose. I think I'm gonna out the cooler under the "back seat" area. REV1 of the design pictured below. Scrap angle iron from the garage and some rubber isolation mounts. Test fit #1
You do not have the required permissions to view the files attached to this post.
-
Ol'fogasaurus
- Posts: 17881
- Joined: Mon Nov 13, 2006 10:17 pm
Re: slayer's buggy build
Slayer, a rule of thumb is that the nut goes on the underside not the head of the bolt, that way if things get loose the bolt does not be the part to drop away but should stay in place to somewhat hold things together... a rocky clamping setup maybe but should still be there.
I checked others work in engineering and, while not often, the nut did get on top. If so then double nut it to lock it in place. Locking nuts are usually thinner than the regular nuts as they are not the working part of the "clamping together of things" being done.
For what it is worth.
Lee
I checked others work in engineering and, while not often, the nut did get on top. If so then double nut it to lock it in place. Locking nuts are usually thinner than the regular nuts as they are not the working part of the "clamping together of things" being done.
For what it is worth.
Lee
-
SCOTTRODS

- Posts: 631
- Joined: Sun Nov 07, 2010 7:15 am
Re: slayer's buggy build
I'm a "Down and Aft" guy too, Lee... I thought I was the only one that noticed stuff like that. I am reluctant to tell anyone they could do something "better" on the forums most times, as they often have an access issue that requires the upside down nature of them... As far as Locking washers - Nothing beats NORDLOCK... look them up and see if you can't find a video on them. There just isn't a better locking solution for nuts and bolts, without thread locker from hell... I used to do some work that required them and thread locker due to extreme vibration... VW's seem like an ultimate application of the two.
Ol'fogasaurus wrote: ↑Fri Jul 08, 2022 5:56 pm Slayer, a rule of thumb is that the nut goes on the underside not the head of the bolt, that way if things get loose the bolt does not be the part to drop away but should stay in place to somewhat hold things together... a rocky clamping setup maybe but should still be there.
I checked others work in engineering and, while not often, the nut did get on top. If so then double nut it to lock it in place. Locking nuts are usually thinner than the regular nuts as they are not the working part of the "clamping together of things" being done.
For what it is worth.
Lee
I have found them completely missing more than once. - PILEDRIVER
Some pics of My Powder Coating work
http://s244.photobucket.com/albums/gg6/terrellster/
My Facebook Page for Powder Coating
http://www.facebook.com/profile.php?id=100001788886297
Some pics of My Powder Coating work
http://s244.photobucket.com/albums/gg6/terrellster/
My Facebook Page for Powder Coating
http://www.facebook.com/profile.php?id=100001788886297