Ol'fogasaurus black buggy

Offroad VW based vehicles have problems/insights all their own. Not to mention the knowledge gained in VW durability.
Ol'fogasaurus
Posts: 17881
Joined: Mon Nov 13, 2006 10:17 pm

Re: Ol'fogasaurus black buggy

Post by Ol'fogasaurus »

A long explanation on working on this buggy the way I have.

Image

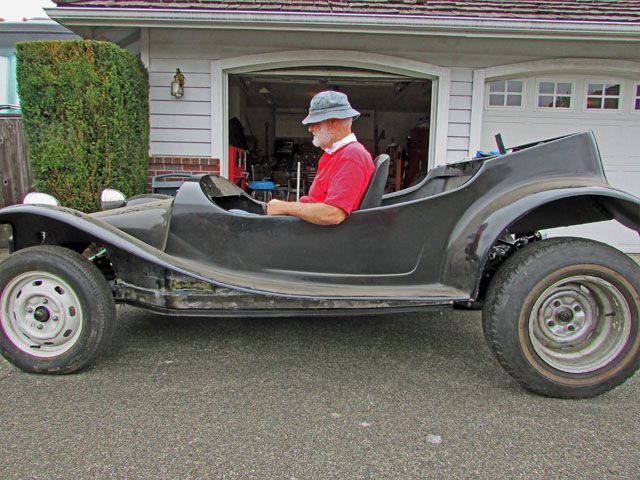
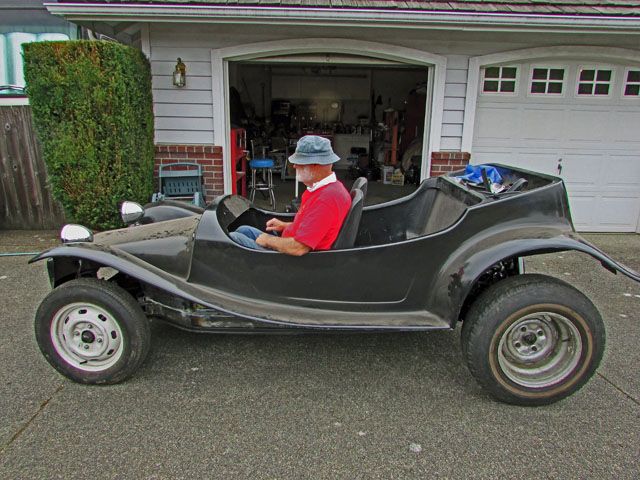
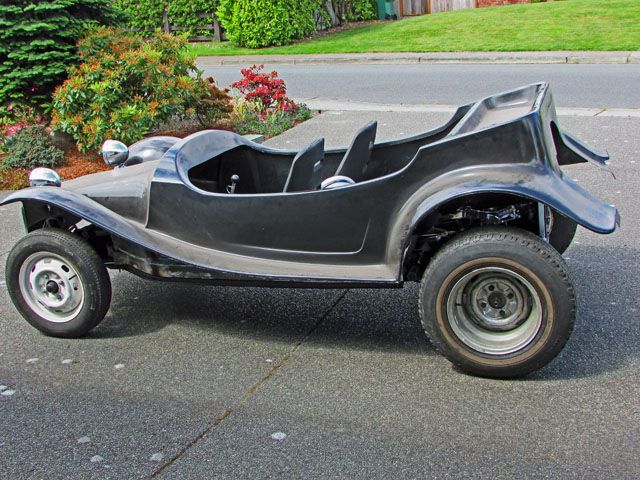
On this glass buggy think of it this way: It has fenders and running boards as part of the body: they are in the way of getting close to the inside of the buggy. People want to look at the buggy so they try to step on the running boards to either look in or get in: NO! they are not supported yet The running boards and, much less the fenders, keep you about a "short foot" (I just went out and measured and they are 10" at the cowl and 6 1/2" at the rear fenders (remember that a stock bug does the same thing; it flairs out from the front firewall towards the back then at latching side door post it then bends back to the rear of the pan). Add to that 2" for the structural flange along the body side's upper sill that bend in adding more difficulty and less access to the inside of the body.

The buggy is not on stands right now which lowers the sill height considerably and keeps you from having to chase the buggy rolling around as you work on it. As the buggy sits right now, the lowest part of the sill, where the front of the seat will be is ~32" off the floor. I have a roll around stool who's wheels collapse up when weight is put on the stool that I use to get in and out of the body. If that stool moves when I am getting in the almost doing a split to step in will turn into the splits and "the family jewels" will be spread all over the sill... if you know what I mean. Awkward to say the least.

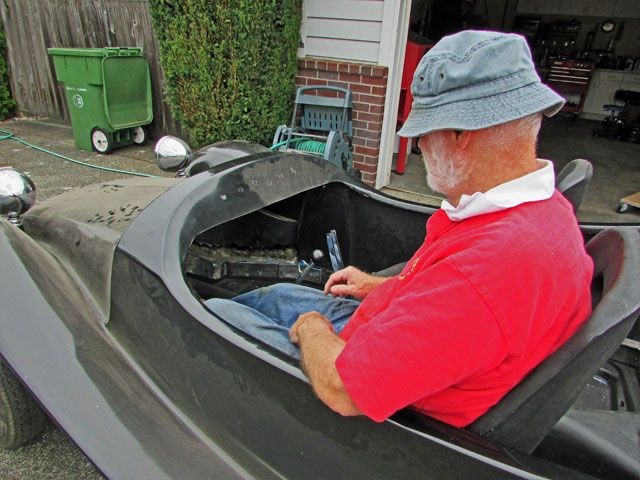
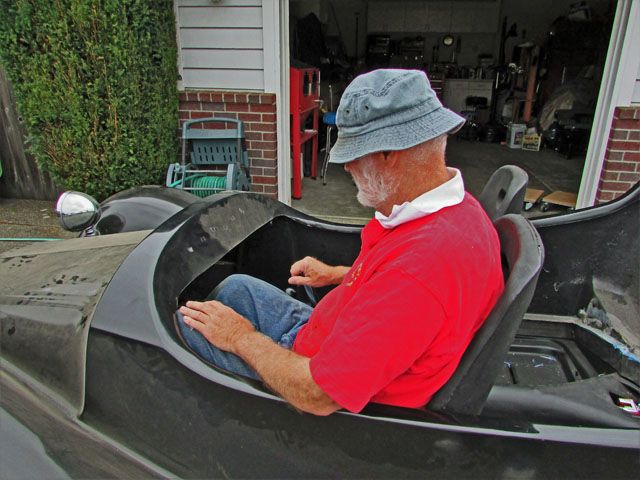
Look at the distance between the shifter and the dash. The dash is very close to the top of the shifter and the dash is just slightly ahead of the shifter. With the one seat sitting roughly where I think it will be the dash is a reasonable distance away from your legs but when the steering wheel gets installed (the seats location and height are in important part of the puzzle as it determines the cage and the front cross bar is where the steering column is supported). I want the seats sitting as low as possible. Just one of the reasons is to keep the cage from getting too high.

To ease the access if getting in and out, the steering wheel will have to be removable but then the steering shaft is going to be a menace especially during getting into the buggy.

The design of the cage is going to be a big factor in the location of the steering column and access too. Right now my blue buggy has the bars between the front and rear hoops with a bend in the middle to ease access and keep the body away from any trees assuming I get into a "leaner" situation. Mostly they are for ease of access. I also have a third bar in the center which is great for pulling yourself up and out of the seat. It also is good for the GoPro to mount to. The pushing up on the tunnel to get out is going to be a problem, which I have already mentioned, if I use the turning brake setup that RyanB came up with where the cylinders are mounted a distance behind the handle pivots and there are long rods going between the seats. I will have to build a protection for them (no cup holders!).

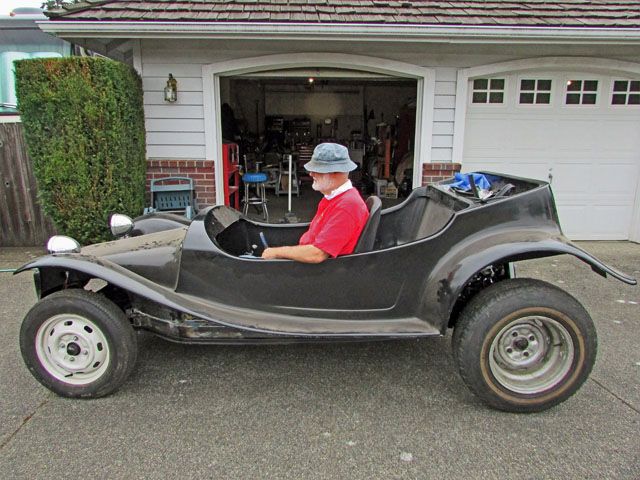
Notice that there are no doors on the buggy. I have seen two glass buggies with doors (I don't consider the Maxi Taxi as dune buggy in the Manx class) and they are short doors; no room to access and go under the dash in a reclined position. Working under the dash on a glass buggy is not an easy task at best and this body style is even worse especially when the seats are in place. I have to make the mount to the floor strong but their removal quick and easy and that includes the seat mount also. Also notice that the buggy seems to be narrow under the dash. I don't think it is but I think (I haven't measured) the dash is farther to the rear then a bug or glass bodied buggy.

There is no accessibility under the hood. It is a solid piece of the body and sits very low at that. Other than the master cylinders that area is not be available for use unless I add an Aaa-oooga horn. The hood not being able to be opened is fairly common in the Berry Mini-T style of buggy bodies as most glass bodies are able to have their hoods lifted off... assuming one can figure out the locking mechanism. On a glass buggy: to get access to the MC you usually remove the hood and wha-la, there it is. You can also access the MC by going in under the fender but it is tight even if you turn the wheels to the right.

In this case I am not going with spindle mounts but with hubs so the bolt on wheel can be removed for easier access to the MCs. The steering tires I have are 670s which are a large diameter style but not the largest diameter steering tire out there. The large diameter make MC access a bit tighter adding to that the running boards and fenders. It will still be tight filling the MCs but should be easier.

Again, the fuel tank is going to be in the rear under the apron with the engine and Truss/Kaffer bar.

No rear seat although the body came with the lower part of the seat. No room for the passengers and they would sit way too high in the buggy. I just don't think it would be safe whether I was a good or bad driver. I would want them to be within the body lines not with only their legs being inside. The rear cross-piece is the bad guy here. A custom chassis would have made things a bit easier but too late for that.

What I have listed here is just part of what has/had to be considered but it will give you an idea why I did some things one way and not other ways. Did I make mistakes... good lord yes but sometimes that is the way you have to learn... sometimes. I do take advice although it may not seem like it but I do consider any and all advice. If I have already thought about some advice given to me and decided not to go that way... I will still rethink it and don't reject it out of context. I do appreciate all input... for sure!

Would I attach this style of buggy again... ask me again when I am done. :roll:

Lee
Ol'fogasaurus
Posts: 17881
Joined: Mon Nov 13, 2006 10:17 pm

Re: Ol'fogasaurus black buggy

Post by Ol'fogasaurus »

I spent 5 hours today going to battle with the passenger seat. Man vs. inanimate object is one of the longest running wars in the history of the world. Sometimes a tie is as good as a win so I won today.

Image

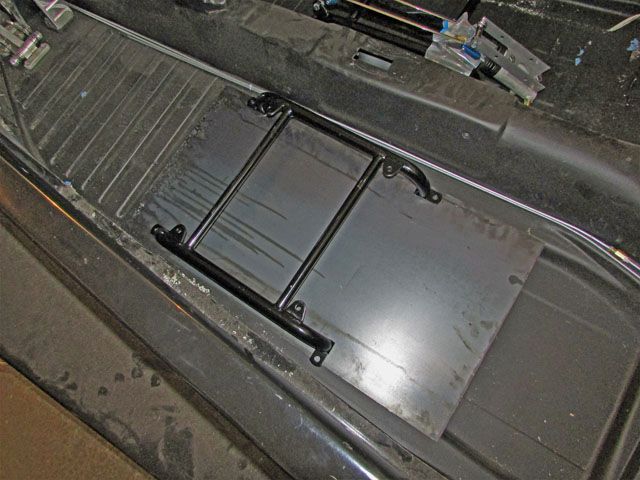
My template was checked out and corrected and everything fit... right? Wrong! A lot of hand work but it did get assembled, maybe not perfectly but good enough and strong enough.

Image

Image

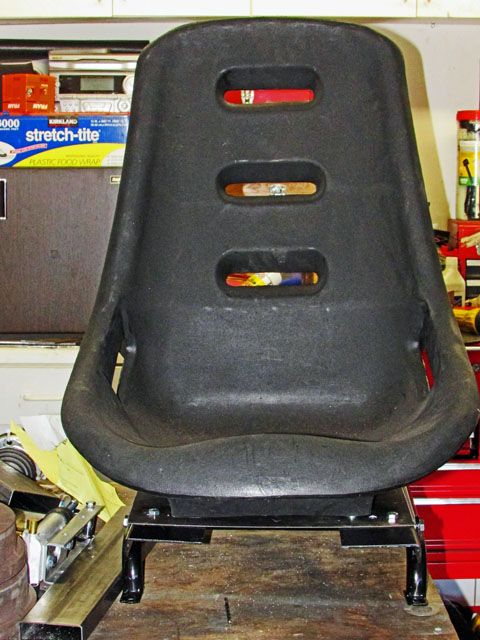
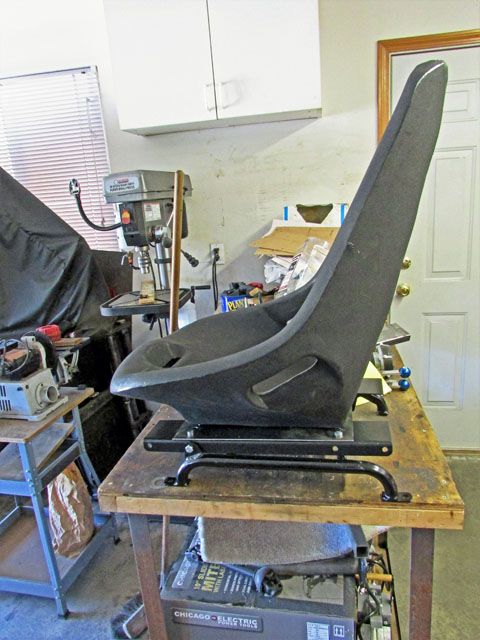
All put together both look the same but this one does not slide... the seat tips forward.

I'm pooped!

Lee
Ol'fogasaurus
Posts: 17881
Joined: Mon Nov 13, 2006 10:17 pm

Re: Ol'fogasaurus black buggy

Post by Ol'fogasaurus »

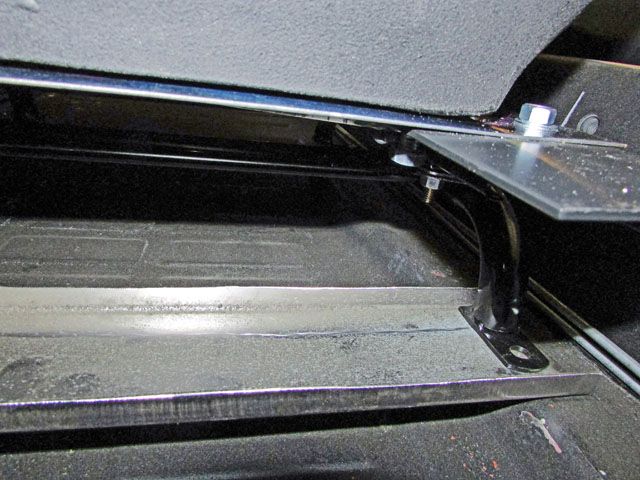
I had mentioned that I was going to have to make some mounts for the rear of the seat mount as the seat mount legs were not wide enough to span the foot rest area in the pan. I had bought two 36" pieces of 1 X 3 X .060 rectangular tube for the mount. I am a bit unsettled about the thickness of the stock but I think it is going to be OK with the stiffening flanges.

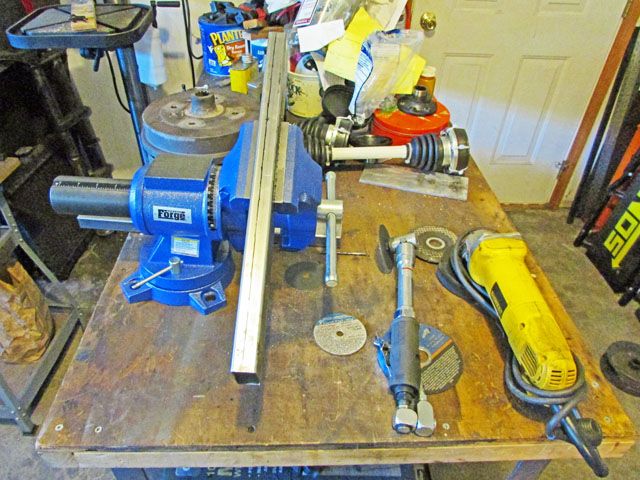
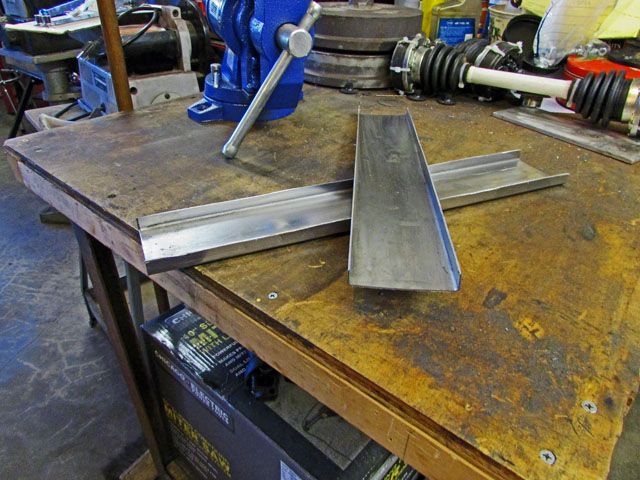
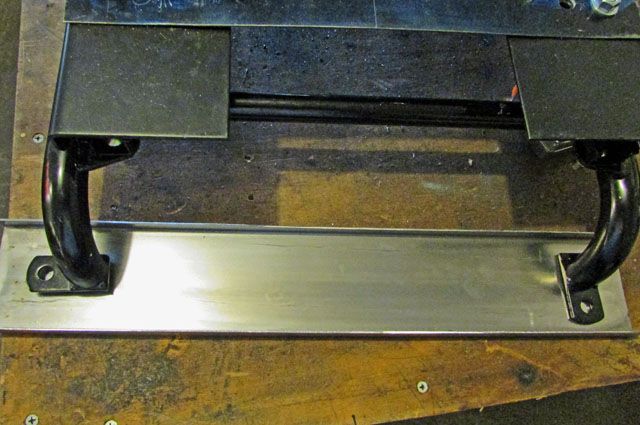
Today I started on cutting the tubes into a U- shaped pieces; e.g., a piece of flat stock with stiffening flanges on the sides.

Image

Since I don't have the base for my new vice stand yet all I needed was the clamping part of the vice for cutting. I only needed to have some support so I didn't have to clamp tight and the rotating head allowed me to fully clamp the piece lightly but with the full grip of the vice and at an angle to the table. I tilted the tube with the end resting on the table and started cutting

I had already marked a 1/2" high line the full length on both sides of the 1" high part of the tube. The marks were originated from the un-seamed side of the tube. The seamed side had too many issues with it to consider using here.

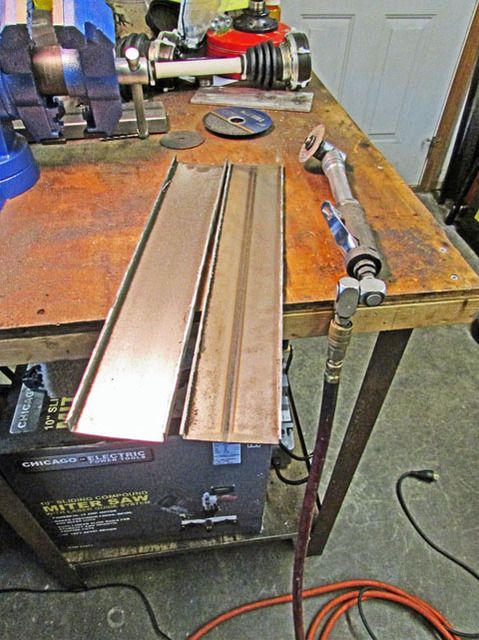
I had put a cut-off disc in my 4 1/2 electric grinder and a 3" cutting disc in my long reach air-cutter/grinder. I then tried to cut the tube: first with the 4 1/2" cutting disc then will the 3" cutting disc. Almost immediately it was made clear that there was more control of the cut by with the 3" disc. I got a straighter line without having to fight several different things the larger grinder tried to play with me. Both cuts didn't take as long as I had thought they would and the cuts were pretty straight.

Image

Both sides of the finished cut.

Image

Anxious to see what I had: I put the mount under the back of the seat base to see how it is going to work. While I don't want to do it I might have to rotate the feet in the rear so that the mounting bolts for the seat base are inboard of the sides of the foot well. My problem is I don't weld enough to get half-way good and the foot material is much thicker than the tube for the base is and yes... I know to weld from the thick metal to the thin metal not vice-versa but that doesn't make it any easier for a old codger weld.

Image

Both mounts cut, deburred then cleaned. I did the same for the scrap material top so I won't get hung up on them in the scrap bin. :wink:

I did put my rosy red rectum in the seat to see how it felt and... not too bad but then I was very ginger about doing it. Where I had put it my legs were fairly straight out so interference from the dash should not a problem. I need to get a taller person than me in there and a shorter person in also to check to see how the seat slides work and how the fit/placement of the mount is.

The cutting and fitting of the mounts from start to where I stopped was about an hour.

Now I am going to have to locate, cut to length, mounting holes in the pan and for the seat base then on to the next part of the build. That will be time consuming I am sure.

Lee
Ol'fogasaurus
Posts: 17881
Joined: Mon Nov 13, 2006 10:17 pm

Re: Ol'fogasaurus black buggy

Post by Ol'fogasaurus »

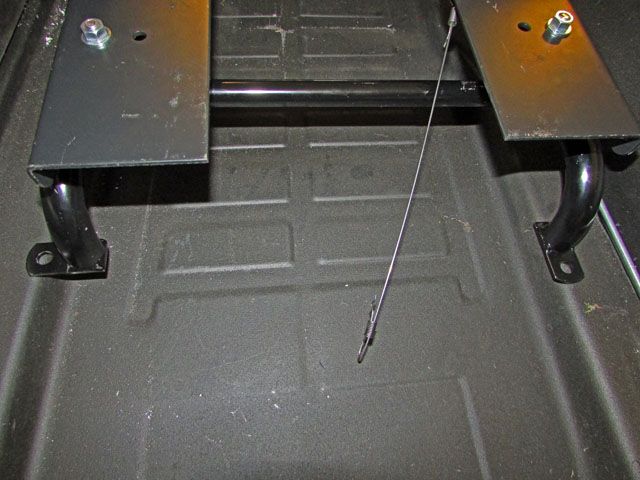
As you can tell by these two pictures that no matter if you turn the frame one way or the opposite as far back as it sits in the pan the less area it has to mount. I have made some cross-pieces for it to bolt to but still, it is going to be too close to the edge of the foot well radius and wall.

Image

Image

Since I have to change the foot direction to make the mounting holes work properly. Originally I thought about making the foot 90° to 180° depending on how the foot is set to where it is now then maybe angled 45° inboard from the strait back position like is in the front foot locations. I got thinking that not only to allow a different mounting hole position but to get an additional load "purchase" I would make a couple cylindrical feet with several mounting hole in them. I hope this makes sense. I can draw something up if needed.

Opinions' ??

Lee
Ol'fogasaurus
Posts: 17881
Joined: Mon Nov 13, 2006 10:17 pm

Re: Ol'fogasaurus black buggy

Post by Ol'fogasaurus »

Image

The more I play with this it seems to be the more limited I get. I wanted to make some new pads that were round and bolt the seats down with them but again, they would not only interfere with the curve into the foot well but at three inches in diameter would be a shade to big to fit inside the new 3" mount. What you see above might be what I am stuck with. The seat frame is also warped and I have to work/on that at the same time so it might be that I will have to end up welding instead of bolting the rear seat mounting pads to the new cross-piece I have made.

Tomorrow will be dedicated to finding out where the warping is as it seems to be getting worse. It could be in the new top piece that the seats bolts to which is entirely possible. Since it is salvaged material and I seem to remember that it might not have been totally flat that will have to be checked out. I have some painting and other cleanup to do on that so it will give me a chance to work it flat if that is the problem A little heat, a flat spot, a straight edge with clamps, a length of RR track or a BFH to exercise my will over it.

Lee
cbeck
Posts: 244
Joined: Tue Oct 20, 2015 5:17 pm

Re: Ol'fogasaurus black buggy

Post by cbeck »

I think the officials need to review the the footage and see if it can be called a tie :D
Ol'fogasaurus
Posts: 17881
Joined: Mon Nov 13, 2006 10:17 pm

Re: Ol'fogasaurus black buggy

Post by Ol'fogasaurus »

Last night I took the seat from apart. With all the components off the basic from has a small warp to it but not the roughly 1/2" that I was seeing in one leg. The problem seems to be in the slider assembly (I hate this new spell check android just updated into my tablet. A pain in the ass is nothing compared to fighting with it) but I am not sure of that yet. I'll spend some time playing with it later on today.

Lee
Ol'fogasaurus
Posts: 17881
Joined: Mon Nov 13, 2006 10:17 pm

Re: Ol'fogasaurus black buggy

Post by Ol'fogasaurus »

OK, here is what I have figured out so far. I took the seat back off the seat mount then took the seat mount apart... down to how it came out of the box. The basic seat base and, and still has a rack/twist to it of about 1/16" or less. Enough that the base will tip off three legs I don't think it is enough so that mounting it won't pull it down. I could heat it with all four of the legs of the base clamped down to get it to sit straight but I am not sure I want to do that... yet.

When I put the sliders back in place and tighten the studs, even though the holes aren't a net fit and allow some movement, I can get a bit of more lift to the one foot. The funny thing is that it isn't consistent because I took the sliders on and off several times with different results.

I then took off the new drag-bar I made to get the sliders to work together. This was to made sure that both of the sliders were even which it turned out they weren't. Apparently, even though I had used a square to even out the seat mounts before I made the new bar to join the two slides, one or both of the latch mechanisms' may not fully in their locking places or the slides were not even. The springs on the latches and handle are very strong and fighting it and moving stuff was not the easiest thing for one person to do. The new bar I made does not affect what ever is causing the lift/torqueing of the seat base but it too will be fixed right away. The idea is still good and it works great but I also might have to but a couple of small off-set bends in it for alignment.

I still have to put the new seat mount base back on and snug it up to see if it is causing part of the problem. It the holes are off, which they could be :roll: that might add to the fix. The bolts they attach to are carriage bolts and sit in the sliding part of the track and act as guards. They like to play games with you: games like "look for me... I just fell out of the track and onto the floor and bounced miles away or under a work bench" or "I just dropped far enough that the square part of my head so it is not in the square hole and I twisted my self into the track jamming things so just try to do something stupid! :twisted: ". The nuts and washers aren't any better either. :evil:

I just went out and reassembled the seat mount again finger tight then put the seat mount adapter in place. The one fort stall has the 1/16" and is seems to stay constant. I don't know where the 1/2" lift came from as I can't duplicate it again. I also noticed that the one foot that is in the air is slightly angled so that sliding a piece of flat stock under the foot makes it just about down to the tube before it get too tight. I also don't think I will have to off-set the new drag-bar as it feels like both might be at the same level or close enough. I did put a washer as a spacer between both latch mechanisms' but I might need to put two in place so the mechanisms' work smoothly with no binding.

Are the seat mounts OK... probably but they can be ornery too.
Ol'fogasaurus
Posts: 17881
Joined: Mon Nov 13, 2006 10:17 pm

Re: Ol'fogasaurus black buggy

Post by Ol'fogasaurus »

I got the driver's seat pretty much in place today. The mount is assembled with one loose bolt on the cross shaft I make for the adjuster (tight fit to put a jam nut in place). I had my wife take some pictures of the adjustment and fit so this isn't a set of ego pictures (I don't like my picture taken for one thing).

Image

This is the seat at full adjustment to the rear. My family runs from 6' and a bunch to 5' and a bit. I haven't measured it but the seat has somewhere close to 6" of slide.

Image

This is the relationship from the seat to the shifter and turning brakes (not the final location for them but close). It is closer to the shifter than I thought but not as bad as I thought either. With the seats like this I might be able to put the turning brakes in-between the seats but even that is not fully decided yet.

Image

The seat at the full forward position.

Image

Me in the seat at the full forward position. If I had to I could drive like this but not well. Without the steering wheel located yet it is hard to tell a bunch of things.

Image

This is pretty much where I will position the seat when I drive. Almost all the way back but not quite.

In my blue buggy I sit 1/2" off the floor but here I am about 3" off the floor. I sit higher than I would like to sit but it isn't that bad this way either. My legs are comfortable and it seems to be easier to get up to exit the buggy.

The steering wheel placement is going to be interesting to say the least. It will sit higher than I thought and it will be interesting for full seat placement forward and fully adjusted to the rear.

I have a 14" steering wheel and an octagonal quick release mount for it but I wonder if I might have to make a mount to raise and lower the steering column. I will have a universal on the steering box which is going to help some I think. I don't want to put a second universal on it as that would make things much more complicated.

I've noticed that I am pushing things fast and making mistakes. Must slow down!

Lee
Ol'fogasaurus
Posts: 17881
Joined: Mon Nov 13, 2006 10:17 pm

Re: Ol'fogasaurus black buggy

Post by Ol'fogasaurus »

Other than some final things like washers and maybe some bolt length changes and the finishing of the seat mounts locations (part of the final fitting I have to do) both seats pretty much done. I still have to do a final/permanent mounting to their respective frames (the seats and frames store better not joined) and locate the final location and make the mounting holes and under pan doublers for the mounting hardware. I am going to weld the seat mounts to the cross-piece and maybe put a piece of angle iron under the center between the walls of the foot well just to be safe. I am waiting for my oldest stepson and his wife to come over for help fitting the seat and maybe roughing in the location for the steering; the long and the short of it. :wink:

I have some of the parts for the steering on order. I just have to pick up a 6' long 7/8 dia. tube for the steering shaft. At best the steering shaft will be in the 3' to 4' range but the extra is for help fitting from the universal on the steering box under the hood area to the firewall for the piercing of said firewall.

One of the things that I need help on with the fitting of the seats is whether one shaft will work for two people of much different heights (the long and the short of it) as the seats slides front to back. One of the things in the fitting should tell me if I need to have a second universal on the shaft hence a different/additional, maybe adjustable in height, mount when the cage is built. We had a set seat location in the blue buggy we did earlier this year; I was able to get a comfortable neutral location for the sizes of the different potential drivers. Not sure if it will work for when the great grandkids get old enough :roll: .

Lee
User avatar
fusername
Posts: 6806
Joined: Sun Jan 28, 2007 11:26 am

Re: Ol'fogasaurus black buggy

Post by fusername »

awesome to see how much has been done on this project! that thing is bigger than I thought in all teh older pics, or are you getting smaller?
give a man a watch and he'll allways know what time it is. give him two and he can never be sure again.

Things are rarely just crazy enough to work, but they're frequently just crazy enough to fail hilariously.
Ol'fogasaurus
Posts: 17881
Joined: Mon Nov 13, 2006 10:17 pm

Re: Ol'fogasaurus black buggy

Post by Ol'fogasaurus »

:lol: :lol: :lol:

Older, much older than when I started it and yes but I have lost some weight too. :roll:

Its funny how photos can make things look smaller especially w/o forms for reference. Remember this is an uncut full length pan I am playing with. Also there is the 3" body lift and a 3" high seat mount so it would be like the seat and I were sitting on the floor of a stock bug.

I am at the point where I am taking a lot of measurements and making adjustments before I am doing much more as everything I do now is driving how I do everythinmaking such as the steering and the height and shape of the cage. For instance: a cage for a Baja probably won't work as I am sitting so low it moves the seat farther back on the pan; e.g., cause and effect.

Lee
Ol'fogasaurus
Posts: 17881
Joined: Mon Nov 13, 2006 10:17 pm

Re: Ol'fogasaurus black buggy

Post by Ol'fogasaurus »

Had an interesting day today. I had asked my oldest stepson and his wife to come over to help me get some seating and steering measurements. They had one of my wife's great grandchildren with them so while my wife got to play with her great granddaughter we took some measurements.

My guess on the seat location was very close to being right on as far as the seat location goes, both could easily live with the current setting quite well so that is set. I now have to drill mounting holes in the mount, make some doublers for the mount, make some larger shaped doublers for under the pan to support the seats because of the thin pan material.

Getting into the black buggy, right now, is not like getting into a Baja or something like that because of no doors; you done open the door then slide into the seat, you step up and over the running boards and body sill, get both feet on the floor, aim then drop. It is even different than getting into my blue fiberglass buggy but then the cage hasn't been built yet so that should make a big difference just don't know exactly what until the cage is built. when I step into the buggy right now I can feel the floor move but hopefully when the cage is there there won't be any reason to stand on the floor. I don't have the thin Brazilian pan halves but the thicker pan halves (I forgot where they came from right now).

When it came to locating the steering wheel their comfort place for the steering wheel was about a half-inch apart in fore and aft steering wheel locations. Neither were in the garage as the measurements of the other one was taken so it was interesting. Steering wheel (centerline) height off the floor was about a half of an inch apart also; he's 6'3" and she is 5'4" as I remember. Since he is a bit taller than I am now I measured from the floor to the top of his head then will add three inches or so to locate the bottom of the tubes between the A and B pillar's to determine cage height.

Lee
Ol'fogasaurus
Posts: 17881
Joined: Mon Nov 13, 2006 10:17 pm

Re: Ol'fogasaurus black buggy

Post by Ol'fogasaurus »

Image

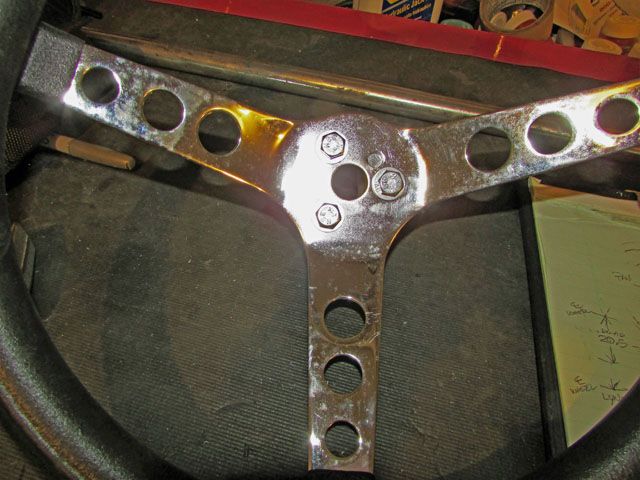
This is the steering wheel I am going to use. It looks a lot better than the picture but it also has been sitting around for about 20 years.

I have been asked why I didn't go with the Model T steering wheel which is available in the smaller 14" size but it is not off-set for being collapsible in a wreck, in fact it is stock and the off-set is the other way. This was a safety decision on my part not a for looks decision.

Image

Image

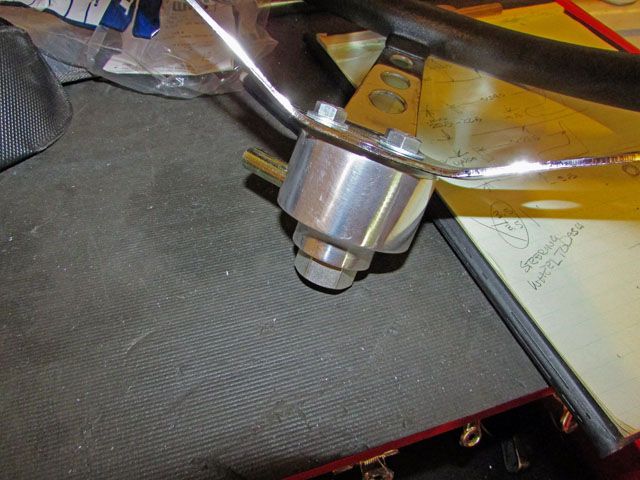
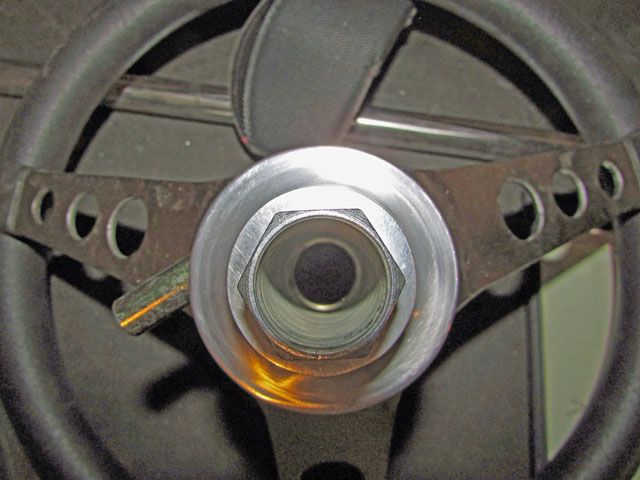
This is the steering mount I am going to use. It is an octagon shaped mount, quick disconnect style. I have been asked why not the splined end style and that is because of $$$ and there are people who could be using this when I am gone and could screw it up as far as mounting it off-center because of the splines. Much harder when comparing the 8 sides vs. many fine adjustments that are possible.

Late last week I ordered a steering box universal (36 splines and 7/8 bore) instead of using the stock fabric steering box coupler. I got under the body today and looked at the angle again and it is way too much of an angle than the fabric/poly unit could work at. Glad I went this way. The new universal should be in later on in the week.

Image

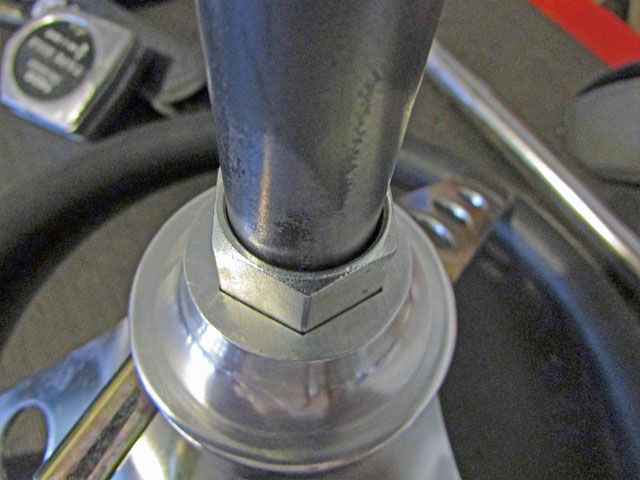
Friday I went and got a 4' long 7/8 X 0.063 seamed tube for the steering shaft. I found that there are two 7/8 steel tubes (0.063) one being slightly larger than the second. I slid the coupler on the smaller diameter and it fit but not as tight as I wanted it to fit. The coupler would not fit onto the larger tube but it was very close. It would have to be turned down slightly to fit.

Right now I am waiting for the steering box coupler w/universal to come in to see how the tube I bought fit it; I bought the smaller of the two but am having second thoughts on it as you can see the gap in the picture (it is sitting at a slight angle which would make the steering wheel wobble a lot). I think I would have to turn down the larger diameter tube about the same amount as the smaller tube is shy of a good fit on the coupler. I haven't mike'd the holes yet so this is an observation type of guess.

Question: something in the back of my mind, from a long time ago, says that when you knurl something it gets a bit larger in diameter. That way I could have a good fit in the coupler and the weld would keep the steering straight to the shaft and the steering wheel would not wobble. Anyone know if that is true? The reason being I do have a knurling tool and could do that assuming it fits on the tooling on my lathe.

Lee
cbeck
Posts: 244
Joined: Tue Oct 20, 2015 5:17 pm

Re: Ol'fogasaurus black buggy

Post by cbeck »

How loose is the 2 pieces of the coupler? Mine is quite loose and i am wondering how to go about making that connection tighter. I also thought knurling was supposed to make a item slightly larger . I would think that should do a centering job well enough to center coupler on the shaft for welding. I got the chrome shaft from my flaps [ that is all he carries] and it fit the release hub fine. Little thicker because of the chrome?
Post Reply