Basic Off-road Ball-Joint Beam rebuild PT 2 starts on p. 13

Offroad VW based vehicles have problems/insights all their own. Not to mention the knowledge gained in VW durability.
Ol'fogasaurus
Posts: 17881
Joined: Mon Nov 13, 2006 10:17 pm

Re: Very Basic Off-road Ball-Joint Beam rebuild

Post by Ol'fogasaurus »

Right now I still am using the bearings and seals which are bigger than the Delrin bushings. One of the problems is that my rear torsion bushing are the Delrin bushing which squeak like crazy (I have to reset things this year so they will get a lube job) and I don't know if I could deal with another set of squeaks up front at the same time :roll: . I thought about changing them but this is a "Very Basic... " :lol:

I did have them tacked well enough but I didn’t want to chance bumping them when pulling the assembly apart either. These arms fit in quite tightly and the suspension so far is very tight. I thought that the chance of bumping something when pulling things apart was not worth the chance of something else going wrong was worth it.

Lee
JUSSUMGUY
Posts: 2467
Joined: Sun Jan 18, 2009 12:23 pm

Re: Very Basic Off-road Ball-Joint Beam rebuild

Post by JUSSUMGUY »

Working with nice clean parts is so much nicer than dirty or semi cleaned parts. What blast cabinet, and how big a compressor do you have?
Ol'fogasaurus
Posts: 17881
Joined: Mon Nov 13, 2006 10:17 pm

Re: Very Basic Off-road Ball-Joint Beam rebuild

Post by Ol'fogasaurus »

Image

I have a Harbor Freight (HF) floor model that I paid $169 for a while back. Currently HF has a sale going for is $219 (http://www.harborfreight.com/40-lb-capa ... 93608.html) but I have seen it once lately at 50% off. http://www.harborfreight.com/catalogsea ... st+cabinet They have other sizes of blast cabinets also.

I have a 60 gallon compressor that does go off a lot (the cabinet uses 90#s) but I think it is adequate for the job. If you decide to buy, get inline water separate (under $20) that your air hose plugs into also (you can see it in the middle right of the cabinet).

You will need at least two electrical plug-ins; one for the light (necessary) and one for the vacuum which is necessary to keep the dust down so you can see what you are doing… and it does. They also have a dust collector that bolts onto the back of the unit also but it is ~$150 http://www.harborfreight.com/blast-cabi ... 94275.html. Also they have adapters http://www.harborfreight.com/catalogsea ... +collector for dust collection.

If you plan on handling 15 X 15 rims, I am pretty sure it will not handle them as it is a side load not a top load but for normal stock or near stock rims I think you should be able to be able to get them in and cleaned in side. I have cleaned up stock length trailing arms if that helps any.

For cleaning of small parts like nuts and bolts you can buy those magnetic parts trays or make your own out of a speaker magnet glued to any of various sized metal baking pans.

Is it the best, no! Are there other blast cabinets for sale and yes! There are several out there that look actually the same as the HF unit but for more $$$. There are others where the price is much higher and the quality looks better but I have also seen some at higher prices cabinets, painted another color that were of the same or lesser quality. Side loading cabinets are limiting to what you can get in but seemingly that is what most are. Top loaders are very nice but there are some side loaders that open from either side and have accessories that will allow you to put long items in for cleaning.

If you do a search there are plans for ones made from plywood or old 55 gal drums too.

I do not run HF's aluminum oxide media though mine but I run glass beads. The nozzles last longer and while they don't work as fast the other media probably does but it probably does a bit less damn-age too. http://www.harborfreight.com/catalogsea ... last+media.

Check this out http://www.shoptalkforums.com/viewtopic ... 3&start=15

Over-all, I think it is a great tool to have in the home shop assuming you are not doing a professional amount of work there! They are also great for other things too like fruit pressing and sand blasting wood signs and the like (do a search and you might be surprised).

I hope this helps.

Lee
User avatar
Hedrock
Moderator
Posts: 3251
Joined: Sun Mar 04, 2007 7:49 pm

Re: Very Basic Off-road Ball-Joint Beam rebuild

Post by Hedrock »

Lee,
Have you had any problems with the cabinet leaking blast media? I had one of the table top models and the cabinet leaked all of the time. I plan to buy a blaster like yours soon but will silicone all of the seams from the outside before I begin to use it. Your thought would be much appreciated on this.
Collecting parts again... No I'm not going to say why!
Ol'fogasaurus
Posts: 17881
Joined: Mon Nov 13, 2006 10:17 pm

Re: Very Basic Off-road Ball-Joint Beam rebuild

Post by Ol'fogasaurus »

No I haven't... not yet anyway. I made sure that I was clear on the gaskets that were pre-applied to the panels when assembling the cabinet part and tried it out. I had been warned about the leakage problem so I already had a plan in case it happened.

The first time I used the gun after I had it assembled it did leak so I emptied the hopper and took the cabinet apart and cleaned things thoroughly then put the panels back together. Both times my wife helped me with the assembling of it because even hanging inside though the door I couldn’t reach the bolts with the screwdriver and the nuts on the outside at the same time. I am sure I could have figured a way to do it but it was faster this way. Then I sealed the seams from the outside with silicone bath calk… I think it was silicone bathroom calk. I injected the silicone in the seams then dipped my finger in water then cleaned the squirt out away and packing it into the seams/smoothing/cleaning it to where it is not that well noticeable.

I still plan on doing the foot pedal conversion and changing the nozzle but not today but not too long away either.

Lee
Ol'fogasaurus
Posts: 17881
Joined: Mon Nov 13, 2006 10:17 pm

Re: Very Basic Off-road Ball-Joint Beam rebuild

Post by Ol'fogasaurus »

Baja-it, how much travel did you end up with?

Lee
User avatar
Qurtys Lyn
Posts: 1558
Joined: Mon Nov 10, 2008 2:22 pm

Re: Very Basic Off-road Ball-Joint Beam rebuild

Post by Qurtys Lyn »

I believe we have between 5.5" and 6" of travel. We tell people 6".
Fusername's evil twin

'72 Std Beetle - 1641 CC
BRAT Motorsports #936
Ol'fogasaurus
Posts: 17881
Joined: Mon Nov 13, 2006 10:17 pm

Re: Very Basic Off-road Ball-Joint Beam rebuild

Post by Ol'fogasaurus »

I got ~6" but for some reason I expected more. When I put in the adjusters then I will be better off (hopefully) in the compression part of the travel which is what is needed. Also, it will allow me to set the torsion bars at different heights to soften the ride up some what allowing the tires to keep in touch with the ground/sand better and changing the ride is a big deal!

Thanks for the quick input. Lee
BAJA-IT
Posts: 2046
Joined: Tue Oct 07, 2008 5:02 pm

Re: Very Basic Off-road Ball-Joint Beam rebuild

Post by BAJA-IT »

Yea, right about 6". That's all you get with a ball joint beam.
BRAT Motorsports #936
Bolt Center: Salt Lake City, Ut
ACE: Air Cooled Engineering, now Black Line Racing
Ol'fogasaurus
Posts: 17881
Joined: Mon Nov 13, 2006 10:17 pm

Re: Very Basic Off-road Ball-Joint Beam rebuild

Post by Ol'fogasaurus »

I did get the hooks welded to the trailing arms on the other side of the beam today. One of the hooks on the first side I did, even with all of the welding done using the same settings did not penetrate as well as the rest so, just as a precaution, I am going to back weld from the inner side of the trailing arm flange. So far, I am fairly pleased with the job, not necessarily with the look of the welds but, with the one exception, the penetration is what it should have been.

Now comes the tedious task; that of the welding up of the seams of the shock mounts themselves. :roll:

Lee
Ol'fogasaurus
Posts: 17881
Joined: Mon Nov 13, 2006 10:17 pm

Re: Very Basic Off-road Ball-Joint Beam rebuild

Post by Ol'fogasaurus »

Now that the house is almost sold I got some time to weld seams. Not an easy thing to do (for me anyway) as following the seams that are so narrow that any jiggle is like coloring outside of the lines.

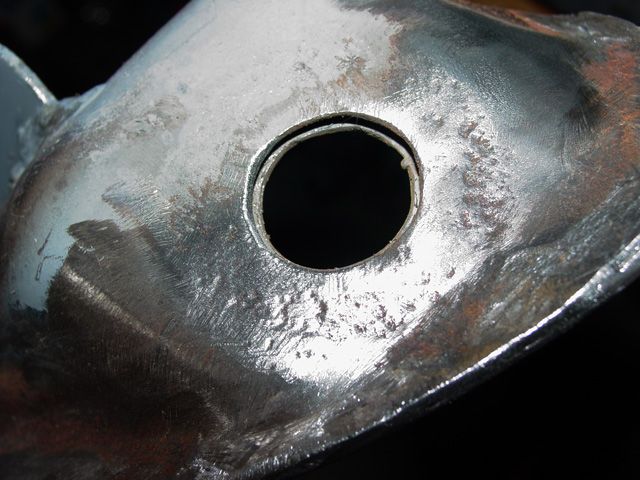
I started on the tower that had the rust on the upper shock mount boss in it and down at the bottom, just as the tower turns under and into the drain hole I found two through rust holes that were joined by almost no metal. I was able to get them trimmed into a slot and the elongated hole seamed shut. The other side of the tower turned out to be solid. I have some other clean-up on this tower to do then on the other tower.

Lee
User avatar
hotrodsurplus
Posts: 410
Joined: Tue Sep 18, 2007 10:43 pm

Re: Very Basic Off-road Ball-Joint Beam rebuild

Post by hotrodsurplus »

Ol'fogasaurus wrote:One of the problems is that my rear torsion bushing are the Delrin bushing which squeak like crazy (I have to reset things this year so they will get a lube job)
If they squeak then I would highly doubt that they are really acetal (trade name Delrin). We use acetal on a lot of projects and we've never heard it squeak. I deal with a suspension manufacturer in Canadia that sells full assemblies with all acetal...no squeaks. It's one of the charms of acetal over urethane.

In fact you're not supposed to lubricate acetal at all. It's self-lubricating and any external lubrication usually only attracts dust which wears acetal bushings prematurely. And some oils contain solvents that can oxidize many plastics like acetal.

If you insist on lubricating it then get a big tube of that sticky white silicone-based crap that Energy Suspension and Prothane sells. It's like $25 and it'll last you a lifetime.

As an aside, that silicone stuff is the only lubricant you're supposed to use on urethane. Period. Petro-based lubricants WILL destroy urethane in time (oil is a solvent for urethanes and I have the bushings to prove it from my truck). Petro-based lubricants will also cause urethane to squeak...guaranteed. I'm on my fifth year on my Toyota and my 12th year on my roadster with urethane bushings lubricated with silicone lubricant and they have yet to squeak once.
Ol'fogasaurus
Posts: 17881
Joined: Mon Nov 13, 2006 10:17 pm

Re: Very Basic Off-road Ball-Joint Beam rebuild

Post by Ol'fogasaurus »

I used the stuff that came with the bushings.

What happened was that I had to reset the preload on the rear torsion tube down (30° down to 26°) some which meant pulling the trailing arms most of the way out of the housing (actually I seem to remember that they came all the way out). I think I got some dirt in there as they didn't squeak before but sure did after. :lol:

Lee
Ol'fogasaurus
Posts: 17881
Joined: Mon Nov 13, 2006 10:17 pm

Re: Very Basic Off-road Ball-Joint Beam rebuild

Post by Ol'fogasaurus »

The wifie-poo is out on the town with her daughter-in-law and her mother for a pre-Mother’s day romp so I snuck out to the garage for a few minutes took a look at the black buggy and the beam build.

I had finished welding the seams on the towers and they still look good and solid (and I stayed within the lines too) although I will clean them up some (pride/ego) and, I think, I may have finally found and fixed all the thinned out/rusted areas other than under the upper shock mount hats.

The undersides of both of the hats, where the bottom side upper shock rubber sits, are driving me crazy though. I may end up forming some metal as doublers and welding them in place just to be sure that things are tough enough. When I originally stripped this beam down to bare metal for the build I did not find enough bad to stop me from using this beam although thinking back on it I think I mentioned about the plugged drain holes and the rust flying out of the seams when I was applying air while cleaning out the plugged drain holes. The rusted out spots kept showing themselves during welding which, of course, was after the mods were too far along to go to the other beam I have.

After the finishing up with the new doublers, I will start on doing the adjusters which is as far as I had planned on going.

Lee
User avatar
ProctorSilex
Posts: 228
Joined: Sun Jul 17, 2011 6:09 pm

Re: Very Basic Off-road Ball-Joint Beam rebuild

Post by ProctorSilex »

Lee,
Where did you get your bushings? I have these for my T1.
Have you tried fitting the trailing arms into the plastic bushings? Do you have any problems sliding the trailing arms into your bushings?
hotrodsurplus wrote:If they squeak then I would highly doubt that they are really acetal (trade name Delrin). We use acetal on a lot of projects and we've never heard it squeak. I deal with a suspension manufacturer in Canadia that sells full assemblies with all acetal...no squeaks. It's one of the charms of acetal over urethane.

In fact you're not supposed to lubricate acetal at all. It's self-lubricating and any external lubrication usually only attracts dust which wears acetal bushings prematurely. And some oils contain solvents that can oxidize many plastics like acetal.
hotrodsurplus,
Do you happen to be dealing with the same bushings as Pacific Customs (above)? They sell it as Delrin, but the package says polypropylene which is not the same! Despite the different chemicals, do you think that polypropylene bushings should not be lubricated either?
Pacific Customs did not know much about it when I called them. They had no idea that Derlin != polypropylene and they were less than certain about why I had trouble sliding the trailing arms in. They suggested their bushing reamer. Have you had to ream these bushings?
hotrodsurplus wrote:Canadia
I say that both intentionally and unintentionally :D
Post Reply