Page 1 of 3
911 Rocker Modification
Posted: Mon Jan 21, 2008 3:45 pm
by slowtwitch
I’ve seen a couple people have asked about the 911 rocker mod, here and at Jake’s site. Well, after I finished doing my rocker arms, I figured that I should’ve documented the process. So I went back into the shop and did one rocker, just for you guys

Before I start, I want to thank all the contributors, who have written about this modification in the past, without their posts; this one would not be written.
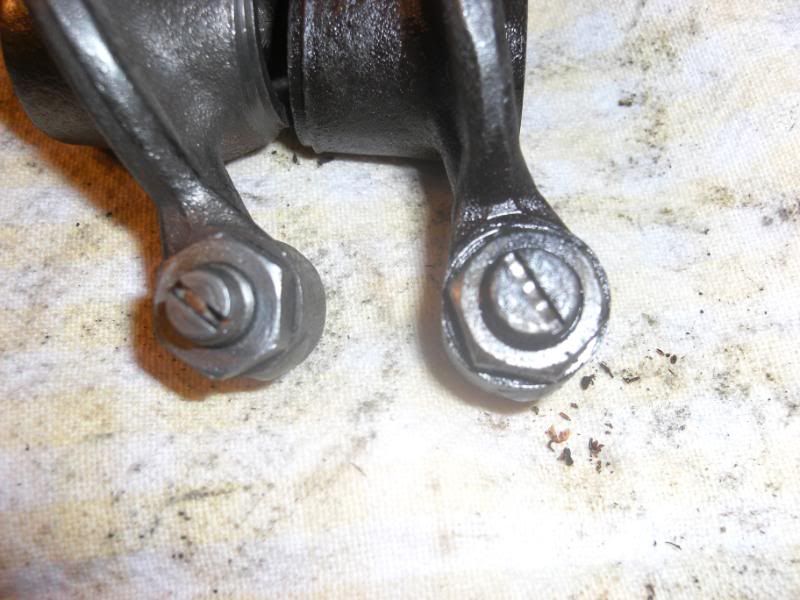
Type 4’s came with two different adjuster sizes, 8mm and 10mm. Since Porsche 911 adjusters (the only adjuster to use) are 8mm, we want 8mm rocker arms. Here is a picture of an 8mm and 10mm.
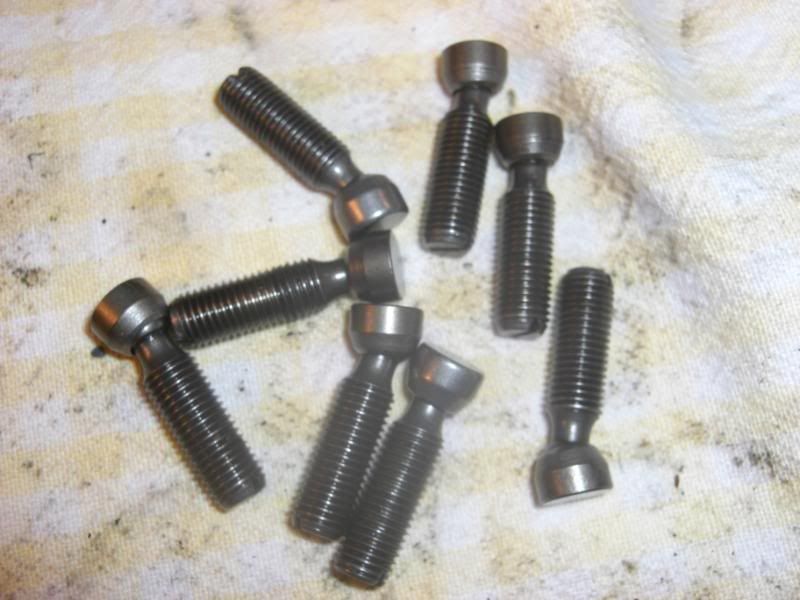
Here are some original 911 adjusters…
Before you can use the 911 adjusters, the type 4 rockers have to be decked about .060”, off the face of the rocker. I measured the rocker and this is what I got….498”
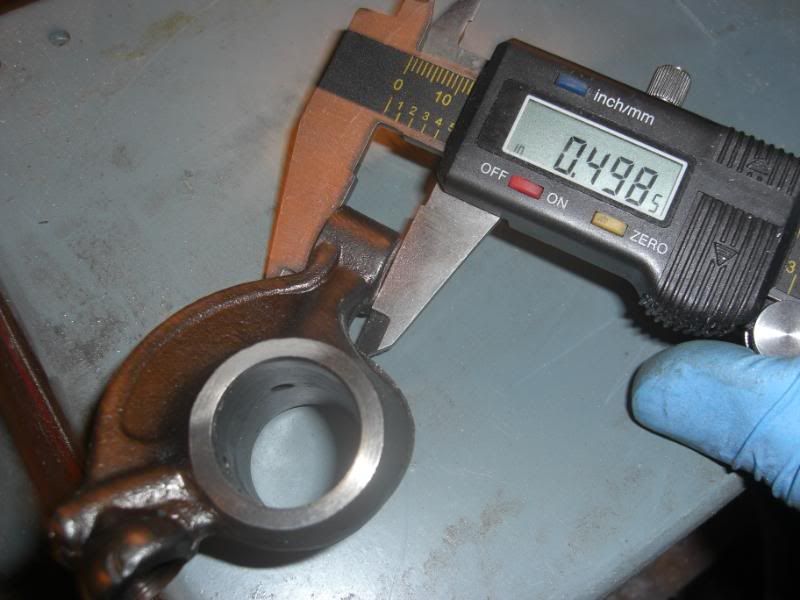
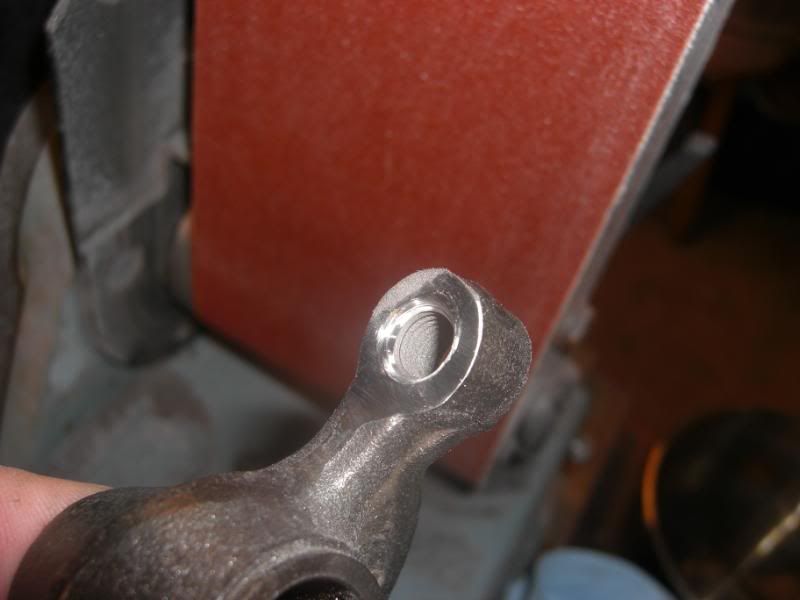
I need to get to about .438”. To do this I used a small belt sander (Craftsman).

I started with 80 grit paper and when I was close to my .438” number, I switched to a 120 grit belt. During sanding, I didn’t wear gloves. This way I could feel the heat, when it was to getting to warm, I cooled the rocker in water. Here a shot after using the sander and reaching the final size….
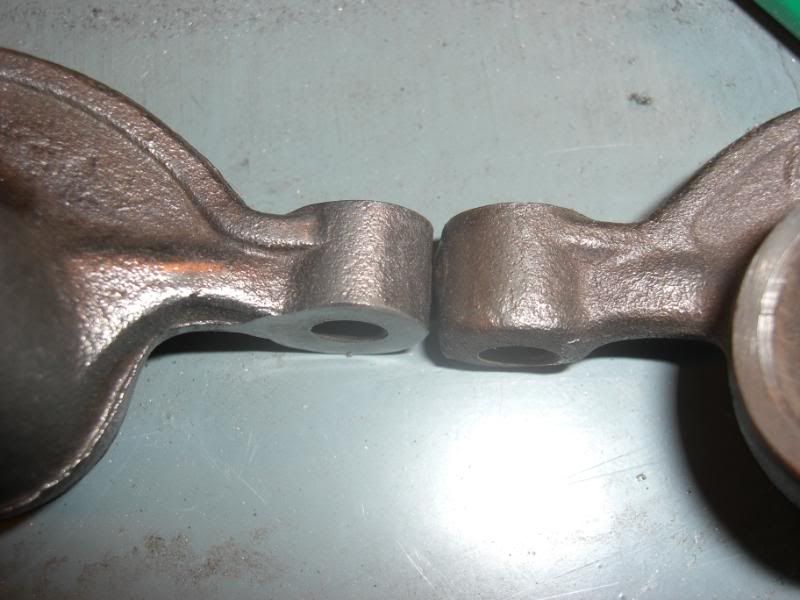
After sanding, I used a dremel, with a small sanding drum, to chamfer the opening. This only took a few circular motions and it was done.

This gives a little breathing room…..
The final step that I took was to polish the face. I used 400 grit (wet and dry paper), on a granite tile (from Home Depot), to polish out any sanding marks.
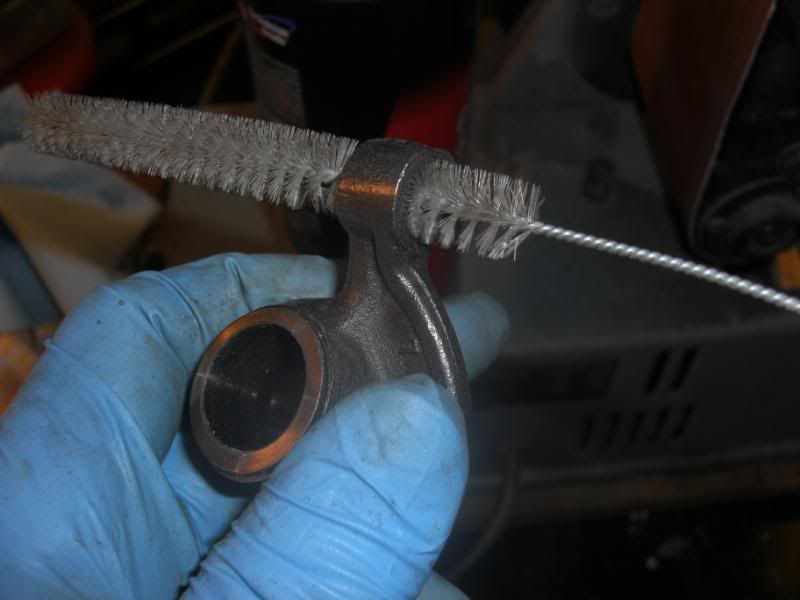
After all the sanding was done, I used carb cleaner and cleaned up the rocker..
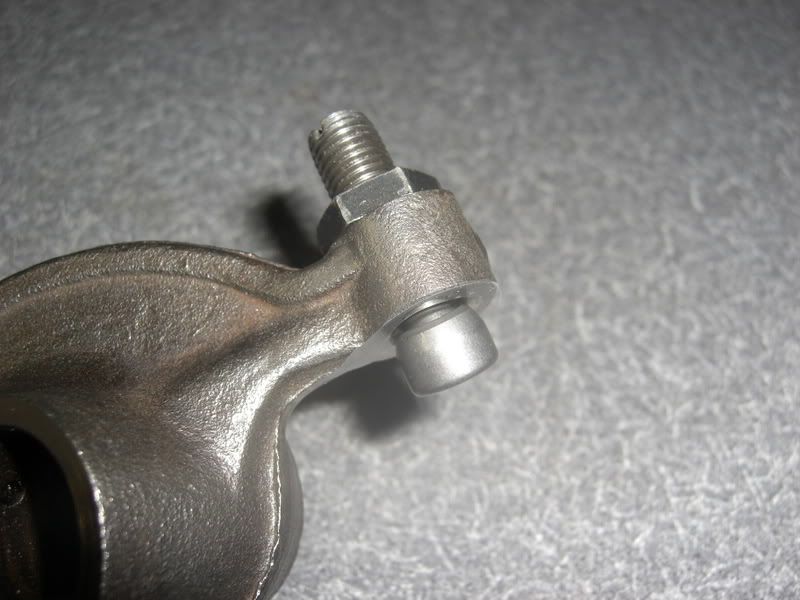
And finally, the end result…
pete
Posted: Mon Jan 21, 2008 5:35 pm
by mnsKmobi
Thanks, Pete. Very informative.
Posted: Mon Jan 21, 2008 5:38 pm
by RonW
pete, nice pics
Posted: Tue Jan 22, 2008 6:43 am
by Wally
For a final touch, you could shorten the rocker by cutting off the excess threads of the adjuster and making a new plilips groove.
With some cams, this might even be neccesary.
Posted: Wed Jan 23, 2008 3:56 pm
by slowtwitch
Wally wrote:For a final touch, you could shorten the rocker by cutting off the excess threads of the adjuster and making a new plilips groove.
With some cams, this might even be neccesary.
Wally, I've seen pics of your shorten adjusters and liked the idea
pete
Posted: Wed Jan 23, 2008 6:22 pm
by sideshow
When I did my valve train I used a common 4-4.5 inch grinder and slowly worked back the same area. As I got closer and closer to what was best geometry wise I found that a 11mm open box wrench was just about perfect for checking to see how level the clearance was and a great go-no-go gage. Also a 8mm x 1.0mm tap and drill powered chamfering tool worked well on the threads
So bare handed I worked over all my rockers, even touched the welds down on the oiling hole.
Thanks for measuring a stock rocker, been wondering for months how much I took off. Apparently about .070
Posted: Sun Jan 27, 2008 8:09 am
by jinx
so you take off about 1.7mm?
Posted: Tue Jan 29, 2008 9:02 pm
by Clatter
The last set id did needed another .030 or so to get the right geometry.
Take the recommended .060, then check the geometry.
Another option would be to use a shim under the stands, but since .030 is really a small amount....
Oil passage issue
Posted: Tue Feb 05, 2008 3:34 pm
by entomologist2004
OK, I just went through this process, based on advice from another site and I note that the oil passage through the rocker enters at the narrow point on the adjuster allowing oil to pour through, this has got to reduce oil pressure at the rocker arm. I am going to try shims to see if this will buy me enough clearance to use these, but based on the picture I see here these have to have the same issue, is this acceptable and I am worrying about nothing or is there a soultion...Thanks,
Walt
Re: Oil passage issue
Posted: Tue Feb 05, 2008 5:41 pm
by Piledriver
entomologist2004 wrote:OK, I just went through this process, based on advice from another site and I note that the oil passage through the rocker enters at the narrow point on the adjuster allowing oil to pour through, this has got to reduce oil pressure at the rocker arm. I am going to try shims to see if this will buy me enough clearance to use these, but based on the picture I see here these have to have the same issue, is this acceptable and I am worrying about nothing or is there a soultion...Thanks,
Walt
By the time it gets to the adjusters, there is really no pressure to speak of, it's 99% splash oiling, and you want as much of it on the adjuster/valve surface and valve spring as possible.
I'm always tempted to cut a slot/s in the threads or in the rocker to assist matters.
(I have given in to the temptation a few times, no problems so far...but keep it reasonable)
Posted: Tue Feb 05, 2008 6:44 pm
by raygreenwood
One of these days soon...I will have to photo my rocker set-up. I has not been run yet. It has thick wall bronze spacers with an oiling groove top and botom of the shaft inside each spacer. It runs edge to edge or rocker to rocker. I have run a 3mm ID oil line through he top of each rocker box and split off to feed each bronze spacer....and will pressurize from the edge...each rocker. I havn't decided exactly the oil line routing outside the rocker box. I should work well.
I have also thouh out ...like Piledriver is thinking...to remove an ectire thread ring in teh center of the fitting about in the range where the oil hole intercepts...then file a thin lonitudinal groove across about five threads....to see if more oil would squirt out toward the tip. Ray
Posted: Tue Feb 05, 2008 9:30 pm
by Piledriver
I'm thinking about drilling the holes in the pushrod tips (etc) bigger for more flow... In order to avoid external plumbing, and get a real spray going.
Unfortunately them's really hard. Have some cobalt bits, but methinks and EDM or ECM rig is in order.
(Electro-chemical machining? Think it's called ECM, maybe just sounds weird to me, basically high current plating in reverse, graphite "plug", high flow electrolyte, VERY tight tolerances are possible, and is almost a DIY project (for some definitions of DIY))
Would probably work awesome to texture cylinders through a photo mask, wouldn't need the prscision plug fo that app

Posted: Tue Feb 05, 2008 9:58 pm
by Unkl Ian
Carbide drill sounds easier.
Posted: Tue Feb 05, 2008 10:04 pm
by Piledriver
Unkl Ian wrote:Carbide drill sounds easier.
Yes, it does. Hope it works...
Rockers for sale?
Posted: Sun Jun 14, 2009 8:09 am
by Hummel
Slowtwitch: Is the rockers for sale?? Price for 8 send to Denmark??

Tommy Hummel